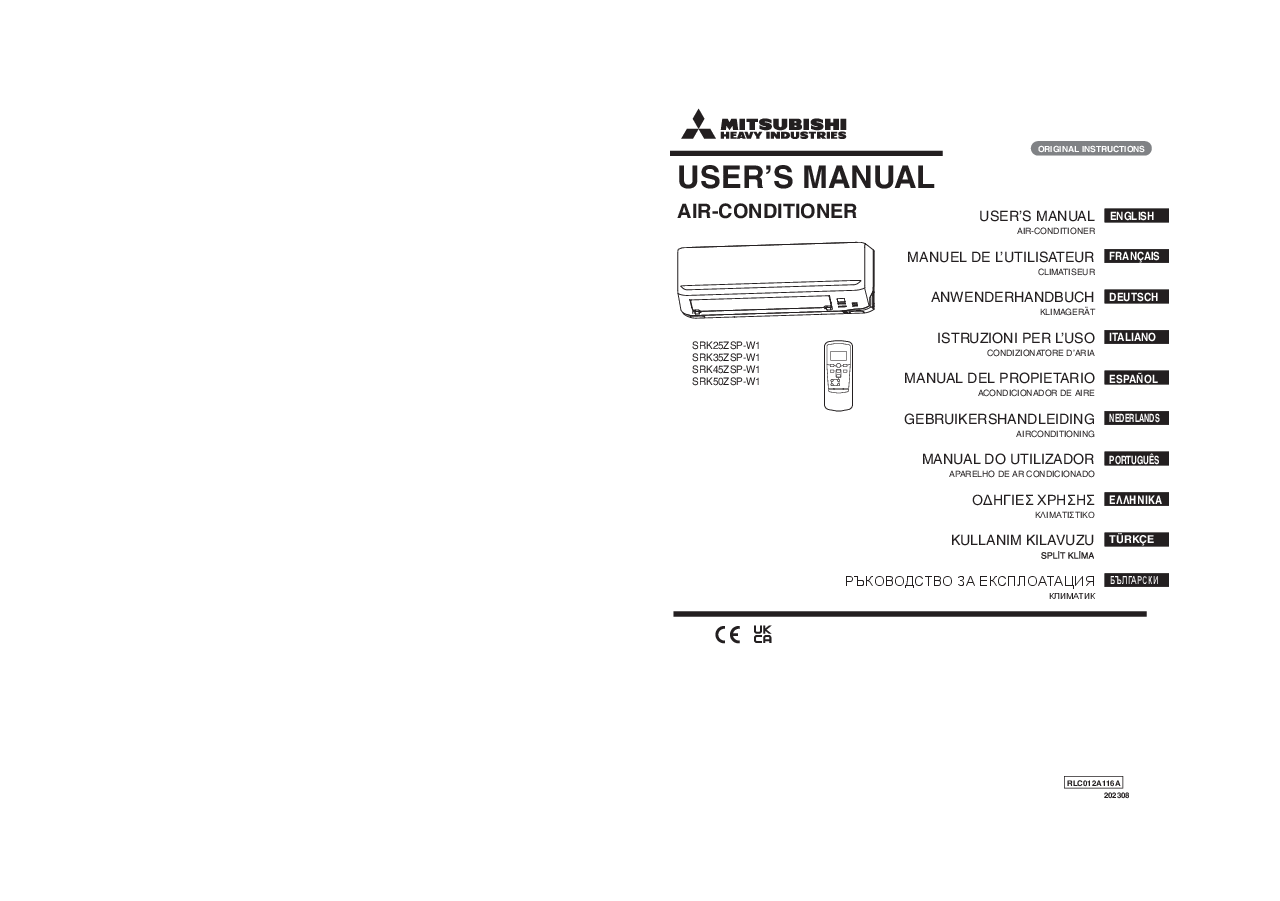
Mitsubishi Heavy Industries Air Conditioner User Manual
Original Instructions
Model Numbers: SRK25ZSP-W1, SRK35ZSP-W1, SRK45ZSP-W1, SRK50ZSP-W1
Welcome
Thank you for choosing a MITSUBISHI HEAVY INDUSTRIES THERMAL SYSTEMS, LTD. air conditioner. To ensure the best and longest possible performance, please read and observe the instructions in this user manual before using the air conditioner. Consult the booklet for any uncertainties regarding use or for any operational anomalies.
Environmental Disposal Information:
The air conditioner may be marked with a symbol indicating that waste electrical and electronic equipment (WEEE), as per Directive 2012/19/EU, must be disposed of separately from household waste. Air conditioners must be disposed of at an authorized treatment facility for reuse, recycling, and recovery, and not in municipal waste streams. Contact your installer or local authorities for more information.
Battery Disposal:
The symbol on the batteries indicates that they must be disposed of separately from urban waste at the end of their life, according to Directive 2006/66/EC. If a chemical symbol (e.g., Hg, Cd, Pb) is present, it signifies heavy metal content. Dispose of batteries correctly at a local collection or recycling center.
The sound pressure emission level from each indoor and outdoor unit is less than 70 dB(A).
Safety Information
Read the following "Safety Measures" carefully before operating the unit to ensure correct functioning. Keep these instructions for future reference. If the unit is transferred to a new user, provide them with these instructions.
⚠️ WARNING
Indicates a potentially hazardous situation which, if not avoided, could result in death or serious injury.
❗ CAUTION
Indicates a potentially hazardous situation which, if not avoided, could result in personal injury or material damage.
Please observe these warnings carefully, as they are essential for your safety.
Symbols Used:
- ? Rigorously prohibited
- ❗ Observe instructions carefully
- ? Ensure proper grounding
Important Notes:
- This user manual must be read carefully.
- Information is included in the user manual and/or installation manual.
- Service personnel must refer to the installation manual when using this device.
This device uses flammable refrigerants. In case of refrigerant leaks, there is a risk of ignition if an ignition source is present.
⚠️ WARNINGS FOR INSTALLATION
- This system is intended for domestic and residential use. Use in harsh environments may lead to mediocre performance.
- The system must be installed by the dealer or a qualified installer. Self-installation is not recommended as incorrect handling could cause water leaks, electric shock, or fire.
❗ CAUTIONS FOR INSTALLATION
- Do not install this system where flammable gas leaks may be present, as this could cause a fire.
- Verify that a ground fault circuit interrupter (GFCI) is installed. Failure to do so may result in electric shock.
- Ensure the drain hose is installed correctly to allow complete drainage. Improper installation can lead to water dripping, causing damage to furniture.
- Ensure the system is properly grounded. Grounding wires must not be connected to gas or water pipes, electrical conductors, or telephone grounding wires. Incorrect grounding can cause electric shock.
This product contains Fluorinated Greenhouse Gases (F-Gases). Do not release R32 into the atmosphere; it is an F-gas with a Global Warming Potential (GWP) of 675. Refer to the outdoor unit label for refrigerant quantity and CO2 equivalent.
⚠️ WARNINGS FOR OPERATION
- Children must not play with the air conditioner.
- Do not expose yourself to refrigerated air for extended periods, as this may affect your health.
- Cleaning and maintenance must not be performed by children without strict supervision.
- Do not insert objects into the air outlet; the internal fan rotates at high speed and could cause injury.
- This air conditioner can be used by children aged 8 and above, and persons with reduced physical, sensory, or mental capabilities, provided they are supervised and have received instructions on safe use and understand the risks.
- Keep the remote control out of reach of children to prevent accidental ingestion of batteries or other incidents.
❗ CAUTIONS FOR OPERATION
- Use only approved fuses. Using wire instead of a fuse is strictly prohibited and may cause malfunction or fire.
- Do not handle switches with wet hands, as this could cause electric shock.
- Do not swing or tilt the outdoor unit. If the indoor unit falls, it can cause injury.
- Do not place flammable insecticides or spray paint near the air conditioner, nor spray directly onto the system, as this may cause fire.
- Do not expose combustion equipment directly to the air conditioner's airflow, as it may not function correctly.
- Do not clean the air conditioner with water. This could cause electric shock. High-pressure washing may damage aluminum fins, affecting performance.
- Do not use for storing food, plants, animals, precision equipment, or works of art. The unit is for normal domestic environments only.
- Do not place containers of water (e.g., vases) on top of the unit. Water intrusion can damage insulation and cause electric shock.
- Do not install the unit where airflow is directed towards plants or animals, as it can harm them.
- Do not step on or sit on the unit, nor place objects on it. The unit could fall or objects could fall, causing injury.
- Periodically check the support structure of the unit, especially after prolonged use. Repair any damage promptly to prevent the unit from falling and causing injury.
- Do not touch the aluminum fins of the heat exchanger; they can cause injury.
- Do not place electrical appliances or objects under the indoor or outdoor unit. Dripping condensation can stain items and cause accidents or electric shock.
- Do not operate the system without the air filter. This can cause system malfunction due to obstruction of the heat exchanger.
- When operating the air conditioner with combustion equipment, ensure regular ventilation. Insufficient ventilation can lead to oxygen deficiency and injury.
- Use a stable ladder or support when removing the air inlet panel and filters. Unstable objects may wobble or fall.
- To clean the unit, stop it and disconnect power. Never open the panel while the indoor fan is rotating.
- Do not place objects near the outdoor unit, nor allow leaves to accumulate. This can attract small animals that may contact electrical parts, causing malfunction, smoke, or fire.
- Do not disconnect the power immediately after stopping the unit. Wait at least 5 minutes to avoid water leaks or breakage.
- Do not control the system via the main switch. This can cause fire or water leaks, and fans may start unexpectedly, causing injury.
- Do not spill liquids on the unit or insert water containers into it. Water intrusion can damage insulation and cause electric shock.
- Contact your dealer for internal unit cleaning. Do not attempt this yourself. Using unapproved detergents or incorrect washing methods can damage plastic parts, cause leaks, or lead to damage, smoke, or fire if the detergent contacts electrical parts or the motor.
- Stop the system and disconnect power if there is thunder or a risk of lightning. Lightning may damage the unit.
- If the power cord is damaged, contact the dealer or a specialized installer. Failure to replace the cord could cause malfunction or fire.
Components
Indoor Unit
- Air Inlet Panel: (See Page 19)
- Air Filters: (See Page 19)
- Fan: Internal unit component.
- Heat Exchanger (Aluminum Fins): Internal unit component.
- Louvers (Vertical Vanes): Adjust left/right airflow.
- Deflectors (Horizontal Vanes): Adjust up/down airflow.
- Air Outlet: Where conditioned air is expelled.
- Air Inlet: Where room air is drawn in.
- Remote Control Signal Receiver: Receives signals from the remote.
- Ambient Temperature Sensor: Detects room temperature.
Warnings: This device uses flammable refrigerants (See Page 2). Do not insert anything into the air outlet. Do not touch the terminal block.
Outdoor Unit
- Air Inlet: (Rear and side)
- Fan: Internal unit component.
- Heat Exchanger (Aluminum Fins): Internal unit component.
- Drainage Hole: For condensate drainage.
- Air Outlet: Where air is expelled.
- Model Name and Refrigerant Type: Information plate.
- Refrigerant Pipe and Electrical Cable Connection: Connects to the indoor unit.
- Flexible Drain Hose: For condensate drainage.
Warnings: Moving fan blades. Do not insert anything into the air outlet. It might cause injury. Sharp edge of fins. Do not touch aluminum fins. It might cause injury. Do not step on top of this unit. It might cause injury. This device uses flammable refrigerants (See Page 2). Do not touch the terminal block. Do not touch refrigerant pipings and connections.
*Aesthetics vary by model.
Remote Control
Display and Buttons
The remote control allows operation and setting of various functions. Key buttons include:
- ON/OFF Button: To turn the unit on or off.
- MODE Button: Selects operating mode (AUTO, COOL, HEAT, DRY, FAN).
- FAN SPEED Button: Adjusts fan speed (AUTO, HI, MED, LO).
- AIR FLOW Button: Adjusts vertical airflow direction (up/down).
- HI POWER/ECONO Button: Selects high power or economy mode.
- TEMP Buttons (+/-): Adjusts the set temperature. Also used for timer and clock settings.
- ON TIMER Button: Sets the timer for automatic ON operation.
- OFF TIMER Button: Sets the timer for automatic OFF operation.
- SLEEP Button: Activates the sleep timer function.
- CLEAN Button: Activates the SELF CLEAN function.
- CANCEL Button: Cancels timer settings and SLEEP function.
- ACL Button: Resets settings to default.
Indicators:
- RUN Indicator (Green): Illuminates during operation. Blinks slowly during SELF CLEAN. Blinks for blocked airflow during heating.
- TIMER Indicator (Yellow): Illuminates during timer operation.
Accessories:
- Remote Control
- Remote Control Holder
- Wood Screws (x2)
- Batteries (R03/AAA x2)
Notes on Remote Control:
- Beeps: The unit beeps (PipPip/Pip) to confirm operations or settings.
- Signal Transmission: Point the remote at the unit. A beep confirms reception.
- Battery Replacement: Replace batteries when the display is dim or shows anomalies. Do not mix old and new batteries or different types. Remove batteries if the remote will not be used for a long period.
- Mounting: The remote can be wall-mounted using the provided holder. Ensure proper signal reception before permanent installation.
- Prohibitions: Do not expose to direct sunlight or strong light, do not spill liquids, do not place near heat sources, and do not place obstacles between the remote and the unit. Handle with care to avoid dropping.
Temporary Operation:
The unit can be turned ON/OFF using the main unit button if the remote is unavailable. Pressing it for more than 5 seconds initiates forced cooling operation (for service). Pressing it briefly turns the unit on or off.
Setting the Current Time:
When batteries are first inserted, the clock defaults to 13:00. Use the ACL button and TEMP buttons to set the correct time. The time must be set correctly for timer functions to work. Data is reset when setting the current time.
Operation Modes
AUTO Mode (Automatic)
The unit automatically selects COOL, HEAT, or DRY mode based on the ambient temperature. The default set temperature is 24°C. Use TEMP buttons to adjust between 18°C and 30°C.
- Press MODE to cycle through modes.
- Press ON/OFF to start/stop.
- To exit AUTO mode, select COOL, HEAT, or FAN mode manually.
FAN SPEED (Fan Speed)
Adjust fan speed (AUTO, HI, MED, LO) for modes other than DRY. Note that fan speed may change automatically in COOL mode under low external temperatures to protect the unit.
COOL/HEAT/DRY/FAN Modes
Select the desired mode using the MODE button. Adjust temperature and fan speed as needed.
- Recommended Temperatures: COOL (26-28°C), HEAT (22-24°C), DRY (24-26°C).
- Operating Temperature Range: External: -15°C to 46°C (COOL), -15°C to 24°C (HEAT). Internal: 18°C to 32°C (COOL), 10°C to 30°C (HEAT). Internal humidity should be below 80% to prevent condensation.
- HEAT Mode Specifics: Heat capacity decreases in colder temperatures. Defrosting may occur automatically, temporarily stopping heating.
Airflow Direction Adjustment
Use the AIR FLOW button to adjust vertical (up/down) airflow. Horizontal (left/right) airflow is adjusted manually by moving the louvers. In HEAT mode, airflow is initially horizontal to prevent cold drafts and returns to the set position after the room warms up.
Memorized Deflector: The unit can memorize a specific airflow angle. Pressing AIR FLOW once stops the louver rotation at that angle.
Caution: Do not direct airflow continuously at people, plants, or animals. Avoid prolonged downward airflow in COOL/DRY modes to prevent condensation and dripping.
SLEEP TIMER
Automatically stops the unit after a set interval, with gradual temperature adjustment to prevent overcooling or overheating. Set in 1-hour increments up to 9 hours. Cannot be used with OFF TIMER simultaneously.
OFF TIMER
Automatically stops the unit at a pre-set time. Set in 10-minute increments. The current time must be set for accurate operation.
ON TIMER
Automatically starts the unit 5 to 60 minutes before the set time to reach optimal temperature. Set in 10-minute increments. The current time must be set for accurate operation.
PROGRAMMED TIMER (Combined ON/OFF Timer)
Allows setting both ON and OFF timers for daily, repeating operation. The unit will stop and then restart according to the programmed times.
Comfort Start: For ON TIMER, the unit may start earlier (5-60 mins) to ensure the desired temperature is reached by the set ON time.
HIGH POWER / ECONOMY Modes
HIGH POWER: Provides maximum cooling/heating for 15 minutes. Temperature is not controlled during this mode. Press HI POWER/ECONO again to cancel or change mode.
ECONOMY: Reduces cooling/heating intensity for energy saving. The unit operates at a slightly adjusted temperature (1.5°C higher in COOL, 2.5°C lower in HEAT). The unit may automatically select ECONOMY mode on subsequent startups.
SELF CLEAN Function
Runs for approximately 2 hours after cooling or dry operation to remove residual moisture, preventing mold and bacteria growth. The RUN indicator blinks during this process. Press ON/OFF to stop immediately. Pressing SLEEP cancels SELF CLEAN and activates SLEEP mode.
Auto Restart Function
If power is interrupted, the unit will automatically resume its previous operating state once power is restored. Timer settings will be cancelled.
Cleaning and Maintenance
Regular cleaning ensures optimal performance and longevity.
Before Maintenance:
- Disconnect the power supply.
- Do not pour liquid directly onto the unit.
- Do not touch the aluminum fins of the heat exchanger.
- Use a stable ladder or support when accessing panels.
Do Not Use:
- Hot water (over 40°C), petroleum solvents, paint thinners, benzene, or trichloroethylene, as they can cause deformation or discoloration.
During Operation:
Cleaning Air Filters:
- Remove the air inlet panel.
- Clean the air filters approximately every two weeks. If very dirty, wash with warm water (approx. 30°C) and dry thoroughly.
- Reinstall the filters securely. Operating without filters will lead to dust accumulation and damage.
Cleaning the Unit:
- Wipe the unit with a soft, dry cloth or use a vacuum cleaner. For heavy dirt, use a cloth dampened with warm water.
Cleaning the Air Inlet Panel:
- The panel can be washed with water. Dry it away from direct sunlight.
- To Open: Gently pull the panel corners forward.
- To Close: Push the panel corners evenly inward.
- Removal/Installation: Open the panel 90 degrees and pull forward to remove. Reinstall by aligning the arm and pressing gently until it locks.
End of Season Maintenance:
- Ventilate for 2-3 hours to dry the interior.
- Turn off the unit and disconnect power (saves energy).
- Clean and reinstall air filters.
- Clean both indoor and outdoor units.
- Remove batteries from the remote control.
Start of Season Maintenance:
- Ensure the grounding wire is secure.
- Check the outdoor unit base for corrosion or rust.
- Ensure no obstructions block airflow around indoor/outdoor unit vents.
- Connect power supply.
- Insert batteries into the remote control.
Installation Precautions
Suitable Installation Location:
- Ensure no obstructions block airflow to the indoor unit.
- Avoid locations with:
- Risk of flammable gas leaks.
- Splashing of oily liquids.
- Exposure to sea winds or sulfurous gases (e.g., hot springs), which can cause corrosion. Consult dealer.
- Keep the unit and remote control at least 1 meter away from TVs and radios.
- Ensure condensate is drained to a suitable location.
Noise Considerations:
- Choose a location that can support the unit's weight and will not amplify noise or vibrations. Use anti-vibration pads if necessary.
- Select a spot where airflow and operating noise will not disturb neighbors.
- Keep the area around the outdoor unit's air inlets/outlets clear of objects to prevent malfunction and noise.
- If abnormal noise occurs, consult the dealer.
Control and Maintenance:
Over time, the unit's interior may accumulate dirt, reducing performance. Regular cleaning and periodic inspection/maintenance are recommended for longer unit life. Contact your dealer or an authorized service center for these services.
If the power cord is damaged, it must be replaced by a qualified technician using special equipment.
Assistance
Before Contacting Service:
- Unit Not Operating: Is the power switch on? Is there a power outage or tripped breaker?
- Inadequate Cooling/Heating: Is the temperature setting correct? Are air filters clean? Are windows/doors open? Is the room exposed to direct sunlight or heat sources? Are there many people in the room?
Contact Your Dealer Immediately If:
- Power protection devices (breakers, fuses) trip frequently.
- The power cord is excessively hot.
- The power cord covering is damaged.
- TV, radio, or other appliances experience interference.
- The switch does not activate operation.
- Abnormal noise is heard.
In case of anomalies, disconnect power for 3 minutes, then reconnect and try restarting. If the problem persists, contact your dealer.
Note: If RUN and TIMER lights blink rapidly (0.5s ON/OFF) or do not function, contact service.
Troubleshooting
Airflow:
- No air during HEATING: The unit is warming up (2-5 mins). RUN light blinks slowly.
- Cold air during HEATING (5-15 mins): Unit is defrosting. RUN light blinks slowly.
- No air during DRY operation: Normal operation. RUN light is on.
Noise:
- Gurgling: Refrigerant flow noise.
- Crackling: Caused by thermal expansion/contraction of plastic parts.
- Hissing/Ticking: Refrigerant control valves or electrical components.
- Outdoor unit whistling: Compressor speed changing.
Other Issues:
- Unit does not restart immediately after stopping (RUN light on): Unit is protected and will restart automatically after 3 minutes.
- Steam during COOL operation: May occur in high temperature/humidity conditions. Will dissipate as conditions normalize. Close windows/doors.
- Unusual Odor: May be due to tobacco or cosmetic particles adhering to the unit.
- Unit does not restart after power interruption: Auto-restart function may not be set. Use remote to restart.
- Remote signals not received: Ensure receiver is not exposed to direct sunlight or strong light.
- Condensation on air outlet grille: May form during prolonged operation in high humidity.
- Indoor fan does not stop immediately: Normal for SELF CLEAN mode (runs for 2 hours).
- Outdoor fan does not stop immediately: Normal for about 1 minute after operation to protect the unit.
- RUN light stays on after operation stops: Indicates SELF CLEAN is running or has just completed.
Self-Diagnosis
Indicator lights on the unit signal operational anomalies. Refer to the table below:
| Indicator | Fault Description | Cause |
|---|---|---|
| RUN Light Blinking | Error 1: Indoor Heat Exchanger Sensor | Broken sensor conductor 1, incorrect connector connection. |
| Error 2: Ambient Temperature Sensor | Damaged sensor wire, poor connector connection. | |
| Error 5: Circuit Error | Circuit anomaly or faulty connector. | |
| Error 6: Indoor Fan Motor Error | Faulty fan motor, poor connector connection. | |
| Error 7: Insufficient Refrigerant / Service Valve Closed | Refrigerant leak or service valve closed. | |
| Error 1: Outdoor Temperature Sensor | Damaged sensor wire, poor connector connection. | |
| Error 2: Outdoor Heat Exchanger Sensor | Broken sensor conductor, incorrect connector connection. | |
| RUN Light Blinking (cont.) | Error 4: Drain Tube Sensor Error | Damaged drain tube sensor wire, poor connector connection. |
| Error 1: Power Interruption | Compressor locked, open phase, power transistor short circuit, service valve closed. | |
| Error 2: Outdoor Unit Fault | Broken compressor wire, compressor locked. | |
| Error 3: Overcurrent | Overload, excessive refrigerant level. | |
| RUN Light On | Error 4: Power Transistor Error | Faulty power transistor. |
| Error 5: Compressor Overheating | Gas shortage, faulty drain sensor, service valve closed. | |
| Error 6: Signal Transmission Error | Faulty power supply, interrupted signal cable, faulty indoor/outdoor control boards. | |
| Error 7: Outdoor Fan Motor Error | Faulty fan motor, poor connector connection. | |
| High Pressure Cooling Protection | Excessive refrigerant level, outdoor unit short circuit. | |
| RUN Light Blinks Twice | Rotor Lock | Faulty compressor, open phase on compressor, faulty outdoor unit control board. |
Declarations of Conformity & Contact Information
EU Declaration of Conformity
MITSUBISHI HEAVY INDUSTRIES THERMAL SYSTEMS, LTD. declares that the apparatus (Split Type Air Conditioner, SRK Series Indoor Units, SRC Series Outdoor Units) conforms to Directive 2006/42/EC and standards EN 60335-1, EN 60335-2-40.
Authorised Representative in the EU: MHIAE SERVICES B.V.
UK Declaration of Conformity
MITSUBISHI HEAVY INDUSTRIES THERMAL SYSTEMS, LTD. declares that the apparatus (Split Type Air Conditioner, SRK Series Indoor Units, SRC Series Outdoor Units) conforms to the Supply of Machinery Regulations S.I. 2008/1597 and standards EN 60335-1, EN 60335-2-40.
Authorised Representative in the GB: MITSUBISHI HEAVY INDUSTRIES AIR-CONDITIONING EUROPE, LTD.
Contact Information:
MITSUBISHI HEAVY INDUSTRIES THERMAL SYSTEMS, LTD.
2-3, Marunouchi 3-chome, Chiyoda-ku, Tokyo, 100-8332, Japan
https://www.mhi-mth.co.jp/en/
MITSUBISHI HEAVY INDUSTRIES AIR-CONDITIONING EUROPE, LTD.
5 The Square, Stockley Park, Uxbridge, Middlesex, UB11 1ET, United Kingdom
Tel: +44-333-207-4072
Fax: +44-333-207-4089
https://mhiae.com
MHIAE SERVICES B.V.
Herikerbergweg 238, Luna ArenA, 1101 CM Amsterdam, Netherlands
P.O.Box 23393 1100 DW Amsterdam, Netherlands
Tel: +31-20-406-4535
http://www.mhiaeservices.com/