Logitech CRAFT Advanced Keyboard with Creative Input Dial

User Manual
Craft is a wireless keyboard with a premium typing experience and a versatile input dial that adapts to what you’re making — keeping you focused and in your creative flow.
Getting started
- Download Logitech Options to enhance the creative dial experience, and more. To download and learn more about the possibilities go to logitech.com/options
- Turn on your Craft keyboard.
- Press and hold one of the three Easy-Switch™ keys to ensure your device is in pairing mode.
- To connect Craft to your computer, plug the provided Unifying receiver into a USB port, use an existing Unifying receiver, or connect with Bluetooth.
- Open Logitech Options, select Craft, discover what the Crown can do and optimize your new keyboard for the apps you use the most!
Product Overview

- The Craft Keyboard Crown
- Easy-Switch buttons
- Dual OS modifier keys for Mac and Windows
- F-key functionality
- Rechargeable battery
- Keyboard backlighting
The Crown
The Logitech Craft Keyboard Crown is designed to change the way you use applications. You can touch, tap, and turn the Crown — the functions change depending on the app you’re using and what you’re doing within the app.
VIDEO – Introducing Logitech Craft
Discover what the Crown can do in your favorite apps


 |
The Crown in Microsoft Word | Video |
 |
The Crown in Microsoft Excel | Video |
 |
The Crown in Microsoft PowerPoint | Video |
See How does the Craft keyboard Crown work? to learn more about how the Crown can increase your productivity.
For information on the Software Development Kit (SDK) for the Craft Crown, see Craft Crown SDK.
Specs & Details
FAQ – Frequently Asked Questions
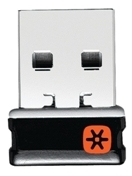
Your Unifying USB receiver can be paired with up to six Unifying devices at a time. You can determine if your Logitech devices are Unifying by this logo:
What do you want to try today?
|
Connecting your device to a Unifying receiver
|
You can use Logitech Unifying software to connect your keyboard or mouse to your computer.
NOTE: If you don’t already have it installed, you can download Unifying software from the Software Downloads page.
1. Launch the Logitech Unifying software.Windows:
– Start > Programs > Logitech > Unifying > Logitech Unifying Software
– Macintosh: Application / Utilities / Logitech Unifying Software
2. At the bottom of the Welcome screen, click Next.
NOTE: These instructions use Windows screenshots for a keyboard. Macintosh will look slightly different, but the instructions are the same for keyboard or mouse.
3. When you see the “Restart the device…” window, follow the on-screen instructions to turn your device off and then back on.
4. When your device is detected, you’ll see a “We have detected your…” confirmation screen. Type a test message in the field provided to make sure it works.
5. If your device connected successfully, click Yes and then Next.
6. If your device doesn’t work right away, wait a minute to see if it connects. If it doesn’t, select No and then click Next to restart the pairing process from Step 1 above.
7. Click Finish to exit the Logitech Unifying Software (or Pair Another Device to pair additional devices). Your device should now be connected.
If your device is marked with the Unifying logo, you can use it with any Unifying receiver. Unifying receivers can be paired with up to six Unifying devices at a time.
Unifying logo on product
Unifying receiver
To connect a Unifying device to your Unifying receiver:
1. Launch the Logitech Unifying software.
NOTE: If you don’t already have it installed, you can download Unifying software from the Software Downloads page.
– Windows: Start > Programs > Logitech > Unifying > Logitech Unifying Software
– Macintosh: Application / Utilities / Logitech Unifying Software
2. At the bottom of the Welcome screen, click Next.
NOTE: These instructions use Windows screenshots. Macintosh will look slightly different, but the instructions are the same.
3. Follow the on-screen instructions to turn your device off and then back on.
4. When your device is detected, you’ll see a confirmation message. If you connected a:
– Keyboard: Type a test message in the field provided to make sure it works.
– Mouse: Move it around to see if the cursor moves with it.
5. If your device connected successfully, click Yes and then Next.
6. If your additional device doesn’t work right away, wait a minute to see if it connects. If it doesn’t, select No and then click Next to restart the pairing process from Step 1.
7. Click Finish to exit the Logitech Unifying Software. Your device should now be connected.
Your Unifying USB receiver can be connected to up to six Unifying devices. You can determine if your Logitech devices are Unifying by this logo: 
To connect additional Unifying devices to your Unifying USB receiver:
1. Launch the Logitech Unifying software.
NOTE: If you don’t already have it installed, you can download SetPoint from the M515 Downloads Page, which contains the Unifying software.
– Windows: Start > Programs > Logitech > Unifying > Logitech Unifying Software
– Macintosh: Application / Utilities / Logitech Unifying Software
2. At the bottom of the Welcome window, click Next.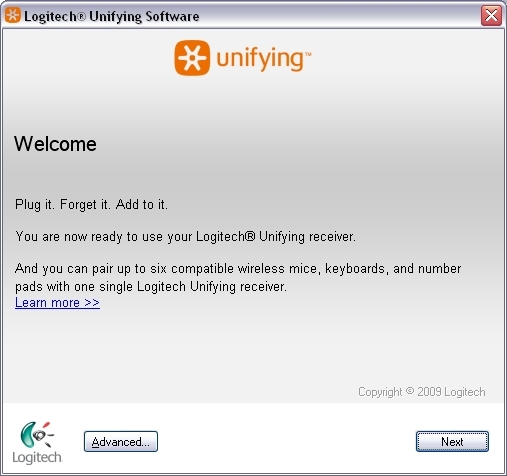
NOTE: These instructions use Windows screenshots. Macintosh will look slightly different, but the instructions are the same.
3. When you see the “Restart the device…” screen (shown below), follow the on-screen instructions to turn your device off and then back on.
4. When your device is detected, you’ll see a “We have detected your…” confirmation screen. If you connected a:
– Keyboard: Type a test message in the field provided to make sure it works.
– Mouse: Move it around to see if the cursor moves with it.
If your device connected successfully, click Yes and then Next.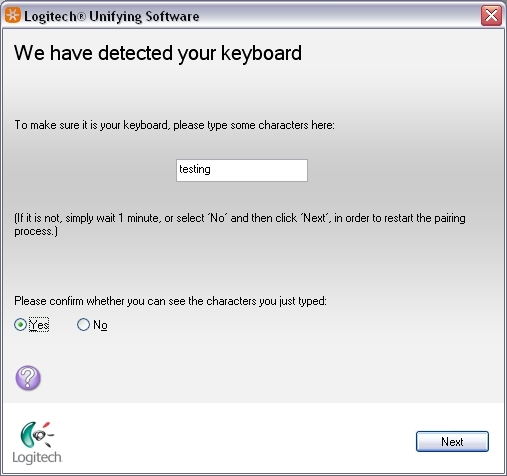
If your additional device doesn’t work right away, wait a minute to see if it connects. If it doesn’t, select No and then click Next to restart the pairing process from Step 1 above.
5. Click Finish to exit the Logitech Unifying Software. Your device should now be connected.
A Logitech Unifying receiver can pair up to 6 compatible devices.
To pair multiple devices to a Unifying receiver, the Unifying software requires installation on your computer.
To get the Logitech Unifying software, go to www.logitech.com
You can use any Unifying receiver to connect up to six Unifying devices.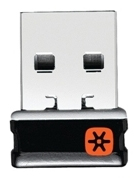
Look for this Unifying logo on both your product and the receiver:
Each time you switch a device to a different receiver, you need to reconnect it using the Logitech Unifying software. See answer 23116 for instructions.
NOTE: Although a device may be supported by the Unifying receiver, Logitech Keyboard and Mouse software support will depend on the specific product.
You can change your connection type from Unifying to Bluetooth or Bluetooth to Unifying at any time. Here’s how:
How to change from Bluetooth to Unifying receiver:
1. Press and hold the Easy-Switch button for 3 seconds to delete the previous setting and add a new one. If you haven’t used all of the available Easy-Switch channels, switch to the next one.
2. Plug the Unifying receiver into your computer.
3. Open the Unifying software if you purchased the receiver separately. If you don’t have the Unifying software installed, you can get it here.
4. Follow the on-screen instructions to complete the connection. See Connect your Logitech Bluetooth device for more help.
How to change from Unifying receiver to Bluetooth:
1. Press and hold the Easy-Switch button for 3 seconds to delete the previous setting and add a new one. If you haven’t used all of the available easy-switch channels, switch to the next one.
2. Open Bluetooth settings and follow the on-screen instructions.
3. Upon pairing, the LED light on your Logitech device stops blinking and glows steadily for 5 seconds. The light then turns off to save energy.
4. If you are setting up your device for the first time, please refer to the Getting Started section for additional help.
The Logitech G403 Wireless, G304, G305, G603, G703, G903 are built on the LIGHTSPEED architecture and connect to proprietary LIGHTSPEED receivers. They are not compatible and cannot be paired with the Unifying receiver.
The connectivity range for your mouse is 10 meters (33 feet) from the Unifying receiver. Moving the mouse closer will improve connectivity
In an ideal environment, a Unifying or non-Unifying device can operate up to 30 feet (10 meters) away from its receiver (shown below) in a clear line of sight.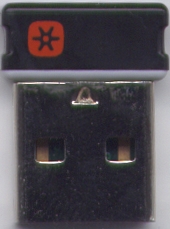

If you’re not getting this distance, try these suggestions:
– Replace the battery/batteries or make sure your mouse or keyboard is fully charged
– Move devices that emit radio waves or could cause radio interference away from your work area (Examples: cell phones, radios, wireless routers, microwaves)
To determine if your environment is shortening your operating range, try using your device in a different environment to see if the distance improves. If it does, look for other possible sources of interference you can remove from your work area.
ost Logitech mice are designed with a space to store its receiver. When you’re not using the mouse, you can store the receiver inside of it.
To locate the storage space for the receiver in your mouse:
1. Flip the mouse over and slide the battery cover off.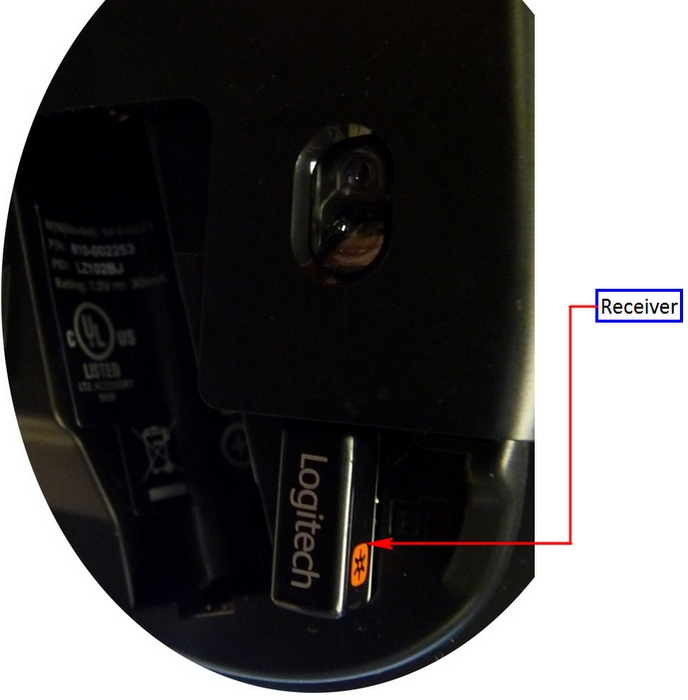
2. Locate the small rectangular slot next to the battery compartment.
3. Slide the receiver into the slot. It will fit facing either way.
4. Replace the battery cover.
Note: The image is only for reference to indicate the location of the receiver. The actual receiver may look different depending on the product specification.
TIP: If you have an extra receiver from any Logitech device you aren’t currently using, this is a great place to store it.
Re-pair or Troubleshoot
If you’re unable to pair your device to the Unifying receiver, please do the following:
STEP A:
1. Make sure the device is found in Devices and Printers. If the device is not there, follow steps 2 and 3.
2. If connected to a USB HUB, USB Extender or to the PC case, try connecting to a port directly on the computer motherboard.
3. Try a different USB port; if a USB 3.0 port was used previously, try a USB 2.0 port instead.
STEP B:
Open Unifying Software and see if your device is listed there. If not, follow the steps to connect the device to a Unifying receiver.
If you’ve previously connected both channels using Bluetooth and want to reassign the connection type, do the following:
1. Download Logitech Options® software.
2. Open Logitech Options and on the home screen, click ADD DEVICE.
3. In the next window, on the left, select ADD UNIFYING DEVICE. A Logitech Unifying Software window will appear.
4. Put any channel you want to reassign connectivity in pairing mode (long press for three seconds until the LED starts to blink) and connect the USB Unifying receiver to your computer.
5. Follow the on-screen instructions in the Logitech Unifying Software. Once you complete the steps, your device will be successfully paired to your Unifying receiver.
our Unifying receiver can be paired with up to six Unifying devices at a time. If you need to unpair a device for any reason, you can use Logitech Unifying software. If you don’t already have it installed, you can download Unifying software from the Software Downloads page.
NOTE: Before proceeding, please make sure you have either a wired mouse connected to the computer, or a second mouse connected to the receiver.
1. To unpair your device:Open the Unifying software:
– Start > All Programs > Logitech > Unifying > Logitech Unifying Software
2. On the Welcome window, click Advanced…
3. In the left pane, select the device you wish to unpair.
4. On the right side of the window, click Un-pair, and then click Close. This will remove your mouse or keyboard from the list of Unifying devices and it will no 5. longer work with your computer.
6. To make your device work again, you will need to re-pair it with the Unifying receiver. See Connecting a device to a Unifying receiver for more information.
Symptom
After disabling the ability to wake-up the system in Windows Device Manager, the Unifying mouse or keyboard still brings the system out of sleep mode.
Solution
Even if you bought a mouse-only or keyboard-only product, the Unifying receiver that came with it still enumerates for both the mouse and keyboard interfaces.
Example
If you have two mice attached, then you would need to uncheck the “Allow this device to wake the computer” option for both mice plus a keyboard in the Windows Device Manager.
Use the process below to identify and configure the Unifying devices to not wake up the system in Windows Device Manager.
Changing wake-up settings in the Device Manager
1. To change the wake-up settings in Windows Device Manager, you’ll need to launch it through Computer Management and then make your selections. Here’s how:
2. Click Start, right-click Computer, and then click Manage.
3. Click Device Manager in the navigation pane on the left.
4. Select and expand either the “Keyboards” or “Mice and other pointing devices” category.
5. Right-click on the first entry and go to Properties > Details tab > Hardware IDs under the Property section.
6. Make sure the Value section contains: HID\VID_046D&PID_C52B. If it doesn’t, click Cancel and open the next mouse or keyboard entry in the list.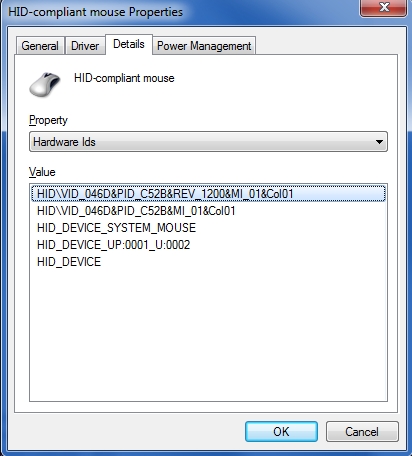
7. Select the “Power Management” tab and uncheck the “Allow this device to wake the computer” check box.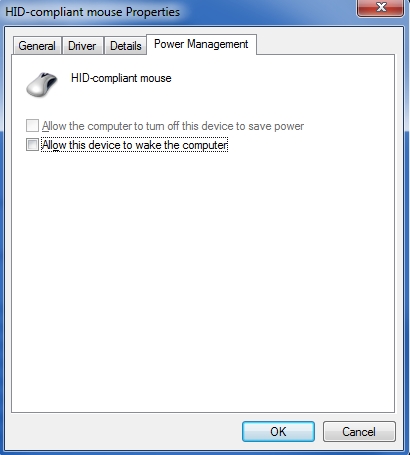
8. Repeat the same steps for all entries in both the “Keyboards” and “Mice and other pointing devices” categories.
To ensure you are purchasing the right receiver for your device, identify your receiver from below:
– Unifying Receiver
– Logi Bolt Receiver
– Other Receiver
——————————-
Unifying Receiver
If you’ve lost or damaged the Unifying receiver for your keyboard or mouse, you can purchase a replacement from here.
A Unifying receiver looks like the image below, and it does not work with products that are not Unifying compatible.
To determine if your Logitech device is Unifying compatible, look for this Unifying logo on your device.![]()
Logi Bolt Receiver
If your receiver and product have the below logo, you have the Logi Bolt receiver and a Logi Bolt compatible product.
To learn more about Logi Bolt, click here.
To purchase a replacement receiver, click here.
Other Receiver
If your device used a receiver other than Unifying or Logi Bolt, or if you are unable to purchase a receiver from the above links, please reach out to our Customer Support team.
Unifying Software (Download)
Try the suggestions below if your Logitech device isn’t detected in the Unifying software:
– Make sure your device is not paired to your laptop using Bluetooth.
– It may take several minutes for the Unifying software to detect your peripherals — give the software a few minutes to detect the peripherals.
– Try manually pairing your devices — click Advanced on the bottom left of the Unifying screen, then click Pair a New Device.
Try the suggestions below If your mouse and/or keyboard isn’t detected in the Unifying software
– Make sure your mouse and/or keyboard are not paired to your laptop using Bluetooth.
– It may take several minutes for the Unifying software to detect your peripherals — give the software a few minutes to detect the peripherals.
– Try manually pairing your devices — click Advanced on the bottom left of the Unifying screen, then click Pair a New Device.
If the Unifying software doesn’t proceed when you click Next, try the following:
1. Close the Unifying software.
2. Disconnect then reconnect the receiver.
3. Launch the Unifying software.
The two most common Logitech keyboards are mechanical and membrane, with the primary difference being how the key activates the signal that is sent to your computer.
With membrane, the activation is made between the membrane surface and circuit board and these keyboards can be susceptible to ghosting. When certain multiple keys (usually three or more*) are pressed simultaneously, not all of the keystrokes will appear and one or more may disappear ( ghosted).
An example would be if you would type XML very rapidly but don’t release the X key before pressing the M key and subsequently press the L key, then only X and L would appear.
Logitech Craft, MX Keys and the K860 are membrane keyboards and may experience ghosting. If this is a concern we would recommend to try a mechanical keyboard instead.
*Pressing two modifier keys (Left Ctrl, Right Ctrl, Left Alt, Right Alt, Left Shift, Right Shift and Left Win) together with one regular key should still work as expected.
We’ve identified a few cases where devices aren’t detected in the Logitech Options software or where the device fails to recognize customizations made in the Options software (however, the devices do work in out-of-box mode with no customizations).
Most of the time this happens when macOS is upgraded from Mojave to Catalina/BigSur or when interim versions of macOS are released. To resolve the problem, you can enable permissions manually. Please follow the steps below to remove the existing permissions and then add the permissions. You should then restart the system to allow the changes to take effect.
– Remove existing permissions
– Add the permissions
- d Logi Options Daemon.
- Click on Logi Options and then click on the minus sign ‘–’.
- Click on Logi Options Daemon and then click on the minus sign ‘–’.
- Click Quit and Reopen.
To add the permissions:
- Go to System Preferences > Security & Privacy. Click the Privacy tab and then click Accessibility.
- Open Finder and click on Applications or press Shift+Cmd+A from the desktop to open Applications on Finder.
- In Applications, click Logi Options. Drag and drop it to the Accessibility box in the right panel.
- In Security & Privacy, click on Input Monitoring.
- In Applications, click Logi Options. Drag and drop it to the Input Monitoring box.
- Right-click on Logi Options in Applications and click on Show Package Contents.
- Go to Contents, then Support.
- In Security & Privacy, click on Accessibility.
- In Support, click Logi Options Daemon. Drag and drop it to the Accessibility box in the right pane.
- In Security & Privacy, click on Input Monitoring.
- In Support, click Logi Options Daemon. Drag and drop it to the Input Monitoring box in the right pane.
- Click Quit and Reopen.
- Restart the system.
- Launch the Options software and then customize your device.
It is not possible to use one Easy-Switch button to at the same time change both your mouse and keyboard to a different computer/device.
We do understand that this is a feature that a lot of customers would like. If you are switching between Apple macOS and/or Microsoft Windows computers, we offer Flow. Flow allows you to control multiple computers with a Flow-enabled mouse. Flow automatically switches between computers by moving your cursor to the edge of the screen, and the keyboard follows.
In other cases where Flow is not applicable, one Easy-Switch button for both mouse and keyboard might look like a simple answer. However, we cannot guarantee this solution at the moment, as it is not easy to implement.
Logitech Options software is not compatible with the recent update from Adobe Photoshop 22.3, with native support for Apple M1 computers. We have not observed issues with Intel-based Mac computers.
Adobe Photoshop 22.3 has been confirmed to work with the Logitech Options plugin when you open it using Rosetta 2. Use the following steps:
1. Install the latest Logitech Options software.
2. Install Adobe Photoshop 22.3.
3. Connect any plugin-supported device.
– Navigate to Applications > Adobe Photoshop 2021 > Adobe Photoshop 2021.
4. Right-click on Photoshop.
5. Select Open using Rosetta. The plugin actions should now work.
If you’re getting the error “LogiOptions extension could not be loaded because it was not properly signed”, please remove the Adobe Photoshop plugin and then add it again.
– Make sure that the NumLock key is enabled. If pressing the key once doesn’t enable NumLock, press and hold the key for five seconds.
– Verify that the correct keyboard layout is selected in Windows Settings and that the layout matches your keyboard.
– Try enabling and disabling other toggle keys such as Caps Lock, Scroll Lock, and Insert while checking if the number keys work on different apps or programs.
– Disable Turn on Mouse Keys:
1. Open the Ease of Access Center — click the Start key, then click Control Panel > Ease of Access and then Ease of Access Center.
2. Click Make the mouse easier to use.
3. Under Control the mouse with the keyboard, uncheck Turn on Mouse Keys.
– Disable Sticky Keys, Toggle Keys & Filter Keys:
1. Open the Ease of Access Center — click the Start key, then click Control Panel > Ease of Access and then Ease of Access Center.
2. Click Make the keyboard easier to use.
3. Under Make it easier to type, make sure all checkboxes are unchecked.
– Verify the product or receiver is connected directly to the computer and not to a hub, extender, switch, or something similar.
– Make sure the keyboard drivers are updated. Click here to learn how to do this in Windows.
– Try using the device with a new or different user profile.
– Test to see if the mouse/keyboard or receiver on a different computer.
On macOS, the Play/Pause and media control buttons by default, launch and control the macOS native Music app. The default functions of keyboard media control buttons are defined and set by macOS itself and therefore cannot be set in Logitech Options.
If any other media player is already launched and running, for example, playing music or a movie onscreen or minimized, pressing the media control buttons will control the launched app and not the Music app.
If you wish your preferred media player to be used with the keyboard media control buttons it must be launched and running.
Apple has announced a forthcoming update macOS 11 (Big Sur) due to be released in the fall of 2020.
|
Logitech Options Fully Compatible
|
Logitech Control Center (LCC) Limited Full Compatibility Logitech Control Center will be fully compatible with macOS 11 (Big Sur), but only for a limited compatibility period. macOS 11 (Big Sur) support for Logitech Control Center will end early 2021. |
|
Logitech Presentation Software Fully Compatible |
Firmware Update Tool Fully Compatible Firmware Update Tool has been tested and is fully compatible with macOS 11 (Big Sur). |
|
Unifying Fully Compatible Unifying software has been tested and is fully compatible with macOS 11 (Big Sur). |
Solar App Fully Compatible Solar app has been tested and is fully compatible with macOS 11 (Big Sur). |


If your mouse or keyboard stops working during a firmware update and starts to blink repeatedly red and green, this means the firmware update has failed.
Use the instructions below to get the mouse or keyboard working again. After you download the firmware, select how your device is connected, either using the receiver (Logi Bolt/Unifying) or Bluetooth and then follow the instructions.
1. Download the Firmware Update Tool specific to your operating system.
2. If your mouse or keyboard is connected to a Logi Bolt/Unifying receiver, follow these steps. Otherwise, skip to Step 3.
– Make sure to use the Logi Bolt/Unifying receiver that originally came with your keyboard/mouse.
– If your keyboard/mouse uses batteries, please take the batteries out and put them back in or try replacing them.
– Unplug the Logi Bolt/Unifying receiver and reinsert it into the USB port.
– Turn off and on the keyboard/mouse using the power button/slider.
– Press any button on the keyboard/mouse to wake up the device.
– Launch the downloaded Firmware Update Tool and follow the on-screen instructions.
– If your keyboard/mouse still does not work, please reboot your computer and repeat the steps at least two more times.
3. If your mouse or keyboard is connected using Bluetooth and is still paired to your Windows or macOS computer:
– Turn off and on your computer’s Bluetooth or reboot your computer.
– Turn off and on the keyboard/mouse using the power button/slider.
– Launch the downloaded Firmware Update Tool and follow the on-screen instructions.
– If your keyboard/mouse still does not work, please reboot your computer and repeat the steps at least two more times.
Do not remove the device pairing from the System Bluetooth or Logi Bolt when the device is blinking red and green.
If the issue persists, please contact our customer support team.
If your device failed to update and can’t be updated with the Firmware Update Tool again, try the following:
1. Unplug the receivers and remove the Bluetooth connections of all your Logitech devices.
2. Open and run the Logitech Firmware Update Tool, keep your device turned on, and wait until the software recognizes your device. This may take up to 30 seconds.
3. If the device isn’t detected after 30 seconds, wake up the device by pressing any key or restart the device.
If you are using Logitech Options or Logitech Control Center (LCC) on macOS you may see a message that legacy system extensions signed by Logitech Inc. will be incompatible with future versions of macOS and recommending to contact the developer for support. Apple provides more information about this message here: About legacy system extensions.
Logitech is aware of this and we are working on updating Options and LCC software to ensure we comply with Apple’s guidelines and also to help Apple improve its security and reliability.
The Legacy System Extension message will be displayed the first time Logitech Options or LCC loads and again periodically while they remain installed and in use, and until we have released new versions of Options and LCC. We do not yet have a release date, but you can check for the latest downloads here.
NOTE: Logitech Options and LCC will continue to work as normal after you click OK.
Premiere Pro 2020 (version 14.0.2 or later) has enabled the NewWorldScript engine. It has the following two issues:
– Logitech Options 8.10 with Craft Keyboard and MX Master 3 does not work at all for Timeline Navigation.
– Even after fixing the plugin code, the NewWorldScript engine is very slow (about x15) and is not usable for JogWheel. (Windows-only issue).
The following instructions are to help you revert to the old scripting engine as a temporary solution.
1. Launch Premiere Pro 2020.
2. Open the Console window:
– Windows: Ctrl + F12
– Mac: Cmd + F12
3. Verify the current settings:
– Copy and paste the following text to the Command text field and then press Enter:
debug.get ScriptLayerPPro.EnableNewWorld
Note: Expected to be true,
4. Disable NewWorldScript and enable ExtendScript:Copy and paste the following text to the Command text field and press Enter:
debug.set ScriptLayerPPro.EnableNewWorld=false
5. Verify the current settings:
– Copy and paste the following text to the Command text field and press Enter:
debug.get ScriptLayerPPro.EnableNewWorld
Note: Expected to be false.
6. Restart Premiere Pro 2020.
– Quit the application.
– If the Premiere Pro process is still running, end the process in Task Manager (Ctrl+Shift+ESC).
To reenable NewWorldScript as the default:
In step 3 above, set to True:
debug.set ScriptLayerPPro.EnableNewWorld=true
Reference:
New World scripting will be ON by default in the next Premiere Pro release!
You can view the available keyboard shortcuts for your external keyboard. Press and hold the Command key on your keyboard to display the shortcuts.
You can change the position of your modifier keys at any time. Here’s how:
– Go to Settings > General > Keyboard > Hardware keyboard > Modifier Keys.
If you have more than one keyboard language on your iPad, you can move from one to the other using your external keyboard. Here’s how:
1. Press Shift + Control + Space bar.
2. Repeat the combination to move between each language.
When you connect your Logitech device, you might see a warning message.
If this happens, make sure to connect only the devices you’ll be using. The more devices that are connected, the more interference you might have between them.
If you are having connectivity issues, disconnect any Bluetooth accessories that you’re not using. To disconnect a device:
– In Settings > Bluetooth, tap the information button next to the device name, then tap Disconnect.
If your Bluetooth mouse or keyboard does not reconnect after a reboot at the login screen and only reconnects after the login, this might be related to FileVault encryption.
When FileVault is enabled, Bluetooth mice and keyboards will only re-connect after login.
Potential solutions:
– If your Logitech device came with a USB receiver, using it will solve the issue.
– Use your MacBook keyboard and trackpad to login.
– Use a USB keyboard or mouse to login.
Note: This issue is fixed from macOS 12.3 or later on M1. Users with an older version might still experience it.
You can use Logitech Unifying software to connect your keyboard or mouse to your computer.
NOTE: If you don’t already have it installed, you can download Unifying software from the Software Downloads page.
1. Launch the Logitech Unifying software.
– Windows: Start > Programs > Logitech > Unifying > Logitech Unifying Software
– Macintosh: Application / Utilities / Logitech Unifying Software
2. At the bottom of the Welcome screen, click Next.
NOTE: These instructions use Windows screenshots for a keyboard. Macintosh will look slightly different, but the instructions are the same for keyboard or mouse.
2.When you see the “Restart the device…” window, follow the on-screen instructions to turn your device off and then back on.
3. When your device is detected, you’ll see a “We have detected your…” confirmation screen. Type a test message in the field provided to make sure it works.
4. If your device connected successfully, click Yes and then Next.
4. If your device doesn’t work right away, wait a minute to see if it connects. If it doesn’t, select No and then click Next to restart the pairing process from Step 1 above.
5. Click Finish to exit the Logitech Unifying Software (or Pair Another Device to pair additional devices). Your device should now be connected.
When you use the Crown on your Craft keyboard with MS Word, the features that are available depend on the type of information that you select.

| 1 | Nothing is selected |
| 2 | Select text |
| 3 | Select image or an object |
| 4 | Select a table |
When nothing is selected the Crown offers you the following basic features:
- Theme style
- Theme color
- Theme font

When text is selected, the Crown offers you the following features:
- Font size
- Paragraph style
- Align

When you select an image or object, Crown gives you the following features:
- Scale
- Rotate
- Wrap text

When you select a table, the Crown offers you the following features:
- Table style
- Table color

Craft Keyboard Crown Features in MS Word and what they do
The following Crown features are available for the following tools in Photoshop:
 |
Tool Description | Available Crown Features |
|---|---|---|
| Blur Tool | The Blur tool blurs hard edges in an image. |
|
| Sharpen Tool | The Sharpen tool sharpens soft edges in an image. |
|
| Smudge Tool | The Smudge tool smudges data in an image. |
|
 |
Tool Description | Available Crown Features |
|---|---|---|
| Brush Tool | The Brush tool paints brush strokes. |
|
| Pencil Tool | The Pencil tool paints hard edged strokes. |
|
| Color Replacement Tool | The Color Replacement tool replaces a selected color with a new color. |
|
| Mixer Brush Tool | The Mixer Brush tool is used to simulate painting styles, for example, canvas blending of colors and adjustable paint wetness. |
|
 |
Tool Description | Available Crown Features |
|---|---|---|
| Clone Stamp Tool | The Clone Stamp tool paints using a sample of a selected area within an image. |
|
| Pattern Stamp Tool | The Pattern Stamp tool uses a selected part of an image to create patterns. |
|
 |
Tool Description | Available Crown Features |
|---|---|---|
| Crop Tool | The Crop tool trims images. |
|
| Perspective Crop Tool | The Perspective Crop tool lets you transform the perspective in an image while cropping. |
|
| Slice Tool | The Slice tool creates slices. |
|
| Slice Select Tool | The Slice Select tool selects slices. |
|
 |
Tool Description | Available Crown Features |
|---|---|---|
| Dodge Tool | The Dodge tool lightens areas in an image. |
|
| Burn Tool | The Burn tool darkens areas in an image. |
|
| Sponge Tool | The Sponge tool changes the color saturation of an area. |
|
 |
Tool Description | Available Crown Features |
|---|---|---|
| Eraser Tool | The Eraser tool removes pixels and reestablishes parts of a picture to a former saved state. |
|
| Background Eraser Tool | The Background Eraser tool erases areas to transparency by dragging. |
|
| Magic Eraser Tool | The Magic Eraser tool is used to change solid colored areas into transparent areas. |
|
 |
Tool Description | Available Crown Features |
|---|---|---|
| Eyedropper Tool | The Eyedropper tool samples color to choose a new background or foreground color. You can sample from any content available on your screen within Photoshop. |
|
| Ruler Tool | The Ruler tool helps you position images accurately, and the tool will calculate the distance between two designated points, and provides a line when used to measure any two points. |
|
| Note Tool | The Note tool makes notes that can be attached to an image. |
|
| Count Tool | The Count tool counts objects in an image. |
|
 |
Tool Description | Available Crown Features |
|---|---|---|
| Gradient Tool | The Gradient tools are used to slowly blend multiple colors; there are preset color schemes or you can create your own. |
|
| Paint Bucket Tool | The Paint Bucket tool fills areas with the selected or foreground color. The areas filled in often have the same or similar colors. |
|
| 3D Material Drop Tool | The 3D Material Drop tool is similar to the Paint Bucket tool and allows you to use selected samples on 3D objects. |
|
 |
Tool Description | Available Crown Features |
|---|---|---|
| Hand Tool | The Hand Tool allows you to navigate edited images that are not fully centered in your project window. |
|
| Rotate View Tool | The Rotate View tool rotates the canvas. |
|
 |
Tool Description | Available Crown Features |
|---|---|---|
| History Brush Tool | The History Brush tool is used to paint a snapshot of a selected moment in the current image. |
|
| Art History Brush Tool | The Art History Brush tool paints using stylized strokes that simulate different paint styles, this is done by using a selected moment, or snapshot. |
|
 |
Tool Description | Available Crown Features |
|---|---|---|
| Horizontal Type Tool | The Horizontal Type tool creates and edits vector-based text in a separate layer. |
|
| Vertical Type Tool | The Vertical Type tool creates and edits vector-based text in a separate layer. |
|
| Vertical Mark Type Tool | The Vertical Type Mask tool creates type-shaped selections. |
|
| Horizontal Mark Type Tool | The Horizontal Type Mask tool creates type-shaped selections. |
|
 |
Tool Description | Available Crown Features |
|---|---|---|
| Lasso Tool | The lasso tools make freehand selection around an image or area of your designation. |
|
| Polygonal Lasso Tool | The Polygonal Lasso tool is used to perform straight edged selection of an image or object. |
|
| Magnetic Lasso Tool | The Magnetic Lasso Tool actively searches for edges and attaches to the selected edges. |
|
 |
Tool Description | Available Crown Features |
|---|---|---|
| Marquee Tool Set | The Marquee tools make rectangular, elliptical, single row, and single column selections. |
|
| Elliptical Marquee Tool | See description for Marquee Tool Set above. |
|
| Single Row Marquee Tool | See description for Marquee Tool Set above. |
|
| Single Column Marquee Tool | See description for Marquee Tool Set above. |
|
 |
Tool Description | Available Crown Features |
|---|---|---|
| Move Tool | The Move tool moves selections, layers. |
|
| Artboard Tool | The Artboard tool is used to preview your Photoshop project on a canvas size and allows you to change the rotation and to add duplicate artboards. |
|
 |
Tool Description | Available Crown Features |
|---|---|---|
| Path Selection Tool | The Path Selection tool is used to make segmented selections and show the anchor points and direction lines. |
|
| Direct Selection Tool | The Direct Selection Tool is used to select and move existing paths, vector shapes or anchor points. |
|
 |
Tool Description | Available Crown Features |
|---|---|---|
| Pen Tool | The Pencil tool paints hard-edged strokes. |
|
| Freeform Pen Tool | The Freeform pen tool lets you draw similar to drawing on pen and paper. The tool adds anchor points as you draw, the points can be adjusted once available. |
|
| Add Anchor Point Tool | The Add Anchor Point tool adds anchors and lets you reshape vectors and shapes. |
|
| Delete Anchor Point Tool | The Delete Anchor Point tool deletes anchors and reshapes existing vector paths and shapes. |
|
| Convert Point Tool | The Delete Anchor Point tool deletes anchors and reshapes existing vector paths and shapes. |
|
 |
Tool Description | Available Crown Features |
|---|---|---|
| Quick Selection Tool | The Quick Selection tool uses an adjustable brush edge and lets you quickly “paint” a selection. |
|
| Magic Wand Tool | The Magic Wand tool selects similarly colored areas. |
|
 |
Tool Description | Available Crown Features |
|---|---|---|
| Rectangle Tool | The Rectangle tool creates rectangular shapes and paths. |
|
| Rounded Rectangle Tool | The Rounded Rectangle tool creates rectangular shapes and paths with rounded corners. |
|
| Ellipse Tool | The Ellipse tool creates elliptical shapes and paths. |
|
| Polygon Tool | The Polygon tool creates polygonal shapes and paths. |
|
| Line Tool | The Line tool creates line shapes and paths. |
|
| Custom Shape Tool | The Custom Shape tool creates versatile shapes and paths. |
|
 |
Tool Description | Available Crown Features |
|---|---|---|
| Spot Healing Brush Tool | The Spot Healing Brush is used to soften or remove blemishes. |
|
| Healing Brush Tool | The Healing Brush tool selects areas of your Photoshop project or image by using samples or patterns. |
|
| Patch Tool | The Patch tool repairs selected areas of your Photoshop project or image using samples or patterns. |
|
| Content-Aware Move Tool | This tool is used to remove sections of a project or image that you don’t want in the image. It uses the surrounding area to blend the section you are focusing on with the content around it. The results are similar to Content-Aware Fill, but this tool allows for more flexibility . |
|
| Red Eye Tool | The Red Eye tool removes the red reflection caused by a flash. |
|
 |
Tool Description | Available Crown Features |
|---|---|---|
| Zoom Tool | The Zoom tool magnifies and reduces the view of an image. |
|
You can customize the F-keys, located across the top on your Craft keyboard, with Logitech Options software.

If you don’t have Logitech Options, you can download it from the product’s Download page.
To customize the F-keys:
- Open Logitech Options and select the Craft keyboard.
- Click on one of the F-keys to customise it. A drop down menu appears.

- Select the feature to assign to the key. In the image above, Brightness Down will be assigned to the F1 key.
The F-key functions are as shown:
| Key | Description |
|---|---|
 |
Screen brightness down |
 |
Screen brightness up |
 |
Task View |
 |
Action Center |
 |
Show / Hide desktop |
 |
Key backlighting level down |
 |
Key backlighting level up |
 |
Media control : Previous |
 |
Media control : Play |
 |
Media control : Next |
 |
Volume control : Mute |
 |
Volume control : Down |
 |
Volume control : Up |
 |
Calculator application |
 |
Print-screen |
 |
Scroll Lock |
 |
Device Lock |
INTRODUCTION
This feature on Logi Options+ allows you to backup the customization of your Options+ supported device automatically to the cloud after creating an account. If you are planning to use your device on a new computer or wish to go back to your old settings on the same computer, log into your Options+ account on that computer and fetch the settings you want from a backup to set up your device and get going.
HOW IT WORKS
When you are logged into Logi Options+ with a verified account, your device settings are automatically backed up to the cloud by default. You can manage the settings and the backups from the Backups tab under More settings of your device (as shown):
Manage settings and backups by clicking on More > Backups:
AUTOMATIC BACKUP OF SETTINGS — if the Automatically create backups of settings for all devices checkbox is enabled, any settings you have or modify for all of your devices on that computer are backed up to the cloud automatically. The checkbox is enabled by default. You can disable it if you don’t want the settings of your devices to be backed up automatically.
CREATE A BACKUP NOW — this button allows you to backup your current device settings now, if you need to fetch them later.
RESTORE SETTINGS FROM BACKUP — this button lets you view and restore all the available backups you have for that device that are compatible with that computer, as shown above.
The settings for a device are backed up for every computer that you have your device connected to and have Logi Options+ that you are logged into. Every time you make some modifications to your device settings, they get backed up with that computer name. The backups can be differentiated based on the following:
Name of the computer. (Ex. John’s Work Laptop)
Make and/or model of the computer. (Ex. Dell Inc., Macbook Pro (13-inch) and so on)
The time when the backup was made
The desired settings can then be selected and restored accordingly.
WHAT SETTINGS GET BACKED UP
– Configuration of all the buttons of your mouse
– Configuration of all the keys of your keyboard
– Point & Scroll settings of your mouse
– Any application-specific settings of your device
WHAT SETTINGS ARE NOT BACKED UP
– Flow settings
– Options+ app settings
Likely Cause(s):
– Potential hardware issue
– Operating system /software settings
– USB port issue
Symptom(s):
– Single-click results in double-click (mice and pointers)
– Repeating or strange characters when typing on the keyboard
– Button/key/control gets stuck or responds intermittently
Possible solutions:
– Clean the button/key with compressed air.
– Verify the product or receiver is connected directly to the computer and not to a hub, extender, switch or something similar.
– Unpair/repair or disconnect/reconnect hardware.
– Upgrade firmware if available.
Windows only — try a different USB port. If it makes a difference, try updating the motherboard USB chipset driver.
Try on a different computer. Windows only — if it works on a different computer, then the issue might be related to a USB chipset driver.
*Pointing devices only:If you’re not sure if the problem is a hardware or software issue, try switching the buttons in the settings (left click becomes right click and right click becomes left click). If the problem moves to the new button it is a software setting or application issue and hardware troubleshooting cannot resolve it. – If the problem stays with the same button it is a hardware issue.
– If a single-click always double-clicks, check the settings (Windows mouse settings and/or in Logitech SetPoint/Options/G HUB/Control Center/Gaming Software) to verify if the button is set to Single Click is Double Click.
NOTE: If buttons or keys respond incorrectly in a particular program, verify if the problem is specific to the software by testing in other programs.
Likely Cause(s)
– Potential hardware issue
– Interference issue
– USB port issue
Symptom(s)
Typed characters take a few seconds to appear on the screen
Possible solutions
1. Verify the product or receiver is connected directly to the computer and not to a hub, extender, switch or something similar.
2. Move the keyboard closer to the USB receiver. If your receiver is in the back of your computer, it may help to relocate the receiver to a front port. In some cases the receiver signal gets blocked by the computer case, causing a delay.
3. Keep other electrical wireless devices away from the USB receiver to avoid interferences.
4. Unpair/repair or disconnect/reconnect hardware.
– If you have a Unifying receiver, identified by this logo, ![]() see Unpair a mouse or keyboard from the Unifying receiver.
see Unpair a mouse or keyboard from the Unifying receiver.
– If your receiver is non-Unifying, it cannot be unpaired. However, if you have a replacement receiver, you can use the Connection Utility software to perform the pairing.
5. Upgrade the firmware for your device if available.
6. Windows only — check if there are any Windows updates running in the background that may cause the delay.
7. Mac only — check if there are any background updates that may cause the delay.
8. Try on a different computer.
When your device isn’t working, the problem is likely a connection or power issue. This can be due to several reasons, such as:
– Low battery levels
– Plugging the receiver into a USB hub or other unsupported device such as a
KVM switch
– NOTE: Your receiver must be plugged directly into your computer.
– Using your wireless keyboard on metal surfaces
– Radio frequency (RF) interference from other sources, such as wireless speakers, cell phone, and so on
– Windows USB port power settings
If your keyboard is not working or frequently loses connection try the following steps:
1. Check the batteries or make sure your device is charged.
2. Make sure the keyboard is On.
3. Keep other electrical wireless devices away from the USB receiver to avoid interferences.
4.. Move the keyboard closer to the USB receiver.
5.Unpair/repair or disconnect/reconnect hardware:
– If you have a Unifying receiver, identified by this logo, ![]() see Unpair a mouse or keyboard from the Unifying receiver for instructions.
see Unpair a mouse or keyboard from the Unifying receiver for instructions.
– If your receiver is non-Unifying, it cannot be unpaired. However, if you have a replacement receiver, you can use the Connection Utility software to perform the pairing.
6. Try a different USB port. If using a different USB port works, try updating the motherboard USB chipset driver.
7. Windows only — check USB port power settings.
8. Upgrade the firmware for your device if available.
9. Try the device on a different computer.
Likely Cause(s):
– Security and Privacy settings are locked
– Partial or corrupted download of Logitech Options installer
Symptom(s):
– Logitech Options doesn’t start installing
– Install is either paused or hung at some point during the installation
Possible solutions:
When the installation seems to be stuck or not progressing, it could mean that the security settings are locked. To unlock the Security and Privacy settings, please follow the instructions below:
1. Open System Preferences.
2. Select Security & Privacy.
3. On the bottom left of the window, select Click the lock to make changes.
Enter your Username and Password.
4. The Security & Privacy settings are now unlocked and you should be able to install the software.
5. If you’re still not able to install, and if you have Yosemite or earlier, see the Apple support article on how to repair your disk permissions.
6. Visit the Apple support site to learn how to start your Mac in Safe Mode. This may help you to pinpoint the problem.
Likely Cause(s):
– Low battery levels
– Plugging the receiver into a USB hub or other unsupported device such as a
KVM switch
NOTE: Your receiver must be plugged directly into your computer.
– Using your wireless device on metal surfaces
– Radio frequency (RF) interference from other sources, such as wireless speakers, cell phone, and so on
Symptom(s):
– Bluetooth connection keeps dropping
– The device doesn’t connect to Bluetooth
– Button/cursor lagging
Possible solutions:
– Reduce the distance between the device and the Bluetooth receiver. If it’s an internal Bluetooth card (ex. laptop) then try improving the line of sight of the device to the computer.
– Check for radio frequency (RF) interference from other sources, such as wireless speakers, cell phone, and so on.
– Check if the device works with the USB receiver. If it doesn’t, then most likely the device is defective.
Windows:
– Try updating your Bluetooth chipset driver.
– Check for Windows updates.
– For a Bluetooth USB dongle, update the drivers for it from the manufacturer’s website.
– For an internal Bluetooth chipset, refer to the computer’s motherboard manufacturer drivers.
Mac: Check for OS updates.
If you’re unable to pair your device to the Unifying receiver, please do the following:
STEP A:
1. Make sure the device is found in Devices and Printers. If the device is not there, follow steps 2 and 3.
2. If connected to a USB HUB, USB Extender or to the PC case, try connecting to a port directly on the computer motherboard.
3. Try a different USB port; if a USB 3.0 port was used previously, try a USB 2.0 port instead.
STEP B:Open Unifying Software and see if your device is listed there. If not, follow the steps to connect the device to a Unifying receiver.
Read More About:
Logitech CRAFT Advanced Keyboard with Creative Input Dial User Manual


