![]() KoPa WiFi Lab for Windows
KoPa WiFi Lab for Windows
Software User Manual

Software Installation
Environmental requirements for software installation
System requirements:
CPU type: i5 10th Generation or later version;
Memory capacity ≥ 16GB or more;
Hard drive capacity ≥ 512GB or more;
System: Genuine Microsoft Windows 10 (64 bit) or later version;
Graphics card: Core display or discrete graphics card.
Note: Some functions in the software require the computer with
Microsoft Word 2003 or later version (for output measurement results to Microsoft Word function)
Microsoft Excel 2003 or later version (for output measurement results to Microsoft Excel function)
Microsoft Outlook 2003 or later version (for sending pictures via email function)
Installation steps
Step1. Run the file “KoPa Capture Pro Install ”. When window pops up, please select the installation guide language.
Note: The installation guide language is independent of the software interface language. If you need to change the software interface language, please select the “Language” function in the “Settings” menu to modify.
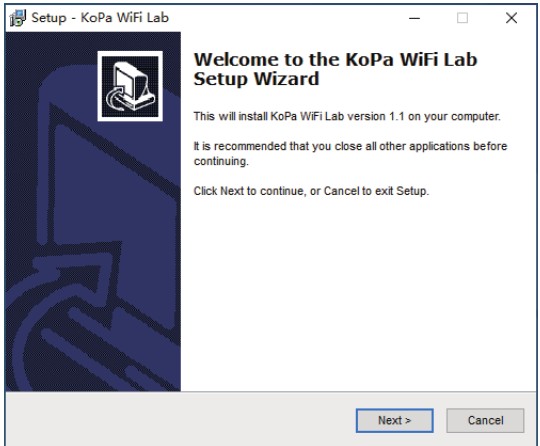 Step 2.When the window “Welcome to use KoPa Capture Pro Setup
Wizard” pops up, please click the button ![]() .
.
 Step 3. When the window “Select Destination Location” pops up, click “Browse” to choose the file path for installation (usually default), and then click
 ![]() to continue.
to continue.
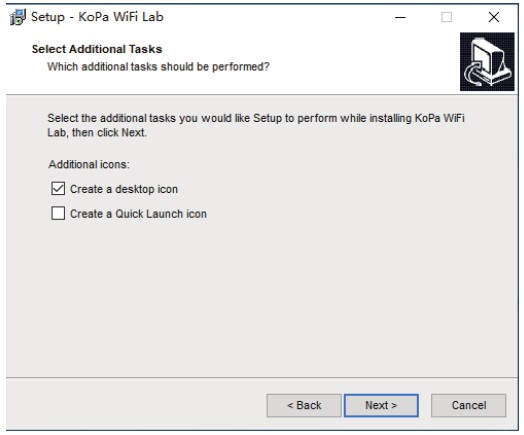
Step 4. When following window appears, select the shortcut you need, and then click the button ![]() .
.
 Step 5. Confirm information like the “Destination Location” of software installation. After confirmation, please click the button
 ![]() .
.
 Step 6. An installation progress bar will appear during the software installation procedure. The software installation necessitates the registration of some runtime libraries, which might be intercepted by some antivirus software. If such interception pops up, please allow the procedure to continue.
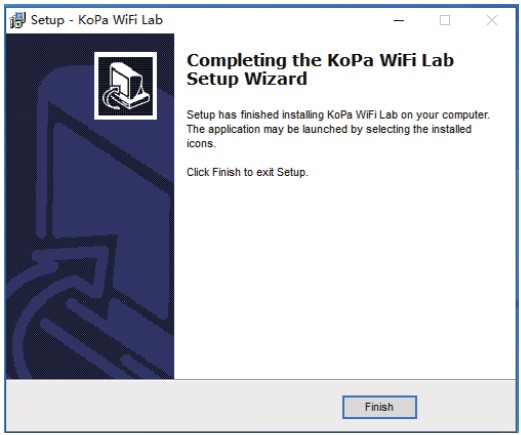
Step 7. An installation progress bar will appear during the software installation procedure. When the following window appears, the software has been installed successfully. Then click the button ![]() to complete the installation. After closing the window, check the icon
to complete the installation. After closing the window, check the icon ![]() on your computer desktop. If you fail to find it, please find it from the path “Start”→“All programs”.
on your computer desktop. If you fail to find it, please find it from the path “Start”→“All programs”.
 Software connection to the camera method
This software supports connecting to the camera via network cable or WiFi connection.

Software Instructions
Operation interface

![]() Number of user connections mode
Number of user connections mode
Feature Details:
Scan QR code connection and view the current number of user connections to the multi-viewing workstation.
Smart devices (mobile phone or tablet) can scan the QR code to connect to the multi-viewing workstation and observe the microscopic images in real time.
The “Number of user connections” mode on the left side of KoPa WiFi Lab allows you to view the total number of users currently connected to the multi-viewing workstation (connection number is 2 in the example image on the right ). The system automatically detects the number of refreshed users online, join or leave midway and then return can be viewed in real time.

Shortcut Toolbar
Shortcut tools

| Open | Retrieve images from the local disk to the software. | |
| Save | After annotating the picture, adding text, etc., click the “Save” button to save the current annotation, text, etc |
|
| Preview | If a still image is retrieved from the window, clicking this button will return the window to the preview dynamic picture. |
|
| Select object | Select “objects” such as annotations, text, measurements, etc. for the next step, such as moving, deleting, etc. Support single selection or select them by drawing a big box around them. | |
| Drag | Use the mouse to drag the still image. | |
| Undo | Undoing the last operation on an “object”. | |
| Redo | Redoing the last operation on an “object”. | |
| Delete | Delete or erase the selected “object” with a single click. | |
| Compare with multiple windows |
comparison / Four screen comparison. |
|
| Flip | Flip the image on the currently selected screen. | |
| Mirror | Mirror the image on the currently selected screen. | |
| Snapshot | Snapshot the image on the currently selected screen. | |
| Screen capture | Screen capture on the entire computer desktop. | |
| Record | Record on the currently selected screen. | |
| Screen record | Screen record on the entire computer desktop. | |
| Image processing | Composite overlay of selected color fluorescence images. |
Combined channel
Fluorescent channels can be assigned quickly

| Live image taking | |
| Preview window setting: double window to display original image and combined channel image separately, single window to display combined channel image only | |
| Image Zoom | |
| Image reduction | |
| Adapts to screen size | |
| Import images |
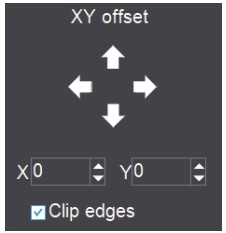
Fluorescence channels can be specified for imported images (as shown in the figure below)

Note: Please import images with the same resolution, otherwise the image import will fail.
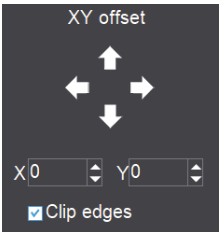
Allows direct input of X, Y, and brightness values for fine adjustment.
Combined color images
Color fluorescent images can be quickly combined.

Note: Please import images with the same resolution, otherwise the image import will fail.
Allows direct input of X, Y, and brightness values for fine adjustment.
| Live image taking | |
| Preview window setting: double window to display original image and combined channel image separately, single window to display combined channel image only | |
| Image Zoom | |
| Image reduction | |
| Adapts to screen size | |
| Import images |
Camera property control
![]() Adjust the corresponding image property parameters as needed to achieve the desired image effect.
Adjust the corresponding image property parameters as needed to achieve the desired image effect.

| Staining tape | Users can select different exclusive types of stained pathology sections to obtain matching image effects and more accurate color reproduction. BF type 1: for bright-field, red or gold-based sections. BF type 2: for bright-field, cyan-dominated sections. FL type: for fluorescence observation. |
| Brightness | Manually drag the adjustment bar to adjust the image brightness. |
| Exposure | When checked, the camera will automatically expose according to the environment used. When unchecked, manual exposure can be performed through the adjustment bar, supporting direct input of values in the box. |
| White Balance | Manual white balance adjustment can be made through the adjustment bar, supporting direct input of values in the box. Click on “R” will restore the default value of the R channel alone. Click on “B” will restore the default value of the B channel alone. |
| Gain | Manually drag the adjustment bar to adjust the image gain. Support for entering values directly in the box. Click on “Gain” will restore the default value of gain alone. |
| Contrast | Manually drag the adjustment bar to adjust the image contrast. Support for entering values directly in the box. Click on “Contrast” will restore the default value of contrast alone. |
| Hue | Manually drag the adjustment bar to adjust the image hue. Support for entering values directly in the box. Click on “Hue” will restore the default value of hue alone. |
| Saturation | Manually drag the adjustment bar to adjust the image saturation. Support for entering values directly in the box. Click on “Saturation” will restore the default value of saturation alone. |
| Sharpness | Manually drag the adjustment bar to adjust the image sharpness. Support for entering values directly in the box. Click on “Sharpness” will restore the default value of sharpness alone. |
| Gamma | Manually drag the adjustment bar to adjust the image gamma. Support for entering values directly in the box. Click on “Gamma” will restore the default value of gamma alone. |
| Export image properties | |
| Import image properties | |
| Restore Default values | |
| Preview resolution |
![]() Measuring tools
Measuring tools
Provides calibration function as well as measurement function for dynamic or still image in the preview window.
Calibration
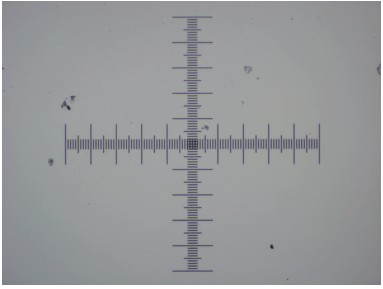
Step 1: Please place the micrometer under the microscope, the example below uses a micrometer with 1DV= 0.01mm.
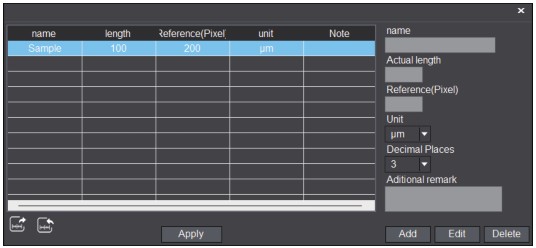
Step 2: Click on “ ![]() ” to bring up the calibration table as shown below.
” to bring up the calibration table as shown below.
Step 3: When using the mouse to draw a straight line on the micrometer image and setting the scale length, selecting a longer scale length will give more accurate results. For example, selecting 10 small scale lengths will give you more accuracy than selecting only 1 scale length.
After releasing the mouse, the image value of the line drawn with the mouse will be automatically updated in the “Benchmark” of the calibration table, as shown in the following figure.
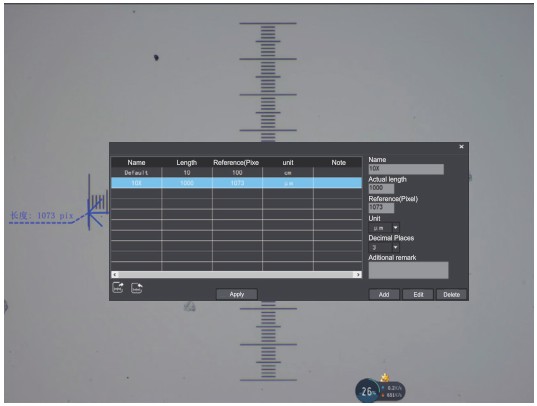
Step 4: Enter a name in the calibration table, such as 10X.
In the calibration table, enter the actual length that just drawn on the micrometer, for example, the sample figure is drawn 100 DV, that is, 0.01mm, or 1000μm, then enter the “actual length” box to fill in the specified 1000, “unit” select “μm”. Then click “Add” to add this calibration value to the calibration table to be used. Add the calibration value for other objectives of different magnifications in this way.
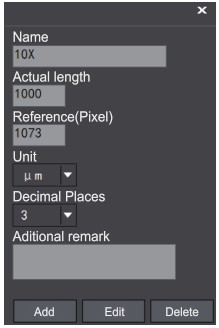
Notes.
① “Add”: The information in the right box will be added to the list on the left.
② “Edit”: The calibration value selected in the left list will be modified.
③ “Delete”: The calibration value selected in the left list will be deleted.
④ “Apply”: The calibration value selected in the left list will be called.
Select measurement tool for measurement
Firstly, select the calibration value according to the actual objective used in the calibration table and click on “Apply”. The following figure shows.

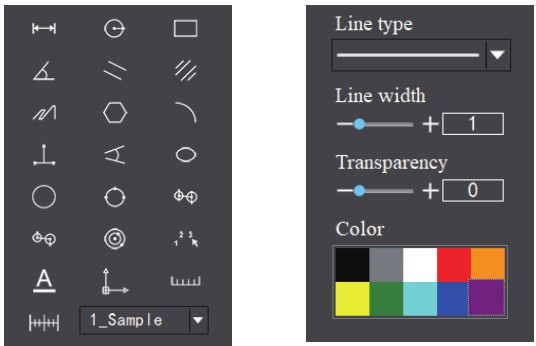
Then select the measurement tools to measurement as follows:
| Straight line measurement | |
| Circular measurement | |
| Rectangular measurement | |
| Angle measurement | |
| Parallel line distance | |
| Double parallel line center distance | |
| Folding line measurement | |
| Polygon measurement | |
| Curvature measurement | |
| Three-point vertical line measurement | |
| Four-point angle measurement | |
| Ellipse measurement | |
| Drawing a circle with radius | |
| Three point drawing circle measurement | |
| Concentric circle measurement | |
| Concentric radius circle distance drawing circle measurement | |
| Circle measurement | |
| Manual calculation | |
| Set the font | |
| Scale lines | |
| Scale bar | |
| Select line type | |
| Set the measurement tool line width | |
| Set the transparency of the measurement tool | |
| Set the measurement tool color |
The results of each measurement will be displayed on the right side of the software. The user can export the measurement results.
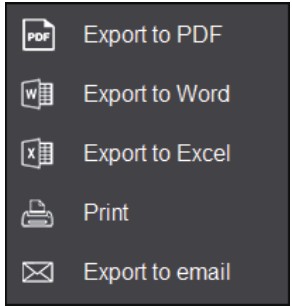
Click the export tool ![]() in the upper right display bar to export data and images to PDF, Word, Excel, printer and mail (Outlook only). Export to PDF, printer and mail functions are only available for still images.
in the upper right display bar to export data and images to PDF, Word, Excel, printer and mail (Outlook only). Export to PDF, printer and mail functions are only available for still images.
Select Export to Word, as shown below: Enter file name, select path, and click “Save”. The exported documents are as follows:
| Serial No. | Measure item | Measured value |
| 1 | Circular measurement | Radius=21.175 um Perimeter=133.046 um Area=1408.611 um2 |
| 2 | Concentric circle measurement | Radius1=19.674 um Perimeter1=123.616 um Areal=1216.025 um2 Length=60.056 urn Radius2=19.507 urn Perimeter2=122.569 um Area2=1195.504 um2 |
| 3 | Linear distance measurement | Length=76.050 urn |
![]()
Drawing tools

| pencil | |
| straight line | |
| highlighter | |
| single arrow straght line | |
| rectangle | |
| oval | |
| concentric circle | |
| isosceies triangle | |
| set font | |
| insert text | |
| line type | |
| set line width | |
| set transparency | |
| color |
Lecturing function
![]()
Lecturing function
Brief description of functions:
Synchronized broadcasting computer screen or operation process to the smart devices (mobile phone or tablet); Real-time display of microscopic images and computer operation screens at the smart devices (mobile phone or tablet);
Displaying lesson plans, PPT, videos, etc., in real time at the smart devices (mobile phone or tablet);

![]() Electronic white board function
Electronic white board function

Click the “Whiteboard” button in the upper right corner of the software to show the teacher’s desktop to the smart devices (mobile phone or tablet) and to comment on the desktop and other courseware. The “Whiteboard” tools from left to right are: Pen, Arrow, Enter Text, Undo, Redo, Eraser, Delete Object, Line Width, Line Type, Color, Macro Photo, Macro Video, Mouse Penetration (this tool allows you to call the file data in the computer disk), and return to the software interface, which helps you to annotate the desktop, video, etc. and comment on the desktop in the lecture mode. It helps to annotate and push the displayed courseware, videos, etc. to the smart devices (mobile phone or tablet) in real time.
Thumbnail toolbar
Right-clicking on a thumbnail will display the action menu as shown in the figure below.
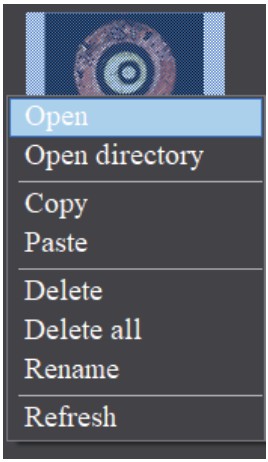
Open: Open the image in the software default way.
Open directory: Open the directory where the selected image is located.
Copy: Copy the currently selected image.
Paste: Paste the image that has been copied. (Note: Paste can only be done within the thumbnail toolbar).
Delete: Permanently delete the selected image and permanently delete the source file.
One-click deletion: permanently delete all thumbnails and permanently delete the source files.
Rename: Rename the selected image.
Refresh: Refresh the current image thumbnail area.
Software setup

KoPa Capture Pro Software User Manual
Documents / Resources
 |
KoPa WiFi Lab for Windows Software [pdf] User Manual WiFi Lab for Windows Software, WiFi Lab, for Windows Software, Windows Software, Software |


