GUIDELINES Get Sharp Mitered Corners
OVERVIEW
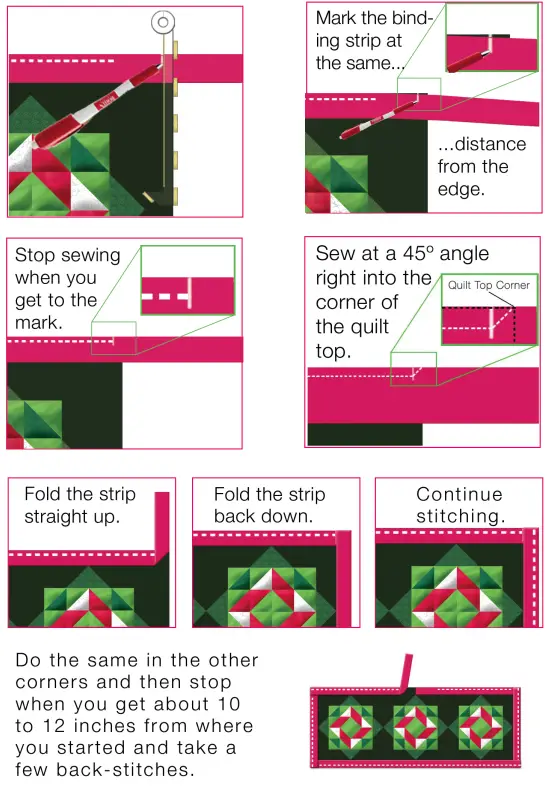
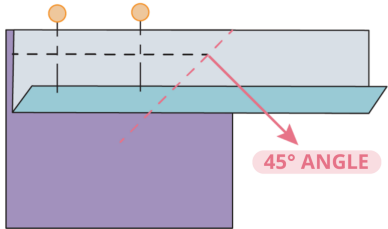
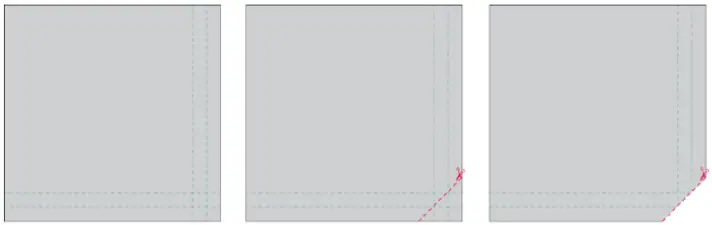
Mark the stopping point with the Prep-Tool & Marker.
WATCH THE VIDEO TUTORIAL
Youtube: https://www.youtube.com/watch?v=LjCcxMckheY
WHAT EVEN IS THAT
- A mitered corner is a technique used in sewing, woodworking, and other crafts to create a neat and polished 90-degree corner, typically on borders or edges. In sewing, it’s often seen on quilt borders, napkins, tablecloths, and bed linens.
- The technique involves folding the two edges to be joined at a 45-degree angle so that when they’re aligned, they form a perfect 90-degree corner.
- This results in a seamless transition without any overlapping fabric, giving the corner a clean, sharp appearance.
WHY USE MITERED CORNERS?
- Aesthetic Appeal: Mitered corners provide a professional and refined look to finished projects. The clean lines and absence of bulky fabric at the corners make the end product more visually appealing.
- Reduced Bulk: Especially in sewing, overlapping fabric can create bulky, lumpy corners that are not only unattractive but can also be challenging to sew over. Mitered corners eliminate this problem by distributing the fabric evenly.
- Durability: Mitered corners, due to their construction, can often be more durable than other corner techniques. The even distribution of fabric means there’s less wear and tear at any single point, increasing the lifespan of the item.
- Versatility: While mitered corners are often associated with square or rectangular items, the technique can be adapted for projects with more sides, like octagonal tablecloths, making it a versatile skill to have in one’s crafting arsenal.
- Enhanced Patterns: For projects with striped or patterned fabric, mitered corners can create a beautiful, symmetrical design at the corners, enhancing the overall look of the finished item.
INSTRUCTIONS FOR MITRED BIAS BINDING CORNER
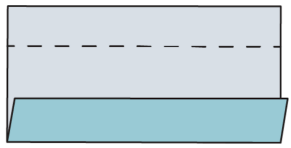
- For Single or Double Folded Binding: Unfold one side of the binding as shown in the subsequent image.
- Align this unfolded section with the fabric’s right side, ensuring raw edges coincide, and pin. Sew along the binding’s fold line, halting at a 45-degree angle from the corner.
- Angle the binding upwards at 45 degrees as illustrated below and pin.
- Realign the binding’s top edge as shown and pin. Initiate sewing from the 45-degree mark.
MITRED CORNER INSTRUCTIONS
- On all edges, iron to the wrong side 1/2 your hem/seam allowance. Repeat iron the same amount again. At the corners, make sure you fold and iron evenly, and that you steam press all. We will be using the fold marks.
- Unfold everything. Find the middle square formed by the folds. Mark a line through its corners all the way across as below. Cut on the line just drawn as below.
- Fold on this line as below so that the fold lines line up with each other. Iron slightly, making sure not to lose your other fold lines.
- Now fold back your first fold and iron. Next, fold back your second fold and iron. Pin and sew a topstitch along the edge.
Instructions
- Mark the binding strip at the same distance from the edge. Use the Prep Tool and Marker to ensure accuracy.
- Stop sewing when you get to the mark. This ensures the correct placement for the mitered corner.
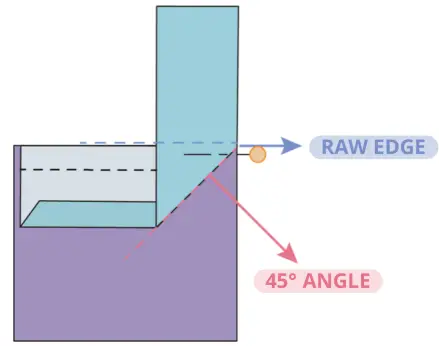
- Sew at a 45° angle right into the corner of the quilt top. This creates the sharp-mitered corner effect.
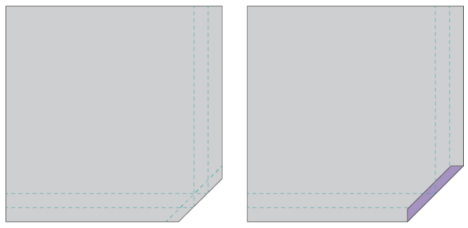
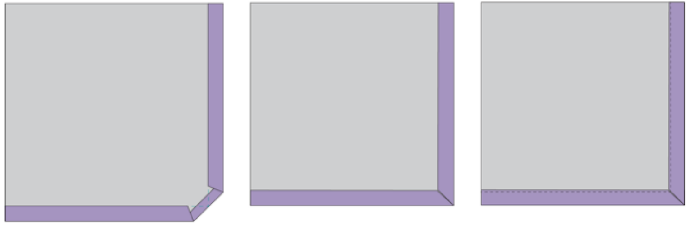
- Fold the strip straight up. This prepares the fabric for the next fold.
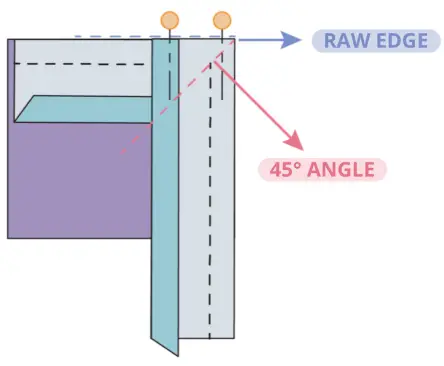
- Fold the strip back down. Align it with the edge of the quilt.
- Continue stitching. Ensure the seam is secure and even.
Final Steps
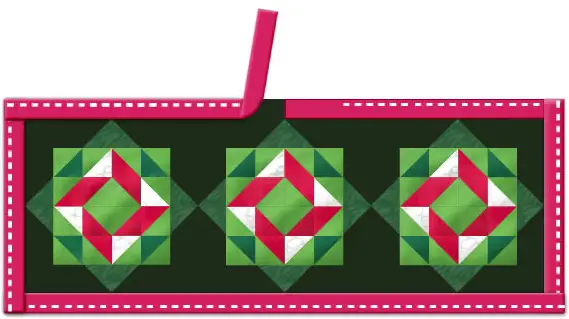
Do the same in the other corners and then stop when you get about 10 to 12 inches from where you started and take a few back-stitches.
Specifications
| Tool | Prep-Tool & Marker |
|---|---|
| Angle | 45° |
| Distance | 10 to 12 inches from start |
FAQ
- What is the purpose of marking the binding strip?
Marking ensures that the mitered corner is sharp and accurately placed. - Why sew at a 45° angle?
Sewing at a 45° angle helps create a clean and sharp mitered corner. - How do I know when to stop sewing?
Stop sewing when you reach the mark made with the Prep-Tool & Marker.
Documents / Resources
 |
GUIDELINES Get Sharp Mitered Corners [pdf] Instructions Get Sharp Mitered Corners, Sharp Mitered Corners, Mitered Corners, Corners |