KYMASGARD DDC-SPS GW Gateway Modbus

Product Information
Specifications
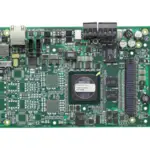
- Product Name: Master-Gateway (DDC/SPS)
- Connection Type: Pairing/Anlernen modus
- Operating Modes: Gateway (default), Node (Pro)
- Communication Protocol: W-MODBUS
Product Usage Instructions
Master-Gateway (DDC/SPS)
To pair the Master-Gateway
- Set DIP switches as required for pairing activation or deactivation.
- Activate pairing on the Gateway using the Pair-Taster button.
- To deactivate pairing and secure connections, follow the instructions provided.
FAQ
How do I activate pairing on the Master-Gateway?
To activate pairing on the Master-Gateway, use the Pair-Taster button and set the DIP switches accordingly.
DIP SWITCH

- The connection type is set via pos. 1 of the “W-Modbus” DIP switch – see table!
- The operating mode is set via pos. 2 of the “W-Modbus” DIP switch – see table!
- To use it as a master gateway (base station on DDC/PLC), DIP 2 must be set to ON.
- If the unit is switched over, it is unpaired and must be paired again in the network.
- Pos. 3 of the “W-Modbus” DIP switch is not used.
STATUS LEDS
The two LEDs L1 and L2 (on the left of the “Pair” push-button) indicate the wireless state of the sensor. They activate after the system is switched on and deactivate automatically after approx. 30 minutes.
If required, the LEDs can be reactivated manually using the “Pair” push-button.
TELEGRAM LED
The LED (on the right of the push-in terminals) flashes to indicate that Modbus communication is active. If there is a fault in the Modbus cables, the LED lights up red steadily.
Different functions are assigned to the “Pair” push-button.
Briefly pressing the button (tap) activates the status LEDs for approx. 30 minutes.
A long press of the button (approx. 3 seconds) activates Bluetooth. The status LED L2 flashes green. The unit remains visible for approx. 60 seconds and can be detected by the Lumenradio W-Modbus app. The connection remains active until you press “Disconnect” in the app or activate Pairing mode on the unit.
STATUS LEDS

PAIRING “Gateway”
The network can be set up without connection to a Modbus RTU bus. If you intend testing Modbus communication during commissioning, you must set the Modbus parameters of the wired Modbus via DIP switches.
To pair a W-Modbus unit to a Gateway, you must set both units to Pairing mode. This also applies if the unit needs to be integrated into an existing network. Nodes that have already been paired are also automatically set to Pairing mode and paired again. Only one single master gateway (DDC/PLC) may be in Pairing mode at any one time in the immediate vicinity (wireless range)!
The master gateway (DDC/PLC) – hereinafter referred to as the Master Gateway – is paired in three simple steps:
- Activate pairing (open the connections)
- The Master Gateway is activated via DIP switches:
- DIP1 → ON (pairing active – open connection – status LED L1 flashes orange),
- DIP 2 must stay on ON.

- Please refer to the unit-specific operating instructions for the procedure for activating or deactivating Pairing mode on the W-Modbus unit.
- Pair the units (set up a connection)
- All W-Modbus units in active Pairing mode automatically search for a Master Gateway that is also set to pairing.
- This initial connection setup can take approx. 1 – 2 minutes.
- Now there is a temporary connection that can be secured as described in step 3. After approx. 2 – 3 minutes, it is already possible to test the Modbus communication and exchange data in this phase.
- Deactivate pairing (secure the connections)
- After all units have paired successfully, the user must manually terminate pairing on the Master Gateway: DIP1 → OFF (pairing deactivated – secure connection – Status-LED L1 lit orange)
- This automatically deactivates the paired nodes. The W-Modbus units then perform an auto-restart and establish a secure connection. Modbus communication is re-established within 2 – 3 minutes.
- A permanent connection is now established and remains even after the unit is restarted. Data exchange can begin in standard mode.

NOTES
Status LEDs turn off (LED L1 and L2 turn off)
- LEDs deactivate automatically after a 30-minute time-out.
The LEDs can be reactivated using the pair button (short push of button).
Error message (LEDs L1 and L2 flashing red) - Perform a reset: disconnect the unit from the power supply for approx. 1 minute, then switch it on again. If the error persists, please contact S+S Technical Support.

DIP SWITCH

- The operating mode is set via pos. 2 of the “W-Modbus” DIP switch – see table!
- For use as a Node(Pro) gateway (wireless adapter for wired Modbus units), DIP 2 must be set to OFF.
- If the unit is switched over, it is unpaired and must be paired again in the network.
- Pos. 1 and 3 of the “W-Modbus” DIP switch are not used in Node mode.
STATUS LEDS
The two LEDs L1 and L2 (on the left of the “Pair” push-button) indicate the wireless state of the sensor. They activate after the system is switched on and deactivate automatically after approx. 30 minutes.
If required, the LEDs can be reactivated manually using the “Pair” push button.
TELEGRAM LED
The LED (on the right of the push-in terminals) flashes to indicate that Modbus communication is active. If there is a fault in the Modbus cables, the LED lights up red steadily.
“PAIR” PUSH-BUTTON
- Different functions are assigned to the “Pair” push button.
- Briefly pressing the button (tap) activates the status LEDsfor approx. 30 minutes.
- A long press of the button (≥ 10 seconds) activates Pairing.
- Deactivation takes place automatically when you exit the Pairing mode on the master gateway.
- A long press of the button (approx. 3 seconds) activates Bluetooth. The status LED L2 flashes green. The unit remains visible for approx. 60 seconds and can be detected by the Lumenradio W-Modbus app. The connection remains active until you press “Disconnect” in the app or activate Pairing mode on the unit
STATUS LEDS
MODBUS UNIT CONNECTION
- The number of nodes depends on the unit type (1 node with GW-Modbus – max. 16 nodes with GW-ModbusPro).
- The wired Modbus node is connected to Terminals A and B of the Node(Pro) gateway (DIP2 → OFF).
- DIP switches [B] are used for setting the bus parameters. These may differ from the settings on the DDC/PLC.
- Each of the connected Modbus units must be set to a unique bus address. After pairing the unit with the master gateway, you can change the bus address or connect additional nodes to the NodePro.
PAIRING “Node(Pro)”
To pair a Node(Pro) gateway (slave) to a master gateway (DDC/PLC), both units must be set to Pairing mode. This also applies if the unit needs to be integrated into an existing network. Nodes that have already been paired are also automatically set to Pairing mode and paired again. Only one master gateway may be in Pairing mode at any one time in the immediate vicinity (wireless range)! The Node(Pro) gateway can be optionally paired as standalone.
The Node(Pro) gateway (slave) – hereinafter referred to as the node-unit – is paired in three simple steps:
- 1Activate pairing (open the connections)
- To activate “Pair mode” on the node unit, press the “Pair” push-button (long push of button for ≥ 10 seconds – DIP 2 must remain on OFF).
- The status LEDs indicate that Pairing mode is active: L1 flashes red, L2 is turned off.
- The process for activating or deactivating Pairing mode on the master gateway (DDC/PLC) can be found in the unit-specific operating instructions

- Pair the units (set up a connection)
- When Pairing mode is active, the Node unit automatically searches for a master gateway that is set to Pairing. This process can take approx. 1 – 2 minutes.
- The status LEDs indicate the running processes: L1 flashes red – L2 is lit red
- The status LEDs then indicate successful pairing: L1 flashes green –
- L2 is lit green or orange (depending on the quality of the wireless connection).
- Note! If the unit is paired with a master gateway from a third-party provider,
- the status LEDs indicate using different colours: L1 continues flashing red – L2 is lit green.
- Now there is a temporary connection that can be secured as described in step 3.
- After approx. 2 – 3 minutes, you can already test the Modbus communication and exchange data in this phase.
 Deactivate pairing (secure the connections)
- After all units have paired successfully, the user must manually terminate pairing on the master gateway. This also terminates pairing on all paired units.
- The node unit then performs an auto-restart and establishes a secure connection. Modbus communication is re-established within 2 – 3 minutes.
- The status LEDs indicate the ongoing restart: first, L1 and L2 turn off.
- The status LEDs then indicate that the connection is secure: L1 is lit green –
- L2 is lit green, orange or red (depending on the quality of the wireless connection).
- A permanent connection is now established and remains even after the unit is restarted. Data exchange can begin in standard mode.

STATUS LEDS
The two LEDs L1 and L2 (on the right of the “Pair” push-button) indicate the wireless state of the sensor. They activate after the system is switched on and deactivate automatically after approx. 30 minutes.
If required, the LEDs can be reactivated manually using the “Pair” push button.
TELEGRAM LED
The LED (on the left of DIP switch A) flashes to indicate that Modbus communication is active.
If there is a fault in the Modbus cables, the LED lights up red steadily.
“PAIR” PUSH-BUTTON
- Different functions are assigned to the “Pair” push button.
- Briefly pressing the button (tap) activates the status LEDs for approx. 30 minutes.
- A long press of the button (≥ 10 seconds) activates Pairing.
- Deactivation takes place automatically when you exit the Pairing mode on the master gateway.
- A long press of the button (approx. 3 seconds) activates Bluetooth. The status LED L2 flashes green. The unit remains visible for approx. 60 seconds and can be detected by the Lumenradio W-Modbus app. The connection remains active until you press “Disconnect” in the app or activate
- Pairing mode on the unit.
- For more information, see “Configuration” (W-Modbus app).
W-MODBUS SENSOR

PAIRING “Slave”
- The bus address is set to “1” at the factory and can be changed using DIP switches (see “Modbus configuration” section).
- The bus address can be changed at any time, even after pairing to a gateway.
- To pair a W-Modbus sensor (slave) to a master gateway (DDC/PLC), both units must be set to Pairing mode. This also applies if the unit needs to be integrated into an existing network. Nodes that have already been paired are also automatically set to Pairing mode and paired again. Only one master gateway may be in Pairing mode at any one time in the immediate vicinity (wireless range)!
- The W-Modbus sensors (slave) – hereinafter referred to as the sensor – are paired in three simple steps:
- Activate pairing (open the connections)
- The sensor is automatically set to Pairing mode at the factory.
- Manual activation is performed by pressing the “Pair” push-button (long push of button for ≥ 10 seconds).
- The status LEDs indicate that Pairing mode is active: L1 flashes red, L2 is turned off.
- On display units, [PAIRING] is shown alternately with the configured bus address.
- Please refer to the unit-specific operating instructions for the procedure for activating or deactivating Pairing mode on the master gateway (DDC/PLC).

- Pair the units (set up a connection)
- When Pairing mode is active, the sensor automatically searches for a gateway that is set to Pairing. This process can take approx. 1 – 2 minutes.
- The status LEDs indicate the running processes: L1 flashes red – L2 is lit red
- [PAIRING] is shown first on display units.
- The status LEDs then indicate successful pairing: L1 flashes green –
- L2 is lit green or orange (depending on the quality of the wireless connection).
- On display units, [CONNECTED] is shown after successful connection.
- Note! If the unit is paired with a master gateway from a third-party provider,
- the status LEDs indicate using different colours: L1 continues flashing red – L2 is lit green.[PAIRING] remains showing on the display.
- Now there is a temporary connection that can be secured as described in step 3.
- After approx. 2 – 3 minutes, you can already test the Modbus communication and exchange data in this phase.

- Deactivate pairing (secure the connections)
- After all units have paired successfully, the user must manually terminate pairing on the master gateway. This also terminates pairing on all paired units.
- The sensor then performs an auto-restart and a secure connection is established. Modbus communication is re-established within 2 – 3 minutes.
- The status LEDs indicate the ongoing restart: first, L1 and L2 turn off.
- On display units, [NO NETWORK] is shown briefly.
- The status LEDs then indicate that the connection is secure: L1 is lit green –
- L2 is lit green, orange or red (depending on the quality of the wireless connection).
- On display units, [SECURED] is shown after the connection is secured.
- A permanent connection is now established and remains even after the unit is restarted. Data exchange can begin in standard mode.

NOTES
Status LEDs turn off (LED L1 and L2 turn off)
- LEDs deactivate automatically after a 30-minute time-out.
The LEDs can be reactivated using the pair button (short push of button).
Error message (LEDs L1 and L2 flashing red – Display units show [W-M ERR!].) - Perform a reset: disconnect the unit from the power supply for approx. 1 minute, then switch it on again. If the error persists, please contact S+S Technical Support.

Documents / Resources
 |
KYMASGARD DDC-SPS GW Gateway Modbus [pdf] User Guide DDC-SPS, DDC-SPS GW Gateway Modbus, GW Gateway Modbus, Gateway Modbus, Modbus |