1. Киришүү
This manual provides comprehensive instructions for the installation, operation, maintenance, and troubleshooting of the Vivotek FE9391-EHV-V2 12MP Outdoor Fisheye IR Illumination Camera. Please read this manual thoroughly before using the product to ensure proper setup and functionality. Retain this manual for future reference.
2. Продукт бүтүп калдыview
2.1 Негизги өзгөчөлүктөрү
- 12 Megapixel Effective Still Resolution for high-quality imaging.
- Fisheye Lens with 1.2mm focal length for wide-area surveillance.
- Integrated IR Illumination for clear night vision up to 20 meters.
- WDR Pro technology for optimal image visibility in high contrast lighting.
- H.265/H.264/MJPEG compression for efficient video streaming.
- IP66-rated weather-resistant enclosure for outdoor use.
- Motion-only alert type for event detection.
- Wi-Fi Connectivity Protocol for flexible network integration.
2.2 Пакеттин мазмуну
Пакетте бардык буюмдар бар экенин текшериңиз:
- Vivotek FE9391-EHV-V2 Camera Unit
- Орнотуу комплекти (бурамалар, якорьлор)
- Суу өткөрбөйт туташтыргыч
- Ыкчам орнотуу колдонмосу
- Software CD (or download link information)
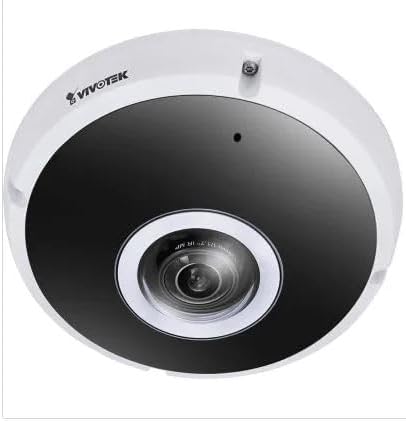
Сүрөт 2.1: Алдыңкы view of the Vivotek FE9391-EHV-V2 12MP Outdoor Fisheye IR Illumination Camera, showing the lens and IR illuminators.
3. Коопсуздук маалыматы
- Орнотуудан жана иштетүүдөн мурун бардык нускамаларды кылдат окуп чыгыңыз.
- Ensure the power source matches the camera's requirements (Corded Electric).
- Камераны бөлүктөргө бөлүүгө же өзгөртүүгө аракет кылбаңыз. Бул кепилдикти жокко чыгарат.
- Avoid pointing the camera directly at strong light sources for extended periods.
- Орнотуу жергиликтүү электр эрежелерине ылайык квалификациялуу кызматкерлер тарабынан аткарылышы керек.
- Protect cables from being walked on or pinched.
4. Орнотуу жана орнотуу
4.1 Монтаждалуучу жер
Select a suitable outdoor location for mounting. Consider the desired surveillance area, proximity to power, and network connectivity (Wi-Fi or wired Ethernet). The camera is IP66 rated for outdoor use.

Figure 4.1: Dimensional drawing of the Vivotek FE9391-EHV-V2 camera, showing a diameter of 150mm and height of 68.2mm.
4.2 Физикалык орнотуу
- Монтаждоо бетин даярдаңыз: Use the provided mounting template (if included) to mark drill holes.
- Бургулоо тешиктери: Зарыл болсо, багыттоочу тешиктерди бургулап, дубалга бекиткичтерди орнотуңуз.
- Камераны коргоо: Attach the camera base securely to the mounting surface using the provided screws.
- Кабелдерди туташтыруу:
- Күч: Электр кабелин ылайыктуу кубат булагына туташтырыңыз.
- Тармак: Connect an Ethernet cable for wired network access, or ensure Wi-Fi signal strength is adequate for wireless connection. Use the waterproof connector for outdoor Ethernet connections.
- Камеранын бурчун тууралоо: Loosen the adjustment screws (if applicable) to position the fisheye lens for optimal coverage. Tighten screws once adjusted.

Figure 4.2: An Ethernet cable with an RJ45 connector, used for wired network connectivity.
4.3 Баштапкы тармак конфигурациясы
After physical installation and power-up, the camera needs to be configured on your network.
- Камераны табыңыз: Use the Vivotek IP Utility software (available on the manufacturer's webсайт) тармагыңыздагы камераны табуу үчүн.
- IP дарегин дайындоо: Assign a static IP address or ensure it obtains an IP address via DHCP.
- Мүмкүнчүлүк Web Интерфейс: ачуу а web браузерге кирип, камерага кирүү үчүн анын IP дарегин киргизиңиз web- негизделген конфигурация интерфейси.
- Кирүү: Enter the default username and password (refer to the Quick Installation Guide for defaults). Change the default password immediately for security.
- Wi-Fi Setup (if applicable): Navigate to the network settings and configure the Wi-Fi connection if you are using wireless connectivity.
5. Иштөө нускамалары
5.1 Live View
Once configured, you can access the live video feed through the web interface or compatible Vivotek surveillance software.
- Web Браузер: Камерага кириңиз web interface and navigate to the "Live View" бөлүм.
- Surveillance Software: Add the camera to your Vivotek NVR or VMS (Video Management Software) for centralized monitoring.
- Мобилдик колдонмо: Download the Vivotek mobile app and add your camera for remote viewing.

5.1-сүрөт: Мисample of surveillance footage from multiple cameras displayed on a tablet device, demonstrating remote monitoring capabilities.

Figure 5.2: A monitor displaying a split-screen view of four camera feeds, labeled CAM1 through CAM4, illustrating a typical surveillance setup.
5.2 Жазуу жана сактоо
The camera supports various recording options:
- Жергиликтүү сактагыч: Insert a microSD card (not included) into the camera's slot for edge recording. Configure recording schedules and event triggers (e.g., motion detection).
- Network Video Recorder (NVR): Connect the camera to a compatible NVR for continuous or event-based recording.
- Булуттагы сактагыч: Some Vivotek models or third-party services may offer cloud storage integration. Refer to the camera's web interface for specific options.
5.3 Кыймылды аныктоо жана эскертүүлөр
Configure motion detection zones and sensitivity settings in the camera's web interface. When motion is detected, the camera can trigger actions such as:
- Recording video to local storage or NVR.
- Sending email notifications with snapshots.
- Uploading footage to an FTP server.
6. Техникалык тейлөө
- Линзаны тазалоо: Камера линзасын жумшак, таза чүпүрөк менен акырын сүртүңүз. Өтө кир болсо, оптикалык беттер үчүн арналган линза тазалоочу эритмени колдонуңуз. Абразивдүү тазалоочу каражаттарды колдонбоңуз.
- Турак жайды тазалоо: Камера корпусун жарнама менен тазалаңызamp Күчтүү жуучу каражаттарды же эриткичтерди колдонуудан алыс болуңуз.
- Программалык камсыздоонун жаңыртуулары: Regularly check the Vivotek website for firmware updates. Updating firmware can improve performance, add features, and enhance security.
- Кабелдик текшерүү: Periodically inspect all cables for signs of wear or damage, especially for outdoor installations.
- Экологиялык текшерүү: Камеранын иштөө чөйрөсү белгиленген температура жана нымдуулук диапазондорунда болушун камсыз кылыңыз.
7. Кыйынчылыктарды
7.1 Video Feed жок
- Күчтү текшерүү: Ensure the camera is receiving power. Verify power adapter and cable connections.
- Тармак туташуусу: Confirm the Ethernet cable is securely connected or that the Wi-Fi signal is strong and the camera is connected to the correct network.
- IP дареги: Verify the camera's IP address and ensure it is not conflicting with another device on the network.
- Firewall: Check if any firewall settings on your network or computer are blocking access to the camera.
7.2 Сүрөттүн сапаты начар
- Таза линза: Камера объективинин таза жана чаң же тактар жок экенин текшериңиз.
- Жарыктандыруу шарттары: Adjust camera settings for optimal exposure in varying light conditions. Ensure IR illuminators are functioning at night.
- Резолюция орнотуулары: Verify that the video resolution and quality settings are configured appropriately in the camera's web интерфейс.
- Тармак өткөрүү жөндөмдүүлүгү: Insufficient network bandwidth can lead to choppy or low-quality video. Check network load.
7.3 Motion Detection Not Working
- Кыймылды аныктоону иштетүү: Камеранын жөндөөлөрүндө кыймылды аныктоо функциясы иштетилгенин текшериңиз.
- Sensitivity and Zones: Adjust motion detection sensitivity and define detection zones correctly.
- Жазуу графиги: Verify that the recording schedule is active for motion-triggered events.
8. Техникалык шарттар
| Өзгөчөлүк | Деталь |
|---|---|
| Модель номери | FE9391-EHV-V2 |
| Натыйжалуу дагы эле чечим | 12 депутат |
| Объектив | 1.2mm Fisheye Lens |
| Инфракызыл жарыктандыруу диапазону | 20 м |
| WDR технологиясы | WDR Pro |
| Видеону кысуу | H.265 / H.264 / MJPEG |
| Connectivity Protocol | Wi-Fi |
| Эл аралык коргоо рейтинги | IP66 |
| Power Source | Электр зымдары |
| Продукциянын өлчөмдөрү (L x W x Y) | 5.9 x 5.9 x 2.68 дюйм (150 x 150 x 68.2 мм) |
| Өндүрүүчү | Vivotek Inc. |
| Сунушталган Колдонуулар | Тышкы коопсуздук |
9. Кепилдик жана колдоо
For warranty information, technical support, and additional resources, please visit the official Vivotek webсайтка же кардарларды тейлөө бөлүмүнө кайрылыңыз.
- Өндүрүүчү: Vivotek Inc.
- Webсайт: www.vivotek.com (Чыгampшилтеме, чыныгы шилтеме ар кандай болушу мүмкүн)
- Байланыш: караңыз webаймактык колдоо байланыш маалыматы үчүн сайт.
Please have your model number (FE9391-EHV-V2) and purchase date available when contacting support.


