1. 서론
This manual provides detailed instructions for the installation, operation, and maintenance of your ASRock B860M Live Mixer WiFi motherboard. Designed for content creators, this motherboard offers robust connectivity and reliable performance for demanding tasks. Please read this manual thoroughly before proceeding with installation or operation.

그림 1: 전면 view of the ASRock B860M Live Mixer WiFi motherboard. This image highlights the CPU socket, RAM slots, and various heatsinks.
2. 주요 특징
The ASRock B860M Live Mixer WiFi motherboard is equipped with advanced features to support high-performance computing and content creation:
- Power Phase Design: Features a 10+1+1+1+1 power phase design with Dr.MOS for VCore+GT+SA, ensuring stable power delivery to the CPU.
- DDR5 메모리 지원: Supports 4 x DDR5 DIMMs in dual channel configuration, with speeds up to 8666+ (OC) MHz.
- 그래픽 출력: Multiple display options including 1 HDMI, 1 DisplayPort, and 1 Thunderbolt 4 Type-C port.
- 오디오 품질 : Integrated Realtek ALC1220 7.1 CH HD Audio Codec with Nahimic Audio for immersive sound.
- Enhanced Capacitors: Utilizes exclusive 20K Capacitors with 1000uF capacitance for improved durability and stability.
- 고속 연결: Includes WiFi 6E and 2.5G LAN for fast and reliable network connections.
비디오 1: 끝view of ASRock Intel B860 Series Motherboards. This video highlights key features and design aspects of the B860 motherboard series, including power delivery and connectivity options.
3. 설정 및 설치
마더보드와 구성 요소를 올바르게 설치하려면 다음 단계를 따르세요.
3.1 언박싱 및 검사
마더보드와 모든 액세서리를 포장에서 조심스럽게 꺼내세요. 눈에 띄는 손상이 있는지 살펴보세요.
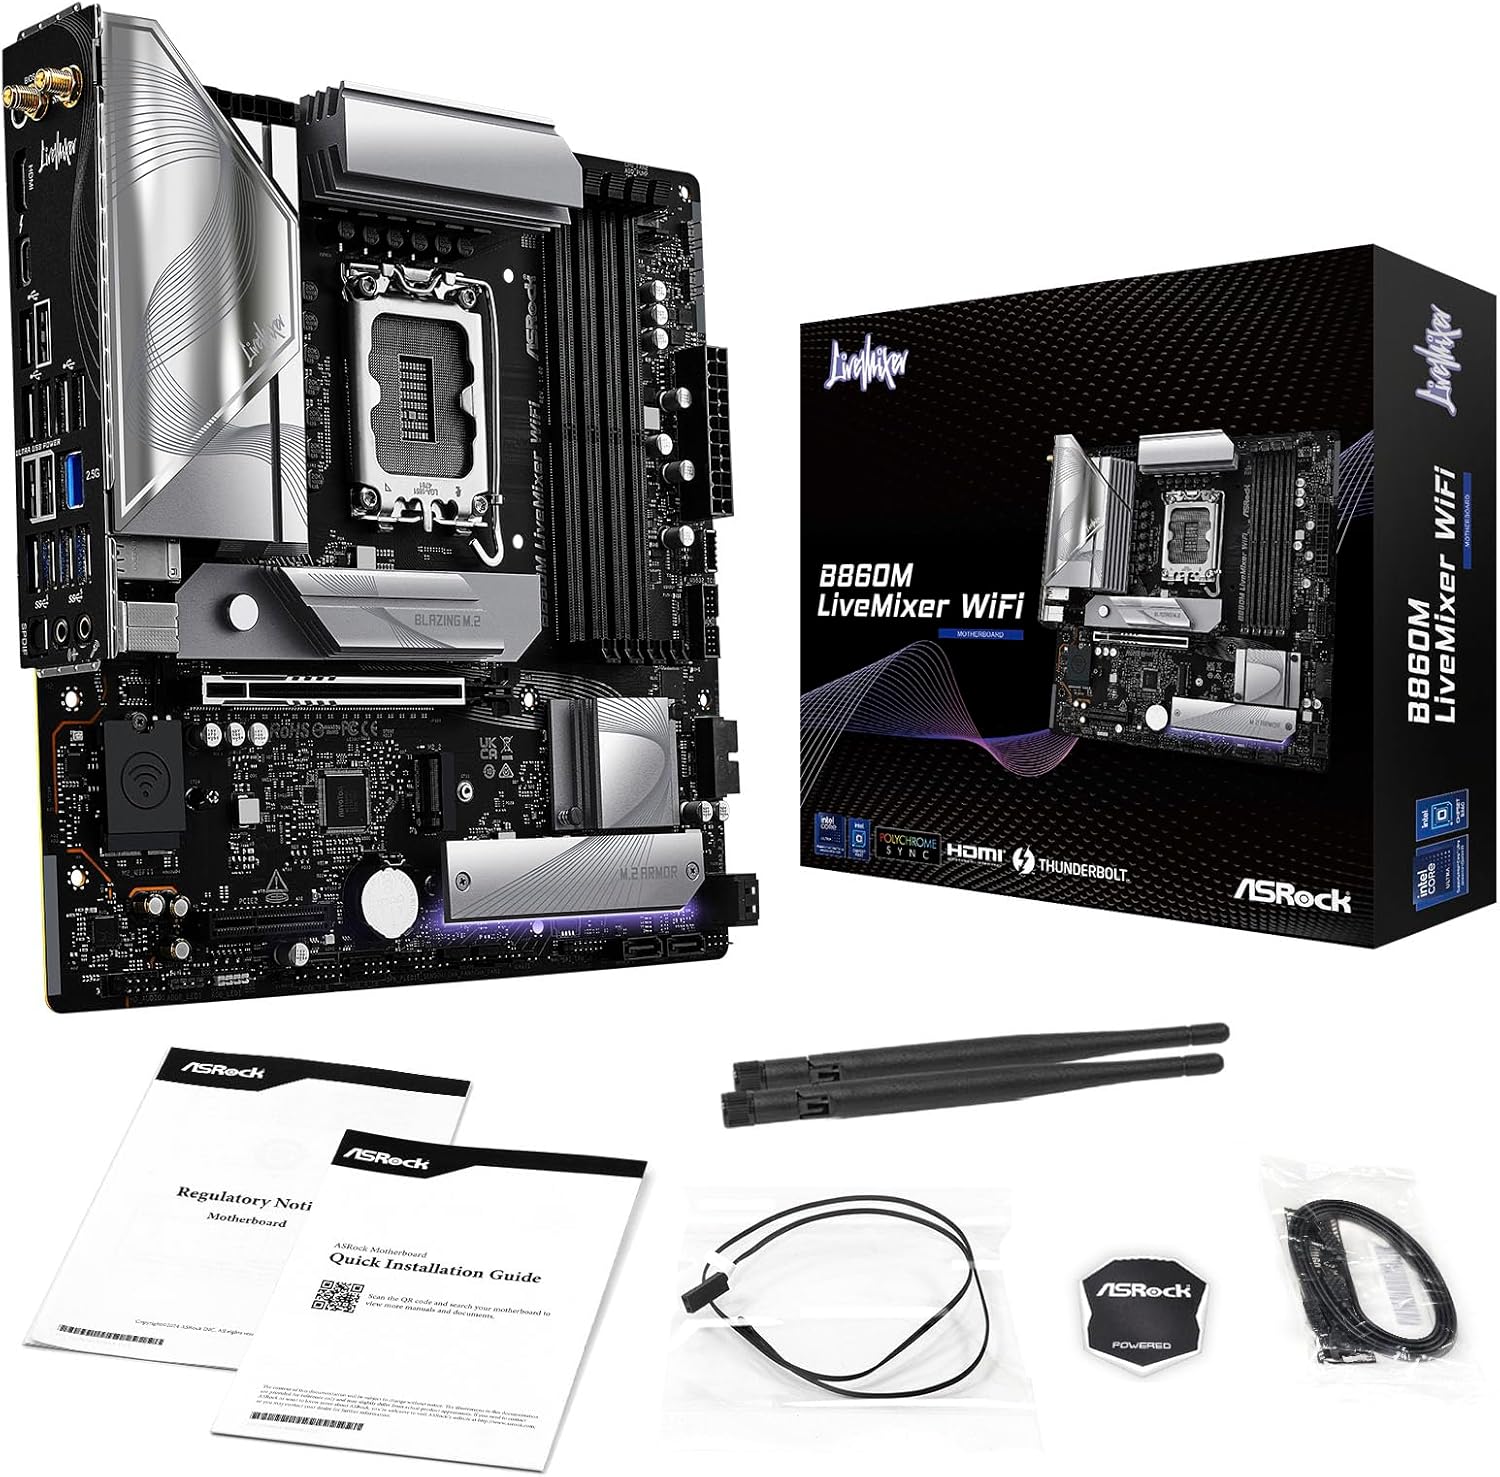
Figure 2: Contents of the ASRock B860M Live Mixer WiFi motherboard package. This image displays the motherboard, documentation, Wi-Fi antennas, and other accessories included.
3.2 CPU 설치(LGA1851)
- 메인보드에서 LGA1851 CPU 소켓을 찾으세요.
- CPU 소켓 레버를 열고 보호 덮개를 제거하십시오.
- Align your Intel Core Ultra processor with the socket, ensuring the notches on the CPU match the keys on the socket. Gently place the CPU into the socket without forcing it.
- CPU 소켓 레버를 닫아 프로세서를 고정하십시오.
3.3 메모리(DDR5) 설치
- DDR5 DIMM 슬롯 4개를 찾으세요.
- DIMM 슬롯의 양쪽 끝에 있는 클립을 엽니다.
- 메모리 모듈을 슬롯에 맞춰서 모듈의 홈이 슬롯의 키와 일치하는지 확인합니다.
- 클립이 제자리에 고정될 때까지 메모리 모듈의 양쪽 끝을 단단히 누릅니다.
3.4 저장 장치 설치 (M.2 및 SATA)
The motherboard supports multiple M.2 slots and SATA3 6.0 Gb/s ports.
- M.2 SSD: Locate the M.2 slots (e.g., Blazing M.2, M.2 Armor). Insert the M.2 SSD into the slot at an angle, then push it down and secure it with the provided screw or tool-less mechanism.
- SATA 드라이브: Connect SATA data cables from your storage drives (HDDs/SSDs) to the SATA3 6.0 Gb/s ports on the motherboard. Connect power cables from your power supply to the drives.

그림 3: 각도 view of the ASRock B860M Live Mixer WiFi motherboard, highlighting the M.2 slots and their heatsinks for high-speed storage.
3.5 Expansion Cards (PCIe 5.0)
Insert your graphics card or other PCIe expansion cards into the appropriate PCIe 5.0 slot. Ensure it is seated firmly and secured with a screw to your chassis.
3.6 전원 연결
파워서플라이의 24핀 ATX 전원 커넥터와 8핀(또는 4+4핀) CPU 전원 커넥터를 마더보드의 해당 포트에 연결하십시오.
3.7 후면 I/O 연결
Connect your peripherals to the rear I/O panel. This includes USB devices, display cables (HDMI, DisplayPort, Thunderbolt 4 Type-C), Ethernet cable, and audio devices.

그림 4: 상세 view of the rear I/O panel on the ASRock B860M Live Mixer WiFi motherboard, showing various USB ports, display outputs, Ethernet, and audio jacks.
Video 2: Demonstrates the ultimate connectivity features for creators on ASRock motherboards, including Thunderbolt and high-speed networking.
4. 사용 설명서
After successful installation, power on your system. The motherboard will perform a Power-On Self-Test (POST). You can access the BIOS/UEFI setup utility by pressing the 삭제 or F2 POST 과정에서 키로 사용됩니다.
4.1 BIOS/UEFI 설정
The BIOS/UEFI interface allows you to configure system settings, including boot order, memory profiles (XMP), fan speeds, and overclocking options. Refer to the on-screen instructions within the BIOS for navigation and adjustments.
4.2 BIOS Update Procedure
Updating your BIOS can improve system stability, compatibility, and performance. ASRock provides tools like USB BIOS Flashback and Instant Flash for this purpose.
Video 3: A detailed tutorial on how to update the motherboard BIOS using ASRock's USB BIOS Flashback and Instant Flash methods. This is crucial for maintaining system compatibility and performance.
For detailed steps on using USB BIOS Flashback or Instant Flash, please refer to the video tutorial above or the dedicated section in the full user manual available on the ASRock support web대지.
5. 유지관리
정기적인 유지보수는 마더보드의 수명과 최적의 성능을 보장합니다.
- 먼지 제거: Periodically clean dust from inside your PC case, especially from heatsinks and fans, using compressed air.
- BIOS 업데이트: Keep your BIOS updated to the latest version to ensure compatibility with new hardware and software, and to benefit from performance improvements and bug fixes.
- 드라이버 업데이트 : Install the latest drivers for your motherboard chipset, audio, network, and other components from the ASRock web대지.
- 케이블 관리 : Ensure proper cable management to maintain good airflow within the case, preventing overheating.
6. 문제 해결
문제가 발생하면 다음의 일반적인 문제 해결 단계를 고려하세요.
- 전원 없음: Check all power connections (24-pin ATX, 8-pin CPU, GPU power). Ensure your power supply is switched on.
- 디스플레이 없음: Verify that your monitor is connected to the correct graphics output port (motherboard or discrete GPU). Reseat your graphics card and RAM modules.
- 시스템 불안정/충돌: Check RAM seating and try running with one stick of RAM at a time. Ensure CPU cooler is properly installed. Update BIOS and drivers.
- 부팅 문제: Check boot order in BIOS/UEFI. Ensure your storage drive is detected.
- 주변 장치가 감지되지 않음: Try different USB ports. Install necessary drivers for the peripheral.
For more advanced troubleshooting, consult the full user manual or ASRock's online support resources.
7. 사양
| 특징 | 세부 사항 |
|---|---|
| 상표 | 애즈락 |
| 모델명 | B860M LIVEMIXER WIFI |
| CPU 소켓 | LGA 1851 |
| 호환 프로세서 | 인텔 코어 울트라 |
| 칩셋 유형 | 인텔 B860 |
| RAM 메모리 기술 | DDR5 |
| 메모리 클럭 속도 | 8666MHz(OC) |
| 메모리 저장 용량 | 최대 256GB |
| 그래픽 출력 옵션 | 1 HDMI, 1 DisplayPort, 1 Thunderbolt 4 Type-C |
| 오디오 코덱 | Realtek ALC1220 7.1 CH HD 오디오 코덱, Nahimic 오디오 |
| 랜 | 2.5G 랜 |
| 무선 연결 | 와이파이 6E |
| 파워 페이즈 | 10+1+1+1+1 전원 위상, VCore+GT+SA용 Dr.MOS |
| 커패시터 | Exclusive 20K Cap with 1000uF Capacitance |
| 폼 팩터 | 마이크로 ATX |
| 패키지 크기 | 11.73 x 10.51 x 2.4 인치 |
| 품목 무게 | 3.25파운드 |
8. 보증 및 지원
보증 정보, 기술 지원 및 드라이버 다운로드에 대해서는 공식 ASRock을 방문하세요. web대지:
You can also find additional support and FAQs on the ASRock store page: ASRock 아메리카 스토어
Protection plans are available for purchase separately to extend coverage for your product.


