1. 서론
Thank you for choosing the PETLIBRO Automatic Pet Feeder PLAF001. This device is designed to provide scheduled and portion-controlled meals for your cat or small to medium-sized dog, ensuring a healthy and consistent feeding routine. This manual will guide you through the setup, operation, and maintenance of your new pet feeder.
비디오 설명: 이 영상은 일반적인 내용을 제공합니다.view of the PETLIBRO Automatic Pet Feeder, showcasing its features and benefits in a home environment with pets.
2. 제품 오버view
The PETLIBRO Automatic Pet Feeder PLAF001 offers several key features to enhance your pet's feeding experience:
- Timed and Measured Feeding: Schedule 1-4 meals per day with 1-9 portions per meal, promoting healthy eating habits and preventing overfeeding.
- 4L Visible Food Tank: A large, semi-transparent tank allows for easy monitoring of food levels without opening the lid.
- 10초 음성 녹음: Record a personalized message to call your pet at meal times, providing comfort and familiarity.
- 신선도 유지: The top lid features a lock function and a built-in desiccant bag holder to keep food fresh and secure from pets.
- Easy-to-Clean Stainless Steel Bowl: The removable stainless steel bowl is durable and easy to clean, promoting hygiene.
- 2방향 전원 공급 장치: Operates via a 5V AC adapter or 3 D-cell alkaline batteries (sold separately) for uninterrupted feeding, even during power outag에스.

이미지 설명: The PETLIBRO Automatic Pet Feeder PLAF001, a white unit with a digital display and a stainless steel food bowl filled with kibble.

이미지 설명: A cat eating from the PETLIBRO feeder, illustrating the timed and measured feeding feature with icons for meal frequency and portion size.

이미지 설명: A cat eating from the feeder, highlighting the 10-second voice recording feature that plays during meal times.

이미지 설명: 클로즈업 view of the feeder's lid, showing the compartment for the desiccant bag to keep pet food fresh.
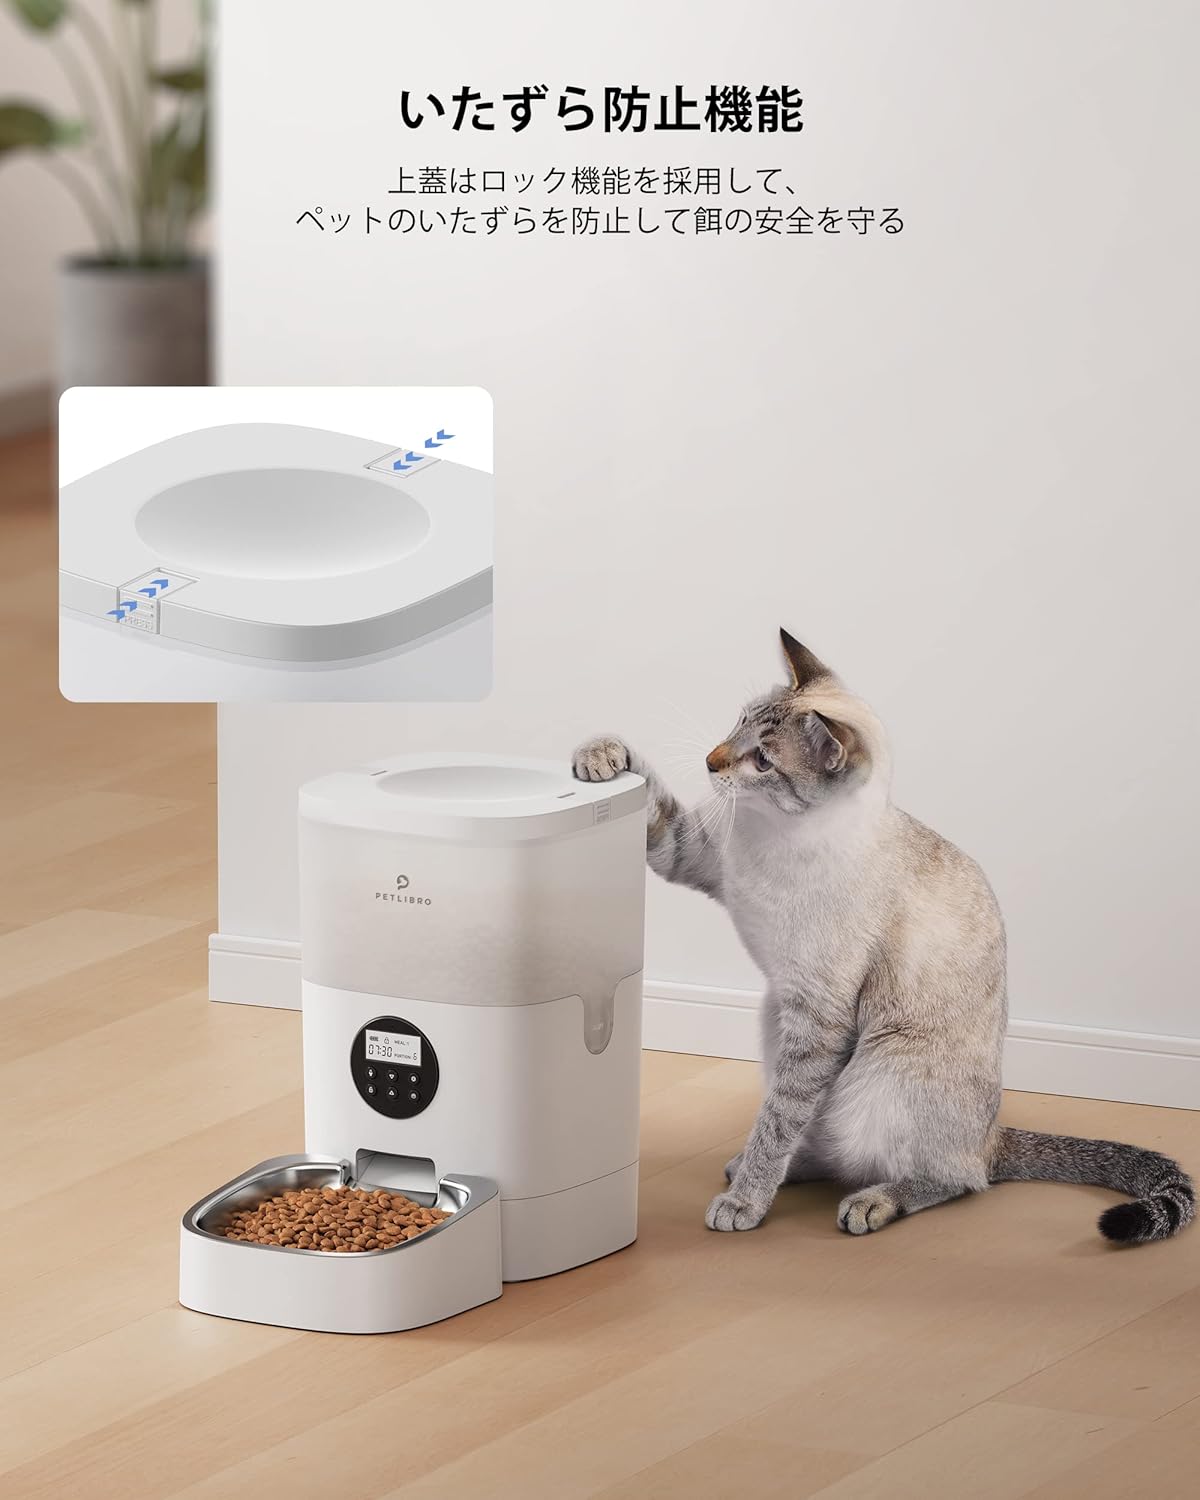
이미지 설명: A cat attempting to open the feeder's lid, demonstrating the tamper-proof lock mechanism.

이미지 설명: A cat eating from the feeder's stainless steel bowl, which is designed with an 8-degree tilt for ergonomic feeding.

이미지 설명: The PETLIBRO feeder with an overlay indicating its 4-liter food capacity.
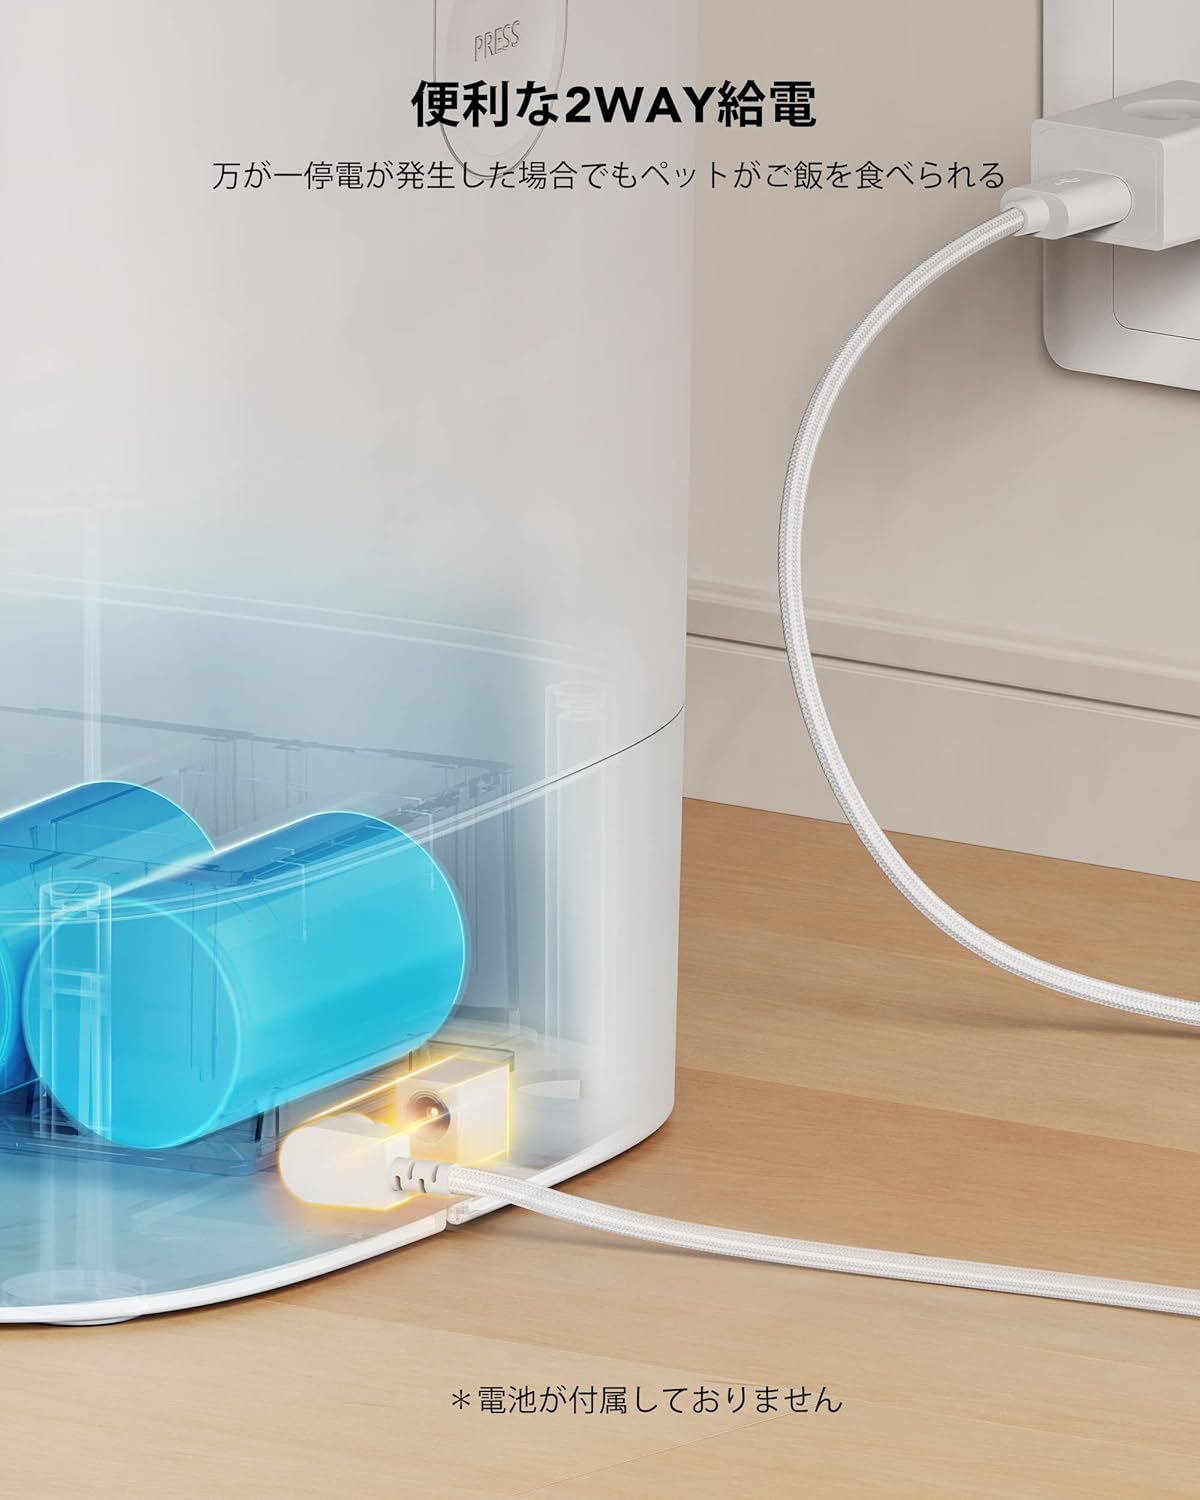
이미지 설명: An image illustrating the two-way power supply options for the feeder: AC adapter and battery backup.
3. 설정 가이드
3.1 개봉 및 초기 조립
Carefully remove all components from the packaging. Ensure you have the main feeder unit, food tray, power adapter, and desiccant bag.
비디오 설명: This video demonstrates the assembly and program setup for the PETLIBRO Automatic Feeder, including unboxing, power connection, and basic settings.
3.2 피더 전원 공급
급식기는 두 가지 방식으로 전원을 공급받을 수 있습니다.
- AC 어댑터 : Connect the 5V AC adapter to the power port on the back of the feeder and plug it into a wall outlet.
- 배터리 백업 : 전원을 위해tage protection, install three D-cell alkaline batteries (not included) into the battery compartment on the bottom of the feeder. The feeder will automatically switch to battery power if AC power is lost.
3.3 Food Tray Installation
Attach the stainless steel food bowl to the main unit. Ensure it clicks securely into place.
3.4 Adding Pet Food and Desiccant
- 먹이통의 윗뚜껑을 엽니다.
- 건조 사료를 사료통에 부어주세요. 사료 알갱이 크기는 2~10mm(0.07~0.4인치) 사이여야 합니다.
- Place a desiccant bag into the designated holder under the lid to maintain food freshness.
- Close the lid securely until it locks.
4. 사용 설명서
4.1 현재 시간 설정
To set the current time on your feeder:
- 잠금 버튼을 길게 누르세요.🔒) for 3 seconds to unlock the control panel.
- Press the settings button (⚙️). The hour display will flash.
- 위로 (△) 및 아래 (▽시간을 조정하는 버튼이 있습니다.
- Press the settings button (⚙️) again to move to the minute display, then adjust with the up/down buttons.
- Press the settings button (⚙️) one more time to save the current time.
4.2 Setting Number of Meals
To set the number of meals per day:
- 제어판이 잠금 해제되어 있는지 확인하십시오.
- Press the settings button (⚙️) until "MEAL" flashes on the display.
- 위로 (△) 및 아래 (▽) buttons to select the desired number of meals (1-4).
- Press the settings button (⚙️) 저장합니다.
4.3 Setting Meal Schedule (Time & Portion)
To set the time and portion size for each meal:
- 제어판이 잠금 해제되어 있는지 확인하십시오.
- Press the settings button (⚙️) until "MEAL 1" flashes.
- 위로 (△) 및 아래 (▽) buttons to set the hour for Meal 1. Press settings to confirm.
- Adjust the minutes for Meal 1 using the up/down buttons. Press settings to confirm.
- Adjust the portion size (1-9) for Meal 1 using the up/down buttons. Press settings to confirm.
- Repeat steps 2-5 for MEAL 2, MEAL 3, and MEAL 4 as needed.
- Press the settings button (⚙️) to exit the settings menu and save all changes.
4.4 식사 통화 녹음
You can record a 10-second voice message to play during meal times:
- 제어판이 잠금 해제되어 있는지 확인하십시오.
- Press and hold the microphone button (🎤) for 3 seconds. The microphone icon will flash, indicating recording has started.
- 마이크에 대고 메시지를 말씀해 주세요.
- Release the microphone button to stop recording. A "DiDi" sound confirms the recording is saved.
- Press the microphone button once to play back your recording.
4.5 수동 급지
음식을 수동으로 배식하려면:
- 제어판이 잠금 해제되어 있는지 확인하십시오.
- Press the manual feed button (🍽️) 한 번 누르면 음식 1인분이 나옵니다.
- 버튼을 여러 번 누르면 추가 분량을 받을 수 있습니다.
5. 유지관리
5.1 피더 청소
Regular cleaning ensures hygiene and proper function. All parts that come into direct contact with food can be washed, except for the base unit.
- Ensure the food tank is empty before disassembling.
- Remove the food tank by pressing the tabs and lifting upwards.
- Remove the stainless steel bowl and its holder.
- Wash the food tank, lid, food bowl, and bowl holder with mild soap and water. Rinse thoroughly and dry completely before reassembly.
- Do not wash the main base unit, as it contains electronic components. Wipe it with a damp 필요하다면 천을 사용하세요.

이미지 설명: A visual guide demonstrating the four steps to disassemble the PETLIBRO feeder for thorough cleaning, excluding the base.
5.2 Rotor and Paddle Replacement
If the food dispensing rotor or paddle needs replacement, follow these steps:
비디오 설명: This video provides a detailed guide on how to replace the paddle and rotor components of the PETLIBRO Automatic Feeder.
- Remove the food tank from the base unit.
- Using a screwdriver, loosen the four screws on the rotor cover.
- Remove the rotor cover.
- Carefully remove the old rotor and paddle.
- Place the new paddle and rotor into position, ensuring they are correctly aligned.
- Secure the new components by tightening the screws on the rotor cover.
- Reattach the food tank to the base unit.
6. 사양
| 특징 | 세부 사항 |
|---|---|
| 제품 모델 번호 | PLAF001 |
| 애완동물 종류 | Medium-sized breeds (Dogs, Cats) |
| 펫 라이프 Stage | 모든 생명은tages |
| 색상 | White (Transparent Tank) |
| 크기 | AF001-12W |
| 특별 기능 | Voice Recording, Timer Function, 4L Large Capacity, 10-second Voice Recording, 2-Way Power Supply, Built-in Desiccant |
| 배터리 사용 | No (Batteries sold separately for backup) |
| 재료 | Body: Food-grade ABS resin, Bowl: Stainless steel |
7. 문제 해결
If you encounter any issues with your PETLIBRO Automatic Pet Feeder, please refer to the following common problems and solutions:
- 피더에서 음식이 나오지 않음: Check if the food tank is empty, if the kibble size is appropriate (2-10mm), or if there's a jam in the dispenser. Ensure the power supply is connected and working.
- 디스플레이가 작동하지 않습니다: Verify the power connection. If using batteries, check if they are installed correctly and have sufficient charge.
- 설정이 저장되지 않습니다: Ensure you press the settings button (⚙️) to confirm and save changes after adjusting each setting.
- 음성 녹음이 재생되지 않습니다. Check if the recording was saved successfully (indicated by a "DiDi" sound). Ensure the volume is not set to zero.
- Food getting stale: Replace the desiccant bag regularly (every 2-4 weeks) and ensure the lid is securely closed.
문제가 지속되면 고객 지원팀에 문의하세요.
8. 보증 및 지원
Your PETLIBRO Automatic Pet Feeder PLAF001 comes with a manufacturer's warranty. Please refer to the warranty card included in your packaging for specific terms and conditions.
For technical support, troubleshooting assistance, or warranty claims, please contact PETLIBRO customer service through their official web사이트 또는 제품 설명서에 제공된 연락처 정보를 참조하세요.


