1. 서론
This manual provides essential instructions for the safe and efficient operation, installation, and maintenance of your Hatco GR2AHL-66D3 Designer Infrared High Watt Foodwarmer. Please read this manual thoroughly before installation and use to ensure proper function and to prevent potential hazards.
The Hatco GR2AHL-66D3 is a 69.5-inch wide Glo-Ray Designer Dual Strip Heater with lights, designed for holding food at safe serving temperatures. It features a high-wattage infrared heating system, tubular metal heater rods, and a durable aluminum construction.
2. 중요한 안전 정보
화재, 감전 또는 부상의 위험을 줄이려면 전기 제품을 사용할 때 항상 기본적인 안전 예방 조치를 따르세요.
- Read all instructions before operating the foodwarmer.
- 장치가 올바르게 접지되었는지 확인하십시오.
- 손상된 코드나 플러그를 사용하여 장치를 작동하지 마십시오.
- Keep hands and clothing away from heating elements during operation. Surfaces will be hot.
- 장치를 물이나 다른 액체에 담그지 마십시오.
- 청소 또는 수리하기 전에 장치의 플러그를 뽑으십시오.
- 본 제품은 상업적 목적으로만 사용하도록 설계되었습니다.
3. 개봉 및 검사
Upon receiving your Hatco GR2AHL-66D3 foodwarmer, carefully unpack the unit and inspect it for any shipping damage. If damage is found, contact the carrier immediately and retain all packaging materials for inspection.
모든 구성 요소가 있는지 확인하세요.
- Hatco GR2AHL-66D3 Foodwarmer unit
- 14-inch high legs (if applicable to your model configuration)
- 사용 설명서(본 문서)
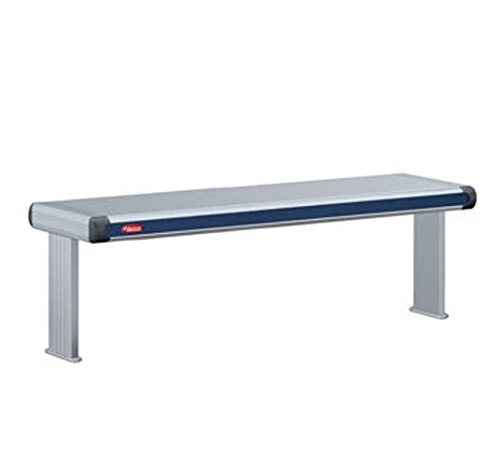
Figure 1: Hatco GR2AHL-66D3 Designer Infrared High Watt Foodwarmer. This image displays the overall structure of the foodwarmer, highlighting its dual strip heating elements and integrated lighting.
4. 설정 및 설치
4.1. 위치
Place the foodwarmer on a stable, level, non-combustible surface. Ensure adequate clearance around the unit for proper ventilation and safe operation. Avoid placing near flammable materials.
4.2. Leg Installation (if applicable)
If your model includes 14-inch high legs, securely attach them to the designated mounting points on the foodwarmer chassis using the provided hardware. Ensure all legs are tightened firmly before placing the unit on a surface.
4.3. 전기적 연결
The Hatco GR2AHL-66D3 is a high-wattage appliance (3420 watts). It requires a dedicated electrical circuit with the correct voltage와 amperage. Consult a qualified electrician to ensure your electrical supply meets the unit's requirements and local electrical codes. Do not use extension cords.
- 볼륨을 확인하세요tage rating on the unit's nameplate matches your power supply.
- Plug the power cord directly into a grounded electrical outlet.
5. 사용 설명서
5.1. 전원 켜기 / 끄기
Locate the power switch(es) on the unit. Typically, there will be separate switches for the infrared heating elements and the lights.
- To turn on the heating elements, flip the designated switch to the "ON" position.
- To turn on the lights, flip the designated light switch to the "ON" position.
- To turn off, flip the switches to the "OFF" position.
5.2. Food Holding
The infrared heating system is designed to maintain pre-heated food at safe serving temperatures. Place food in appropriate pans or containers directly under the heating elements. The 3-inch spacing between elements ensures even heat distribution.
Note: This unit is not designed to cook food or reheat cold food. Always ensure food is at the desired serving temperature before placing it in the foodwarmer.
6. 청소 및 유지 관리
Regular cleaning and maintenance will extend the life of your foodwarmer and ensure sanitary operation.
6.1. 매일 청소
- ALWAYS UNPLUG THE UNIT AND ALLOW IT TO COOL COMPLETELY BEFORE CLEANING.
- 외부 표면 전체를 물로 닦아주세요amp 천과 순하고 마모성이 없는 세척제를 사용하세요.
- Clean the heating elements and light fixtures carefully to remove any food debris. Avoid spraying water directly onto electrical components.
- Dry all surfaces thoroughly before plugging the unit back in.
6.2. 전구 교체
If a light bulb burns out, ensure the unit is unplugged and cool. Carefully remove the old bulb and replace it with a new bulb of the same type and wattage. Refer to the unit's label for specific bulb requirements.
7. 문제 해결
서비스에 문의하기 전에 다시 문의하세요view 다음은 일반적인 문제와 해결책입니다.
| 문제 | 가능한 원인 | 해결책 |
|---|---|---|
| 장치의 전원이 켜지지 않습니다. | 콘센트에 전원이 공급되지 않습니다. 전원 코드가 뽑혀 있습니다. 차단기가 작동했습니다. | 전원 콘센트를 확인하세요. 전원 코드가 단단히 꽂혀 있는지 확인하세요. 회로 차단기를 재설정하세요. |
| Heating elements not working. | Heating element switch off; faulty element. | Ensure heating switch is ON. If still not working, contact qualified service personnel. |
| 전구가 작동하지 않습니다. | Light switch off; burned-out bulb. | Ensure light switch is ON. Replace bulb if necessary (refer to Section 6.2). |
| 음식이 따뜻하게 유지되지 않습니다. | Food placed cold into unit; unit not preheated; improper pan usage. | Ensure food is preheated. Allow unit to warm up. Use appropriate food pans. |
If problems persist after attempting these solutions, contact Hatco customer service or a qualified service technician.
8. 사양
- 모델: GR2AHL-66D3
- 유형: Glo-Ray Designer Dual Strip Heater with Lights
- 너비: 69.5인치(69-1/2인치)
- 간격: 3 inches between heating elements
- 난방 기술: Infrared, High Wattage, Tubular Metal Heater Rod
- 건설: Designer Aluminum
- 전기 등급 : 3420 Watts (Voltage dependent on specific configuration, refer to unit's nameplate)
- 다리 높이: 14 inches (if equipped)
- 인증: cULus, UL EPH Classified
- 기원: 미국에서 제작
9. 보증 및 지원
Hatco Corporation provides a limited warranty for its products. Specific warranty terms and conditions are available on the official Hatco website or by contacting Hatco customer service. Please retain your proof of purchase for warranty claims.
For technical assistance, parts, or service inquiries, please contact Hatco customer support. Contact information can typically be found on the manufacturer's website or on the product's nameplate.


