1. 서론
This manual provides essential instructions for the safe and efficient installation, operation, and maintenance of the Emerson 7001616-J000 1400W Server Power Supply. This power supply unit (PSU) is designed for integration into server systems, providing stable and reliable power to critical components. Please read this manual thoroughly before proceeding with any installation or operation.
2. 안전 정보
부상과 장비 손상을 방지하려면 항상 다음 안전 예방 조치를 준수하세요.
- Ensure the server system is completely powered off and disconnected from the main power source before installing or removing the power supply.
- 전원 공급 장치를 열지 마십시오.asing. There are no user-serviceable parts inside, and dangerous voltages가 존재합니다.
- Handle the power supply with care to avoid dropping or physical damage.
- 과열을 방지하기 위해 전원 공급 장치는 통풍이 잘 되는 곳에 설치하십시오.
- Use only compatible power cables and connectors.
- If any smoke, unusual odors, or abnormal noises are detected, immediately disconnect power and contact qualified service personnel.
3. 설정 및 설치
Follow these steps for proper installation of the Emerson 7001616-J000 Server Power Supply:
- 준비: Power down the server completely and unplug all power cords from the wall outlet. Open the server chassis according to the server manufacturer's instructions.
- Locate PSU Bay: Identify the designated power supply bay within your server chassis. If replacing an existing PSU, carefully remove the old unit.
- Insert PSU: Gently slide the Emerson 7001616-J000 power supply into the bay. Ensure it is fully seated and aligned with the mounting points.
- 안전한 전원 공급 장치: Secure the power supply using the screws or latching mechanisms provided by your server chassis.
- 케이블 연결: Connect the necessary power cables from the PSU to the server's motherboard, hard drives, and other components. Refer to your server's manual for specific cable routing and connection points.
- 섀시 닫기: Once all connections are secure, close the server chassis.
- AC 전원 연결: Plug the AC power cord into the power supply's input receptacle and then into a grounded electrical outlet.

4. 사용 설명서
Once installed, the Emerson 7001616-J000 power supply operates automatically when the server is powered on. It provides continuous and stable power to the server components.
- 전원 켜기: After connecting the AC power cord, press the power button on your server to initiate startup.
- 상태 표시기 : Some server systems or power supplies may feature LED indicators to show operational status (e.g., green for normal operation, amber for fault). Consult your server's documentation for specific indicator meanings.
- 전원 끄기 : To power off the server, follow the operating system's shutdown procedure, then press and hold the server's power button if necessary. For complete power disconnection, unplug the AC power cord from the wall outlet.
5. 유지관리
정기적인 유지보수는 전원 공급 장치의 수명과 최적의 성능을 보장하는 데 도움이 됩니다.
- 먼지 제거: Periodically inspect the power supply's fan and ventilation grilles for dust accumulation. Use compressed air to gently clear dust from these areas. Ensure the server is powered off and unplugged before cleaning.
- 케이블 검사: Check all power cables connected to the PSU for any signs of wear, fraying, or loose connections. Replace damaged cables immediately.
- 환경 조건: Ensure the server operates within recommended temperature and humidity ranges. Excessive heat or moisture can degrade power supply performance and lifespan.
- 펌웨어 업데이트: While the PSU itself typically does not have user-updatable firmware, ensure your server's system firmware (BIOS/UEFI) is up to date, as it can affect power management.
6. 문제 해결
전원 공급 장치에 문제가 발생하면 다음과 같은 기본적인 문제 해결 단계를 고려하십시오.
| 문제 | 가능한 원인 | 해결책 |
|---|---|---|
| 서버 전원이 켜지지 않습니다. | No AC power, loose connections, faulty PSU. | Verify AC power cord is securely plugged into both the PSU and a working wall outlet. Check all internal power connections. If problem persists, the PSU may be faulty. |
| Server powers on but shuts down unexpectedly. | Overheating, unstable power, faulty PSU. | Ensure adequate ventilation. Check for dust buildup. Verify stable AC power source. If issues continue, the PSU may be failing. |
| Unusual noises or smells from PSU. | 내부 구성 요소 오류. | Immediately power off the server and disconnect AC power. Do not attempt to repair. Contact qualified service personnel. |
If these steps do not resolve the issue, contact your server manufacturer or a qualified technician for further assistance.
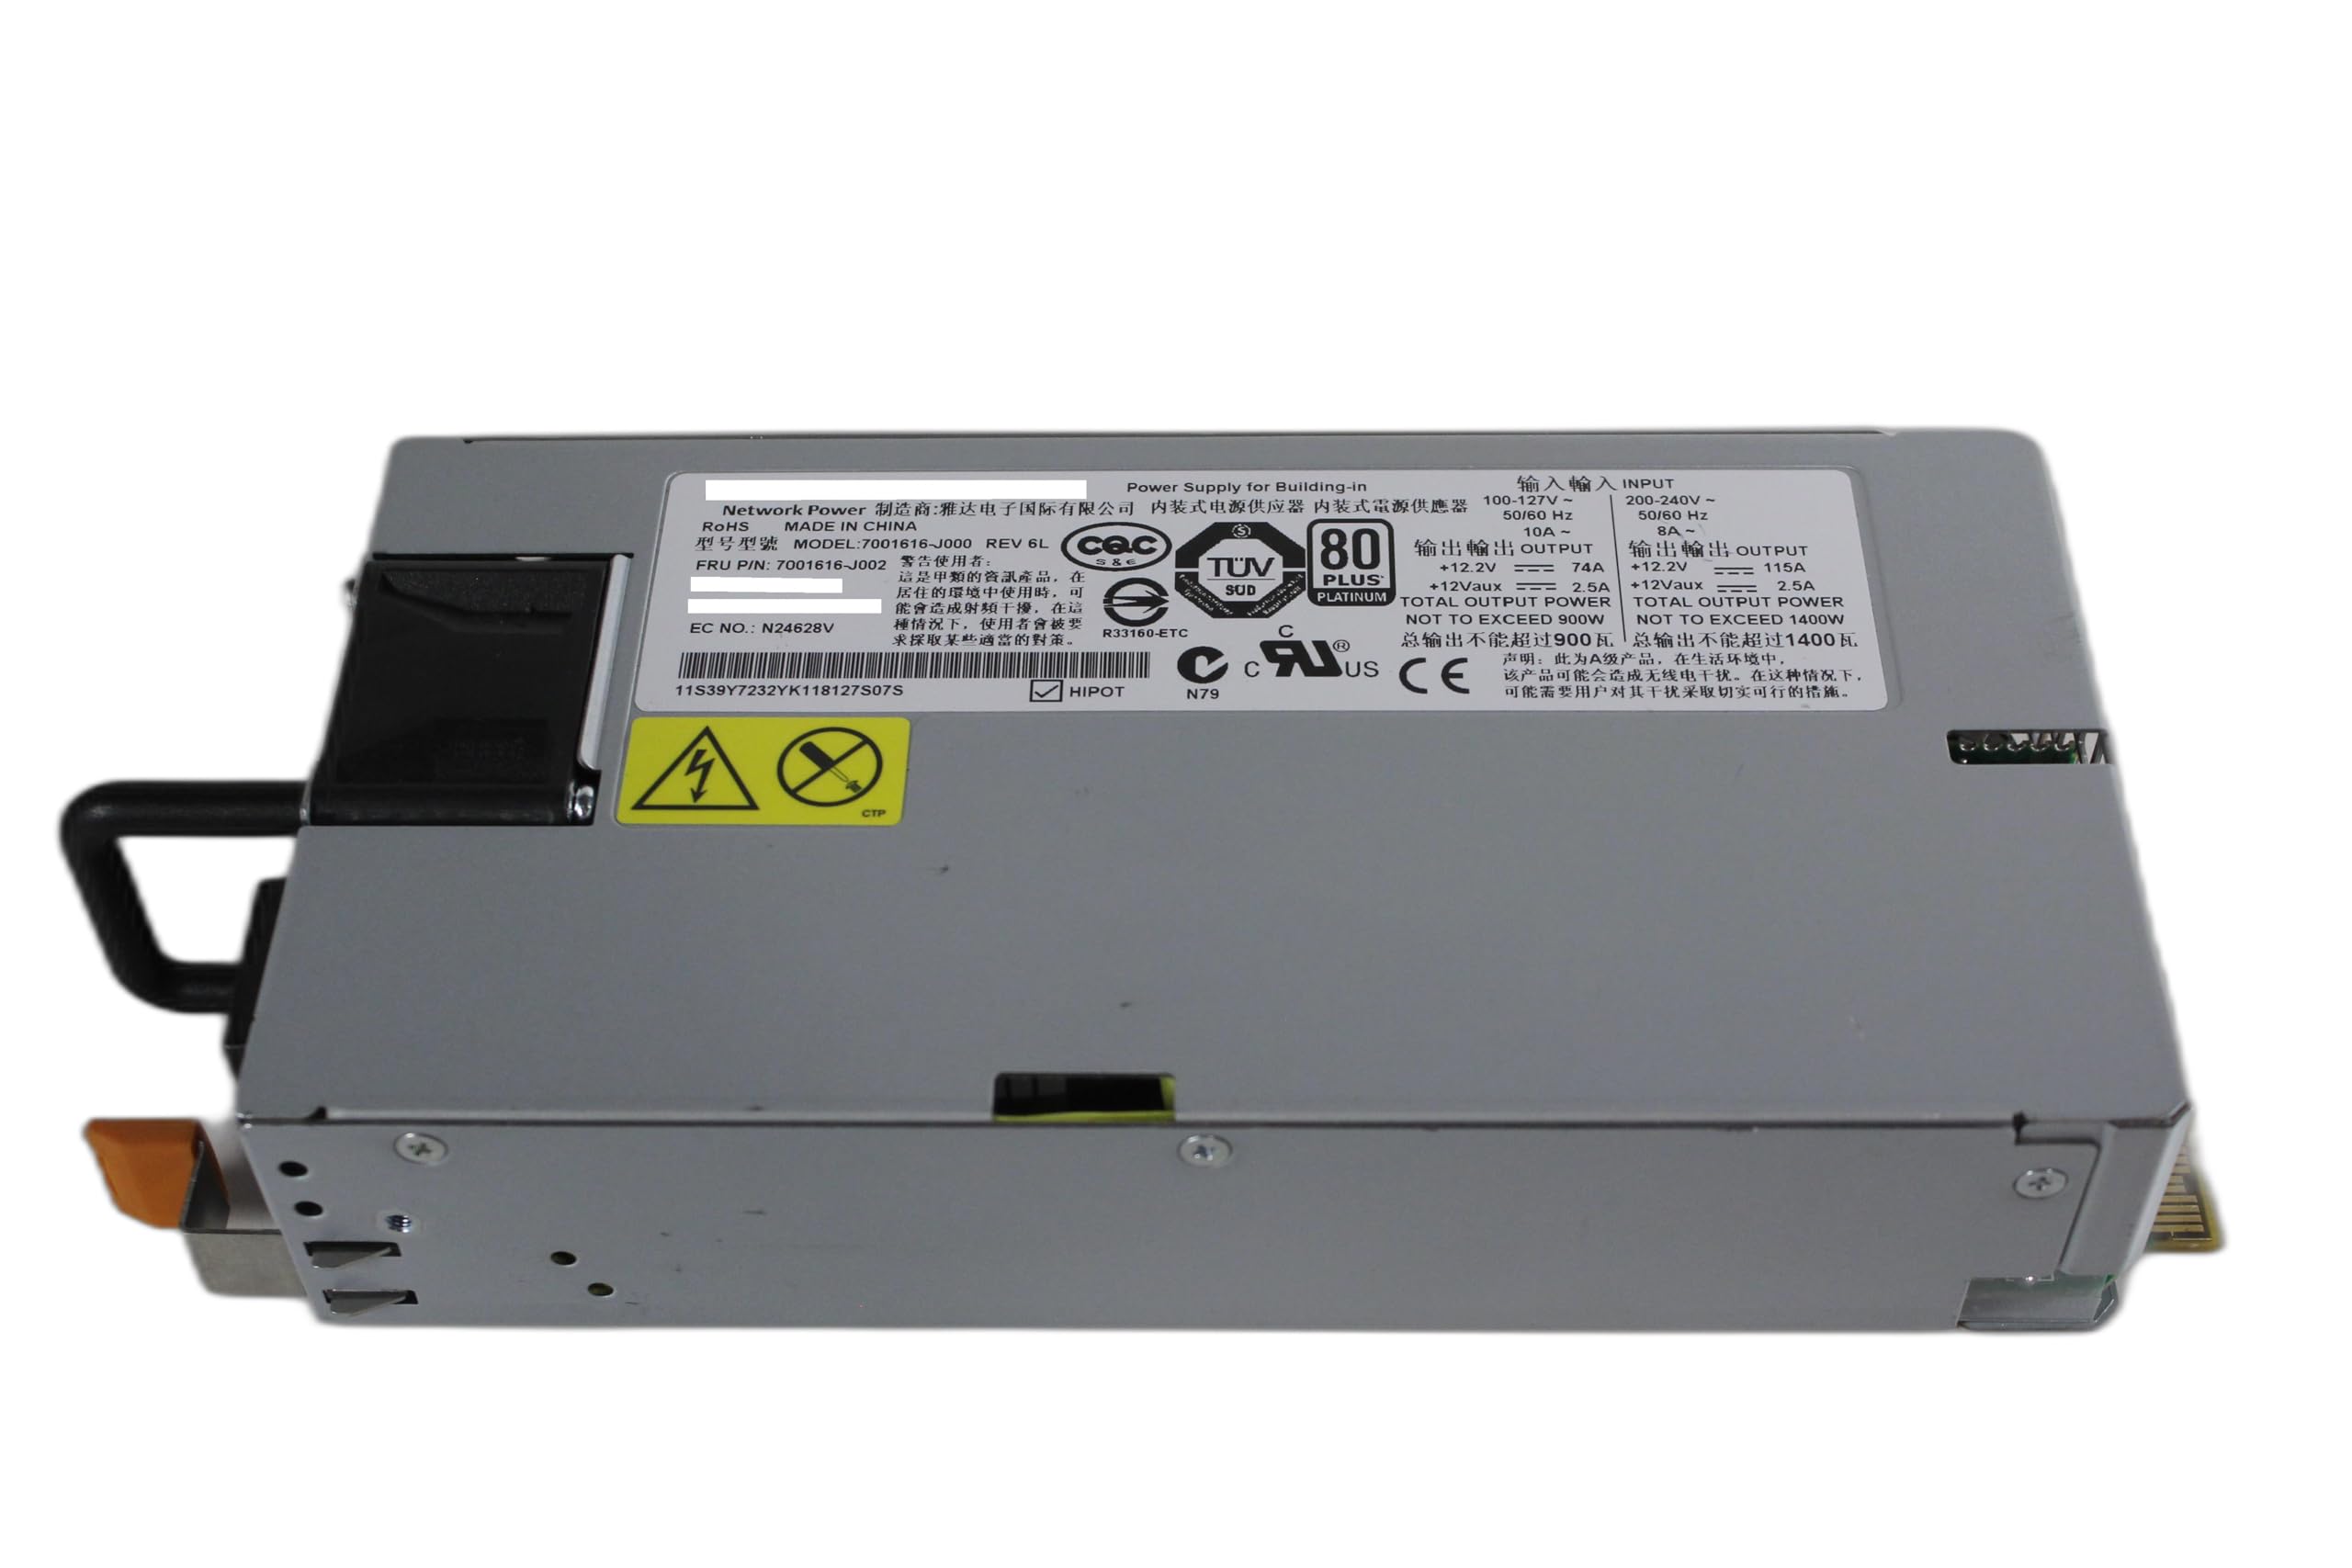
7. 사양
The following table details the technical specifications for the Emerson 7001616-J000 1400W Server Power Supply:
| 특징 | 세부 사항 |
|---|---|
| 모델 번호 | 7001616-J000 |
| FRU P/N | 7001616-J002 |
| 부품 번호 | 39Y7232, 39Y7233 |
| 상표 | 에머슨 |
| 입력 Voltage 범위 1 | 100-127V~, 50/60 Hz, 10A |
| 입력 Voltage 범위 2 | 200-240V~, 50/60 Hz, 8A |
| Output Power (Total) | Up to 1400W (at 200-240V input) |
| 출력 볼륨tag전자 +12.2V | 74A (at 100-127V input), 115A (at 200-240V input) |
| 출력 볼륨tage +12Vaux | 2.5A |
| 효율 등급 | 80 PLUS 플래티넘 |
| 품목 무게 | 약 1파운드 |
| 제조업체 | IBM (as listed) |
| 한국어: | 791398644166 |
8. 보증 및 지원
For warranty information and technical support, please refer to the documentation provided with your server system or contact the original seller or manufacturer. Keep your purchase receipt as proof of purchase.