1. សេចក្តីផ្តើម
អរគុណសម្រាប់ការទិញasing the OLIGHT Osight 3MOA Dot Sight. This high-performance open reflex sight is designed for quick target acquisition and reliable operation. It features an industry-first magnetic charging cover, motion sensor, and multiple brightness settings to suit various conditions. Please read this manual thoroughly before use to ensure proper installation, operation, and maintenance.
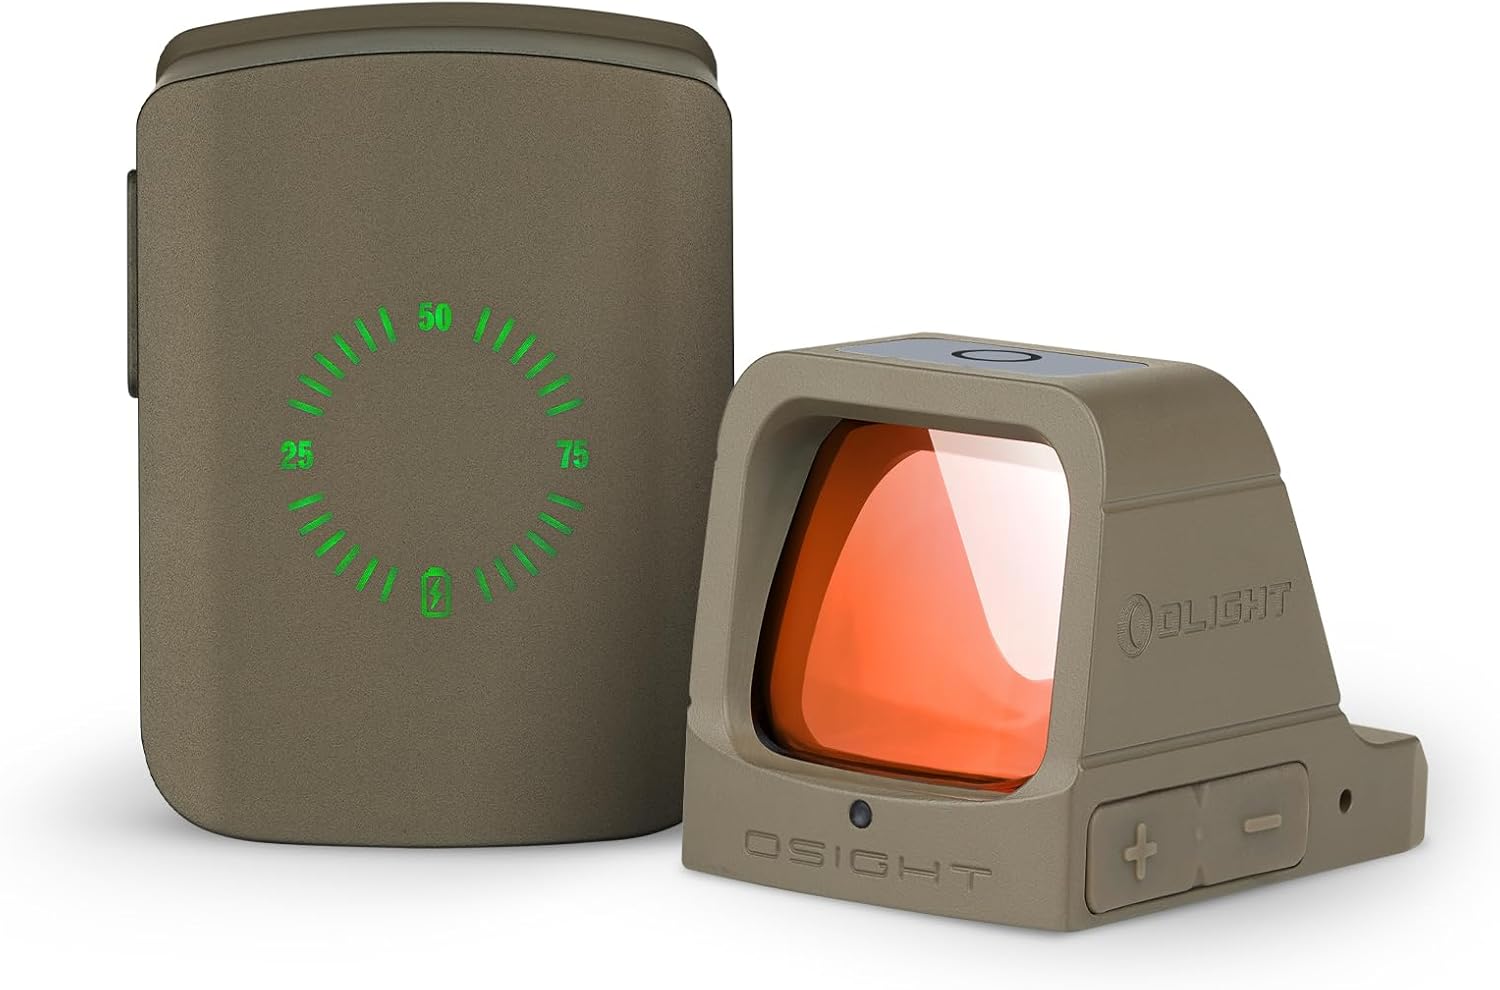
The OLIGHT Osight 3MOA Dot Sight shown with its innovative magnetic charging cover.
លក្ខណៈពិសេសនៃផលិតផល
- Industry-First Magnetic Charging Cover: The charging cover features a battery level percentage display and can recharge the dot sight three times, protecting it from dust and scratches.
- រយៈពេលប្រតិបត្តិការយូរ៖ The Osight can operate for over 70,000 hours in low mode. With the charging cover, runtime extends to over 70 days.
- Large Window Size: Equipped with a 24x21.5mm lens for accurate target acquisition and easy follow-up shots, even during recoil.
- ចំណុច 3 MOA៖ Provides a clear and easy-to-locate aiming point for quick target acquisition.
- Quick Zero Adjustment: Easy windage and elevation adjustments allow for precise zeroing at 15, 25, or 30 yards. Default zero distance is 25 yards.
- Proven Reliability: Maintains zero through 10,000 rounds of testing.
- Three Selectable Settings: Manual, Lockout, and Auto-Sensing modes.
- 12 កម្រិតពន្លឺ៖ Includes 10 daytime modes and 2 nighttime modes to suit various lighting conditions.
- Motion Sensing Function: Automatically turns off after 10 minutes of no movement and turns back on upon detecting vibration, enhancing power efficiency.
3. មាតិកាកញ្ចប់
The OLIGHT Osight package typically includes the following items:
ជាងview of the items included in the OLIGHT Osight product package.
- OLIGHT Osight Dot Sight
- Magnetic Charging Cover
- ខ្សែសាក USB-C
- ឧបករណ៍កែតម្រូវ
- វីសម៉ោន
- ក្រណាត់លាងសម្អាត
- សៀវភៅណែនាំអ្នកប្រើប្រាស់
- កាបូប
4. ការដំឡើងនិងការដំឡើង
The Osight is compatible with RMR footprint mounts and Picatinny rails. Ensure you have the correct mounting hardware for your specific firearm.
4.1 Adapter Plate Installation Tips
If an adapter plate is required for your setup, please install it correctly according to the adapter plate manufacturer's instructions.

The Osight is compatible with direct installation or via an adapter plate, particularly for setups with a gap (>3mm) for suppressors/optical sights.

The Osight is not suitable for devices with suppressors/optical sights without a gap.
សំខាន់៖
To ensure the overall reliability of the Osight, pay close attention to inch-pound torque specifications and the use of threadlocker on the included screws. Excessive or insufficient torque can prevent the Osight from zeroing correctly or lead to installation failure. Follow these details to ensure the Osight functions properly.

Warning regarding proper torque and threadlocker use during installation.
5. សេចក្តីណែនាំប្រតិបត្តិការ
5.1 បើក/បិទថាមពល
Press either the '+' or '-' button on the optic to turn it on. To turn off the optic, press and hold both '+' and '-' buttons simultaneously for 0.5 seconds.
5.2 ការកំណត់ពន្លឺ
The Osight features 12 brightness levels: 10 for daytime use and 2 for nighttime use. Level 12 is the highest brightness. Use the '+' and '-' buttons to adjust the brightness.

The Osight offers 12 brightness levels, including modes for day and night use.
5.3 របៀបប្រតិបត្តិការ
The Osight offers three operating modes: Manual, Lockout, and Auto-Sensing. Press and hold the '+' button to switch between these modes.
- របៀបដោយដៃ៖ The reticle blinks once when selected. Brightness is manually controlled.
- របៀបចាក់សោរ៖ The reticle blinks twice when selected. Brightness is fixed for tactical use.
- របៀបស្វ័យចាប់អារម្មណ៍៖ The reticle blinks three times when selected. Brightness adjusts automatically based on ambient light.

The Osight offers Manual, Lockout, and Auto-Sensing modes for versatile use.
5.4 ឧបករណ៍ចាប់សញ្ញាចលនា
When the motion sensor function is enabled, the scope automatically turns off if no movement is detected for more than 10 minutes. If vibration is detected in the auto-off state, the scope automatically turns on. This feature enhances power efficiency.
- To turn Motion Sensor ON: Double-click '-' and hold for 3+ seconds. The reticle blinks once.
- To turn Motion Sensor OFF: Double-click '-' and hold for 3+ seconds. The reticle blinks twice.

The motion sensor automatically activates the sight upon movement and deactivates it after a period of inactivity.
5.5 Power Save Function (Cover)
Placing the magnetic charging cover over the optic will turn off the reticle, conserving power. Removing the cover will activate the reticle again.
5.6 Battery Level Display (Optic)
Press either button on the optic to display the current power level via an indicator light:
- បៃតង៖ ≥50%
- ពណ៌លឿង៖ 50% - 20%
- ក្រហម៖ 20% - 10%
- ពន្លឺក្រហម៖ <10%
This video demonstrates the basic operation of the Osight, including power on/off, mode selection, motion sensor, and battery level indication.
៥.២.៣. ការលៃតម្រូវសូន្យ
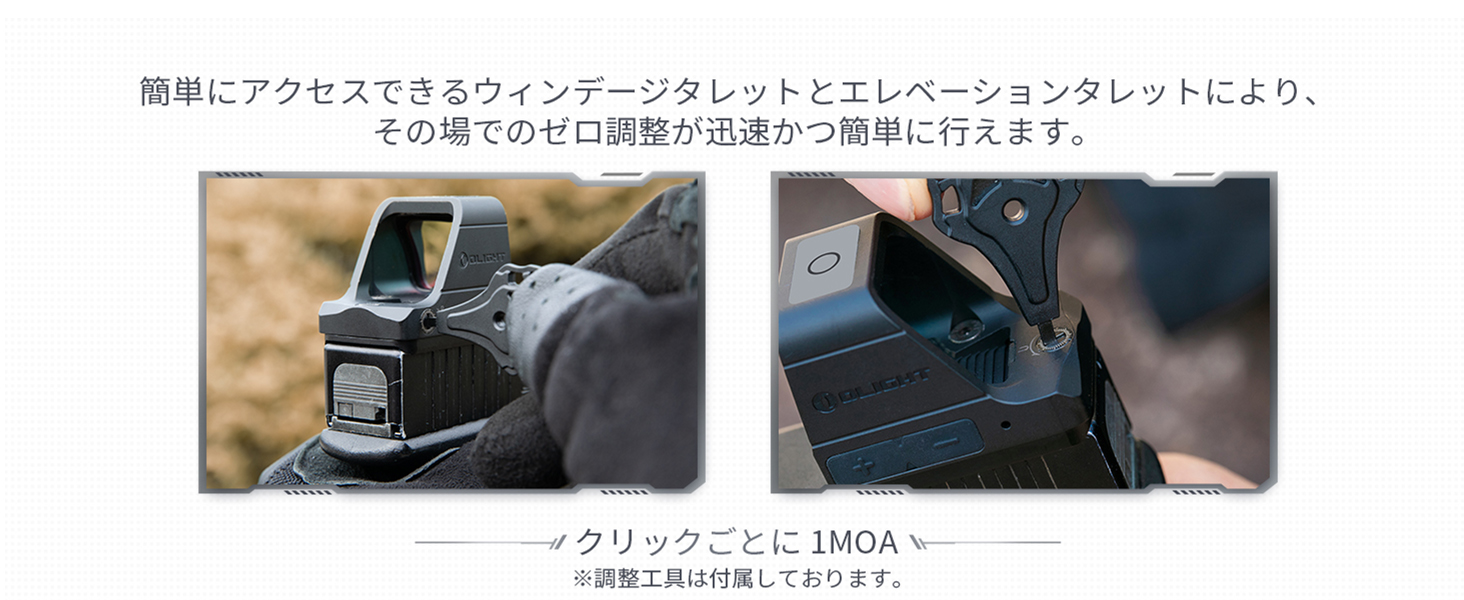
The Osight allows for quick and easy zero adjustment using the windage and elevation turrets. Each click adjusts the point of impact by 1 MOA.

The zero adjustment process for the Osight, showing the windage and elevation turrets.
6.1 Zeroing Procedure (15 Yards Exampលេ)
- Step 1: Initial Grouping. Fire 5 rounds from 15 yards to determine the Point of Impact (POI) relative to your Point of Aim (POA). Using a rest is recommended to eliminate human error.
- Step 2: Adjust Windage. Measure the horizontal deviation (windage) between the center of your group (POI) and your POA. For example, if your POI is 2.15 inches to the right, you would rotate the windage adjustment clockwise 14 clicks to move the reticle leftward.
- Step 3: Adjust Elevation. Measure the vertical deviation (elevation) between the center of your group (POI) and your POA. For example, if your POI is 2.34 inches high, you would rotate the elevation adjustment clockwise 15 or 16 clicks to move the reticle downward.
- Step 4: Apply Adjustments. Use the provided adjustment tool to make the calculated windage and elevation changes. Rotate clockwise to move the reticle left (windage) or down (elevation). Rotate counter-clockwise to move the reticle right (windage) or up (elevation).
- Step 5: Confirm Zero. Fire another 5 rounds to confirm the new POI. Repeat steps 1-4 if further adjustments are needed.
This video demonstrates the step-by-step process for zeroing the Osight at 15 yards.
7. ថ្ម និងការសាកថ្ម
The Osight features an innovative magnetic charging system with a dedicated charging cover.
7.1 Charging the Cover
The charging cover has a built-in 800mAh lithium polymer battery and charges via a universal USB-C port. Connect the provided USB-C cable to the port on the cover and a power source.

The charging cover features a laser micro-perforated battery percentage display for intuitive power monitoring.
7.2 Charging the Osight
The Osight dot sight itself has a 170mAh lithium polymer battery and charges magnetically when placed inside the charging cover. A fully charged cover can recharge the Osight approximately three times.
7.3 Battery Level Display (Cover)
Press the side button on the charging cover to illuminate the battery percentage display, showing the remaining charge of the cover's internal battery.
7.4 Extended Runtime
The Osight offers an impressive runtime of over 70,000 hours in its lowest brightness mode. Even at the brightest setting, it can operate for over 17 days continuously. When combined with the fully charged magnetic cover, the total operating time can exceed 70 days.

The Osight boasts an extended runtime, providing reliable performance for prolonged periods.
8. ការថែទាំ
To ensure the longevity and optimal performance of your OLIGHT Osight, follow these maintenance guidelines:
- ការសម្អាត៖ Use the provided cleaning cloth or a soft, lint-free cloth to gently wipe the lenses. For stubborn smudges, a small amount of lens cleaning solution designed for optics can be used. Avoid abrasive materials or harsh chemicals.
- ការផ្ទុក៖ When not in use, store the Osight with its magnetic charging cover to protect the lens from dust and scratches and to keep the battery charged. Store in a cool, dry place away from direct sunlight and extreme temperatures.
- ការថែរក្សាថ្ម៖ Recharge the charging cover regularly, especially if it will be stored for an extended period, to maintain battery health.
- អធិការកិច្ច៖ Periodically check all mounting screws to ensure they are securely tightened.
9. ការដោះស្រាយបញ្ហា
If you encounter issues with your OLIGHT Osight, refer to the following common troubleshooting steps:
- Reticle Not Appearing:
- Ensure the optic is turned on by pressing either '+' or '-' button.
- Check the battery level of the Osight. If low, place it in the charging cover.
- If the motion sensor is enabled, ensure the optic has been moved to activate it.
- Verify that the magnetic cover is not covering the optic, as this will turn off the reticle.
- Reticle Too Dim/Bright: Adjust the brightness using the '+' and '-' buttons. If in Auto-Sensing mode, try switching to Manual mode to gain full control.
- Inaccurate Zero:
- Re-perform the zero adjustment procedure carefully.
- Ensure the mounting screws are tightened to the correct torque specifications. Loose mounts can cause zero shift.
- Check for any obstructions or damage to the optic or mount.
- បញ្ហាសាកថ្ម៖
- Ensure the USB-C cable is properly connected to the charging cover and power source.
- Check the battery level of the charging cover.
- Ensure the Osight is correctly seated in the magnetic charging cover.
- សាកល្បងប្រើខ្សែ USB-C ឬអាដាប់ទ័រថាមពលផ្សេង។
If these steps do not resolve the issue, please contact OLIGHT customer support for further assistance.
10. លក្ខណៈបច្ចេកទេស
| លក្ខណៈ | ការបញ្ជាក់ |
|---|---|
| ម៉ាក | ពន្លឺ |
| គំរូ | អូហ្សី |
| ទំហំ Reticle | 3 MOA Dot |
| សម្ភារៈ | អាលុយមីញ៉ូម |
| ពណ៌ | តាន់ |
| វិមាត្រផលិតផល | 5.1 សង់ទីម៉ែត្រ (L) x 4.4 សង់ទីម៉ែត្រ (W) x 3.5 សង់ទីម៉ែត្រ (H) |
| វិមាត្រកញ្ចប់ | 14.9 x 8 x 6.7 សង់ទីម៉ែត្រ |
| ទំងន់ផលិតផល | 0.11 គីឡូក្រាម (110 ក្រាម) |
| អង្កត់ផ្ចិតកែវភ្នែកគោលបំណង | 24 ម។ |
| ប្រភេទម៉ោន | Picatinny Mount (RMR Type) |
| ធន់នឹងទឹក។ | IPX6 |
| Battery Included/Built-in | បាទ |
| Night Vision ឆបគ្នា។ | បាទ |

Detailed dimensions of the Osight dot sight.

The large window size (24mm x 21.5mm) of the Osight for improved field of view.
11. Additional Product Information
This video highlights key features of the Osight 3MOA High-Performance Dot Sight, including its construction, lens quality, mounting, and charging capabilities.
12. ការធានា និងការគាំទ្រ
OLIGHT products are backed by a comprehensive warranty. For detailed warranty information, product registration, or technical support, please visit the official OLIGHT webគេហទំព័រ ឬទាក់ទងផ្នែកសេវាកម្មអតិថិជនរបស់ពួកគេ។ រក្សាបង្កាន់ដៃទិញរបស់អ្នកសម្រាប់ការទាមទារធានា។


