1.製品オーバーview
The E-ACE 4.3-inch Dual Lens Car DVR Rearview Mirror Dash Cam is designed to enhance driving safety by providing comprehensive video recording of your journeys. This device integrates a front-facing camera and supports an optional rear-facing camera, offering a wide field of view and continuous recording capabilities. Its sleek design replaces your existing rearview mirror, providing a discreet and integrated solution for vehicle surveillance.
Key features include a 4.3-inch high-definition display, dual-lens recording, night vision, loop recording, and a G-sensor for automatic incident detection.

Image: The E-ACE rearview mirror dash cam displaying both front and rear camera feeds on its integrated screen.
2. パッケージ内容
パッケージに以下の項目が含まれているか確認してください。
- E-ACE Rearview Mirror Dash Cam Unit
- カーチャージャー
- Fixed Bandages (for mounting)
- ユーザーマニュアル
- カードリーダー
- オプション: リア View Camera + Cable (6M or 10M, depending on variant)
- Optional: Buck Line (for parking monitoring power)
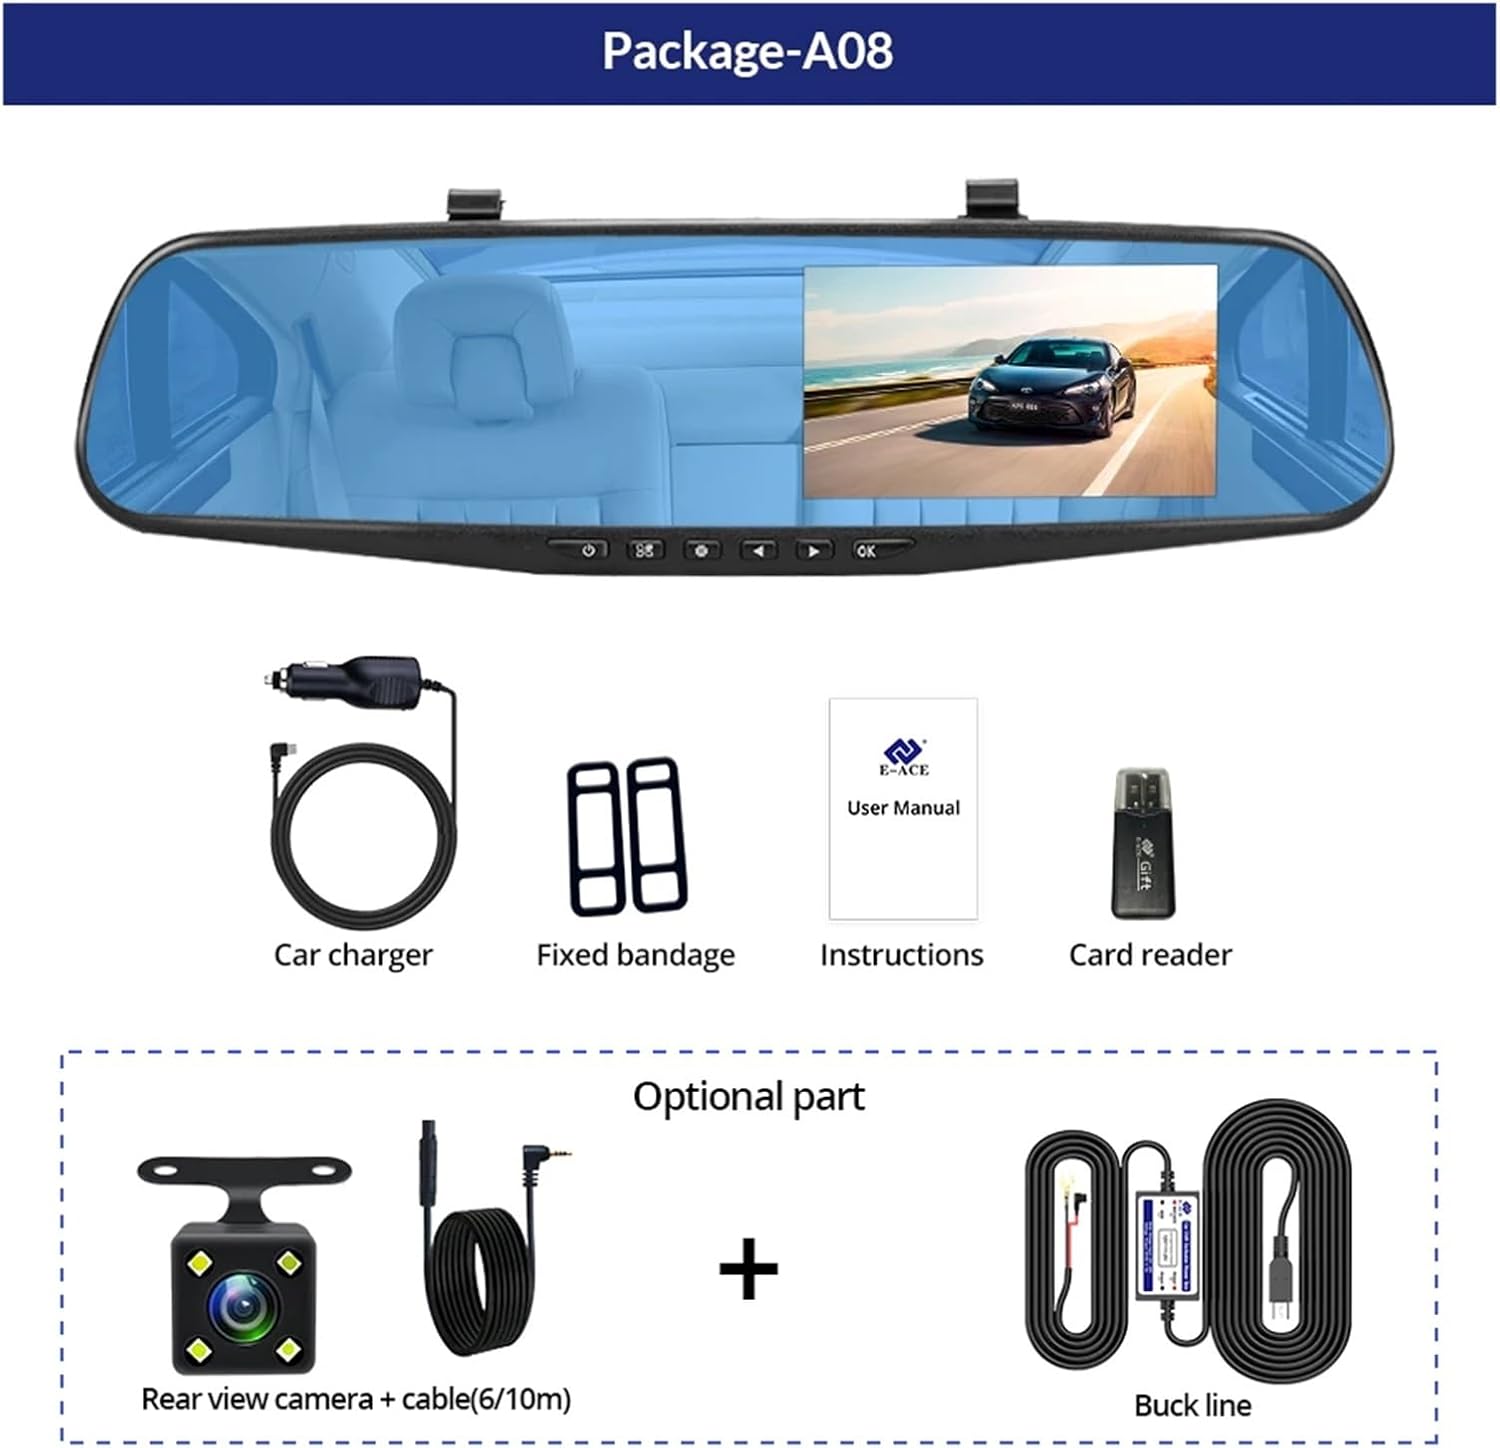
Image: A visual representation of the items included in the E-ACE dash cam package, showing the main unit and accessories.
3 製品の特徴
- 4.3インチ高解像度ディスプレイ: Provides clear visibility for real-time monitoring and playback.
- デュアルレンズ設計: Captures both front and rear footage simultaneously for comprehensive coverage.
- Built-in Night Vision Technology: Ensures clear recordings in low-light conditions.
- ユーザーフレンドリーなインストール: Sleek rearview mirror design integrates seamlessly into your vehicle.
- ループ録音: 最も古いfooを自動的に上書きしますtagメモリカードがいっぱいになると、連続録画ができなくなります。
- G-Sensor Feature: Detects sudden movements or impacts and automatically locks the current video file 上書きされないようにするためです。
- 駐車監視: Records video when motion or impact is detected while the vehicle is parked (requires buck line connection).
- 170度広角: 幅広い view これからの道の。
- 反転画像: リアカメラを表示 view 後退時の駐車ガイドライン付き。

Image: An illustration highlighting the various functional features of the E-ACE dash cam.
4.コンポーネントの識別
Familiarize yourself with the various parts and controls of your E-ACE dash cam:

Image: A detailed diagram identifying the buttons, ports, and features on the E-ACE dash cam unit.
- オン/オフボタン: デバイスの電源をオンまたはオフにします。
- メニューボタン: 設定とオプションにアクセスします。
- モードボタン: Switches between video recording, photo, and playback modes.
- 上ボタン: メニュー内を上へ移動したり、設定を調整します。
- 下ボタン: メニュー内を下に移動したり、設定を調整します。
- OKボタン: 選択を確定するか、録画を開始/停止します。
- TFカードスロット: Insert your MicroSD (TF) card here.
- AV-INポート: リアカメラを接続します。
- USBポート: 電源供給とデータ転送用。
- リセットボタン: Resets the device to factory settings (use a thin pin).
- マイクロフォン: 車内の音声を録音します。
5. セットアップとインストール
5.1メモリーカードの挿入
Before installation, insert a high-speed MicroSD (TF) card (Class 10 or higher, up to 64GB recommended) into the TF Card Slot (7) with the contacts facing the screen. Ensure the card is inserted correctly until it clicks into place.
5.2 ドライブレコーダーの取り付け
- Attach the fixed bandages to the back of the dash cam unit.
- Securely strap the dash cam over your vehicle's existing rearview mirror using the fixed bandages. Ensure it is centered and stable.
5.3電源の接続
- Connect the car charger to the USB Port (9) on the dash cam.
- 車の充電器のもう一方の端を車のシガレットライターソケットに差し込みます。
- Route the power cable neatly along the windshield trim to avoid obstructing your view.
5.4 リアカメラの取り付け(オプション)
- Connect the rear camera cable to the AV-IN Port (8) on the dash cam.
- Route the rear camera cable from the dash cam to the rear of your vehicle. This typically involves tucking the cable under the headliner and along the side pillars.
- Mount the rear camera on the rear windshield or near the license plate using its adhesive or screws. Ensure it has a clear view 後ろの道の。
- If using the reverse image function, connect the red wire from the rear camera cable to your vehicle's reverse light power supply.
6. 操作手順
6.1 電源オン/オフ
- 自動: The dash cam will automatically power on and start recording when your vehicle's ignition is turned on (if connected to a switched power source).
- マニュアル: Press and hold the ON/OFF Button (1) to manually power the device on or off.
6.2 基本操作
- モードの切り替え: Press the Mode Button (3) to cycle between Video Recording, Photo, and Playback modes.
- アクセスメニュー: In any mode, press the Menu Button (2) to enter the settings menu. Use the UP (4) and Down (5) buttons to navigate, and OK (6) to select.
- 記録の開始/停止: In Video Recording mode, press the OK Button (6) to manually start or stop recording.
6.3表示モード
While recording, you can typically switch between different display views by pressing the UP or Down buttons:
- フロントカメラのみ
- Rear Camera Only
- Picture-in-Picture (Front main, Rear sub-window)
- Picture-in-Picture (Rear main, Front sub-window)
6.4ループ記録
Set the loop recording duration (e.g., 1, 3, or 5 minutes) in the settings menu. When the memory card is full, the oldest unlocked file新しい録音によって上書きされます。
6.5 Gセンサー
The G-sensor automatically detects collisions or sudden braking. When triggered, it locks the current video file, preventing it from being overwritten by loop recording. Adjust sensitivity in the settings.
6.6 駐車監視(オプション)
If the buck line is installed, the dash cam can monitor your vehicle while parked. When motion or impact is detected, it will automatically record a short video. Enable this feature in the settings.
6.7 日付と時刻の設定
It is important to set the correct date and time in the system settings for accurate timestamp録音に反映されます。
7. メンテナンス
- クリーニング: レンズと画面の清掃には、柔らかく乾いた布をご使用ください。研磨剤入りの洗剤や溶剤は使用しないでください。
- メモリーカード: Format the MicroSD card regularly (e.g., once a month) within the dash cam's settings to maintain optimal performance and prevent data corruption. Back up important file■フォーマットする前。
- 温度: Avoid exposing the device to extreme temperatures, as this can affect battery life and component integrity.
- ファームウェアの更新: メーカーの webパフォーマンスの向上や機能の追加が可能なファームウェア アップデートについては、定期的にサイトを参照してください。
8。 トラブルシューティング
| 問題 | 考えられる原因 | 解決 |
|---|---|---|
| ダッシュカムの電源が入りません。 | No power supply; faulty charger; loose connection. | Check car charger connection and vehicle's cigarette lighter. Try a different USB cable/charger. |
| 録音は自動的に停止します。 | Memory card full; slow memory card; G-sensor sensitivity too high. | Format the memory card. Use a Class 10 or higher MicroSD card. Lower G-sensor sensitivity in settings. |
| ビデオfootagぼやけています。 | レンズに保護フィルムが貼ってある、レンズが汚れている、焦点が正しくない。 | Remove any protective film. Clean the lens with a soft cloth. |
| リアカメラが表示されません。 | 接続が緩んでいる、ケーブル/カメラに障害がある。 | Check the AV-IN connection. Ensure the rear camera is properly installed. |
| デバイスがフリーズまたはクラッシュします。 | ソフトウェアの問題、メモリ カード エラー。 | Press the Reset Button (10) with a thin pin. Format the memory card. |
9. 仕様
- モデル名: DMMRUTXB
- 画面: 4.3インチ
- カメラ: Dual Lens (Front & Rear support)
- ビデオ解像度: FHD 1920x1080P (Front)
- 特徴: Loop Recording, G-Sensor, Night Vision, Parking Monitoring, 170-degree wide angle
- ストレージ: Supports MicroSD (TF) card, Class 10 or higher (up to 64GB)
- 接続性: USB, AV-IN (for rear camera)
- 商品の重量: 約1.76オンス(50グラム)
- パッケージ寸法: 約0.39×0.39×0.39インチ
- メーカー: DMMRUTXB
10. 保証とサポート
保証情報およびテクニカルサポートについては、ご購入時に付属の説明書をご参照いただくか、販売店またはメーカーに直接お問い合わせください。ご購入時のレシートは購入証明として保管してください。


