TP-Link TL-MR3420 Wireless N300 3G/4G Router User Manual
モデル: TL-MR3420
1. はじめに
The TP-Link TL-MR3420 Wireless N300 3G/4G Router is designed to share a 3G/4G mobile broadband connection wirelessly. By connecting a compatible UMTS/HSPA/EVDO USB modem to the router, a Wi-Fi hotspot is instantly established, allowing multiple devices to access the internet. This router also features a 3G/WAN connection backup strategy, ensuring a continuous internet connection by switching between 3G/4G and WAN (Ethernet) connections as needed. It supports wireless N speeds of up to 300Mbps, suitable for various online activities.
2. パッケージ内容
- TP-Link TL-MR3420 Wireless N300 3G/4G Router
- 電源アダプター
- イーサネットケーブル
- クイックインストールガイド
3.ハードウェアオーバーview
3.1 Front Panel and LEDs
The front panel of the router features LED indicators that provide information about the device's status, including power, system, WLAN, WAN, LAN, and 3G/4G connection status.

画像: 正面 view of the TL-MR3420 router, showing the TP-Link logo and status LEDs.
3.2 Side Panel (USB Port)
The side panel includes a USB 2.0 port, primarily used for connecting a compatible 3G/4G USB modem.
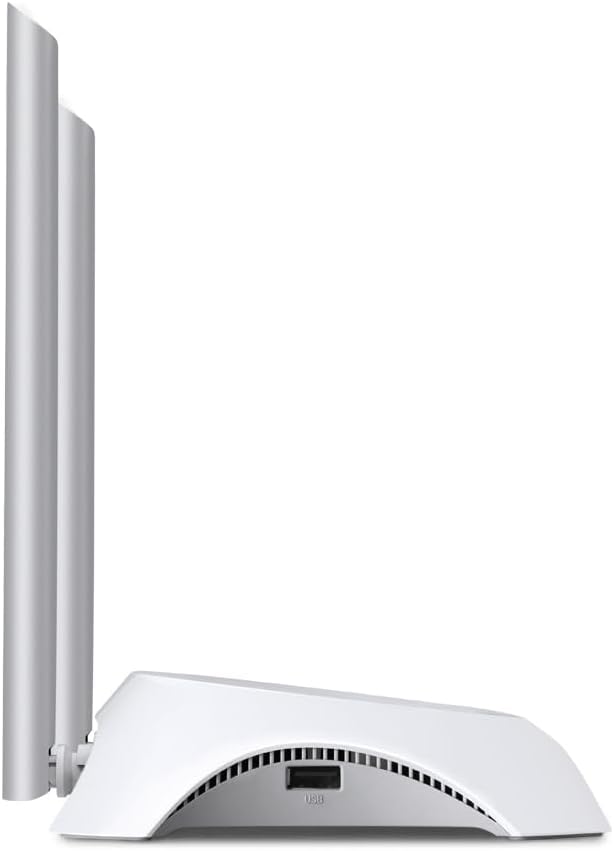
画像: サイド view of the TL-MR3420 router, highlighting the USB port for modem connection.
3.3 背面パネル(ポートとボタン)
The rear panel provides various ports and buttons for connectivity and control.
- 電源ポート: 電源アダプタに接続します。
- 電源オン/オフボタン: ルーターの電源をオンまたはオフにします。
- WANポート(青): Connects to a DSL/Cable modem for traditional internet access.
- LAN ポート (黄色): Four ports for connecting wired devices like computers or switches.
- WPS/リセットボタン: WPS 機能を使用する場合は押します。工場出荷時設定にリセットする場合は押し続けます。
- アンテナコネクタ: 2本の外部アンテナを取り付けます。

画像: 背面 view of the TL-MR3420 router, displaying the power port, WAN port, LAN ports, WPS/Reset button, and antenna connectors.
4.セットアップガイド
4.1 物理的な接続
- アンテナを接続します。 Screw the two detachable antennas firmly into their connectors on the rear panel.
- Connect 3G/4G USB Modem: Insert your compatible 3G/4G USB modem into the USB port on the side of the router.
- 電源オン: 電源アダプタをルーターの電源ポートに接続し、壁のコンセントに差し込みます。必要に応じて電源オン/オフボタンを押してください。
- (Optional) Connect to WAN: If using a wired internet connection as a backup or primary, connect an Ethernet cable from your DSL/Cable modem to the blue WAN port on the router.
- (オプション) 有線デバイスを接続する: Connect your computer or other wired devices to the yellow LAN ports using Ethernet cables.

Image: The TL-MR3420 router with a 3G USB modem connected to its side USB port.
4.2 初期設定(Web インターフェース)
- ルーターに接続します。 Connect your computer to the router either via an Ethernet cable to a LAN port or wirelessly using the default Wi-Fi SSID printed on the router's label (e.g., TP-Link_XXXX).
- アクセス Web ブラウザ: 開く web ブラウザ(Chrome、Firefoxなど)と入力
http://tplinkwifi.netorhttp://192.168.0.1(またはhttp://192.168.1.1)をアドレスバーに入力し、Enterキーを押します。 - ログイン: デフォルトのユーザー名とパスワードを入力します。通常は
adminfor both. If these do not work, check the label on the bottom of your router. - クイックセットアップを実行します。 画面上のクイック セットアップ ウィザードに従って、インターネット接続とワイヤレス設定を構成します。
4.3 3G/4G Connection Setup
During the Quick Setup, select 3G/4Gルーター mode. The router will automatically detect your USB modem. You may need to select your region and ISP, and enter APN (Access Point Name) details if prompted. Ensure your 3G/4G USB modem is compatible with the TL-MR3420.
4.4 WAN Connection Setup (Optional)
If you are using a wired internet connection, configure the WAN settings. This can be done via Dynamic IP, Static IP, or PPPoE, depending on your Internet Service Provider (ISP) requirements. The TL-MR3420 supports a 3G/WAN failover strategy, allowing you to set a preferred connection (3G/4G or WAN) and use the other as a backup.
4.5 ワイヤレスネットワークの設定
Set your desired Wireless Network Name (SSID) and a strong password (WPA/WPA2 Personal recommended) for your Wi-Fi network. This will secure your wireless connection.
5. ルーターの操作
5.1 LEDインジケータの理解
| 導かれた | 状態 | 表示 |
|---|---|---|
| 力 | On | ルーターの電源がオンになっています。 |
| システム | 点滅 | ルーターは正常に動作しています。 |
| 無線LAN | オン/点滅 | Wireless function is enabled/data is being transmitted. |
| ワン | オン/点滅 | WAN port is connected/data is being transmitted. |
| LAN(1-4) | オン/点滅 | Corresponding LAN port is connected/data is being transmitted. |
| 3G/4G | オン/点滅 | 3G/4G modem is connected and working/data is being transmitted. |
5.2 デバイスの接続
- ワイヤレスデバイス: 検索する your Wi-Fi network (SSID) on your device and enter the password you configured.
- 有線デバイス: Connect an Ethernet cable from your device to any of the yellow LAN ports on the router.
5.3 3G/WANフェイルオーバー
The router can be configured to use either 3G/4G or WAN as the primary internet connection, with the other serving as a backup. If the primary connection fails, the router will automatically switch to the backup, ensuring continuous internet access. This setting can be managed in the router's web interface under Network > WAN Backup.
6. メンテナンス
6.1ファームウェアのアップグレード
TP-Linkの公式ウェブサイトからファームウェアのアップデートを定期的に確認し、インストールしてください。 website. Firmware updates can improve performance, add new features, and fix bugs. Download the correct firmware for your model and follow the instructions provided on the TP-Link support page for upgrading via the web interface (System Tools > Firmware Upgrade).
6.2 バックアップと復元の構成
You can back up your router's configuration settings to a file on your computer. This allows you to restore your settings quickly after a factory reset or if you need to revert to a previous configuration (System Tools > Backup & Restore).
6.3 システムの再起動
If the router is experiencing issues, a simple reboot can often resolve them. You can reboot the router from the web interface (System Tools > Reboot) or by unplugging and replugging the power adapter.
6.4 工場出荷時設定へのリセット
A factory reset will revert all settings to their default values. This can be done by pressing and holding the WPS/Reset button on the rear panel for approximately 5-10 seconds until the System LED flashes rapidly, or via the web interface (System Tools > Factory Defaults).
7。 トラブルシューティング
- インターネットにアクセスできません:
- Check LED indicators: Ensure Power, System, WLAN, and 3G/4G (or WAN) LEDs are on or flashing correctly.
- Verify physical connections: Ensure all cables are securely connected.
- Check 3G/4G modem: Ensure it is properly inserted and recognized by the router.
- Confirm ISP settings: Verify that your 3G/4G or WAN settings (APN, connection type) are correct in the router's web インタフェース。
- Reboot the router and modem.
- ワイヤレス接続の問題:
- Ensure WLAN LED is on/flashing.
- Verify correct Wi-Fi SSID and password.
- ルーターに近づいて信号強度を確認してください。
- Change wireless channel in router settings to avoid interference.
- インターネット速度が遅い:
- Check your 3G/4G signal strength or WAN connection speed.
- Ensure no other devices are heavily using bandwidth.
- ルーターのファームウェアを更新します。
8. 仕様
| 特徴 | 詳細 |
|---|---|
| モデル名 | TL-MR3420 |
| ワイヤレス標準 | IEEE 802.11n、802.11g、802.11b |
| ワイヤレス速度 | 最大300Mbps |
| 周波数帯域 | 2.4GHz帯 |
| アンテナタイプ | 2x 5dBi 取り外し可能な全方向性アンテナ |
| インターフェース | 1x 10/100Mbps WAN Port, 4x 10/100Mbps LAN Ports, 1x USB 2.0 Port |
| ボタン | WPS/Reset Button, Power On/Off Button |
| 寸法(幅×奥行き×高さ) | 11.34×8.9×2.8インチ(製品寸法) |
| アイテム重量 | 9.5オンス |
| 電源 | 12VDC / 1A (External Power Adapter) |
| ワイヤレスセキュリティ | 64/128ビットWEP、WPA/WPA2、WPA-PSK/WPA2-PSK暗号化 |
| 対応デバイス | Personal Computer, UMTS/HSPA/EVDO USB Modems |
9. 保証とサポート
9.1製品保証
The TP-Link TL-MR3420 Wireless N300 3G/4G Router typically comes with a 2-year limited warranty. Please refer to the warranty card included in your package or visit the official TP-Link webお住まいの地域に固有の詳細な保証条件については、こちらのサイトをご覧ください。
9.2 テクニカルサポート
技術的なサポート、トラブルシューティング、その他のお問い合わせについては、TP-Linkの公式サポートをご覧ください。 webサイト。FAQ、ファームウェアのアップデート、カスタマー サポートの連絡先情報が見つかります。
- TP-Linkのサポート Webサイト: www.tp-link.com/support/


