1. Introduzione
This manual provides detailed instructions for the installation, operation, and maintenance of your TOWODE 4CH 5MP Hybrid 5-in-1 DVR Security Camera System. Please read this manual thoroughly before using the product to ensure proper setup and functionality. This system is designed to provide comprehensive surveillance for your property.
2. Informazioni sulla sicurezza
- Assicurarsi che tutti i collegamenti di alimentazione siano sicuri e correttamente dimensionati per il dispositivo.
- Do not expose the DVR to liquids or extreme temperatures.
- Handle the hard drive with care to prevent data loss or damage.
- In caso di dubbi sul cablaggio elettrico, l'installazione deve essere eseguita da personale qualificato.
- Keep cameras and cables out of reach of children.
- Utilizzare solo accessori e adattatori di alimentazione approvati dal produttore.
3. Contenuto della confezione
Verifica che tutti gli articoli elencati di seguito siano inclusi nel tuo pacchetto:
- 1x 4CH DVR recorder
- 2x 5MP HD Cameras
- 1 HDD da 1 TB (preinstallato)
- 2x 15 meters integrated line (Video/Power cables)
- 2x 12V2A power supply
4. Prodotto finitoview
The TOWODE 4CH 5MP Hybrid 5-in-1 DVR Security Camera System provides robust surveillance capabilities with high-definition video recording and advanced features.
4.1 Componenti del sistema

This image displays the main components of the security system: the 4-channel DVR unit, two 5MP bullet-style security cameras, and an icon representing the pre-installed 1TB hard drive. The DVR features various input/output ports on its rear panel, including video inputs, audio inputs/outputs, VGA, HDMI, USB, and network ports.
4.2 DVR Rear Panel and Camera Connections

Questa immagine fornisce una descrizione dettagliata view of the DVR's rear panel, highlighting various connection ports such as BNC video inputs (VIDEO IN), audio input/output (AUDIO IN/OUT), VGA, HD-port (HDMI), USB, network (NET), and DC 12V power input. The image also shows a 5MP camera with its power and video output cables, indicating its IP66 weatherproof rating, 3.6mm lens, and up to 80 ft IR night vision capability.
5. Impostazione
5.1 connessione fisica
- Collega le telecamere: Connect the BNC video cable from each 5MP camera to the 'VIDEO IN' ports on the rear of the DVR. Connect the camera's power cable to the provided 12V power supply.
- Connetti il monitor: Connect a monitor to the DVR using either the 'HD-port' (HDMI) or 'VGA' port.
- Connetti il mouse: Plug the USB mouse into one of the 'USB' ports on the DVR.
- Connessione di rete (facoltativa): Per telecomando viewing, connect an Ethernet cable from the 'NET' port on the DVR to your router.
- Accensione: Connect the DVR's power adapter to the 'DC 12V' input and then to a power outlet. The system will power on automatically.
5.2 Configurazione iniziale
Al primo avvio, il sistema ti guiderà attraverso una procedura guidata di configurazione iniziale. Questa in genere include:
- Impostazione di una password amministratore.
- Configurazione delle impostazioni di data e ora.
- Impostazioni di rete (DHCP o IP statico).
- Inizializzazione del disco rigido (se richiesto).
6. Istruzioni per l'uso
6.1 Modalità di registrazione
Il DVR supporta diverse modalità di registrazione:
- Registrazione continua 24 ore su 24, 7 giorni su 7: The system records continuously. This mode ensures no moment is missed.
- Registrazione di rilevamento del movimento: Recording starts only when motion is detected, saving storage space.
- Registrazione programmata: Imposta orari specifici per la registrazione.

This image illustrates the 24/7 non-stop recording feature, showing a monitor displaying a 4-channel live view from various surveillance points, including a home, a warehouse, and a family playing. The DVR unit is visible below the monitor, emphasizing continuous security coverage.
6.2 Accesso remoto
You can access your security system remotely via mobile app or PC software.
- Applicazione mobile: Download the recommended app (e.g., XMeye) from your smartphone's app store. Register an account, add your DVR by scanning the QR code or entering its ID, and view live feeds or playback.
- Software per PC: Install the VMS software on your computer. Add the DVR using its IP address or cloud ID for remote monitoring.
6.3 Riproduzione
per riview registrato footage:
- Access the 'Playback' menu on the DVR interface.
- Selezionare la data e il canale della telecamera desiderati.
- Use the timeline to navigate and play back recordings.

This image illustrates the 'Advanced Smart Playback' feature, showing a timeline at the bottom with markers indicating recorded events. Above the timeline, various snapshots from different times are displayed, such as a person entering a door, a family walking, and a delivery. This feature allows users to quickly review momenti specifici.
6.4 Sistema di allarme intelligente
The system features intelligent human detection and alarm functions:

This image demonstrates the AI Motion Face Detection feature. It shows a smartphone displaying a live video feed with a 'Motion Detection Alarm' notification from the XMeye app. In the background, two individuals are highlighted with detection boxes, indicating that the system has identified human presence and triggered an alert, which can be pushed to the app or sent via email.
When human motion is detected, the system can:
- Attiva un allarme.
- Invia notifiche push al tuo cellulare.
- Invia avvisi via email.
7. Funzionalità avanzate
7.1 5-in-1 Hybrid DVR Compatibility
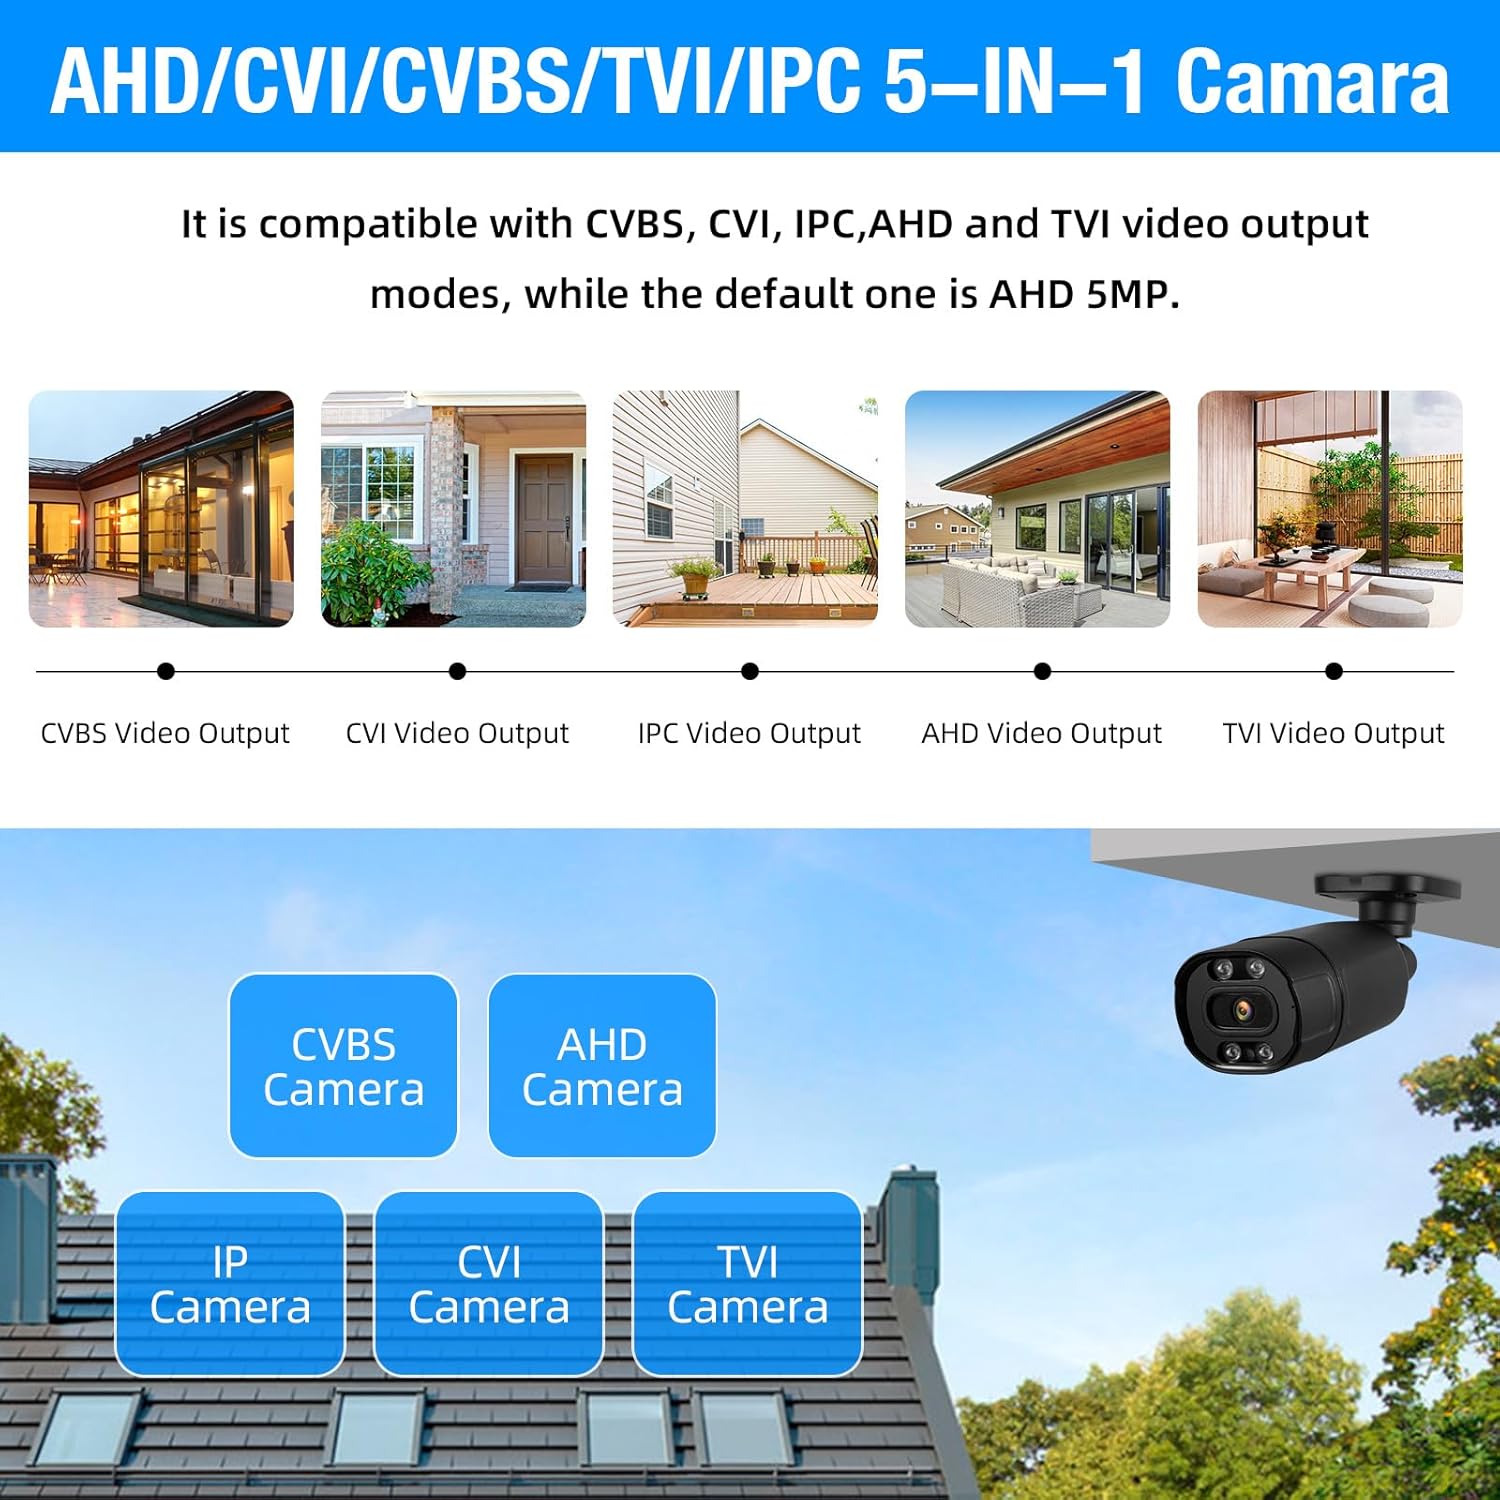
This image highlights the 5-in-1 Hybrid DVR's compatibility with multiple video output modes: CVBS, CVI, IPC (IP Camera), AHD, and TVI. It visually represents different camera types (CVBS, AHD, IP, CVI, TVI) that can be connected to the DVR, demonstrating its versatility. The default mode is AHD 5MP.
The DVR supports AHD/TVI/CVI/CVBS/IP camera 5-in-1 access mode, allowing flexibility in camera selection and integration with existing systems.
7.2 IP66 Weatherproof Cameras

This image showcases the IP66 Weatherproof and Dustproof rating of the security camera. It depicts a camera being hit by rain, with icons indicating its ability to withstand hot temperatures (up to 131°F/55°C) and cold temperatures (down to 14°F/-10°C), ensuring reliable outdoor performance in various weather conditions.
The included cameras are constructed from high-quality metal aluminum material with an IP66 rating, making them suitable for both indoor and outdoor use in various weather conditions.
7.3 H.265+ Efficient Video Compression

This image compares H.265+ and H.264 video compression technologies. It highlights that H.265+ offers smoother viewing and reduced memory space. Bar graphs illustrate that H.265+ provides 100% fluency and 100% storage space efficiency compared to H.264, which shows reduced fluency and higher storage consumption, demonstrating the superior efficiency of H.265+.
The DVR utilizes advanced H.265+ video compression technology, which significantly improves the compression ratio compared to H.264. This results in longer recording times and up to 80% storage savings, while maintaining high image quality and providing a smooth viewesperienza di acquisizione.
7.4 Archiviazione espandibile

This image shows the DVR unit with a visual representation of a pre-installed 1TB HDD. Text overlays indicate 'Expandable Capacity' and 'Worry-Free Backup,' along with 'Up to 14TB External HDD,' signifying that the system's storage can be significantly expanded beyond the initial 1TB.
The system comes with a pre-installed 1TB hard drive. For extended recording needs, the DVR supports expandable storage up to 14TB via an external HDD.
8. Manutenzione
8.1 Pulizia
- Telecamere: Periodically clean camera lenses with a soft, dry cloth to ensure clear image quality. For outdoor cameras, remove any dirt or debris from the housing.
- DVR: Keep the DVR free from dust. Use a soft brush or compressed air to clean ventilation openings. Do not use liquid cleaners directly on the unit.
8.2 Gestione del disco rigido
- The 1TB HDD is pre-installed and configured for continuous recording, overwriting the oldest footage quando è pieno.
- Eseguire regolarmente il backup dei dati importantitage to an external storage device (e.g., USB drive) if needed.
- Check the hard drive status in the DVR's system settings periodically to ensure proper functioning.
9. Risoluzione Dei Problemi
9.1 Nessuna uscita video sul monitor
- Controllare che il DVR sia acceso.
- Verify that the monitor is powered on and set to the correct input source (HDMI/VGA).
- Assicurarsi che il cavo HDMI/VGA sia collegato saldamente sia al DVR che al monitor.
9.2 Cameras Not Displaying Image
- Check if the camera's power adapter is connected and receiving power.
- Ensure the BNC video cable is securely connected to both the camera and the DVR.
- Verify the camera type is compatible with the DVR's current channel settings (AHD, TVI, CVI, CVBS, IP).
9.3 Accesso remoto non funzionante
- Assicurarsi che il DVR sia connesso a Internet tramite un cavo Ethernet.
- Controlla la connessione Internet del tuo router.
- Verify network settings on the DVR (DHCP enabled or correct static IP).
- Confirm that the mobile app or PC software is correctly configured with the DVR's ID/IP address.
9.4 Hard Drive Not Recording
- Check the hard drive status in the DVR's system settings. It may need to be initialized or formatted.
- Ensure recording schedules are properly set up.
- Verify that motion detection settings are correctly configured if using that mode.
10. Specifiche
| Caratteristica | Dettaglio |
|---|---|
| Marca | TOWODE |
| Numero di modello | A6504L2 |
| Tecnologia di connettività | Cablato |
| Risoluzione di acquisizione video | 1944p (5 MP) |
| Caratteristiche speciali | App Control, Audio Recording, Human Detection, Motion Sensor |
| Numero di canali | 4 |
| Capacità di archiviazione della memoria | 1 TB (preinstallato) |
| Fonte di alimentazione | Elettrico con cavo |
| Dimensioni articolo (L x P x A) | 9.84 x 7.87 x 1.96 pollici |
| Dispositivi compatibili | Cameras, Personal Computers, Smartphones, Tablets |
| Gamma di visione notturna | 80 piedi |
| Frequenza dei fotogrammi | 25 fotogrammi al secondo |
| Modalità di registrazione | Rilevamento continuo del movimento |
| Tipo di lente | Fisso (3.6 mm) |
| Ingresso video | BNC (AHD/TVI/CVI/CVBS/IP 5-in-1) |
| Peso dell'articolo | 7.3 libbre |
| Valutazione resistente alle intemperie | Grado di protezione IP66 |
11. Garanzia e supporto
For technical support, troubleshooting assistance, or warranty inquiries, please refer to the contact information provided with your product packaging or visit the official TOWODE websito. Conservare la ricevuta d'acquisto come prova d'acquisto per eventuali reclami in garanzia.


