1. Introduzione
Thank you for choosing the Hunter Fan Company Avia II Ceiling Fan. This manual provides detailed instructions for the safe installation, operation, and maintenance of your new ceiling fan. Please read all instructions carefully before beginning installation and retain this manual for future reference.

Figure 1: Hunter Avia II Ceiling Fan, 52-inch, Matte Black finish with light wood-grain blades.
The Avia II is a contemporary ceiling fan designed to enhance your living space with its soft-modern style and integrated light fixture. Its smooth rounded edges contribute to a unified and elegant appearance. This fan is equipped with a 3-speed WhisperWind reversible motor, ensuring optimal performance for both cooling in summer and circulating warm air in winter. It is ideal for large rooms such as living rooms and bedrooms.

Figure 2: Avia II Ceiling Fan installed in a spacious modern bedroom setting.
2. Informazioni sulla sicurezza
Per ridurre il rischio di scosse elettriche, incendi o lesioni personali, seguire sempre queste precauzioni di sicurezza di base:
- Prima di installare il ventilatore, leggere tutte le istruzioni e le informazioni di sicurezza e conservare queste istruzioni.
- Tutti i cablaggi devono essere conformi alle normative elettriche nazionali e locali. Se non si ha familiarità con i cablaggi, consultare un elettricista qualificato.
- Before you begin, disconnect power by turning off the circuit breakers to the fan's outlet box and associated wall switch location.
- La scatola di derivazione e la struttura di supporto devono essere montate saldamente e in grado di supportare in modo affidabile un peso minimo di 15.9 kg (35 libbre). Utilizzare solo scatole di derivazione certificate UL e contrassegnate con la dicitura "FOR FAN SUPPORT" (PER SUPPORTO VENTILATORE).
- Non utilizzare il ventilatore con cavi di alimentazione o spine danneggiati.
- Evitare di posizionare oggetti sul percorso delle lame.
- Assicurarsi che il ventilatore sia installato a un'altezza tale che le pale siano ad almeno 7 piedi (2.13 metri) dal pavimento.
- Non utilizzare il ventilatore con un dimmer non specificamente progettato per ventilatori da soffitto.
3. Contenuto della confezione
Disimballa con cura il ventilatore e controllane il contenuto. Dovresti avere i seguenti articoli:
- Gruppo motore ventola
- Pale del ventilatore (5)
- Telecomando con batteria
- Downrod (4 inch)
- Tettuccio e staffa di montaggio
- Assemblaggio kit luci
- Pacchetto hardware (viti, rondelle, dadi per cavi, ecc.)

Figure 3: Included handheld remote control for the Avia II Ceiling Fan.
4. Configurazione e installazione
4.1 Preinstallazione
- Assicurarsi che l'alimentazione sia interrotta tramite l'interruttore automatico.
- Verify that the chosen installation location has a suitable, UL Listed outlet box capable of supporting the fan's weight.
- Gather all necessary tools: Phillips screwdriver, flat-blade screwdriver, wire strippers, electrical tape, ladder.
4.2 Montaggio della ventola
- Attach the mounting bracket to the outlet box using the screws provided with the outlet box. Ensure it is securely fastened.
- Assemble the downrod to the fan motor assembly, feeding the wires through the downrod.
- Sollevare con cautela il gruppo ventola e appenderlo alla staffa di montaggio utilizzando la sfera di sospensione.

Figura 4: Lunghezze consigliate delle aste di discesa in base all'altezza del soffitto per una circolazione ottimale dell'aria.
4.3 Cablaggio
Connect the fan's electrical wires to the household wiring according to the wiring diagram provided in the separate installation guide (not included in this manual). Typically, this involves connecting the ground wire, neutral wire, and hot wire(s) using wire nuts. Ensure all connections are secure.
4.4 Fissaggio delle lame e del kit luci
- Attach the fan blades to the motor housing using the provided screws. Ensure all screws are tightened securely.
- Connect the light kit wires to the fan motor wires as instructed.
- Secure the light kit assembly to the fan motor housing.
- Install the light cover/diffuser.

Figure 5: Close-up of the integrated LED light fixture.

Figure 6: Detail of the fan blade texture and attachment.
5. Istruzioni per l'uso
5.1 Funzionamento del telecomando
Your Avia II ceiling fan comes with a handheld remote control for convenient operation. Ensure the battery is correctly installed in the remote.
- Controllo della velocità della ventola: Use the fan speed buttons (typically up/down arrows or numbered buttons) to cycle through the 3 available fan speeds (low, medium, high).
- Controllo della luce: Press the light button to turn the light on or off. Hold the light button to dim or brighten the integrated LED light.
Figure 7: Remote control functions for fan speed and light dimming.
Figure 8: Icons indicating 3-speed control and WhisperWind motor technology.
5.2 Funzione motoria reversibile
The Avia II features a WhisperWind reversible motor, allowing you to change the direction of the fan blades for year-round comfort.
- Operazione estiva: In warmer weather, set the fan to rotate counter-clockwise (downward airflow). This creates a cooling breeze effect.
- Operazione invernale: In cooler weather, set the fan to rotate clockwise (upward airflow). This helps to circulate warm air trapped near the ceiling, distributing it throughout the room.
To reverse the motor direction, locate the reverse switch on the fan motor housing (usually a small slide switch). Ensure the fan is off before changing the direction.
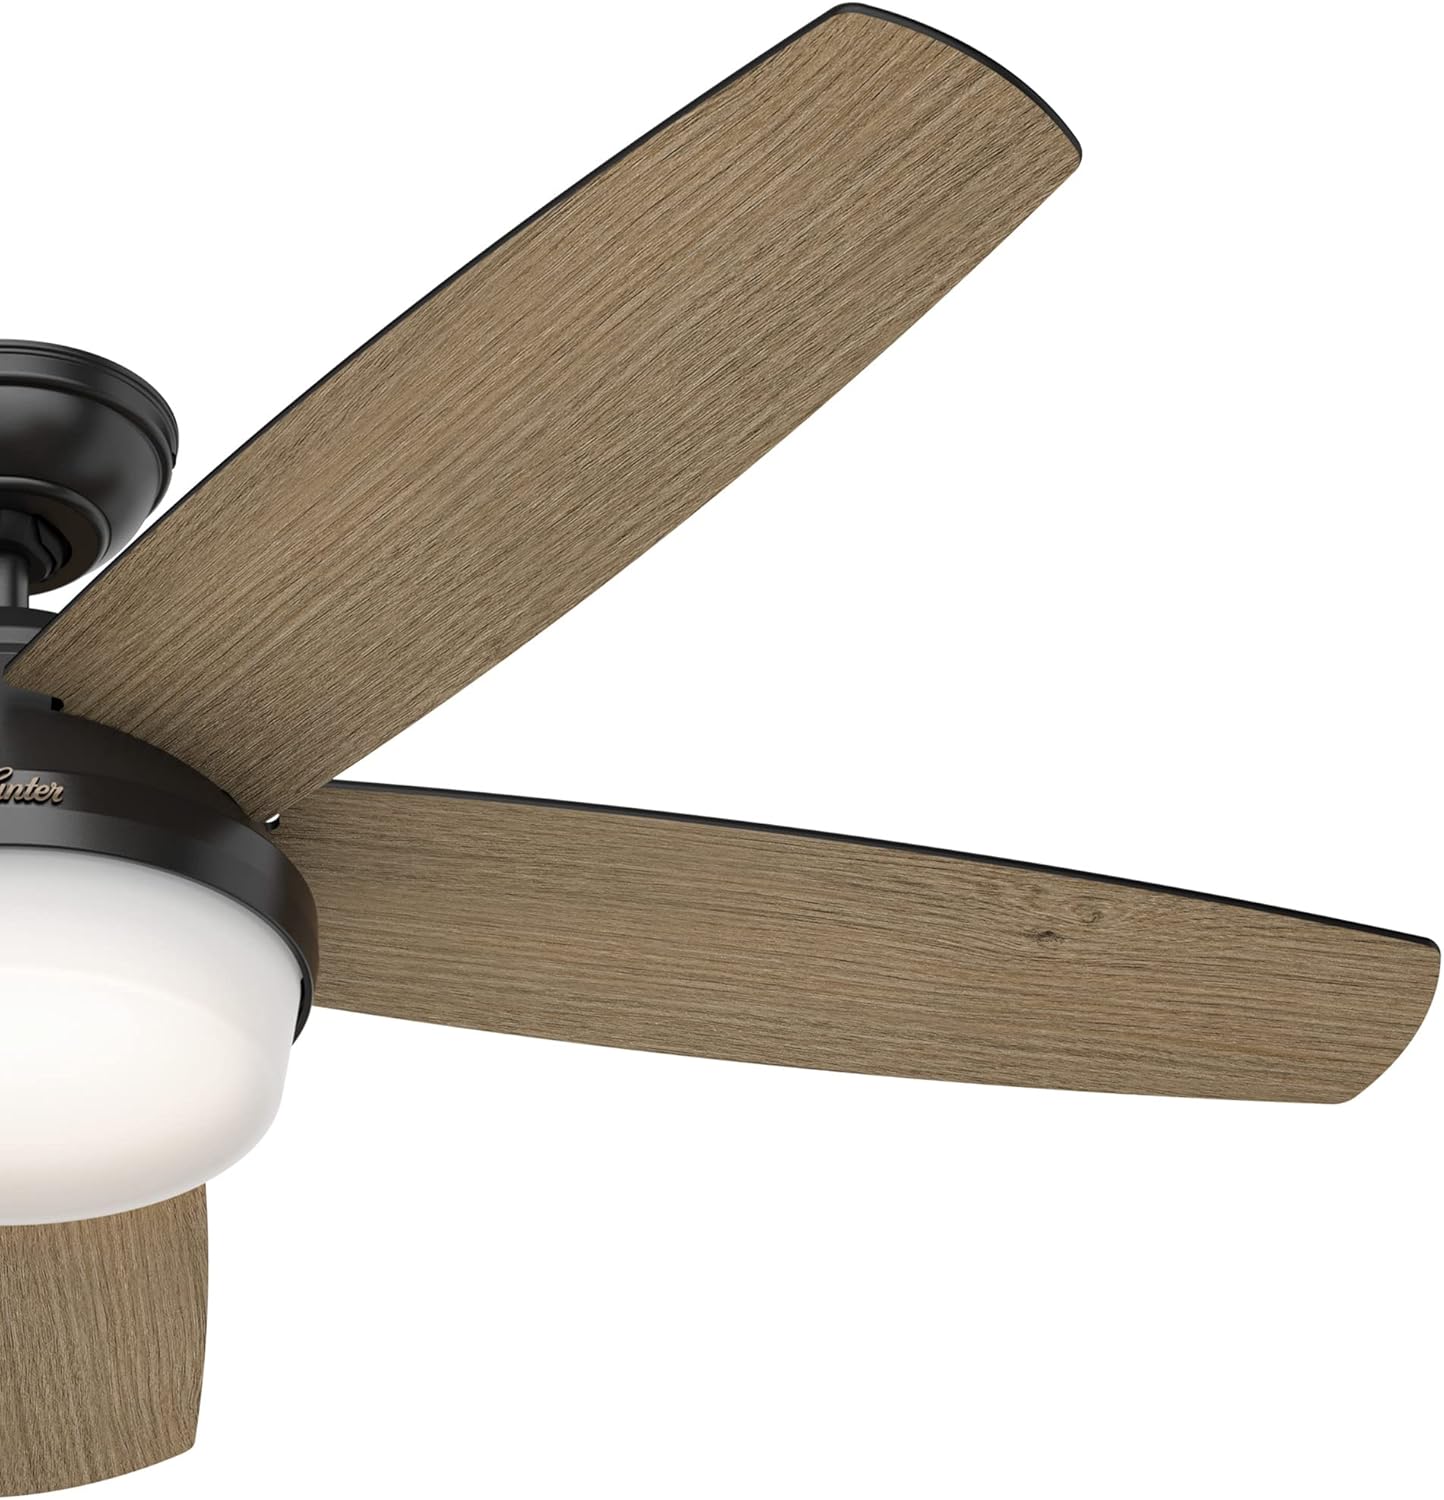
Figure 9: Fan blade angle for optimal air movement.
6. Manutenzione
Regular maintenance will ensure the longevity and optimal performance of your Hunter Avia II Ceiling Fan.
- Pulizia: Per pulire la ventola, strofinare con un panno morbido eamp cloth. Do not use abrasive cleaners or solvents, as they may damage the finish or blades.
- Pulizia della lama: Spolverare regolarmente le pale della ventola per evitare accumuli di polvere che potrebbero compromettere l'equilibrio e le prestazioni.
- Viti di serraggio: Controllare periodicamente tutte le viti della ventola e gli accessori di montaggio per assicurarsi che siano ben serrati. Collegamenti allentati possono causare rumore o oscillazioni.
- Kit luci: The integrated LED light is designed for long life and typically does not require replacement. If issues arise, consult a qualified electrician or Hunter customer support.
7. Risoluzione Dei Problemi
Se riscontri problemi con la ventola, consulta la seguente guida alla risoluzione dei problemi:
| Problema | Possibile causa | Soluzione |
|---|---|---|
| La ventola non si avvia | Nessuna alimentazione alla ventola; Collegamenti dei cavi allentati; Batteria del telecomando scarica. | Controllare l'interruttore automatico; verificare che tutti i collegamenti dei cavi siano saldi; sostituire la batteria del telecomando. |
| La ventola traballa | Viti delle lame allentate; Lame sbilanciate; Staffa di montaggio allentata. | Tighten all blade screws; Use a balancing kit (not included) to balance blades; Ensure mounting bracket is securely fastened. |
| La luce non funziona | Loose wire connections in light kit; Faulty LED module. | Check light kit wiring connections; Contact Hunter customer support if LED module is suspected faulty. |
| Funzionamento rumoroso | Loose screws; Fan not level; Motor hum. | Check and tighten all screws; Ensure fan is level; A slight motor hum is normal, but excessive noise may indicate an issue. |
8. Specifiche
Detailed specifications for the Hunter Avia II Ceiling Fan (Model 59593):
| Caratteristica | Dettaglio |
|---|---|
| Marca | Cacciatore |
| Nome del modello | Avia II |
| Numero di modello | 59593 |
| Misurare | 52 pollici |
| Colore | Nero opaco |
| Tipo di finitura | Brushed Nickel, Matte Black |
| Numero di lame | 5 |
| Materiale della lama | Plastica |
| Tipo di motore | AC Motor (WhisperWind Reversible) |
| Numero di livelli di potenza | 3 (Speeds) |
| Metodo di controllo | Telecomando |
| Tipo di luce | LED integrato |
| Flusso luminoso | 800 lumen |
| Temperatura del colore | 3000 gradi Celsius |
| Cosatage | 40 watt |
| Voltage | 120 Volt |
| Fonte di alimentazione | AC |
| Uso interno/esterno | Al chiuso |
| Peso dell'articolo | 19.62 libbre |
| Dimensioni del prodotto | 52 x 52 x 14.75 pollici |
| Componenti inclusi | Blades, Motor, Remote |
| Batterie incluse? | SÌ |
| Tipo di cella della batteria | Alcalino |
| Data prima disponibilità | 28 marzo 2022 |

Figure 10: Indoor usage icon and fan size selection guide.
9. Garanzia e supporto
9.1 Informazioni sulla garanzia
The Hunter Avia II Ceiling Fan comes with a limited lifetime motor warranty. This warranty is backed by Hunter Fan Company, a leader in the fan business with over 135 years of experience, ensuring innovation, style, and expertise in every product they make.

Figure 11: Hunter Fan Company's commitment to quality and heritage.
9.2 Assistenza clienti
For technical assistance, troubleshooting beyond this manual, or warranty claims, please contact Hunter Fan Company customer support. Refer to the contact information provided with your product packaging or visit the official Hunter Fan Company websito per i dettagli di supporto più aggiornati.