1. Inngangur
This manual provides detailed instructions for the installation, operation, and maintenance of your MOES WiFi Smart Light Switch (1-Gang). This smart switch is designed to enhance your home lighting control with convenience and smart features.
Helstu eiginleikar:
- Supports both no-neutral wire and with-neutral wire configurations.
- No hub required; connects directly to your 2.4GHz Wi-Fi network.
- Compatible with Alexa and Google Assistant for voice control.
- Remote control via smartphone application.
- Timer and scheduling functions for automated lighting.
- Space-saving design fits most standard wall boxes.

Image 1.1: MOES WiFi Smart Light Switch packaging and the 1-gang switch unit.
2. Öryggisupplýsingar
- Slökkvið alltaf á rafmagninu við rofann fyrir uppsetningu eða viðhald.
- Ef þú ert óviss um rafmagnsleiðslur skaltu ráðfæra þig við löggiltan rafvirkja.
- This switch is designed for indoor use only.
- Ekki fara yfir hámarksþyngdarmörk sem tilgreind eru í vörulýsingunum.
3. Uppsetningarhandbók
3.1. Gátlisti fyrir uppsetningu
- Ensure your home has a 2.4GHz Wi-Fi network. 5GHz networks are not supported.
- Confirm the existing wiring in your wall box (neutral wire present or not).
- Tools required: Screwdriver, wire strippers, voltage prófari.
3.2. Leiðbeiningar um raflögn
The MOES Smart Light Switch supports both neutral wire and no-neutral wire configurations. Please identify your wiring type before proceeding.
3.2.1. No-Neutral Wire Installation
If your wall box does not have a neutral wire, a capacitor (included in the package) is required for proper operation. This capacitor must be connected across the light bulb terminals.
- Slökktu á rafmagni: Finndu rofann og slökktu á rofanum sem þú ert að skipta um. Gakktu úr skugga um að rafmagnið sé slökkt með hljóðstyrksmæli.tage prófari.
- Þekkja vírana: In your wall box, identify the Line (Live) wire, Load wire(s), and Ground wire.
- Connect wires to the switch:
- Connect the Line wire to the 'L' terminal on the smart switch.
- Connect the Load wire(s) to the 'L1' (OUT) terminal. For 1-gang switches, typically only L1 is used.
- Connect the Ground wire to the 'GND' terminal.
- Install Capacitor: Connect the provided capacitor across the light bulb terminals (between the live and neutral wires at the light fixture). This is crucial for no-neutral setups to ensure stable power to the smart switch.
- Festu rofann: Secure the smart switch into the wall box and attach the faceplate.
- Endurheimta rafmagn: Kveiktu aftur á rafmagninu við aflrofann.

Image 3.1: Wiring diagram for no-neutral wire installation, showing capacitor connection.

Image 3.2: Comparison of Neutral + Live Wire and No Neutral Wire diagrams, highlighting the capacitor for no-neutral setups.
3.2.2. With-Neutral Wire Installation
If your wall box has a neutral wire, the installation is straightforward.
- Slökktu á rafmagni: Finndu rofann og slökktu á rofanum sem þú ert að skipta um. Gakktu úr skugga um að rafmagnið sé slökkt með hljóðstyrksmæli.tage prófari.
- Þekkja vírana: In your wall box, identify the Line (Live) wire, Neutral wire, Load wire(s), and Ground wire.
- Connect wires to the switch:
- Connect the Line wire to the 'L' terminal on the smart switch.
- Connect the Neutral wire to the 'N' terminal.
- Connect the Load wire(s) to the 'L1' (OUT) terminal. For 1-gang switches, typically only L1 is used.
- Connect the Ground wire to the 'GND' terminal.
- Festu rofann: Secure the smart switch into the wall box and attach the faceplate.
- Endurheimta rafmagn: Kveiktu aftur á rafmagninu við aflrofann.
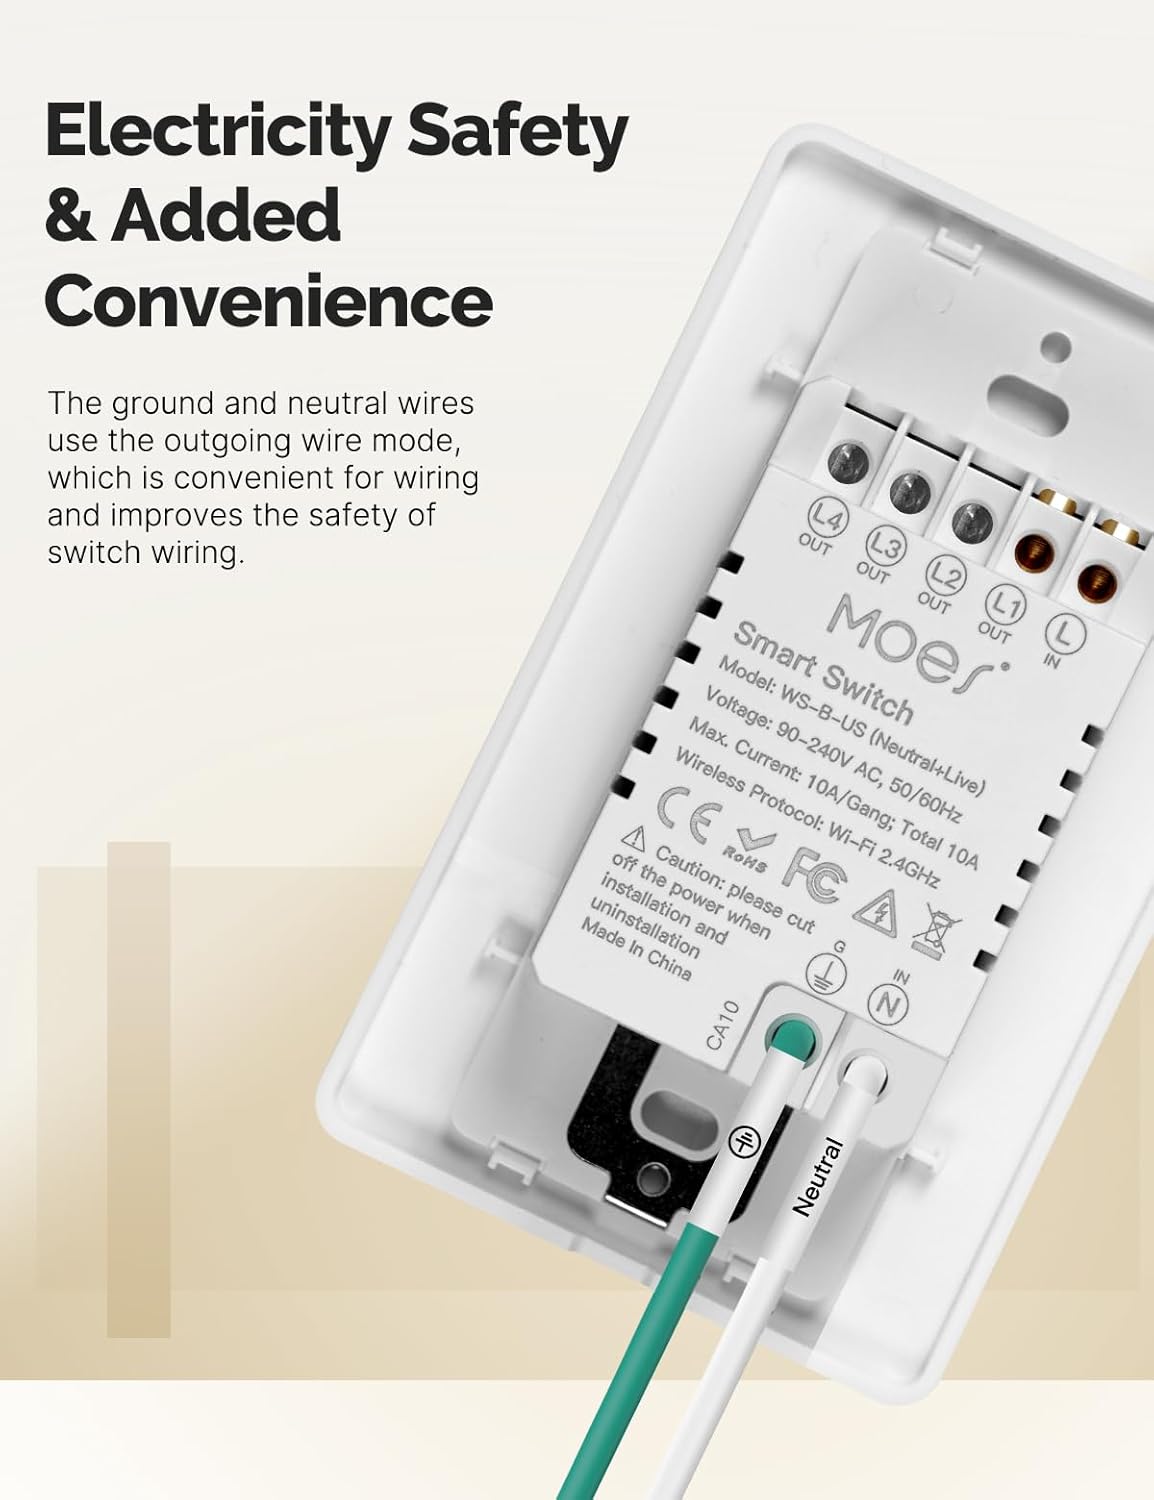
Mynd 3.3: Aftan view of the MOES Smart Switch showing wiring terminals for Line, Neutral, Load, and Ground connections.
3.3. Forritapörun
- Sækja appið: Download the "Smart Life" or "MOES" app from your smartphone's app store.
- Skráning/Innskráning: Búðu til reikning eða skráðu þig inn í appið.
- Bæta við tæki: Ýttu á '+' táknið efst í hægra horninu á appinu til að bæta við nýju tæki.
- Veldu tegund tækis: Choose "Electrical" then "Light Switch" or "Switch (Wi-Fi)".
- Sláðu inn upplýsingar um Wi-Fi: Ensure your phone is connected to a 2.4GHz Wi-Fi network. Enter your Wi-Fi password.
- Pörunarstilling: The switch should automatically enter pairing mode (indicator light blinking rapidly). If not, press and hold the switch button for 5-10 seconds until it blinks rapidly.
- Ljúka pörun: Follow the on-screen instructions in the app to complete the pairing process. Once connected, you can rename the switch.
Video 3.1: A visual guide demonstrating the general installation process for the MOES Smart Light Switch, including wiring and app pairing. (Note: Video may show a multi-gang switch, but principles apply to 1-gang).
4. Notkunarleiðbeiningar
4.1. Handvirk stjórn
Press the physical button(s) on the switch to turn the connected light(s) on or off. The switch features high-quality buttons for reliable operation.
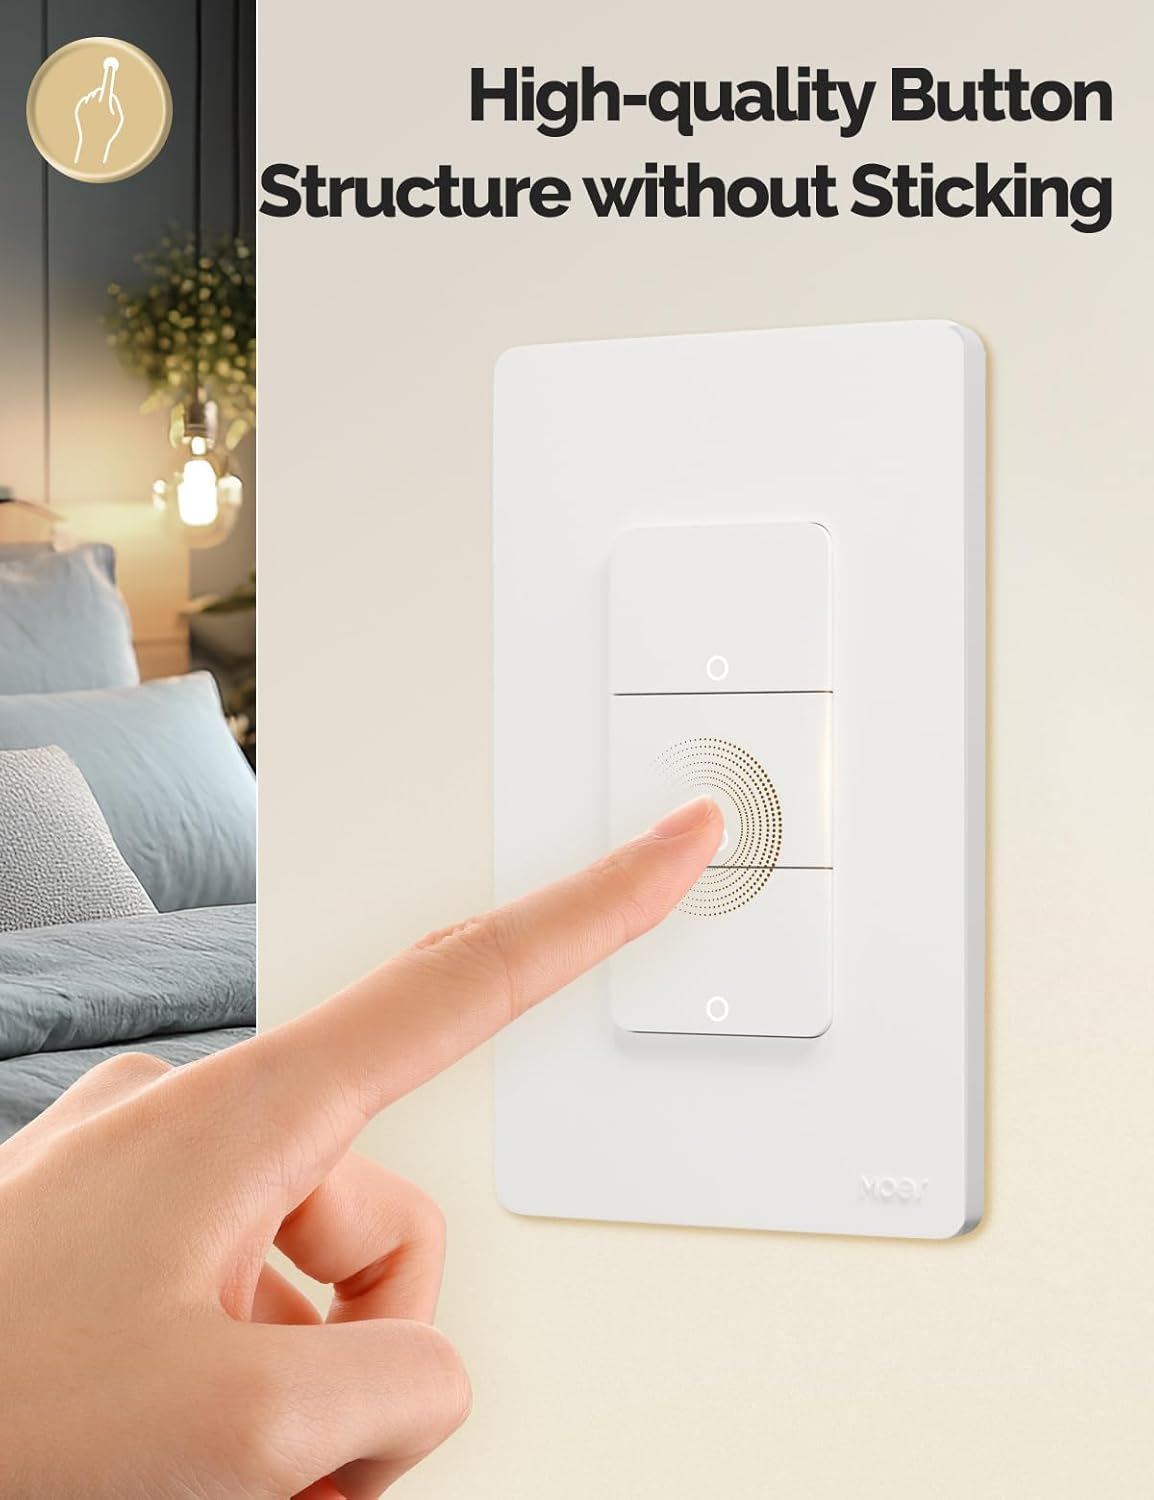
Image 4.1: Close-up of the MOES Smart Switch highlighting its high-quality button design.
4.2. App Control (Remote Control)
Once paired with the app, you can control your lights from anywhere using your smartphone.
- Open the "Smart Life" or "MOES" app.
- Select your smart switch from the device list.
- Tap the on/off icons to control your lights.

Image 4.2: Demonstrates remote control functionality of the smart switch via the mobile application.
4.3. Raddstýring
The switch is compatible with Amazon Alexa and Google Assistant for hands-free control.
- Tengja reikning: In your Alexa or Google Home app, link your "Smart Life" or "MOES" account.
- Uppgötvaðu tæki: Biddu raddaðstoðarmanninn þinn að uppgötva ný tæki.
- Raddskipanir: Use commands like "Alexa, turn on the living room light" or "Hey Google, turn off the bedroom light."

Image 4.3: Setup showing smart speakers (Alexa, Google Home) interacting with the smart switch for voice control.
4.4. Tímastillir og tímaáætlunaraðgerðir
Automate your lighting with customizable timers and schedules through the app.
- Dagskrá: Stilltu ákveðna tíma fyrir ljós til að kveikja eða slökkva á dag eða á völdum dögum.
- Niðurtalning: Set a countdown timer for lights to turn off after a set duration.
- Tímasetning hringrásar: Configure lights to cycle on and off at regular intervals.
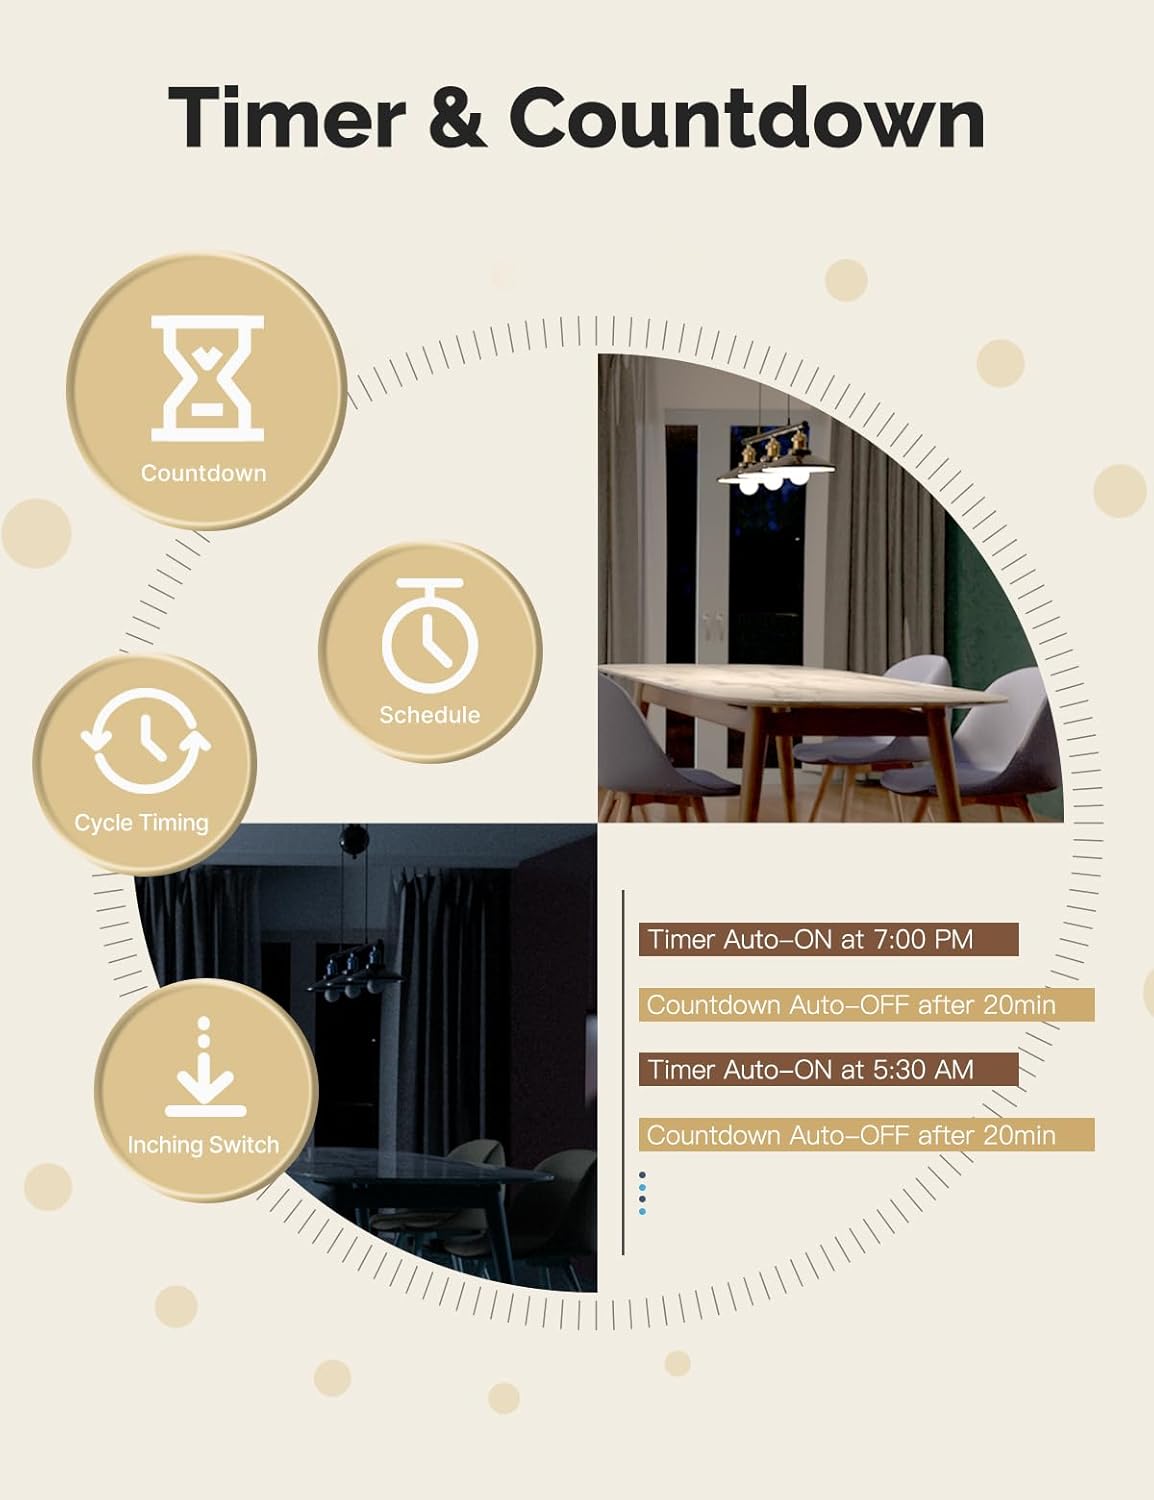
Image 4.4: Visual representation of timer and countdown settings available in the smart home application.
4.5. Indicator Light Mode
The switch features an indicator light that can be configured via the app to show ON/OFF status or switch location in the dark.

Image 4.5: Illustrates different indicator light modes, such as showing ON/OFF status or switch location.
4.6. Relay Status Settings
Configure the switch's behavior after a power outage (Power-off, Power-on, or Restart Memory) through the app settings.

Image 4.6: Screenshot of the app interface for configuring relay status settings after a power interruption.
5. Viðhald
- Clean the switch faceplate with a soft, dry cloth. Avoid abrasive cleaners or solvents.
- Regularly check for app updates to ensure optimal performance and security.
- Ensure your Wi-Fi network is stable and within range of the switch.
6. Bilanagreining
| Vandamál | Möguleg orsök | Lausn |
|---|---|---|
| Switch not responding to app/voice commands. |
|
|
| Lights flicker or do not turn off completely (no-neutral wiring). |
|
|
| Switch gets warm or burns out. |
|
|
| Difficulty with initial installation. |
|
|
7. Tæknilýsing
| Eiginleiki | Smáatriði |
|---|---|
| Vörumerki | MOES |
| Fyrirmynd | WS-US-L (1-Gang) |
| Notkunarhamur | Sjálfvirk |
| Tegund tengiliða | Venjulega opið |
| Tegund tengis | Skrúfustöðvar |
| Flugstöð | Skrúfa |
| Rás hringrásar | 2-átta |
| Gerð uppsetningar | Veggfesting |
| Hafðu samband við efni | Kopar |
| Fjöldi staða | 1 |
| Eftirlitsaðferð | Forrit, fjarstýring, snerting, rödd |
| Þráðlaus bókun | Wi-Fi 2.4 GHz |
| Voltage | 90-240V AC, 50/60Hz |
| Max. Current (per gang) | 8A |
| Total Max. Current | 8A |

Image 7.1: Detailed dimensions and technical specifications of the MOES Smart Light Switch.
8. Ábyrgð og stuðningur
MOES products are designed for reliability and performance. For warranty information, technical support, or further assistance, please visit the official MOES websíðuna eða hafðu samband við þjónustuver þeirra beint.
Þú getur fundið frekari upplýsingar og stuðningsúrræði á MOES Store on Amazon.


