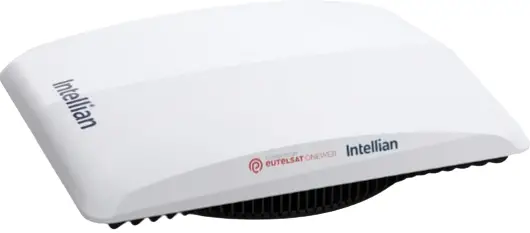
Intellian OW10HM OneWeb LEO User Terminal
Product Specifications
- Product Name: Intellian OW10HM
- Package Includes: Indoor and outdoor units
- Mount Adapter: 60mm mount post
- Tools Required: 13 mm hex wrench, Phillips screwdriver
Important information
This guide provides basic installation instructions for Intellian OW10HM. Scan the QR code for the full installation and operations guide. If you need any assistance, please contact Intellian Technical Support at support@intelliantech.com.
Unpacking system package
Follow the steps for easy and safe unpacking. The solution consists of an indoor and outdoor unit. The outdoor and indoor units are packaged separately. Mounts and mount adapters are sold and packaged separately. Ensure you have the appropriate mount and mount adapter prior to starting the installation. This system is designed to be installed by one person.
The outdoor unit package includes the following items:

The indoor unit package includes the following items:

Outdoor unit ODU installation
Choose the mount that works best for the environment. Review the instructions for the appropriate mount type from the Installation and Operations Guide which can be accessed via the QR code.
Attaching antenna to mount adapter
Intellian recommends the use of the Maritime Mount Adapter kit (OW-xxxx) for proper installation. Refer to the Installation and Operations Guide for more details.
The Maritime mount adapter consists of …..

- Place the mount adapter onto the 60mm mount post. Loosen the bolts if necessary.
- Using a 13 mm. hex wrench, tighten the three bolts on mount adapter onto the mount post.
Leveling the mount adapter - Rotate the mount adapter until it is parallel to the ground using the built-in leveling tool. Verify that the bubble is aligned within the circle guide.
- Tighten the mount adapter to the mount post.
Attaching the antenna - Take out the four screws on the bottom of the antenna and place them to the side.
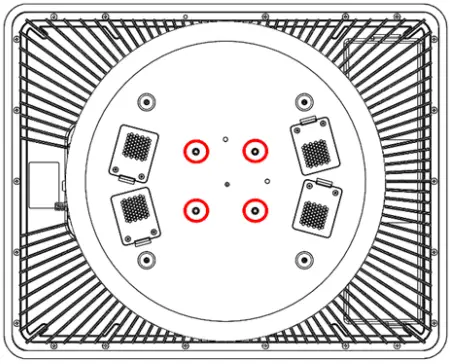
- Move the antenna above the mount adapter lifting it by the handles and carefully placing the antenna on the mount adapter.
- Align the holes in the antenna with the holes on the mount adapter. Fasten the four screws with Phillips screwdriver.
In the case a pedestal mount is used for the installation, custom mount adapter plates may be developed utilizing the Bolt Pattern included in the package. Additionally, mount adapters can be purchased from Seaview. Part # ADA R1 is recommend.
The threaded standoffs (x4) included in the antenna package must be used to ensure adequate air flow.
The installation steps are as follows:- Install the standoffs to the bottom of the antenna using a 13mm wrench or socket.
- Pre-drill the 4x through holes on the ADA R1 on bolt pattern #2 using a 6mm metal drill bit.
- Mount the adapter per the manufacturer’s instructions.
- Place the antenna and standoffs onto the mount adapter ensuring all holes are aligned.
- Install all 4x M6 bolts up through the base of the mount adapter into the antenna’s standoffs ensuring they are tightened.
- The RF Hazard sticker may be applied… where
Connecting cable to antenna
Make sure all of the following is verified before installing system cables.
- All cables with connectors need to be fully secured and protected from physical damage.
- Do not acutely bend any cables during installation.
- Using waterproof and UV protective tape, bind all the connectors located outside.
- Connect the coaxial cable to the F-Connector on the antenna.
- Ensure the cable is secured to the pole.
- Refer to the Operations and Installation Guide for more details on supported cable types and lengths.
- Ensure the jumper cable is securely attached to the SMA connectors. Do not remove unless the use of an external GNSS is required.
Grounding the antenna
Direct grounding for the antenna is very important for safety. Your antenna hardware must be protected from lightning strikes or static electricity by grounding. When establishing your grounding system, it must comply with the safety standards in your country.
Installing the CNX-WIFI
- The CNX-WIFI should be in a clean, dry area where the it can be placed vertically.
- Ensure there is adequate space around the CNX-WIFI for cooling.
- Connect the coaxial cable to the F-connector on the CNX-WIFI
- Connect the power supply adapter to the CNX-WIFI and plug into AC power outlet.
The CNX-WIFI will take about less than 3 minutes to power on. The WAN LED will turn on when the CNX-WIFI has successfully powered up the outdoor unit and is ready to proceed. The blue light may be solid or blinking.
Enabling Service
The OW10HM is now ready to be commissioned. The commissioning process may be done via the embedded Local User Interface (LUI) or the Intellian Mobile App. Intellian’s Mobile App is available HERE.
Ensure you are connected to the CNX-WIFI either via the Management port utilizing the ethernet cable included in the CNX-WIFI package or via the Management SSID (xxxx). Access to the LUI requires you to connect to https://192.168.100.3.
Select Install from the home screen navigation bar. The Install Wizard will go through the steps of setup for the antenna system commissioning. We highly recommend using this wizard to complete your installation and commissioning of the system.

- Start Over button: Brings you back to the first step of the installation.
- Back button: Steps one step back in the installation.
- Next button: Advances to the next step in the installation.

- If a given state is required, the Next button is disabled, and the installation cannot proceed until the current step has been completed.
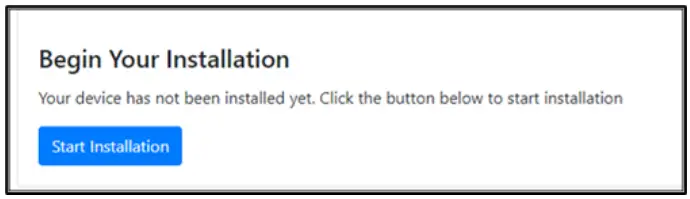
- The first page of the installation process is a splash screen that states that the UT has not yet been installed. To proceed with the installation to the next step, click on Start Installation or Next.
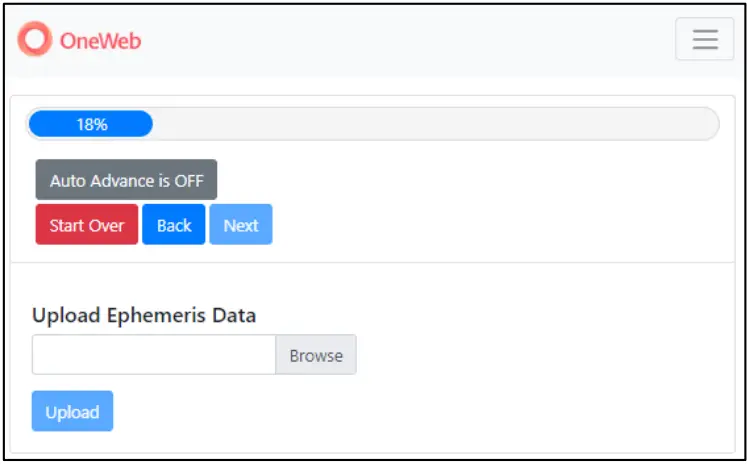
- A progress bar will display until complete. No further action should be required.
- To obtain the latest ephemeris data, proceed to https://ephemeris.oneweb.net/ltef/ and download the file to your computer.
From the Install menu, select the file and select Upload.
If you used the mobile app to complete the installation, a message of “Online” will display. Another way to verify that the system is online is to access any website.
Certifications

FAQ
Q: Can custom-mount adapter plates be used for installation?
A: Yes, if a pedestal mount is used, custom mount adapter plates can be developed utilizing the Bolt Pattern included in the package. Additionally, Seaview’s mount adapters (Part # ADA R1) are recommended.
Q: What tools are required for installation?
A: You will need a 13 mm hex wrench and a Phillips screwdriver for tightening bolts and screws during installation.
Documents / Resources
 |
Intellian OW10HM OneWeb LEO User Terminal [pdf] Installation Guide XXZ-OW10HX, XXZOW10HX, ow10hx, OW10HM OneWeb LEO User Terminal, OW10HM, OneWeb LEO User Terminal, LEO User Terminal, User Terminal |