Okwu mmalite
This manual provides detailed instructions for the installation, operation, and maintenance of your COUGAR OmnyX Mid-Tower ATX Panoramic PC Case. Please read this manual thoroughly before beginning assembly to ensure proper setup and optimal performance. The OmnyX case is designed for maximum airflow and features a panoramic tempered glass design, pre-installed 160mm fans, and advanced cable management solutions.
Atụmatụ igodo
- Nhazi Symmetrical: Allows for omnidirectional placement, offering flexibility in setup.
- Quad 160mm PWM Fans: Includes four pre-installed 160mm PWM fans for efficient cooling and flexible intake modes.
- Zero-Visibility Cable Management: Integrated base compartment and quick-release covers for organized cable routing.
- Sliding IO Module: Allows for relocation of the I/O module and expanded port array.
- Vertical GPU Alignment: Natural alignment of vertically mounted GPUs reduces the risk of damage from displacement.
- GPU Compatibility: Nabata ogologo GPU kacha elu nke 380mm.
- Reverse Connector Motherboard Compatibility: Designed to support motherboards with reverse connectors.
- Nlekọta dị mfe: Features magnetic dust filter panels and quick-release cable management compartment covers.
Ngwaahịa gafereview
Familiarize yourself with the various components and design aspects of your COUGAR OmnyX PC case.
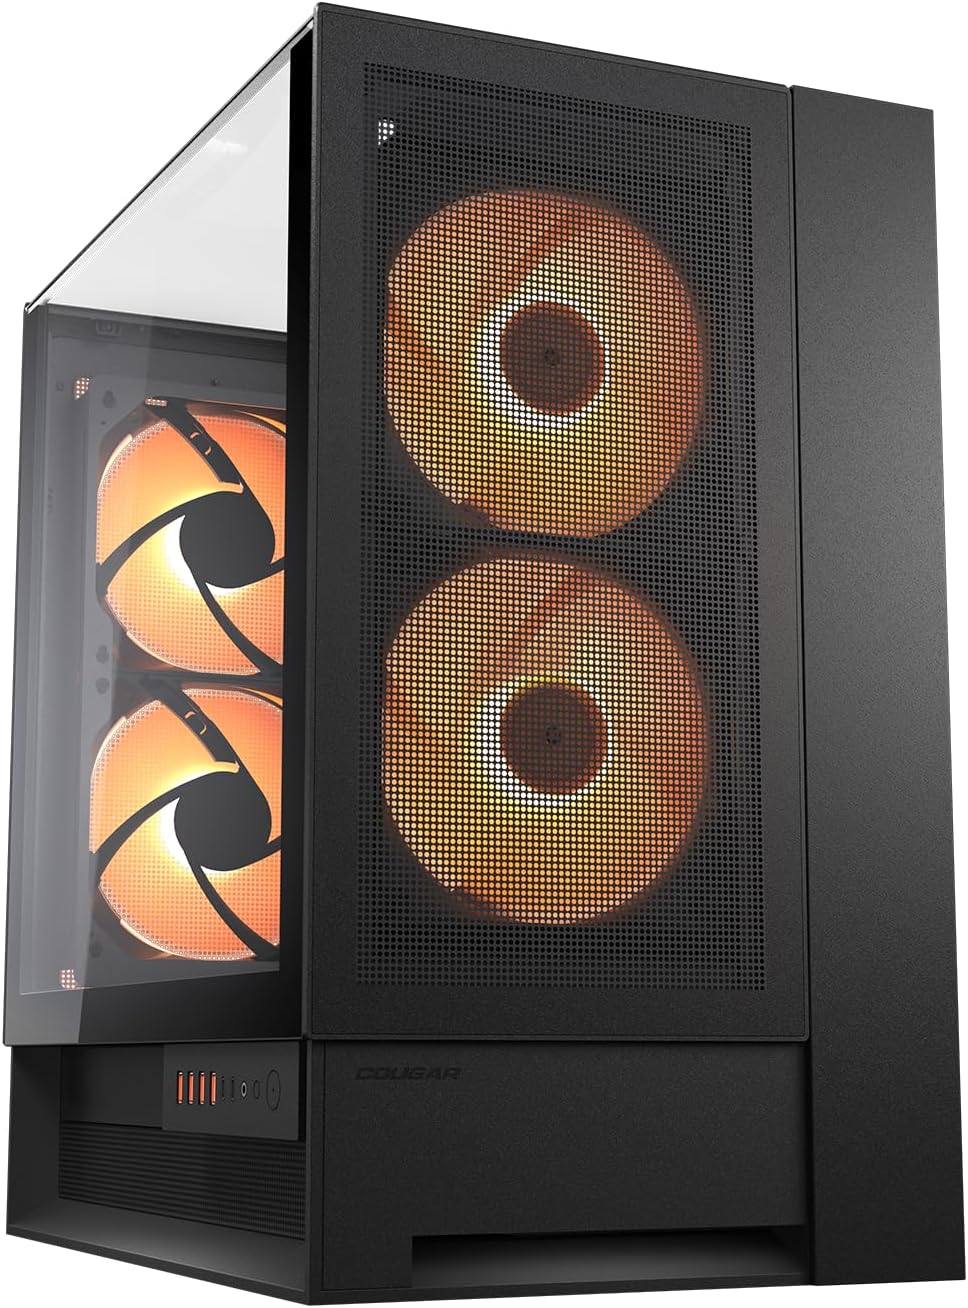
Foto 1: N'ihu na akụkụ view of the COUGAR OmnyX PC case, showcasing the panoramic tempered glass and pre-installed 160mm fans.

Foto 2: Internal layout of the COUGAR OmnyX PC case, highlighting the spacious motherboard tray and component mounting areas.

Foto 3: Gbawara view of the COUGAR OmnyX PC case, illustrating the modular design and removable panels for easy assembly.

Foto 4: agbasasịla view of the COUGAR OmnyX PC case, showing the various components and access points for installation and maintenance.
Ntọala na Ntinye Akụkụ
Follow these general steps for installing components into your COUGAR OmnyX PC case. Always refer to your individual component manuals for specific installation details.
- Kwadebe Okwu ahụ: Carefully remove the tempered glass panels and any other removable panels to gain access to the interior.
- Install the Power Supply (PSU): Mount your power supply in the designated compartment at the bottom of the case. Utilize the integrated base compartment for routing PSU cables.
- Install the Motherboard: Secure your ATX motherboard to the standoffs on the motherboard tray. The OmnyX supports reverse connector motherboards for alternative cable routing.
- Wụnye draịva Nchekwa: Mount your SSDs and HDDs in the available drive bays.
- Install the Graphics Card (GPU): Insert your graphics card into the appropriate PCIe slot. The case supports vertical GPU mounting, which naturally aligns the GPU with gravity.
- Jikọọ eriri: Route all power and data cables through the cable management channels. The zero-visibility cable management system helps keep cables tidy and out of sight.
- Jikọọ I/O n'ihu: Connect the front panel connectors (USB, audio, power button) to your motherboard. The sliding rail system allows for flexible positioning of the I/O module.
- Gbakọtaghachi panel ndị ahụ: Once all components are installed and cables are managed, reattach the tempered glass panels and other removable covers.
Ọrụ
The COUGAR OmnyX PC case is designed for straightforward operation once components are installed.
- Gbanyụọ/ Gbanyụọ: Use the power button located on the front I/O panel to turn your system on or off.
- ọdụ ụgbọ mmiri USB: Utilize the USB ports on the front I/O panel for connecting peripherals and external devices.
- Jacks ọdịyo: Connect your headphones or microphone to the dedicated audio jacks on the front I/O panel.
- Njikwa Fans: The pre-installed 160mm PWM fans can be controlled via your motherboard's fan headers and software, allowing you to adjust fan speeds for optimal cooling and noise levels.
Nlekọta
Regular maintenance ensures the longevity and optimal performance of your PC case.
- Ihe nzacha uzuzu: The OmnyX case features magnetic dust filter panels. Regularly remove and clean these filters to prevent dust buildup and maintain efficient airflow.
- Ime nhicha: Periodically open the case and use compressed air to remove dust from internal components and fan blades. Ensure the system is powered off and unplugged before cleaning.
- Nchacha mpụta: Wipe down the exterior surfaces, including the tempered glass panels, with a soft, damp cloth. Avoid abrasive cleaners that could scratch the surfaces.
Nchọpụta nsogbu
If you encounter issues with your PC case, consider the following common solutions:
- Enweghị ike: Ensure all power cables are securely connected to the power supply, motherboard, and components. Verify the power supply switch is in the 'On' position.
- Ndị Fans anaghị agba ọsọ: Check that fan cables are correctly connected to the motherboard or fan controller. Ensure fan control software settings are configured properly.
- ekpo oke ọkụ: Verify that all fans are operating correctly and are not obstructed. Clean dust filters and ensure proper airflow within the case. Check component temperatures using monitoring software.
- Okwu dabara na akụrụngwa: Double-check that all components are installed according to their respective manuals and the case's specifications (e.g., GPU length, radiator size).
- Front I/O Not Working: Ensure the front panel connectors are correctly plugged into the motherboard headers.
Nkọwapụta
| Njirimara | Uru |
|---|---|
| Ụdị | COUGAR |
| Usoro | OmnyX |
| Nọmba nlereanya | CGR-2WA3W-RGB |
| Ụdị ikpe | Mid Tower |
| Ndakọrịta Motherboard | ATX |
| Ibu Ibu | 12.6 Kilogram (27.7 pound) |
| Akụkụ ngwaahịa (LxWxH) | 18.5 x 11.81 x 20.47 sentimita asatọ |
| Agba | Nwa |
| Ihe onwunwe | Alloy Steel |
| Ụdị Nkwanye Ike | Ugwu ala |
| Usoro jụrụ oyi | Ikuku |
| Eji akwadoro maka ngwaahịa | Ịgba egwu |
Akwụkwọ ikike na nkwado
For warranty information, technical support, or further assistance, please visit the official COUGAR websaịtị ma ọ bụ kpọtụrụ ndị ahịa ha ọrụ.
- Ndị ọchịchị Websaịtị: https://cougargaming.com/
- Kpọtụrụ ọrụ: https://cougargaming.com/contact2/


