User Manual

Foreword
Dear user: Thank you for choosing our wireless camera microphone. In order to better understand the use of this product, it is recommended that you read this manual carefully before use.
Features
- Original lightning connector, no more worries about IOS ecosystem, and safe to use.
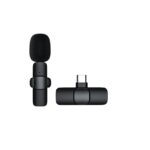
- Three-in-one universal receiver, lavalier design, compact and convenient. Compatible with cameras and mobile phones and others.
- 2.4G wireless transmission technology, the stable transmission distance can be up to 120M.
- Real-time monitoring, free switching of three volume levels.
- Three noise reduction modes can be switched freely, to meet accurate pickup in any complex environment.
- Support TF card local audio storage, no more worry about file loss.
- The microphone can be used as a recording pen alone, and the recording can be saved synchronously anytime and anywhere in any environment.
- Microphone and receiver with 3.5 mm cable which is used for the camera can last 12 hours continuous interviews.
- Equipped with a charging case, the transmitter and receiver are more convenient to store and charge; interviews.
- The charging case has a large battery of 1000mAh that can be recharged, which is the first choice for travel and make a Live.
Applications
- Live, Vlog, Video-shooting, Interview, and others.
Packing List
Charging case(one mic and one receiver)………………….. 1 PCS
Microphone transmitter……………………. 1 PCS
3 in 1 Receiver……………………………….. 1 PCS
Audio cable……………………………………. 1 PCS
Charging cable………………………………. 1 PCS
Wind-proof…………………………………. 1 PCS
User manual………………………………… 1 PCS
Specifications
Charging case
| Input voltage: DC 4.8V-5.4V Charging time: 90 mins Weight: about 85.6g |
Battery capacity: 1000 mAh Recharge times: recharge 3 times for microphone and receiver Charging case size: 47.5*13.47*7.95mm |
Microphone specification
| Frequency: 2.4GHz Latency: 25 ms Frequency response range: 20-20KHz DC: 4.8-5.4V Sensitivity: -26 dBFS Microphone size: 47.1*15.04*15.61mm |
Battery: 230mAh Working time: 12 hrs Charging time: about 80 mins Weight: about 14g S/N Ratio: 64 dB |
Receiver specification
| Frequency: 2.4GHz Latency: 25 ms Frequency response range: 20-20KHz DC: 4.8-5.4V Microphone size: 47.5*13.47*7.95mm |
Battery: 230mAh Working time: 12 hrs Charging time: about 80 mins Weight: about 18.7g |
Functions

| 1. Charging case indicator light 2. Type-C charging port 3. Lightning receiver 4.3.5 mm adapter cable port 5. Type-C receiver 6. Power /reset button |
7. Volume/noise key 8. Indicator light on the receiver 9.3.5mm monitoring port 10. TF memory card slot 11. Mute key 12. Indicator light on the microphone |
Microphone transmitter functions
| No | State | Operation | Light |
| 1 | Power on | 1.0pen the charging case and take out the microphone 2. Click the power button |
Greenlight for one second |
| 2 | Power off | 1. Put it in the charging case and close the cover 2. The press power button for 3 secs | / |
| 3 | Search for pairing | No pairing object | Greenlight flashes slowly |
| 4 | Paired | Connection succeeded | Greenlight is always on |
| 5 | Clear pairing/re-pairing | Three-click the power button within 10 secs after powering on | Red and green light flashes quickly |
| 6 | Mute/pick-up | Click the power button to switch mute/pick-up Mute: stop recording Pick-up: start recording |
I |
| Mute: the blue light is always on | |||
| Pick-up: Greenlight is always on | |||
| 7 | Charging | Put it in the charging case and close the cover | Charging: Blue light flashes |
| Fully charged: Blue light off | |||
| 8 | Low power | Below 3.3 V current (auto power off within 15 mins) | Red light flashes quickly |
| 9 | Automatic power-off | Below 3.3V or no connection for over 10 minutes | Light off |
| 10 | TF card automatic Recording | After the connection is successful, it will automatically enter the TF card recording mode. | Greenlight is always on |
| 11 | Use the microphone as a recorder alone (no pair with receiver) |
Click the power button to switch to start recording / stop recording (autosave the file) | Blue light flashes slowly when recording and green light flashes slowly when stopping recording |
| 12 | when the microphone has no TF card | Recording fails | Blue light is always on |
| 13 | The microphone has a TF card but the TF card is damaged | Recording fails | Blue light is always on |
Receiver functions
| No. | State | Operation | Light |
| 1 | Power on | 1.0pen the charging case and take out the receiver 2. Click the power button |
Greenlight for one second |
| 2 | Power off | 1. Put it in the charging case and close the cover 2. Press the power button for 3 secs | / |
| 3 | Search for pairing | No pairing object | Greenlight flashes slowly |
| 4 | Paired | Connection succeeded | Greenlight is always on |
| 5 | Clear pairing/re-pairing | Three-click the power button within 10 secs after powering on | Red and green light flashes quickly |
| 6 | Mute/pick-up | Click the power button to switch mute/pick-up Mute: stop recording Pick-up: start recording |
Mute: the blue light is always on |
| Pick-up: Greenlight is always on | |||
| 7 | Charging | Put it in the charging case and close the cover | Charging: green light flashes Fully charged: green light off |
| 8 | Low power | Below 3.3 V current (auto power off within 15 mins) | Red light flashes quickly |
| 9 | Automatic power-off | Below 3.3V or no connection for over 10 minutes | Light off |
| 10 | Volume level switch: | Click the volume key | The three levels are cycled in turn |
| The prompt tone are as follows: “Beep” (Level 1) “Beep” “Beep’ (Level 2) “Beep” “Beep’ “Beep” (Level 3) |
|||
| The indicator lights are as follows: Red light flashes once (level 1) Red light flashes twice (level 2) Red light flashes three times (level 3) |
|||
| 11 | Noise reduction ‘eve switch | Double click the noise key | The three levels are cycled in turn |
| The indicator lights are as follows: Greenlight flashes once (level 1) Greenlight flashes twice ( level 2) Greenlight flashes three times (level 3) |
Charging case specification
| No. | State | Operation | Light |
| 1 | Charge the case | Operation A | Charging: red light is always on |
| Charging with Type-C cable | Fully charged: the light is off | ||
| 2 | Battery level indicator of charging case | Open the case/indicator light:100%-75% | Greenlight is on for 10 secs |
| Open the case/indicator light:74%-36% | Blue light is on for 10 secs | ||
| Open the case/indicator light:35%-13% | Red light flashes | ||
| 3 | Charge the transmitter | Put the transmitter in the case and close the cover | Charging: the blue light flashes |
| Fully charged: blue light off | |||
| 4 | Charge the receiver | Put the receiver in the case and close the cover | Charging: Greenlight flashes |
| Fully charged: Greenlight is off | |||
| 5 | Charge multiple devices | Put the transmitter and receiver | Charging: Green and blue light flashes alternately in turn |
| Fully charged: lights is off |
Note: The TF card will automatically save a new recording file every time. When the capacity of the memory card is full, the oldest recording file will be automatically deleted.
Connection instruction
After taking out the device, the indicator lights of the microphones on the receiver and transmitter are always green, it is paired successfully. (See as below picture)

Mobile phone connection instruction
Plug the Lightning receiver/Type-C receiver into the Lightning port/Type-C port of the mobile phone, and the green light of the receiver is always on, and the microphone can be used to pick up sound.

Camera connection instructions
Plug the 3.5mm cable into the receiver and the 3.5mm hole of the camera respectively, the green light of the receiver is always on, and the microphone can be used to pick up sound.

Windows Notebook Operation
Turn on the receiver and connect the TPYE-C port to the TPYE-C jack of the computer, or insert the 3.5 adapter cable to the audio input jack, click the “Speaker” icon at the bottom right of the computer, and then open the sound settings, “Sound” setting option and then click the bottom of the page to select “Voice Input” option, select the corresponding “Microphone” option to confirm.
Desktop Windows operation
Turn on the receiver, plug in the 3.5mm adapter cable to the audio input port of the host computer, click the “Speaker” icon at the bottom right of the computer, and then open the sound settings, the “Sound” setting option, and then click the “Sound Input” option at the bottom of the page, and select the corresponding “Microphone” option to confirm.
MacBook operation
Turn on the receiver and connect the TPYE-C port to the TPYE-C socket of the MacBook. On the MacBook, select the “Settings” option, then click the “Sound” , then select the “Sound output” option, click to select “Speaker”, and then confirm; then select the “Sound input” option, click to select “Microphone -Wireless microphone” , Click Confirm to use.
Turn on OTG (only for the Android system)
Take the OPPO A72 model as an example

Instructions for installing the receiver to the camera
Before installing to the camera, use the receiver’s back clip to clip on the camera shoe and then fix it.

Wool cover installation instruction
Align the plastic buckle of the wool cover with the groove of the transmitter, insert it, and then rotate 90° clockwise to fix it.

Label Meanings
 According to the test results obtained based on RL2004/108/EG (Electromagnetic Compatibility Directive) and RL2006/95/EG (Low Voltage Directive), this product complies with the limits specified in the European Community EMC (Electromagnetic Compatibility) Directive, integration of relevant laws from its member states.
![]() Changes or modifications not expressly approved by the complying party may cause the user to lose permission to operate the device. This device complies with part 15 of the FCC Rules. Operation is subject to the following two conditions: (1) This device may not cause harmful interference. (2) This device must accept any interference received, including interference that may cause undesired operation.
Changes or modifications not expressly approved by the complying party may cause the user to lose permission to operate the device. This device complies with part 15 of the FCC Rules. Operation is subject to the following two conditions: (1) This device may not cause harmful interference. (2) This device must accept any interference received, including interference that may cause undesired operation.
 This symbol indicates that, according to the WEEE (Waste of Electrical and Electronic. Equipment)Directive(2012/19/EU)and national laws, this type of waste should not be discarded along with your household waste, as it contains potentially hazardous substances that may pose a negative impact on the environment and human health. It should be handed over to an authorized WEEE collection facility for recovery and recycling. Herewith you will be helping effective utilization of natural resources. For more information on the disposal of WEEE products, please contact your local municipality, waste management bureau, or household waste disposal service.
Safety Instructions
To avoid electric shock, overheat, fire, radiation, explosion, mechanical risk and injury or property loss due to improper use, please read and observe the following items before use.
- Please check if the power of the connected equipment matches that of this product before operation. Adjust the volume to the proper level during operation. Do not operate at over-power or high-volume level for an extended time to avoid product malfunction or hearing impairment.
- If there is any abnormality during use (e.g., smoke, strange odor), please kill the power switch and unplug it from the power source, then send the product to the local dealer for repair.
- Keep this product and its accessories in a dry and ventilated area. Do not store in a humid or dusty area for an extended time. Keep away from fire, rain, liquid intrusion, bumping, throwing, vibrating,or blocking any ventilation openings, to prevent malfunction.
- Please abide by safety rules during operation. Do not use the product in places prohibited by laws or regulations to avoid accidents.
- Do not disassemble or repair the product by yourself to avoid injury. If you have any questions or require any services, please contact our local dealer.
Note: This equipment has been tested and found to comply with the limits for a Class B digital device, pursuant to Part 15 of the FCC Rules. These limits are designed to provide reasonable protection against harmful interference in a residential installation. This equipment generates, uses, and can radiate radio frequency energy, and if not installed and used in accordance with the instructions, may cause harmful interference to radio communications. However, there is no guarantee that interference will not occur in a particular installation. If this equipment does cause harmful interference to radio or television reception, which can be determined by turning the equipment off and on, the user is encouraged to try to correct the interference by one or more of the following measures:
Reorient or relocate the receiving antenna.
Increase the separation between the equipment and receiver.
Connect the equipment into an outlet on a circuit different from that to which the receiver is connected.
Consult the dealer or an experienced radio/TV technician for help.
Documents / Resources
 |
Hongkong Vimai Technology AP021C Wireless Microphone [pdf] User Manual AP021C, 2AVLI-AP021C, 2AVLIAP021C, AP021C Wireless Microphone, Wireless Microphone, Microphone |