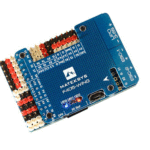
FX-405 Flight Controller Instruction Manual
Heewing FX-405 Flight Controller is a F405 based flight controller that is small but powerful and capable of VTOL flying configuration.
Specification,
– STM32F405 Microcontroller
– ICM42688 IMU
– SLP06 barometer
– Dataflash (V2 board only)
– MAX7456 OSD
– 4 UARTs
– 9 PWM outputs
– FC Input Voltage : 5V
– PMU Input Voltage : 7.4V to 22.2V
– FC Dimension : 44.3mm (L) x 34.4mm (W) x 13.7mm (H)
– FC Weight : 14.2gram (without PMU & wires

- PMU
- FX-405
- GPS
- PMU to FC Cable
- USB Adapter
- Other Cables for connecting VTX, Camera & etc
1. Connecting Receiver
i. connect your preferred receiver to the RC-In Port on the flight controller
ii. Supported Receiver Types
a. SBUS, IBUS, PPM Receiver
– factory parameter is already pre-configured for this type of receiver and the flight controller will auto recognise the type of signal.
BRD_ALT_Config = 0
SERIAL6_PROTOCOL = -1
b. ELRS & CRSF Receiver
– please set the parameter to the values below, “write params” to the flight controller then reboot.
BRD_ALT_Config = 1
SERIAL6_PROTOCOL = 23
For SBUS Receiver For ELRS/CRSF Receiver


2. Setting Failsafe
i. it is important to set your receiver failsafe setting accordingly. Please refer to your receiver manual and verify that the intended failsafe setting is correct before flight ie flight controller going into RTL mode when the radio is off/signal lost.
*have propeller removed when testing this
ii. in the case of VTOL enabled FC, the plane will go into fixed wing mode and transition into VTOL mode during landing at the home position.
3. Starting the Motors
i. the flight controller is set to disarmed the motors during every reboot. Please hold full rudder Right for about 4 seconds to disarm/unlock the motors.
ii. as ARMING_CHECK=0 is set to zero, there are no arming conditions checked by the flight controller before the motors are disarmed so please ensure that you have GPS Home locked and sensors are all ready.
To disarm or stop the motors spinning
i. hold full rudder left for about 4 seconds
Note :
– motors will go into idle mode/spinning slowly when it’s disarmed so please takeoff the propellers when testing this for the first time.
4. Serial Interface
i. Serial interface 1 : default Mavlink 1
ii. Serial interface 2 : default Mavlink 2
5. IIC
Default : ASP5033
6. Setting Up for Digital FPV
i. For new Avatar / SharkByte / DJI O3 (MSP Display Port)
Method 1 – using UART1 or UART2
a. Set the below parameters,
– OSD_TYPE = 3
– SERIAL2_PROTOCOL = 33 (or SERIAL1_PROTOCOL = 33)
– MSP_OPTIONS = 0 (or you may use 4 or 5 if there’s font incompatibility)
b. connect your Air Unit RX & TX to the TX & RX on the UART1 or UART2
c. power your Air Unit from the 9V from the VTX or CAM port on the flight controller
To enable Auto Recording after arming the motors
Go to your DJI Goggle Settings > Recording Settings > Takeoff REC, set to ON
7. MSP OSD Protocol
for the old DJI Google V1 & V2
i. Use UART1 or UART2
Set the below parameters,
– OSD_TYPE = 3
– SERIAL2_PROTOCOL = 33 (or SERIAL1…)
– MSP_OPTIONS = 0
ii. Have RX & TX connected to either UART1 or UART2 and power it from the 9V of VTX or CAM port on the FC
iii. DJI OSD must be enabled on your goggles. Go to Settings > Display > Custom OSD
Optional : You may set OSD_TYPE to 1 to output both analog OSD and MSP OSD.
8. First Flight Preparation
Step 1 – Create new model in your Radio, set up a 3 position switch on your channel 6 for flight modes
Step 2 : Connect your flight controller to Mission Planner, perform Accelerometer Calibration and Radio Calibration
Step 3 : Before your first flight, ensure there is GPS HOME lock and control surfaces are moving at the correct directions
Step 4 : Switch flight mode to QLoiter, full Right Rudder for about 4 seconds to Arm the motors, the motors will start to spin slowly, increase the throttle gradually to take off
Step 5 : Push your sticks to confirm Pitch, Roll and Rudder are reacting to the correct direction
Step 6 : Now you may raise your altitude and switch to FBWA mode for forward flying
9. Flight Controller Pin-out

II2C  USB
USB  Uart1
Uart1 
VTX  CAM
CAM  Uart2
Uart2 
PMU  GPS
GPS 
II2C : Blank
VTX : Analog VTX
USB : to PC
CAM : to Analog Camera
UART 1 : Digital VTX
UART 2 : Digital VTX

S1 Aileron servo(Y cable)
S2 Elevator servo
S3 UBEC
S4 Blank
S5 Left tilt servo
S6 Right tilt servo
S7 Left motor
S8 Right motor
S9 Rear motor
RC-IN Receiver
*Above connection is for T1 Ranger VTOL. You may change it based on your own configuration on other planes
10. PMU Connection

11. Master Wiring

- S1 Aileron servo(Y cable)
S2 Elevator servo
S3 UBEC
S4 Blank
S5 Left tilt servo
S6 Right tilt servo
S7 Left motor
S8 Right motor
S9 Rear motor
RC-IN Receiver - Right motor
- Right aileron servo
- Right tilt servo
- Left motor
- Left aileron servo
- Left tilt servo
Mission Planner Configuration
i. Visit www.heewing.com for the latest instruction manual and build video.
ii. Download the latest Mission Planner from the link below. https://ardupilot.org/planner/docs/mission-planner-installation.html
iii. Open Mission Planner after it has been installed. Connect your flight controller to your PC via the USB adapter provided and your own USB C cable.
Choose the correct Com Port from the dropdown menu on the top left and click “Connect”.

iv. If you are using SBUS, IBUS or PPM, your receiver signal is automatically recognised by the flight controller. No action is needed in this step.
If you are using ELRS or CRSF, go to CONFIG > Full Parameter List > please configure the following parameters,
BRD_ALT_Config = change the value to 1
SERIAL6_PROTOCOL = change the value 23

![]() Then reboot your flight controller.
Then reboot your flight controller.
*the receiver is not powered via USB, you need to connect your flight battery
v. On your preferred Radio, set a 3 position switch to Channel 6.
vi. Go to Setup > Mandatory Hardware > Radio Calibration > Click Calibrate Radio and follow the step by step instructions shown on the screen

vii. Then go to Flight Modes
Toggle your 3 position switch we have set earlier. You should see the flight modes in the screenshot below changes between QLOITER(FM1), FBWA(FM4) & QRTL(FM6)

vii. With the propellers off the motors, you may now power up your VTOL plane and perform the preflight checks such as your control surface direction, VTOL controls, flight modes and etc.
WARNING
Although extensive testing and tuning has been done, the provided VTOL parameters are for your reference only. Heewing RC does not take responsibility for any issue arised from this. If you know what you are doing, you may adjust it accordingly to your flying environment or requirement.
Respect the rules of your local flying site or flying club. Choose an appropriate flying site, vast open space and far away from people and property.
Ensure that everything has been setup correctly before flying. There are many things that is out of our control and you do not hold Heewing RC for any liabilities when using our products.
Documents / Resources
 |
Heewing FX-405 Flight Controller with GPS and PMU [pdf] Instruction Manual FX-405 Flight Controller with GPS and PMU, FX-405, Flight Controller with GPS and PMU, Controller with GPS and PMU, GPS and PMU |