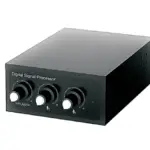
HALL TECHNOLOGIES HT-OSIRIS-DSP1 Digital Signal Processor User Manual

Introduction
OVERVIEW
In the ever-evolving landscape of virtual communication, clear and immersive audio is paramount to successful collaboration. Say hello to the HT-OSIRIS-DSP1, your ultimate solution for achieving exceptional audio quality in online meetings and conferences. With its innovative features and seamless integration, this digital signal processor is here to revolutionise the way you communicate.
The HT-OSIRIS-DSP1 isn’t just a game-changer for professional meetings; it’s also revolutionising the world of education. As distance education becomes increasingly essential, our product steps up to provide unparalleled audio quality and safety features, ensuring seamless learning experiences for both students and teachers.
Safety is of paramount importance in any learning environment. The HT-COMALERT wireless microphone, a complementary addition to the HT-OSIRIS-DSP1 system, isn’t just a microphone – it’s a lifeline. For educators and students alike, the S.O.S. feature takes center stage, offering a quick and reliable way to summon assistance in case of emergencies. Whether it’s a medical situation, security concern, or any unforeseen event, the S.O.S. functionality provides peace of mind, making educational spaces more secure than ever before.
To complete the transformation, the HT-SATELLITE-CM ceiling microphones are the perfect addition for classroom setups. By effortlessly capturing the voices of both teachers and students, these microphones enhance interactivity and engagement, creating an immersive educational experience that bridges physical and virtual worlds.
FEATURES
- Cutting-edge digital signal processing engine that effectively routes and mixes audio inputs, ensuring your audio is crisp, clear, and perfectly balanced, enhancing the overall meeting experience.
- Allows you to route or mix audio inputs to both the line output and USB output individually, granting you greater control over your audio setup.
- Simple plug-and-play Universal Communication Compatibility (UCC) technology, seamlessly connecting to popular conferencing platforms like Google Meet, Microsoft Teams, Zoom, and more. Effortlessly join meetings without the hassle of complex configurations.
- Includes Acoustic Echo Cancellation (AEC), Automatic Gain Control (AGC), and Adaptive Noise Suppression (ANS) technologies, ensuring that your voice remains crystal clear, free from echoes, background noise, and volume imbalances.
- Supports audio ducking processing, ensuring the speaker is always heard over background sound, loud and clear.
- The optional HT-COMALERT wireless microphone not only provides you with exceptional voice lift, ensuring your voice reaches every corner of the room, but also doubles as an essential safety feature with the ability to trigger S.O.S. alerts instantly, enhancing security and peace of mind.
- The optional HT-SATELLITE-CM ceiling microphones offer superior audio pickup, ensuring that every participant’s voice is heard loud and clear.
- Provides flexible control options using Web UI and API commands.
Package Contents
- 1 x HT-OSIRIS-DSP1 Digital Signal Processor
- 1 x DC 12V Power Adapter (with US, UK, EU & AU pins)
- 1 x 3-Pin Phoenix Male Connector
- 2 x 2-Pin Phoenix Male Connectors
- 4 x Mounting Brackets
- 4 x Mounting Screws
Panel Description

| ID | Name | Description |
| 1 | RESET | Use a pointed stylus to press and hold for at least 5 seconds to reset the device to factory defaults |
| 2 | STATUS |
|
| 3 | 12V | Connect to the DC 12V power adapter |
| 4 | CONTROL | Connect to a LAN for Web UI and Telnet Control |
| 5 | CEILING MIC | Connect to one or multiple cascading ceiling microphones for capturing sound and charging microphones. NOTE: The device allows up to four microphones to cascade together. |
| 6 | HOST | USB Type-B port connection to the PC |
| 7 | AEC REF | Connect to the PC’s 3.5mm headphone output for receiving AEC reference signal |
| 8 | AEC OUT | Connect to the PC’s 3.5mm microphone input for transmitting the sound that subtracts a filtered version of the reference signal from the wireless microphone signal |
| 9 | WL IN | 3.5mm input for connection to wireless microphone. The USB Type-A port is used to charge the microphone with 5V/1.25A (if needed) |
| 10 | WIRELESS RECEIVER | USB Type-C port for audio connection to the HT-COMALERT-WR with 5V/1.5A charging |
| 11 | RS232 | Connect to a RS232 device for bidirectional serial communication |
| 12 | ALARM IN / OUT | Ports for signals from/to a third-party control system. Input modes: contact closure or voltage input (3.3V ~ 5A). Output modes: contact closure or 5V voltage. |
INSTALLATION
Note: Before installation, please ensure the device is disconnected from the power source.
- Position and install the mounting brackets (two at each side) using the mounting screws provided.

- Repeat above step for the other side of the device.
- Attach the brackets to the desired location.
Application Wiring
There are various different application methods with wiring examples; two are shown below.
INTEGRATION WITH HT-TRK1

INTEGRATION WITH DISCOVERY

Soft Codec Support
The following are instructions to utilizing the HT-OSIRIS-DSP1 camera and microphones in the Google Meet, Microsoft Teams, and Zoom soft codec applications. The HT-OSIRIS-DSP1 is not limited to these three. (For soft codec applications outside of these three please refer to their user manual.)
GOOGLE MEET
To use the devices in Google Meet, open “More Options” and then click on “Settings.” In the video settings, select the “HT-OSIRISDSP1” for the camera and in the audio settings select “HT-OSIRISDSP1” for both microphone and speaker.


MICROSOFT TEAMS
To use the devices in Microsoft Teams, open Device Settings located in the “More” menu. In the video settings, select the “HT-OSIRIS-DSP1” for the camera and in the audio settings select “HT-OSIRIS-DSP1” for both microphone and speaker.

ZOOM
To use the devices in Zoom, click on the “up” arrow on the microphone and camera buttons located on the bottom left part of the Zoom screen. In the video settings, select the “HT-OSIRIS-DSP1” for the camera and in the audio settings select “HT-OSIRIS-DSP1” for both microphone and speaker.

AUDIO

Web GUI
The Web UI designed for the HT-OSIRIS-DSP1 allows for basic controls and device settings. This Web UI can be accessed through a modern browser, e.g., Chrome, Safari, Firefox, IE10+, etc.
To get access the Web UI:
- Connect the LAN port of the switcher to a local area network. The default IP address of the HTOSIRIS-DSP1 is 192.168.10.254.
- Connect the PC to the same network as the HT-OSIRIS-DSP1.
- Input the IP address in the browser and press Enter, the following login window pops up.

- Input the username and password (default for both: admin) and click Login to enter the main page
The Web UI main page includes IP Settings, Audio, and System Tabs.
- IP Settings (1st page) – change from the default IP address to a different static address; set S.O.S. settings.
- Audio – changes the audio mode to set routing of the audio; set ducking of the microphones.
- System – offers device information and settings for updating the firmware.
IP Settings Tab
IP SETTINGS

| UI Element | Description |
| IP Method | Select DHCP or Static (default) |
| IP Settings | Set the IP address, subnet, and gateway (in Static mode). |
| Apply | Click to apply the settings. |
S.O.S.

| UI Element | Description |
| Status | The status LED illuminates when in S.O.S. mode. |
| Message Output | Select from the dropdown menu the desired method to output a message: Ethernet, RS- 232, Contact Closure |
| Message Output: Ethernet |
|
| Message Output: RS-232 |
|
| Message Output: Contact |
|
| Alarm in Mode | Select the external alarm trigger mode between contact closure and voltage input (3.5 V ~ 5V). |
| Apply | Click to apply setting changes. |
| S.O.S. Log | Contains the log of all triggered events. |
Audio Tab
AUDIO MODE
The HT-OSIRIS-DSP1 includes three input channels and two output channels, among which there are three groups of mutually exclusive options between USB Host and AEC Ref, between WL IN and Wireless Receiver, and between USB Host or AEC out.

| UI Element | Description |
| Audio Mode | Toggle between Auto or Manual mode. In Manual mode, select the desired inputs and outputs by clicking on the radio buttons next to each. |
| Microphone Mute | Click on the microphone symbol next to Ceiling Mic to mute the ceiling mic. |
| Input/Output Levels | Set the desired input/output levels. |
| Reset | Click to reset all audio parameters to default factory settings. |
DUCKING

| UI Element | Description |
| Enable | Click to enable/disable microphone ducking mode. |
| Master | Set which microphone – wireless mic or ceiling mic – to act as the master microphone. If wireless microphone is selected as master microphone the ceiling microphone will be the one ducked when the wireless microphone is spoken into. Default setting is Wireless MIC. |
| USB IN ducking | Click to enable USB input ducking. Default setting is off. |
| Attack Time | Set the amount of time for how quickly the microphone is ducked. Default setting is 100ms. |
| Release Time | Set the amount of time for the ducked microphone to go back to normal when there is no speaking into the master microphone. Default setting is 1000ms. |
| Ducking Depth | Sets the level of how much the ducked microphone is decreased. The lower the value set, the lower the volume of the specified audio input when ducking is triggered. Default setting is -20dB. |
| Ducking Trigger | Sets the level at which the master microphone is used to trigger ducking. The lower the value set, the easier the ducking is triggered. Default setting is -30dB. |
System Tab
DEVICE INFO & FIRMWARE UPDATE

| UI Element | Description |
| Device Information | Displays the device model, current version of firmware, and build time. |
| System Time | Set the system time for accurate log readings. Note, with a power cycle this resets to default factory clock setting. |
| Upgrade | Select the firmware file for the desired device to be upgraded. |
LOGIN & SYSTEM

| UI Element | Description |
| Login | Click to change the password. |
| System | Perform a factory reset, reboot the device, or export the log. |
API Commands
Additional commands not found in the Web GUI such as AEC enable/disable, AGC enable/disable, ANC enable/disable, and others can be found in the HT-OSIRIS-DSP1 API Commands document.
Specifications
| Audio | |
| Input |
|
| Output |
|
| Communication and Control | |
| Control Method | 1 x RJ-45 (LAN) – Web UI |
| S.O.S. |
|
| General | |
| Operating Temperature | 0°C ~ 40°C (32°F to 104°F), 10% to 90%, non-condensing |
| Storage Temperature | -20°C ~ 60°C (-4°F to 140°F), 10% to 90%, non-condensing |
| Power Supply | DC 12V 2A |
| Power Consumption (Max) | 10.1W (Max) |
| Dimension (Width x Heigh x Depth) | 8.46” x 0.98” x 4.73” (215mm x 25mm x 120.2mm) |
| Net Weight | 1.52 lbs. (0.69 kgs) |
© Copyright 2023. Hall Technologies All rights reserved.
234 Lakeshore Drive, Suite #150, Coppell, TX 75019
halltechav.com
support@halltechav.com
(714)641-6607

Documents / Resources
 |
HALL TECHNOLOGIES HT-OSIRIS-DSP1 Digital Signal Processor [pdf] User Manual HT-OSIRIS-DSP1, HT-OSIRIS-DSP1 Digital Signal Processor, HT-OSIRIS-DSP1, Digital Signal Processor, Signal Processor, Processor |