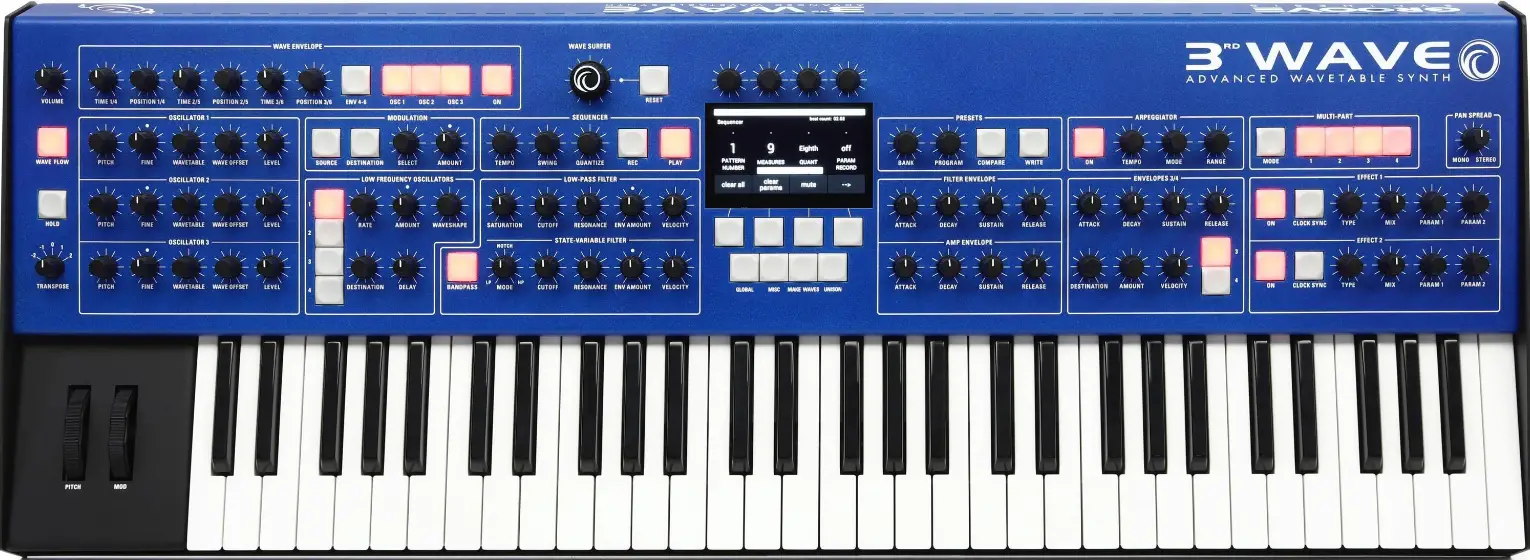
Groove Synthesis 3rd Wave OS 1.8 Sampling Addendum
Specifications:
- 3rd Wave OS Version: 1.8
- Memory for Sample Data: 3.3 MB
- Maximum Sampling Time at 48 kHz: Up to 35 seconds
- Sample Rates: 48 kHz, 24 kHz, 12 kHz
- Bit Depths: 16-bit, 12-bit, 8-bit
Product Usage Instructions
Adding Samples to the 3rd Wave:
There are two ways to add samples to the 3rd Wave:
- Via USB: Follow the standard procedure to transfer samples via USB connection.
- Sampling Directly into the 3rd Wave:
- Connect your audio source to the audio in the jack on the rear panel of the 3rd Wave.
- Press the global button and navigate to the manage sample memory setting using Soft Knob 1.
- Select “go” using Soft Knob 2.
- In the sample memory screen, press “New” to save a new recording to memory.
- Adjust input gain and arm the 3rd Wave for recording in the new sample recording screen.
- To change the input sample rate, go to the next screen by pressing Soft Button 4 and select the desired sample rate (48 kHz, 24 kHz, or 12 kHz).
- Ensure the optimum volume level of your audio source using Soft Knob 4 (input gain) to avoid clipping.
Groove Synthesis:
Choosing a sample rate of 24 kHz or 12 kHz will reduce sample resolution and consume less memory than sampling at 48 kHz.
Using Sample Oscillators:
Utilize the sample oscillators alone or in combination with the standard wavetable and virtual analog oscillators to create complex sounds.
FAQ
- Q: How much sampling time is available on the 3rd Wave?
- A: The 3rd Wave offers up to 35 seconds of sampling time at 48 kHz, with lower sample rates allowing for longer sampling durations.
- Q: Can I change the bit depth of a sample without altering the original data?
- A: Yes, you can set the bit depth of a sample to 16-bit, 12-bit, or 8-bit after importing or recording without permanently modifying the original sample data.
As of OS version 1.8, the 3rd Wave has a new oscillator type — the “S” type — that plays samples you have recorded or imported into the synthesizer. The “S” oscillator type is essentially a container for multi-samples and their individual settings. To use the “S” oscillator, you have to first record or import samples into the 3rd Wave. You must then assign the samples to a specific multisample container in order to access the multi-sample with the wavetable knob, just as you would with a standard wavetable or virtual analog waveform. We refer to this container as a “slot” and that is how it appears in the various sampling-related screens on 3rd Wave. Each multi-sample slot can contain a single sample or a collection of up to eight multi-samples spread across the keyboard. Each sample within a multi-sample slot can have its own independent loop, crossfade, key range, and tuning settings.
Use the sample oscillators alone or in combination with the 3rd Wave’s standard wavetable and virtual analog oscillators to create complex and compelling sounds.
audio requirements:
- monophonic audio (in .wav format when imported over USB)
- sample rates: from 48 kHz to 10 kHz when imported from USB
- bit depths: 16-bit, 12-bit, 8-bit
The 3rd Wave has 3.3 MB of memory for sample data. This allows up to 35 seconds of sampling time at 48 kHz. Samples with a lower sample rate use less memory. If you want to maximize sampling time at the expense of fidelity, try using a sample rate of 24 kHz or 12 kHz. These lower sample rates produce a grungier sound similar to low-resolution vintage samplers.
In addition, after importing or recording, you can set the bit depth of a sample to 16-bit, 12-bit, or 8-bit without permanently modifying the original sample data. Lower-bit depths use the same amount of memory as higher-bit depths.
Adding Samples to the 3rd Wave
There are two ways to add samples to the 3rd Wave:
- Record directly into the audio in jack on the rear panel of the 3rd Wave
- Load a mono-format .wav file from your computer onto the 3rd Wave via USB
Sampling Directly into the 3rd Wave
To record a sample directly into the 3rd Wave:
- Connect your audio source to the audio in the jack on the rear panel of the 3rd Wave.
- Press the global button and use Soft Knob 1 to scroll to the manage sample memory setting.
- Turn Soft Knob 2 to select go.
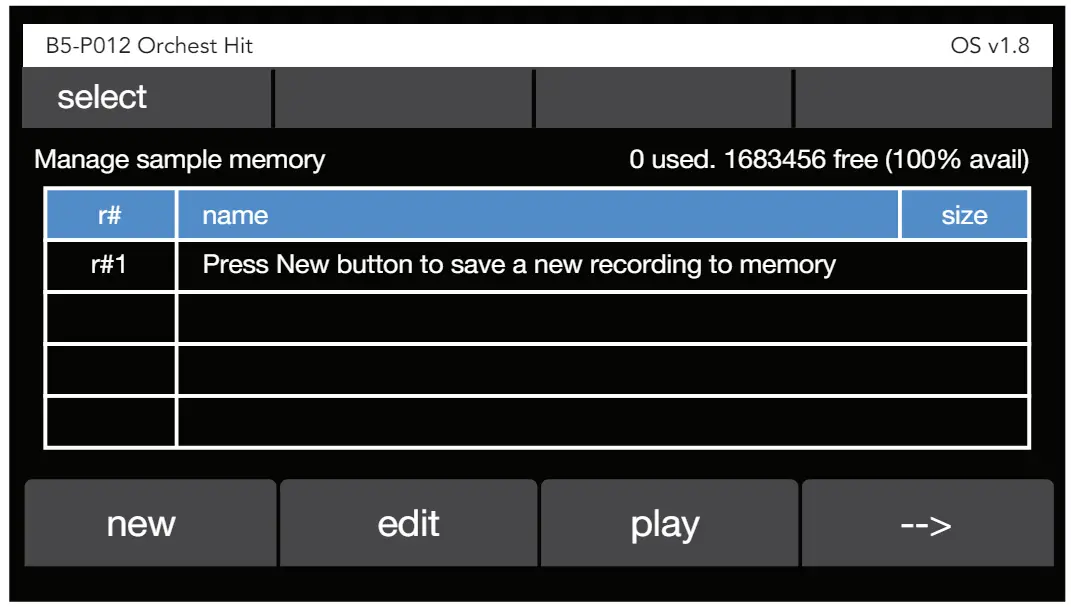
- In the sample memory screen, press Soft Button 1 (new). The new sample recording screen appears. Here you can adjust input gain and arm the 3rd Wave for recording.
 Choosing a sample rate of 24 kHz or 12 kHz will reduce sample resolution (and fidelity) and consume less memory than sampling at 48 kHz.
- If you want to change the input sample rate before you record your sample, press Soft Button 4 to go to the next screen, then press Options. Use Soft Knob 1 to select the desired sample rate (48 kHz, 24 kHz, or 12 kHz). When you have finished, press Soft Button 1 to return to the previous screen 4. In the sample memory screen, press Soft Button 1 (new). The new sample recording screen appears. Here you can adjust input gain and arm the 3rd Wave for recording.
- When you are ready, press Soft Button 1 (arm) then play your audio source. With recording armed, the 3rd Wave will automatically start recording when it detects a signal from the audio source. It will automatically stop recording when the signal ends.
- Press Soft Button 2 (play) to hear the sample you have captured. If you want to re-record the sample, press Soft Button 1 (arm) and repeat the step
- Once the sample is captured, you can trim its length by turning Soft Knob 1 (start) to adjust the start point and Soft Knob 2 (end) to adjust the endpoint. The start and end points are shown on the graph with blue lines.
- If you are happy with the sample, press Soft Button 3 (save) to navigate to the save sample screen. Refer to “Saving and Assigning Samples to a Slot” on page 5 for details on the various settings you will find there.
Importing Samples from a Computer as .wav files
A second way to add samples to the 3rd Wave is to load them from your computer. The files must be monophonic .wav files.
When import a .wav file, the 3rd Wave will automatically convert it to 16-bit format with the option to lower the bit depth when you assign it to a slot. It will read and import sample rates ranging from 48 kHz down to 10 kHz.
To import a sample from your computer as a .wav file:
- Connect the 3rd Wave to your computer using the USB connector on the back of the synth. Once connected, the 3rd Wave will show up on your computer desktop as an external drive called “third wave.”
- Open the “audio” folder on the 3rd Wave. Make sure there are no existing files in the folder. If there are files in the folder, remove them before adding new ones.
- Copy the sample from your computer into the “audio” folder on the 3rd Wave.
- Press the global button and use Soft Knob 1 to scroll to the manage sample memory setting.
- Turn Soft Knob 2 to select go.
- In the sample memory screen, press Soft Button 1 (new). The new sample recording screen appears.
- Press Soft Button 4 (right arrow) to see more options.
- In the screen that appears, press Soft Button 2 (load file). The name of the file that you copied appears in the screen. Press Soft Button 4 (ok) to load the file.
- Press Soft Button 2 (play) to hear the sample you have captured.
- Once the sample is captured, you can trim its length by turning Soft Knob 1 (start) to adjust the start point and Soft Knob 2 (end) to adjust the end point. The start and end points are shown on the graph with blue lines.
- If you are happy with the sample, press Soft Button 3 (save) to navigate to the save sample screen. Refer to “Saving and Assigning Samples to a Slot” on page 5 for details on the various settings you will find there.
Saving and Assigning Samples to a Slot
When you assign a sample to a slot for playback you can set several options in the assigned sample, including its name, its assigned root note, its bit-depth, and more.
A key consideration is which multi-sample slot you will save the sample into. If you save it into a new, empty slot, the container will have just a single sample in it. You can also save the sample into an existing container (one that already contains at least one raw sample) you will create a multi-sample. Any multi-sample slot can contain up to eight different samples.
To assign a sample to a slot:
- In the save sample screen, use Soft Knob 1 to select the sample memory slot. By default, this will be set to the first empty memory container. Saving the sample to an empty container will create a new slot that only contains this one sample.
- Alternatively, use Soft Knob 1 to select a container that already has at least one sample in it if you want to add to an existing slot. You can have up to 8 samples in a slot, and you can spread them across the keyboard by assigning their respective root notes (see below).
- To assign the root note of a sample, press the corresponding key on the 3rd Wave keyboard. When you play this note, the sample will be at the same pitch it was recorded. Each assigned sample in a slot has up to a two-octave range above or below the assigned note. The range depends on where other samples in the same sot have been assigned and also what you enter as the upper and lower range for this particular sample.
- Use Soft Knob 2 to set the bit depth to either 16-bit, 12-bit, or 8-bit, depending on your preference. Lower bit depths reduce fidelity but use the same amount of memory as higher bit depths
- Use Soft Knob 3 and Soft Knob 4 to name the sample.
- When you have finished, press Soft Button 4 (ok) to assign it to your selected slot and to save it to internal memory.
After you assign a sample to a slot, the sample editing screen appears. (See “Save Sample screen” on page 6.) Here you can loop the sample, adjust its start and end point, and more. See “Editing Samples” for more information.

Save Sample screen
Once a sample is assigned to a slot, you can access it with the wavetable knob in the oscillator section of the 3rd Wave and play it. It will appear in the “S” category, which follows the virtual analog waveforms in the “A” category. Select an “S: slot with the desired sample(s) to play and use it in a program.
Bulk Loading .wav Files into Sample Memory
You can load multiple raw .wav files from your computer into the 3rd Wave in a single pass by using the manage sample memory command in the global menu. Note that there is a distinction between a raw sample and the “S” slot that a sample is assigned to for playback in an oscillator.
The 3rd Wave is only importing the raw samples into memory with the bulk load command. It is not assigning them to a sample slot. You will need to make this assignment for each sample after you have imported them using the manage multisamples command.
To bulk load .wav files to sample memory:
- Connect your computer to the USB port on the back of the 3rd Wave using a USB cable.
- Once connected, the 3rd Wave will show up on your computer desktop as an external drive called “third wave.”
- On your computer desktop, open the “audio” folder on the 3rd Wave. Make sure there are no existing files in the folder. If there are files in the folder, remove them before adding new ones.
- Copy up to 100 mono-format .wav files from your computer into the “audio” folder on the 3rd Wave.
- Press the global button and use Soft Knob 1 to scroll to the manage sample memory setting.
- Turn Soft Knob 2 to select go

- Press Soft Button 4 (right arrow) to see more options.
- Press Soft Button 2 (bulk load). A screen appears indicating how many .wav files are currently in the “audio” folder on the 3rd Wave.
- Press Soft Button 4 (ok) to load the files.
- After the files have been imported, the Manage Sample Memory screen appears, showing each file and its size.

Manage Sample Memory screen (page 2)
Now that you have imported the samples, you can assign them to sample containers. They will then be available in the “S” category of any of the three oscillators and can be used in programs for playback.
To assign existing samples from memory into sample slots:
- Press the global button and use Soft Knob 1 to scroll to the manage multisamples setting.
- Turn Soft Knob 2 to select go. The Sample Editing screen appears as seen below.
- Use Soft Knob 1 to select the desired multi-sample container

- Sample Edit screen
- Press Soft Button 1 (add to multi). A list of all samples currently in memory appears as shown below.
- Use Soft Knob 1 to select the desired sample.
- Before pressing Soft Button 4 (select) to assign the sample to the container, set the assigned note for the sample by pressing a key on the keyboard.
- If you are adding multiple samples to the container (8 maximum) set each of their assigned notes as you load them to map them across the keyboard.
- Press Soft Button 4 (select) to add the sample to the container

Multi-sample slot screen
Adding Additional Samples to a Slot to Create a Multi-sample
You can create a multi-sample container by adding more than one sample into the same slot. This is useful for creating drum kits, sound effects sets, or instruments that have multiple samples across the range of the keyboard.
Adding more than one sample into to a container:
- Press the global button and use Soft Knob 1 to scroll to the manage multisamples setting.
- Turn Soft Knob 2 to select go.
- In the Sample Editing screen, use Soft Knob 1 to select the desired sample.
- Sample Edit screen
- Press Soft Button 1 (add to multi).

- To use an existing sample that is saved in memory, use Soft Knob 1 to select the sample.
- Set the assigned note for the selected sample in the slot by pressing a key on the keyboard.
- If you are adding multiple samples to the container (8 maximum) set each of their assigned notes as you load them to map them across the keyboard.
- Press Soft Button 4 (select) to add the sample to the multi-sample container.
Using Samples in a Preset
Once you have imported and assigned one or more samples to a specific slot, you can use them in a program. You will use the wavetable knob in the oscillator section of the 3rd Wave to locate them. Assigned multisample containers appear in the “S” category, which follows the virtual analog waveforms in the “A” category.
To use the sample(s) assigned to a slot in a program:
- In the oscillator section, turn the wavetable knob to scroll to the “S” category of sounds. This category lists the various multi-sample slots that you have created.
- Select the sample slot containing the desired sample(s).
- Play the keyboard to hear the sample.
- Continue designing the sound by adjusting the filters, envelopes, modulation, effects and other parameters as you normally would.
If a sample is in use in a program, you can quickly edit it by pressing Soft Button 2 (sample) in the appropriate oscillator’s screen. The sample editing screen will appear. Here you can loop the sample, adjust its start and end point, edit its name, and more.
Editing Samples
Once you have loaded samples in the 3rd Wave and assigned them to slots, you can edit them in various ways. This includes looping, changing tuning, and adjusting start or endpoints. These settings are not saved into the source sample itself, but per occurrence of the sample within a specific multi-sample slot.
This means that you can set various parameters for the same sample differently in different slots, or even in the same slot if the sample appears multiple times in that slot. You could, for example, change the start or end point of the sample, its loop settings, its tuning, and so on in each different occurrence. There are a maximum of eight multi-sample locations per slot.
The most effective way to edit and audition changes to a sample is to assign it to a multi-sample slot and create a program that uses it on one of the oscillators so you can play it from the keyboard as you make changes. Certain functions such as looping can only be fully auditioned this way. Refer to “Using Samples in a Preset” on page 10 for instructions on to do this.
Once a sample is assigned to a multi-sample slot and in use in a program, you can quickly edit it by turning the wavetable knob on the oscillator that uses the sample and then pressing Soft Button 2 (sample). The sample editing screen will appear. Here you can loop the sample, adjust its start and end point, edit its name, and more.
To edit a sample:
- Press the global button and use Soft Knob 1 to scroll to the manage multisamples setting.
- Turn Soft Knob 2 to select go.
- In the Sample Editing screen, use Soft Knob 1 to select the desired multi-sample slot, then use Soft Knob 2 to select the desired sample itself. The sample appears in the display
Adjusting Start and End Points
- To adjust the playback start point of the sample, turn Soft Knob 3. Press play to hear the effect. The blue line at the beginning of the waveform in the display indicates the playback start point.
- Press soft Button 3 (play) to hear the effect.
- To adjust the end point of the sample, turn Soft Knob 4. The blue line at the end of the waveform the display indicates the playback end.
- Press Soft Button 3 (play) or play a note on the keyboard to hear the effect. (Make sure you are using a program that uses the current sample and are playing in a range where the current sample is active.)
- Continue adjusting the start and end points as desired. When you are satisfied, save the program by pressing the write button on the front panel. This will save the start and end into the multi-sample slot in addition to saving the program.
Looping
To create and edit effective loops, you need to audition the sample by playing it on the keyboard. To do this you need to assign the sample to a multi-sample slot and use it in a preset so you can trigger it from the keyboard as you make changes. Refer to “Using Samples in a Preset” on page 10 for instructions on to do this. Once a sample is in use in a preset, you can quickly edit it by turning the wavetable knob on the oscillator that uses the sample then pressing Soft Button 2 (sample). The sample editing screen will appear. Here you can loop the sample, adjust its start and end point, edit its name, and more.

To loop a sample in the sample editing screen:
- Press Soft Button 2 (loop) to access the looping screen.
- To turn the looping on, press Soft Button 2 (loop select). Press this button repeatedly to select the type of looping that you want.
- The options are:
- Looping off. In this mode, the sample will play from beginning to end as a “one shot.” It will not loop or repeat unless re-triggered.
- Looping on when note on. In this mode, the note will continue looping while you hold a note. Once the note is released, looping stops and the post-loop segment of the sample (if present) will play.
- Looping is always on. In this mode, the note will continue looping both while you hold a note and also once you release the note. This allows very short samples to continue to play for as long as the release section lasts even if the sample itself is short.
- When looping is on, red lines indicate the loop start and end points. To adjust these, use Soft Knob 3 (loop start) and Soft Knob 4 (loop end).
- To edit the crossfade between the beginning and end of the loop, press Soft Button 3 (crossfade).
- Use Soft Knob 2 to choose the crossfade type.
- The options are:
- equal volume. This option is well suited to material that is phase coherent — in other words, where the sound at the beginning and the end of the loop are similar in volume and waveshape. This option creates a linear crossfade that helps keep the overall volume constant during the crossfade.
- equal power. This option is well suited to material that is not phase coherent — in other words, where the sound at the beginning and the end of the loop are very different in volume and waveshape. This option creates a sinusoidal crossfade that is -3dB in the middle of the fade. This helps keep the overall volume constant during the crossfade.
- off. This option turns off crossfading. With crossfading off, you will hear an audible click when the loop occurs unless the audio is perfectly correlated and volume matched at the two loop points.
- Use Soft Knob 2 to choose the crossfade length. Length is shown in milliseconds. The crossfade length can extend up to the full length of the loop.
- To audition the loop, play the 3rd Wave keyboard.
- To adjust the loop start and loop end points, Press Soft Button 1 to return to the sample edit screen.
- The red lines at the beginning and end of the sample indicate the loop start and loop end point.
- Use Soft Knob 3 to adjust the loop start point.
- Use Soft Knob 4 to adjust the loop end point.
- To audition the loop, play the 3rd Wave keyboard. (Make sure you are using a program that uses the current sample and are playing in a range where the current sample is active.)
- Continue adjusting the loop start and end while auditioning the sample If necessary try different crossfade types and crossfade lengths.
- When you are satisfied, save the preset by pressing the write button on the front panel. This will save the loop and crossfade setting into the multi-sample slot in addition to saving the program
Additional Parameters in the Sample Edit Screen
There are several additional parameters that you can access in the Sample Edit screen by using Soft Button 1 (left arrow) and Soft Button 2 (right arrow).

Sample Edit screen 
Sample Edit screen
COPY: Copies all multi-samples to a new slot. This is important if you have multiple presets using the same multi-sample slot. If you make changes to the slot, all presets using it will change. In some cases, it is desirable to copy to a new slot if you want to change the sound and not affect other presets that may be using the same sample or multi-sample.
EDIT NAME: Allows you to change the name of the selected sample slot. To change the name of the slot hit the “edit name” button.
REMOVE MULTI: Deletes the selected multi-sample from the current slot.
CLEAR SLOT: Removes all of the multi-samples from the current slot.
SET NOTE: The parameters in this section allow you to change the tuning, assigned note, minimum note (lowest playable note), and maximum note (highest playable note) for the selected multi-sample.
The options in the set note screen are:
- tuning. Allows you to fine-tune the pitch of the sample. The range is -100 cents to +100 cents.
- assigned. To edit the assigned note, hold down the assigned button (Soft Button 2) while you press a key on the keyboard. Editing the assigned note will automatically adjust the min and max note depending on the other samples in the slot. By default, it splits the note range evenly from the next lower and higher samples. The maximum range (if no other samples are assigned) is two octaves above and below the assigned note location.
- min. Sets the minimum (lowest playable) note. This is useful for creating a specific key range for a particular sample in a multisample slot. You can manually set the minimum note by holding down the corresponding button and pressing a key on the keyboard. Note that each sample has a pitch transposition range of two octaves below the note value currently assigned as the maximum.
- max. Sets the maximum (highest playable) note. This is useful for creating a specific key range for a particular sample in a multi-sample slot. You can manually set the maximum note by holding down the corresponding button and pressing a key on the keyboard. Note that each sample has a pitch transposition range of two octaves above the note value currently assigned as the minimum.
Backing up and Restoring Samples and Sample Slots
Because sample memory on the 3rd Wave is limited, it is useful to be able to periodically backup and restore samples and the memory slots that use them. This allows you to create a variety of sample sets that you can swap out as needed when memory is full.
Note that samples and sample slots are different and must be exported and imported separately. When you export the sample slot, all data is included in its associated bin file, including the raw audio of the sample.
To export individual samples as .wav files
- Connect your computer to the 3rd Wave’s USB port using a USB cable.
- On the 3rd Wave, press the global button and use Soft Knob 1 to scroll to the export sample memory to wav setting.
- Turn Soft Knob 2 to select go.
- Select “Export sample memory to WAV” in the GLOBAL menu.
- Press Soft Button 4 (ok) to begin exporting.
- The 3rd Wave will save a .wav file for each sample.
- On your computer, locate and open the 3rd Wave’s audio folder on your desktop.
- Copy the exported .wav files onto your computer to store and archive them.
To export sample slots:
- Connect your computer to the 3rd Wave’s USB port using a USB cable The 3rd Wave appears on your computer desktop as an external drive called “third wave.”.
- On the 3rd Wave, press the global button and use Soft Knob 1 to scroll to the Export Sample Library setting.
- Turn Soft Knob 2 to select go.
- Press Soft Button 4 (ok) to begin exporting. The 3rd Wave will save a .bin file for each of its sample slots into its audio folder.
- On your computer desktop, locate and open the 3rd Wave’s audio folder.
- Copy the exported .bin files onto your computer to store and archive them.
To restore archived 3rd Wave samples from your computer:
- Connect your computer to the 3rd Wave’s USB port using a USB cable The 3rd Wave appears on your computer desktop as an external drive called “thirdwave.”
- On your computer, locate the 3rd Wave .bin files that you previously exported and copy them into the 3rd Wave’s audio folder. Make sure these files are present in the audio folder. If there are other files, \ remove them before copying the archived .bin files.
- On the 3rd Wave, press the global button.
- To import a single file, use Soft Knob 1 to scroll to the import multisample setting and turn Soft Knob 2 to select go.
- Alternatively, to import a multiple files, use Soft Knob 1 to scroll to the bulk multisample import setting and turn Soft Knob 2 to select go. The files are imported in alphabetical order according to their file name
- Use Soft Knob 1 to select the multi-sample slot index you would like to overwrite.
- Press Soft Button 4 (ok). The 3rd Wave imports the archived file(s)
Documents / Resources
 |
Groove Synthesis 3rd Wave OS 1.8 Sampling Addendum [pdf] User Guide OS 1.8, 3rd Wave OS 1.8 Sampling Addendum, 3rd Wave Addendum, Addendum, OS 1.8 Sampling Addendum, OS Addendum, 1.8 Sampling Addendum, Sampling Addendum |


