![]()

Quick Installation Guide V1.3-2022-09-06
Communication Module
(Wi-Fi/LAN Kit & WiFi Kit & WiFi Box)
V1.3-2022-09-06
Applications

Communication Network via WiFi
Communication Network via LAN
Installation
Packing List
- For Wi-Fi/LAN Kit and WiFi Kit.
- For Wi-Fi/LAN Kit only.
- N=Quantity depends on the Wi-Fi/LAN Kit configuration.
Installing the module
Note: This device should be installed and operated with a minimum distance of 20 cm between the radiator and your body.
 |
 |
03 Power On
Step 1 Power on the inverter.
Step 2 Power on the router.
Step 3 Check the indicators on the Kit and the inverter to confirm the communication status of the kit.
Wi-Fi/LAN Kit
| Indicator | Color | Status | Description |
| Green | ON | The Wi-Fi/LAN Kit is powered on. | |
| OFF | The Wi-Fi/LAN Kit is restarting or not powered on. | ||
 |
Blue | ON | •The WiFi communication or LAN communication works properly. •The LAN communication is abnormal, but the AP hotspot is connected. |
| OFF | •The Wi-Fi/LAN Kit is restarting or not powered on. •The WiFi communication is abnormal. •The LAN communication is abnormal, and the AP hotspot is not connected. |
WiFi Kit
| Indicator | Color | Status | Description |
| Green | ON | The WiFi Kit is powered on. | |
| OFF | The WiFi Kit is restarting or not powered on. | ||
|
Blue | ON | The WiFi AP hotspot is connected. |
| OFF | •Improper communication on WiFi Kit. •The kit is restarting. |
Commissioning
Commissioning via SEMS Portal App
Step 1 Download and install the SEMS Portal App.
 https://www.semsportal.com/home/AppDownload
Step 2 Connect the app and the inverter.
Step 3 Network Commissioning of the Kit.

 Note: After setting the WiFi Network, the Wi-Fi/LAN Kit will restart automatically and the indicator will be off temporarily. The indicator will be on after restarting.
| No. | Parameters | Description |
| 1 | Internet access port | For Wi-Fi/LAN Kit only. Select Wi-Fi or LAN. |
| 2 | WiFi Network | For WiFi mode only. Set the parameters based on the router network information. |
| 3 | Encryption | |
| 4 | Password | |
| 5 | DHCP | •Enable DHCP when the router is in dynamic IP mode. •Disable DHCP when a switch is used or when the router is in static IP mode. |
| 6 | IP Address | •Do not configure the parameters when DHCP is enabled. •Configure the parameters according to the router or switch information when DHCP is disabled. |
| 7 | Subnet Mask | |
| 8 | Gateway Address | |
| 9 | DNS Server |
Commissioning Via Web
Note: Configuring parameters via the web applies to the WiFi Kit and WiFi Box, not the Wi-Fi/ LAN Kit.
 Please select your current wireless network:
 Note: When RSSI of the selected WIFI network is jower than 30%, the connection may be unstable, please select other available network or shorten the distance between the device and router. If your wireless router does not broadcast SSID, please click ‘Next’ and add a wireless network manually.
Add wireless network manually:

Please enter the wireless network password:
| Password |  |
*Note case sensitive for SSID and Password. Please make sure all parameters of the wireless network are matched with the router, including the password.
 Save success!
The current configuration will take effect after restart.
If you still need to configure the other pages of information. please go to complete your required configuration.
Configuration is complete, you can go to the Management page, and click on the restart device “OK” button.
Confirm to complete? 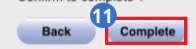
| No. | Parameters | Description |
| 1 | Network name (SSID) | Set the parameters based on the router network information. |
| 2 | Encryption method | |
| 3 | Encryption algorithm | |
| 4 | Password |
(Optional) Continue the following steps when the router is in static IP mode.

DHCP setting for STA

Saved Successfully!
Configurations will take effect after restart. After restarting, you will need to re-login the configuration interface for other settings, so it is recommended to restart after completing all settings. Please click (Restart] to restart now, or click (Back] to continue setting. You can restart after all configurations.
| No. | Parameters | Description |
| 1 | DHCP Mode | Select STATIC. |
| 2 | IP Address | Set the parameters of the WiFi Kit based on the router network information. |
| 3 | Subnet Mask | |
| 4 | Gateway Address | |
| S | DNS Server |
Password Setting
Log in using the initial password for the first time and change the password as soon as possible. To ensure account security, you are advised to change the password periodically
and keep the new password in mind.
Change the password of the Wi-Fi/LAN Kit.

 Note: The indicator will be off temporarily when the Wi-Fi/LAN Kit is restarting and be on again after restarting.
Reconnect WiFi after resetting the Wi-Fi/LAN Kit.
Change the password of the WiFi Kit/WiFi Box

Device Replacement
Step 1 Prepare the new device before replacing the device.
Step 2 Remove the device using the Unlock Tool.
Step 3 Install the new device.
Step 4 Refer to the device Quick Installation Guide to configure the device.
Troubleshooting
| No. | Problem | Solutions |
| 1 | Cannot find Solar-WiFi** | 1. Make sure that the inverter is powered on and the Wi-Fi/LAN Kit is connected properly. 2. Make sure that the smart device is within the communication range of the Wi-Fi/LAN Kit. 3. Restart the inverter. |
| 2 | Unable to connect to Solar WiFi** | 1. Enter the password: 12345678. 2. Make sure that no other smart device is connected to Solar-WiFi**. 3. Restart the inverter and reconnect Solar-WiFi**. 4. Make sure the password is correct. |
| 3 | Cannot log in to 10.10.100.253 |
1. Switch browsers like Google Chrome, Firefox, IE, and Safari. 2. Restart the inverter and reconnect the WiFi. |
| 4 | Cannot find router SSID | 1. Put the router nearer to the inverter. Or add some WiFi relay devices. 2. Check if the channel number of the router is higher than 13. If yes, modify it to a lower number at the router configuration page. |
| 5 | WiFi LED indicator blinks twice continuously with all configuration steps done | 1. Restart the inverter. 2. Check if the SSID, encryption method, encryption algorithm, and password on the WiFi configuration page is the same as that of the Wireless Router, if it is different, please modify it. 3. Restart Wireless Router. 4. Move Wireless Router closer to the inverter or use a wireless repeater to enhance the WiFi signal. |
| 6 | WiFi LED indicator blinks four times continuously when all configuration steps done | 1. Connect the smart device to the network and access to SEMS Portal App to check if the inverter is online. 2. Restart Wireless Router and the inverter. |
Technical Data
| Model | Wi-Fi/LAN Kit | WiFi Kit | WiFi Box | |
| General Data |
Input Voltage | 5V | ||
| Power Consumption | s 2W | |||
| Dimension (L x W x D) | 102 x49 x32 | 96 x49 x32 or 96 x 46 x 29 |
71.5 x 65×39.5 | |
| Operating Temperature | -30 – 60°C | |||
| Operating Humidity | 0 – 100% RH (No Condensation) | |||
| Operating Altitude | <4000m | |||
| Ingress Protection Rating | IP65 | |||
| Comm Data |
Port | RJ45 | – | |
| Extension Cable of LAN | 0.5m | – | ||
| Communication | LAN or WiFi | WiFi | ||
| Transmission Rate | UART: 115200bps Ethernet: 10Mbps /100Mbps |
UART: 9600bps | ||
| Max. Network Cable Transmission Distance |
100m | – | ||
| Frequency Range | 2.412GHz-2.472GHz | |||
| Supported Standards | 802.11 b/g/n | |||
| Supported Device | Router or Switch | I Router | ||
| RF Outpower | < 20 dBm | |||
| Software Data |
Configuration | App or Web | ||
| Language | English | |||
| Working Mode | AP/STA/AP+STA | |||
EU Declaration of Conformity
GoodWe Technologies Co., Ltd. hereby declares that the communication device sold in the European market meets the requirements of the following directives:
- Radio Equipment Directive 2014/53/EU (RED)
- Restrictions of Hazardous Substances Directive 2011/65/EU and (EU) 2015/863 (RoHS)
- Waste Electrical and Electronic Equipment 2012/19/EU
- Registration, Evaluation, Authorization and Restriction of Chemicals (EC) No 1907/2006 (REACH)
You can download the EU Declaration of Conformity on https://en.goodwe.com.
 https://en.goodwe.com/contact-us.asp
GoodWe Technologies Co., Ltd.
 No. 90 Zijin Rd., New District, Suzhou, 215011, China
![]() www.goodwe.com
www.goodwe.com
![]() service@goodwe.com
service@goodwe.com
 |
 |
| 340-00651-03 | https://en.goodwe.com/contact-us.asp |
Documents / Resources
 |
GOODWE WiFi Box Communication Module [pdf] Installation Guide Wi-Fi LAN Kit, WiFi Kit, WiFi Box, WiFi Box Communication Module, Communication Module, Module |