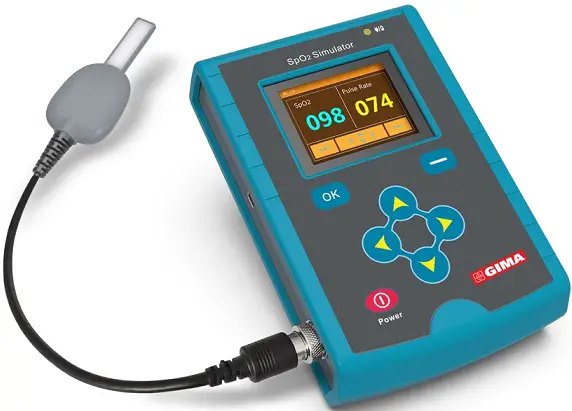
GIMA SPO2 Small and Lightweight Simulator
ATTENTION: The operators must carefully read and completely understand the present manual before using the product.
Gima 54600
 CONTEC MEDICAL SYSTEMS CO., LTD
No.112 Qinhuang West Street, Economic & Technical Development Zone, Qinhuangdao, Hebei Province, PEOPLE’S REPUBLIC OF CHINA
Made in China
![]() MS100
MS100
![]() Prolinx GmbH
Prolinx GmbH
Brehmstr. 56, 40239 Duesseldorf, Germany
 Gima S.p.A.
Via Marconi, 1 – 20060 Gessate (MI) Italy
gima@gimaitaly.com – export@gimaitaly.com
www.gimaitaly.com

Safety
Instructions for Safe Operations
- Check periodically to make sure that there is no visible damage that may affect device’s test performance. It is recommended that the device should be inspected weekly at least. When there is obvious damage, stop using the device.
- Necessary maintenance must be performed by qualified service engineers ONLY. Users are not permitted to maintain it by themselves.
- This product is calibrated before leaving factory.
Warning
- If the equipment is used in a manner not specified by the manufacture, the protection provided by the equipment may be impaired.
- Explosive hazard—DO NOT use the device in the environment with tinder such asanesthetic .
- The disposal of scrap instrument and its accessories and packing (including plastic bags,foams and paper boxes) should follow the local laws and regulations.
- Please check the packing before use to make sure the device and accessories are totally inaccordance with the packing list, or else the device may have the possibility of working abnormally.
- Please choose the accessories which are approved or recommended by the manufacturer, or else it may damage the device.
- This equipment contains no operator serviceable parts, serviced by the qualified person only.
- Must be consulted this manual in all cases where symbol is marked.
Attention
- Keep the simulator away from dust, vibration, corrosive substances, tinder, too high or low temperature and moisture.
- If the device gets wet, please stop operating it.
- When it is carried from cold environment to warm or humid environment, please do not use it immediately.
- DO NOT operate keys on front panel with sharp materials.
- DO NOT have the device immerged in liquid. Do not spray any liquid on the device directly.
Overview
Brief Introduction
SpO2 Simulator is a kind of Separated SpO2 simulator, small and light. As different manufactures may use different R-curve, the stimulator is embedded parts of current popular R-curve in advance.
Features
- Separated connection between simulator probe and host, makes operation and test more convenient.
- 262K color and 320*240 TFT, adjustable brightness level.
- Film key-press, makes the operation more comfortable.
- Power with rechargeable lithium battery, can display the charge information of battery.
- Key volume, can open or close.
Accessaries
- User manual (1)
- simulator probe(1)
- 5.0V adaptor (1)
Storage Environment
- a) Temperature: -20℃~+60℃
- b) Relative humidity: 10%~90%, non-condensing
- c) Height above sea level: 3000m
Operating Environment
- a) Temperature: 10℃~40℃
- b) Relative Humidity: 10%~90%, non-condensing
- c) Height above sea level: 3000m
- d)I P code: IP20 for host; IP00 for probe
- e) Rate input: 5VDC, 1A(3.7VDC internal lithium battery)
Note: The product must be connected to a external power source which fulfils the requirements of EN 61010-1 with the following technical data: - Voltage: 5VDC
- Max. short circuit current: 20A
- Max. power:100W
Operating Principle of Oximeter
Pulse oximeter is a device which measures the rate of two important hemoglobins Hb in blood. Arterial oxygen saturation is defined as the ratio of cHbO2 (the concentration of HbO2)and cHbO2+cHb(the concentration of Hb). SpO2 shows with the type of percentage, and calculates as follows:

With above information, a calibrated oximeter can measure accurately the level of the oxygen in blood, which can provide some valuable data for the patient’s healthy state and the state of the patient who is recovering from anaesthesia and operation.
Technical Specifications
Main Functions
- Oxygen saturation simulation;
- Pulse rate simulation;
- Presettable patient state simulation;
- Reaction time of the tested device can be tested;
- Stimulate the SpO2 and pulse rate under different amplitudes;
- Test the performance under different interference source;
- Selectable different R-curve.
Main Parameters
- SpO2
Range: 35%~100%
Resolution: 1%
Accuracy: When SpO2 is 75%~100%, the error is ±2% or the device’s accuracy, whichever is greater; when SpO2 is 74%~50%, the error is ±3% or the device’s accuracy, whichever is greater; no definition when SpO2 is less than 50%. - Pulse rate
- Range: 20bpm~250bpm
- Resolution: 5bpm
- Accuracy: 1%±1bpm
- Measurement Performance in Amplitude
- Range: 0.000%~20.000%
- Resolution: 1% for 1.000%~20.000%; 0.1% for 0.100%~0.900%; 0.025% for 0.000% ~0.075%.
- Patient state
24 conditions presetting and 8 conditions as default state, adjust the number of patient state by setting motion level.
Operating Guide
Connection
Sockets

Adapter jack locates on the right panel, which is used for connecting adapter for charging internal lithium battery. The socket for simulator probe locates on the left panel, when it connects properly, the device can mensure.
- The simulation finger must be inserted / unplugged in accordance with the direction indicated by the groove on the connector plug.
- Please keep the gleamy surface of the tested device on the same side with silk-screen side of simulator probe, adjust the position of the tested device to get the exacter value.
- Only the simulator probe from our company can be used to connect, otherwise it may cause some danger or damage to the device.

- Figure 5-2 Connect Sketch for Simulator probe
- Figure 5-3 Silk-screen Sketch for Simulator Probe
Power Supply
Built-in lithium battery, when low-battery appears, please use the adapter provided by our company to charge, it is not recommended to use the device during charging.
- The indicator on top right is orange in charging state, it is green after fully charged, then please disconnect the equivalent power source.
- Built-in battery, don’t change it by yourself.
- For the device not used for long, please cut off the equivalent power, and charge it once a month.
Start and Close
Long-press the power button , until hearing a prompt sound of start. First system will enter the welcome interface, then prompt the current R-Curve, and enter the Main Menu lastly. shown as Figure 5-4:

The menus in turn are: Simulation, Alarm Limits, Amplitude(viz. perfusion degree), Preset, setting, R-Curve. Select the corresponding menu with UP, DOWN, LEFT, RIGHT keys and enter corresponding interface by pressing OK key.
Long-press Power key in any interface, it will display “Bye bye!” and close.
You can identify the selected menu by a blue rectangle frame.
Functions
It will check the red LED and infra-red LED normal or not when entering or exiting Simulation and Alarm Limits menu. If normal, the operation is responded immediately; or else, a prompt “NO RED LED NO IRED LED Check probe or press Back”.

Simulations

The tests in this interface are:
- Manual
- Ambient Light
- TLC
- Auto Test
Press UP and DOWN to select the item, press OK key to enter, and press Back to exit to the superior menu. No operation for LEFT and RIGHT.
Manual

In this interface, SpO2 and Rate can be adjusted manually. Press the LEFT and RIGHT key to set the adjusting item, and press Back key to return the menu of last level. No operation for OK key.
- a. SpO2 setup
Move the prompt symbol to “SpO2”, and press UP and DOWN to increase and decrease the SpO2 value with the step size. Default value after start is 96%. - b. Rate setup
Move the prompt symbol to “Rate”, and press UP and DOWN to increase and decrease the Rate value with the set step size. Default value after start is 75bpm.
About step size setup, please refer to the content of 5.3.5.
Ambient light simulation

In this interface, the tests in the interference state are as follows:
- a. NORM(normal state)
- b. 60Hz AC interference
- c. 50Hz AC interference
- d. SUN
- Press LEFT and RIGHT to adjust the item where the prompt symbol is, and press OK key to confirm the setting. Press Back to exit to the superior menu. No operation for UP and DOWN.
TLC

The display information in this interface includes:
- Trans Level Ctrl(0~4095)
- Step Size(5~100)
- Default
Press UP and DOWN to adjust the corresponding item, press Back to return to the superior menu. OK is usable only in the Default item.
- a. Trans Level Ctrl setup
Move the prompt symbol to “Trans Level Ctrl”, and press LEFT and RIGHT to increase and decrease its value with the step size. - b. Step size setup
Move the prompt symbol to “Step size”, and press LEFT and RIGHT to increase and decrease its value. - c. Default
Move the prompt symbol to “Default”, and press OK to recover the simulation level to the default value.
The default values of the simulation level are different according to the different R-curves.
Auto Test
it is used for inspection ,not for customers.
Alarm Limits

This interface is used to test the reaction time of oximeter. The testing items here are:
- a. SpO2
- b. Rate
- c. Asystole
- SpO2 Alarm
Press UP and DOWN to move the prompt symbol to “SpO2 Alarm”, press OK to enter the interface as follows: Use UP and DOWN to set SpO2, and press “Start” to begin the test(the prompt “Timing!” is displayed in the interface ), synchronously observe the device tested(as oximeter). When the value on it reaches the preset value, press “Stop”, synchronously the time from Start to Stop will be displayed in the interface(unit:s).
 - Rate Alarm
Press UP and DOWN to move the prompt symbol to “Rate Alarm”, press OK to enter the interface as follows: Use UP and DOWN to set Rate, and press “Start” to begin the test(the prompt “Timing!” is displayed in the interface ), synchronously observe the device tested(as oximeter). When the value on it reaches the preset value, press “Stop”, synchronously the time from Start to Stop will be displayed in the interface(unit:s).
 - Asystole
Press UP and DOWN to move the prompt symbol to “Asystole”, press OK to enter the interface as follows: Press “Start” to begin the test(the prompt”Timing!”is displayed in the interface ), synchronously observe the device tested(as an oximeter). When the value on it reaches the preset value, press “Stop”, synchronously, the time from Start to Stop will be displayed in the interface(unit:s).
When “Start” is pressed, the inside calculator will clear automatically.
Amplitude

The information in this interface includes:
- Current SpO2
- Current Pulse Amp
This device can simulate the SpO2 and Rate in different Amplitude. Press UP and DOWN to set different Amplitude values to test. Press Back to return the superior menu. No operation for OK.
Preset

The information in this interface includes:
- Current condition
- SpO2 in the current condition
- Rate in the current condition
Preset 24 groups of SpO2 and Rate values in different states, which is used for stimulating patient condition in different states simply. The default is 8 groups of data, and data groups can be change by setting “Motion level”(refer to 5.3.5). Press UP and DOWN to set different conditions to test.
24 conditions are listed as below:
| Level 0 Preset | |||
| No. | State | SpO2(%) | Rate(bpm) |
| 00 | Normal | 98 | 55 |
| 01 | Weak Pulse | 90 | 95 |
| 02 | Bradycardia | 88 | 45 |
| 03 | Hypoxic | 70 | 95 |
| 04 | Neonate | 90 | 180 |
| 05 | Tachycardia | 85 | 130 |
| 06 | Geriatric | 92 | 95 |
| 07 | Obese | 93 | 90 |
| Level 1 Preset | |||
| 08 | Normal/Tap | 98 | 55 |
| 09 | Normal/Shiver | 98 | 55 |
| 10 | Weak Pulse/Tap | 90 | 95 |
| 11 | Weak Shiver | 90 | 95 |
| 12 | Brad/Shiver | 88 | 45 |
| 13 | Hypoxic/Tap | 70 | 95 |
| 14 | Hypoxic/Shiver | 70 | 95 |
| 15 | Neonate/Shiver | 90 | 180 |
| Level 2 Preset | |||
| 16 | Brady Tap #2 | 88 | 45 |
| 17 | Hypox Tap #2 | 70 | 95 |
| 18 | Weak Tap #2 | 80 | 95 |
| 19 | Normal Tap #2 | 93 | 55 |
| 20 | Asystole | 91 | 90 |
| 21 | Low Freq1 | 80 | 75 |
| 22 | Low Freq2 | 70 | 75 |
| 23 | Slow Tap | 80 | 75 |
The 24 conditions above are not applicable to all oximeters.
Setting

The information in this interface is as follows:
- Signal source
- Step size
- Motion level
- Brightness
- Key volume
- Language Set
Press UP and DOWN to set the position of the prompt symbol, press OK to confirm the current selection. Press Back to return to the superior menu. No operation for LEFT and RIGHT in this interface.
a) Signal source setup

Move the prompt symbol to “UUT” and press OK to select UUT as signal source. Move the prompt symbol to “DC” and press OK to select DC as signal source.
b) Step size setup

The setting items in this interface are:
- SpO2 step(1~10), resolution is 1.
- Rate step(5~50), resolution is 5.
Press LEFT and RIGHT to select the adjusting item, and press UP and DOWN to increase and decrease the value. Press Back to return to the superior menu. No operation for OK.
c) Motion level

The numbers of the selectable condition for different motion levels are different. Press UP and DOWN to adjust the motion level. Press Back to return to the superior menu. No operation for OK, LEFT and RIGHT.
d) Brightness

Press UP and DOWN to adjust the brightness level. There are 3 selectable levels. Press Back to return to the superior menu. No operation for OK, LEFT and RIGHT.
e) Key volume

Press UP and DOWN to set the key volume on or off. Press Back to return to the superior menu.
No operation for OK, LEFT and RIGHT.
f) Language Set

Press UP and DOWN to set the Language is English or chinese,German,Portuguese. Press Back to return to the superior menu. No operation for OK, LEFT and RIGHT.
R-Curve

Compatible R-Curve preset currently:
- BCI
- Criticare
- Datascope
- Datex
- PMS M1190
- Masimo
- Nellcor
- Nihon-Kohden
- Ohmeda & Nova
- Respironics
Press UP and DOWN to select the wanted R-curve. Press Back to return to the superior menu. No operation for OK, LEFT and RIGHT.
Some oximeters utilize technology or probes from other manufacturers. The R-Curve selected must correspond to the technology used to ensure accurate result. Please consult
oximeter manufacturer for the correct technology and corresponding R-Curve
Maintenance, Transportation and Storage
Cleaning and disinfection
Turn off the device and disconnect it from the mains, do not immerse it into liquid. Use 75 % alcohol to wipe its enclosure, nature dry or clean it with a clean and soft cloth. Do not spray any liquid on the device directly, and avoid liquid immersion.
Maintenance
Recharge the battery soon after the over-discharge. The device should be recharged once a month when it is not used for long. It can extend the battery life following this guidance.
Transportation and Storage
- The packed device can be transported by ordinary conveyance or according to transport contract. The device can not be transported mixed with toxic, harmful, corrosive material.
- The packed device should be stored in room with no corrosive gases and good ventilation. Temperature: -20℃~+60℃; Relative Humidity: no more than 90%.
Troubleshooting
| Trouble | Possible Reason | Solution |
| Prompt “NO RED LED NO IRED LED”. | The unit under testing is placed improperly. | Please place the unit under testing properly. |
|
Can’t power on. |
1) Low power or no power in battery.
2) Device damage. |
1) Charge battery.
2) Contact with the local service center. |
|
The display disappears suddenly. |
1) Device damage. 2) Lower power in battery. |
1) Charge battery.
2) Contact with the local service center. |
|
Too short time for use after charge. |
1) The battery is not charged full.
2) Battery damage. |
1) Charge battery.
2) Contact with the local service center. |
| The battery is not charged full for more than 12 hours. |
Battery damage. |
Contact with the local service center. |
Key of Symbols

Function Specification
| SpO2 Parameter Specification | |
| Range | 35%~100% |
| Resolution | 1% |
|
Accuracy |
When SpO2 is 75%~100%, the error is ±2% or the device’s accuracy, whichever is greater; when SpO2 is 74%~50%, the error is ±3% or the device’s accuracy, whichever is greater; no definition when SpO2 is less than 50%. |
| Pulse Parameter Specification | |
| Range | 20bpm~250bpm |
| Resolution | 5bpm |
| Accuracy | 1%±1bpm |
| Amplitude Parameter Specification | |
| Range | 0.000%~20.000% |
|
Resolution |
1% for 1.000%~20.000%;
0.1% for 0.100%~0.900%; 0.025% for 0.000% ~0.075%. |
| Battery Requirement | |
| Voltage 3.7 rechargeable lithium battery × 1 | |
| Battery working life | |
| Charge and discharge no less than 500 times | |
| Dimensions and Weight | |
| Dimensions | 189(L) × 125(W) × 41 (H) mm |
| Weight | About 600g (with the lithium battery*1) |
 Disposal: The product must not be disposed of along with other domestic waste. The users must dispose of this equipment by bringing it to a specific recycling point for electric and electronic equipment
GIMA WARRANTY TERMS
The Gima 12-month standard B2B warranty applies
FAQ
- Q: Can I use a different simulator probe with this device?
A: No, only use the simulator probe provided by the company to ensure safe and accurate operation of the device.
Documents / Resources
 |
GIMA SPO2 Small and Lightweight Simulator [pdf] User Manual SPO2, SPO2 Small and Lightweight Simulator, Small and Lightweight Simulator, Lightweight Simulator, Simulator |