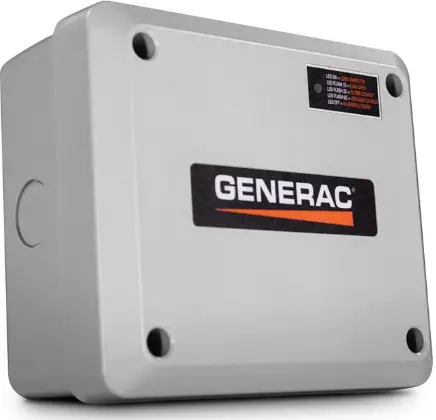
Generac Power Systems G0070001 Smart Management Module
Section 1: Introduction and Safety
WARNING
Loss of life. This product is not intended to be used in a critical life support application. Failure to adhere to this warning could result in death or serious injury.
- WWW.GENERAC.COM
- 1-888-GENERAC (1-888-436-3722)
- visiter http://www.generac.com/service-support/product-support-lookup
WARNING
CANCER AND REPRODUCTIVE HARM www.P65Warnings.ca.gov.
Introduction
Thank you for purchasing a Generac Smart Management Module (SMM). SMMs are designed to work together to prevent the home standby generator from being overloaded by large appliance loads. The modules require no control wires, and provide a cost effective, quick installation. Use of up to eight modules is available, allowing protection of your home and necessary appliances. The information in this manual is accurate based on products produced at the time of publication. The manufacturer reserves the right to make technical updates, corrections, and product revisions at any time without notice.
Read This Manual Thoroughly
WARNING
Consult Manual. Read and understand the manual completely before using Failure to ompletely understand the manual and product would result in death or serious injury. If any section of this manual is not understood, contact the nearest Independent Authorized Service Dealer (IASD) or Generac Customer Service at 1-888-436-3722 (1-888-GENERAC), or visit www.generac.com for starting, operating, and servicing procedures. The owner is responsible for correct maintenance and safe use of the unit. This manual must be used in conjunction with all other supporting product documentation supplied with the product. SAVE THESE INSTRUCTIONS for future reference. This manual contains important instructions that must be followed during the placement, operation, and maintenance of the unit and its components. Always supply this manual to any individual that will use this unit, and instruct them on how to correctly start, operate, and stop the unit in case of emergency.
Safety Rules
The manufacturer cannot anticipate every possible circumstance that might involve a hazard. The alerts in this manual, and on tags and decals affixed to the unit, are not all-inclusive. If using a procedure, work method, or operating technique that the manufacturer does not specifically recommend, verify that it is safe for others and does not render the equipment unsafe. Throughout this publication, and on tags and decals affixed to the unit, DANGER, WARNING, CAUTION, and NOTE blocks are used to alert personnel to special instructions about a particular operation that may be hazardous if performed incorrectly or carelessly. Observe them carefully. Alert definitions are as follows:
DANGER
Indicates a hazardous situation that, if not avoided, will result in death or serious injury.
WARNING
Indicates a hazardous situation which, if not avoided, could result in death or serious injury.
CAUTION
Indicates a hazardous situation which, if not avoided, could result in minor or moderate injury.
NOTE: Notes contain additional information important to a procedure and will be found within the regular text of this manual. These safety alerts cannot eliminate the hazards that they indicate. Common sense and strict compliance with the special instructions while performing the action or service are essential to preventing accidents.
General Hazards
 DANGER
Electrocution. Turn utility and emergency power supplies to OFF before connecting power source and load lines. Failure to do so will result in death or serious injury
Section 2: General Information and Setup
Load Management Options
Load management systems are designed to work together to prevent a generator from being overloaded by large appliance loads. Options include:
- Smart Management Modules (SMMs)
- Smart A/C Module (SACM)—standard in singlephase 100-800 Amp RTS or RXS transfer switches. These options can be used in conjunction or separately.
Application Considerations
- Generator overload condition is determined by generator frequency. Loads are shed when frequency drops below a preset value for a predetermined time. A SMM can be used individually or in conjunction with a SACM to manage a combined total of eight loads. SMMs operate independently when used in conjunction with the SACM.
- Use Priorities A/C 1–4 on the SACM as the top priorities, then up to four SMMs as Priorities 5–8.
- Use only select A/C priorities on the SACM as the top priorities, then use additional SMMs as the remaining priorities.
- To reduce the loads returned to the generator all at once, it is best to set the SMM priorities to follow after the last HVAC load has returned. This allows the generator to accept loads gradually, reducing the potential for additional nuisance load shed events. In any combination of modules, the recovery times after a loss of utility power or shutdown due to overload areshown in Table 2-1.
NOTE: For digital thermostats where a 24 VAC thermostat wire is not available, an SMM must be used to break the power at the HVAC load itself.
Smart Management Module (SMM)
- Any 240V loads, including central air conditioners, can be managed using a SMM. The system can accommodate up to eight individual SMMs.
NOTE: SMMs are self-contained and have individual built-in controllers.
| Priority | Recovery Time | SACM | SMM |
| 1 | 5 minutes | Yes | Yes |
| 2 | 5 minutes 15 seconds | Yes | Yes |
| 3 | 5 minutes 30 seconds | Yes | Yes |
| 4 | 5 minutes 45 seconds | Yes | Yes |
| 5 | 6 minutes | NA | Yes |
| 6 | 6 minutes 15 seconds | NA | Yes |
| 7 | 6 minutes 30 seconds | NA | Yes |
| 8 | 6 minutes 45 seconds | NA | Yes |
SMM and Carton Contents
Priority Dial (A) – Sets module priority.
- NOTE: PRIORITY MUST BE DIFFERENT for each module in an installation. Priority sets the order in which loads recover from a load shed event. Recovery time from a load shed event is five minutes for Priority 1. Each priority after Priority 1 waits an additional 15 seconds after the initial recovery time. See Table 2-1.
- Lockout Switch (B) – Enables or disables lockout function. Switch positions are LOCKOUT LOAD ON GENERATOR (enabled) and LOCKOUT DISABLED. See Table 2-2.
- NOTE: Recovery time is based on priority dial settings. See Table 2-1.
- Test Button (C) – Disables contactor output for a specified time.
- LED (D) – Provides module status. See Table 2-3. Contactor (E) – Normally CLOSED. If the generator begins to overload, the contactor opens to take the load off generator power. The contactor also opens to take the load off generator power. See Connections.
- Mounting Holes (F) – Internal enclosure mounting holes provide clean and sturdy mounting.
- Priority Decal (G) – Provided for recording priority of each module in installation. Install on electrical panel.

Setting Lockout
- SMMs are equipped with a lockout provision. The SMM can be set to enable LOCKOUT mode if load is identified as non-essential and does NOT need to operate on backup power during generator overload. Load can be a single electrical load or an entire subpanel of multiple branch circuits.
- NOTE: LOCKOUT mode works in an overload condition, which is determined by generator frequency. If generator has sufficient capacity, the load will be allowed to turn on even if control is set to LOCKOUT mode. See Figure 2-2. To set SMM to enable standard lockout mode, slide lockout switch (1) to LOCKOUT LOAD ON GENERATOR.
Jumper Locations
See Figure 2-2. The SMM control board is equipped with two movable jumpers (2). Jumper locations are indicated on the diagram:
- (3) Frequency Jumper – default for 60 Hz
- (4) Mode Selector Jumper (identified on control board as “Lock Out Jumper”) – position A is default for most applications
NOTE: Change in jumper (4) is only required for specificapplications and should not be moved under normal circumstances. If unit is installed in an area with unstable frequency power, change the lockout jumper (4) to position B. IMPORTANT NOTE: Jumper (3) should remain in place unless in an area with 50 Hz power.
To move a jumper:
- Remove power.
- Grasp jumper and pull straight up until it clears the pins.
- Move jumper to new location and press it gently onto the pins until seated.
NOTE: To avoid bending or breaking pins, do not rock jumper, use excessive force, or pull sideways to remove it from the SMM control board.

Table 2-2. Lockout Switch Settings
|
Lockout Switch Setting |
Mode Selector Jumper Position |
Mode |
Function |
| LOCKOUT LOAD ON GENERATOR |
A |
Generator |
Module sheds load and does not reconnect until utility returns or overload goes away. See Setting Lockout. This setting is considered standard for most installations. |
| LOCKOUT LOAD ON GENERATOR |
B |
Generator |
Module sheds load and does not reconnect until utility returns or overload goes away. This setting is recommended for installations in areas with unstable frequency power as described in Setting Lockout. |
| LOCKOUT LOAD ON GENERATOR | A or B | Utility | Power is available on module output. |
| LOCKOUT DISABLED | A or B | Generator | Module operates with standard load shed logic. See Table 2-1 for more information. |
| LOCKOUT DISABLED | A or B | Utility | Power is available on module output. |
| NOTE: Duration of Return to Utility timer is longer in Mode B. | |||
Table 2-3. LED States
| State | LED State | Mode | Note |
|
Shed |
1 second flash
(1 On – 1 Off) |
Generator |
Module detected an overload and shed its load. This state only occurs in generator mode, or during a first time utility power-up for five minutes of initial operation. |
| Lockout (30 minutes) | 3 second flash
(3 On – 3 Off) |
Generator |
Module detected an overload while trying to recover from a shed situation. Operation is disabled for 30 minutes.
This state only occurs in generator mode. |
| Lockout Switch Active | 6 second flash
(6 On – 6 Off) |
Generator |
Module output is disabled and there is no power to the appliance while in generator mode and generator is overloaded. Lockout switch must be ON. See Table 2-2. |
| Lockout Switch Active |
ON |
Utility |
Lockout switch operates in generator mode only. It has no function in utility mode. LED is solid, indicating the load is connected. Lockout switch must be ON. See Table 2-2. |
|
Normal |
ON |
Generator or Utility | Indicates the appliance has power. This is the default in utility mode. It is the normal operating state in generator mode when an overload is not detected. |
|
Test |
1 second flash |
Generator or Utility |
Test button triggers a typical shed condition and overrides all other states except generator lockout switch ACTIVE state.
NOTE: Actual test time varies depending on SMM priority setting. Use the following formula to calculate test time: Time = (P-1) x 15 seconds, where P represents priority setting. Example: SMM Priority 6 test time = (6-1) x 15 seconds, or 75 seconds. |
Notes:
- Refer to the Priority Settings table for information on recovery priority times.
- If the module detects a generator overload during a load-shed recovery , the module will again shed the load for up to 30 minutes.

Section 3: Installation, Tests, & Troubleshooting
Electrical Specifications
- Input Voltage 240 VAC
- Current Rating 50A resistive, 40A inductive
- Locked Rotor Amp Rating 180A
- Motor Rating 3 HP
- Contactor Coil Voltage 240 VAC
Enclosure Specifications
| Enclosure | Type 3R |
| Temperature | -22 to 122 °F (-30 to 50 °C) |
Remove Contents from Carton
- Open carton.
- Remove and verify carton contents:
- SMM
- Priority decal
- Owner/installation manual
- Retain carton for mounting template.
- Contact the place of purchase with unit model number to report any missing carton contents.
- Record date of purchase on front cover of this manual.
Tools Needed For Installation
- Power drill and suitable drill bit
- Phillips and flat head screwdrivers
- Mounting screws or wall anchors
- Electrical materials
- Voltmeter to indicate voltage presence
NOTE: Use the Digital Multimeter (DMM) LowZ low input impedance setting to collect accurate voltage measurements. LowZ eliminates the possibility of inaccurate ghost voltage readings, also known as phantom voltage or stray voltage readings. See DMM manufacturer’s literature for additional information.
Mounting Instructions
DANGER
Electrocution. Turn utility and emergency power supplies to OFF before connecting power source and load lines. Failure to do so will result in death or serious injury. Recommended installation is near the electrical panel or appliance/load. The enclosure has a NEMA 3R rating and can be mounted indoors or outdoors. It provides a degree of protection against rain and sleet and is undamaged by the formation of ice on the enclosure.
- Turn OFF both UTILITY (NORMAL) and EMERGENCY (STANDBY) power supplies.
- Choose mounting location (near electrical panel, appliance or load to be managed).
- See Figure 3-1. Use a flat head screwdriver to remove appropriate knockouts (A) from module enclosure for wiring.
 NOTE: If outdoor installation is chosen, bottom knockouts must be used to meet NEMA 3R rating and protect against water ingress.
 - Hold SMM enclosure against mounting surface with arrows (B) pointing up, and mark or drill four mounting holes (C). See Figure 3-2 for mounting dimensions if necessary.

- Height (in/mm)
- H1 6.17 / 156.8
- H2 2.36 / 60
- Width (in/mm)
- W1 7.06 / 179.4
- W2 4.72 / 120
- Depth (in/mm)
- D1 3.7 / 94
Connections
DANGER
Electrocution. Turn utility and emergency power supplies to OFF before connecting power source and load lines. Failure to do so will result in death or serious injury

Legend
- A Red (240 VAC – Line)
- B Black (240 VAC – Line)
- C Red (240 VAC – Load)
- D Black (240 VAC – Load)
- E White – Neutral (as required)
- F Green – Ground (as required)
- G Black – Factory (PCB)
- H Red – Factory (PCB)
- I Blue – Factory (PCB)
- J Blue – Factory (Jumper)
- Turn off both UTILITY (NORMAL) and EMERGENCY (STANDBY) power supplies before connecting the power source and load lines to the transfer switch and SMM.
NOTE: Suitable conduit fittings must be installed in knockout openings when running supply and load wires.
NOTE: Use at least 167 °F (75 °C) rated wire and gauge per installation instructions. See Table 3-1 for the recommended\ wire size based on the load current - Run line supply wires per applicable NEC code articles for the wiring method selected.
- Run load wires per applicable NEC code articles for the wiring method selected.
- See Figure 3-3. Connect line supply wiring (A, B) to the line side of SMM contactor field terminals. Tighten field terminals to 25 in-lbs (2.8 Nm).
- Connect load supply wiring (C, D) to the load side of SMM contactor field terminals.
| Temperature rating of conductor: 167 ºF (75 ºC) | |
| Conductor types (must be copper):
RHW, THHW, THW, THWN, XHHW, USE, ZW |
|
| Size AWG | Maximum Current Rating |
| 14 | 15A |
| 12 | 20A |
| 10 | 30A |
| 8 | 50A* |
| * 40A for Type NM cable | |
NOTE: If neutral (E) and ground (F) wires are included, connect inside SMM using a listed termination device. The unit is now ready to configure, apply power, and perform testing.
Setting Priorities
High-priority 240 VAC loads should be set to the highest priorities so those loads recover first in the event of generator overload.
NOTE: The highest priority, and first load to activate, is Priority 1. The last load to activate is Priority 8.
Setting priority determines timing for three scenarios:
- Order in which loads recover
- Delay time until power returns during an outage
- Delay time for post-load shed recovery
- An example configuration is shown below.
Configurations will vary depending on customer prioritization of loads:
| Priority 1 – Baseboard heat | Priority 5 – Non-essential circuits |
| Priority 2 – Air conditioner | Priority 6 – Pool pump or hot tub |
| Priority 3 – Range | Priority 7 – Other circuits |
| Priority 4 – Clothes Dryer | Priority 8 – Other circuits |
- Set the priority of each SMM as desired (using the example configuration for reference).
- Apply the priority decal in a suitable location on the electrical panel to record chosen priority designations.
- Record priorities on the decal
Tests
Utility Test
- Turn utility power ON and enable all module feeding circuits
- Verify LED begins to flash at one-second intervals.
- All contractors will close after five minutes. LED will illuminate and remain ON.
NOTE: The five-minute delay allows magnetism to dissipate from the air conditioner compressor. This allows easier starting and eliminates the potential for reverse compressor operation.
Installation Summary
- Install cover on the electrical panel.
- Install covers on modules
Troubleshooting
See Table 3-2 for troubleshooting problems, causes, and corrections.
| Problem | Cause | Correction |
| Load is not powered; LED is OFF | Circuit breaker was disabled. | Enable circuit breaker. |
| The load not powered; the LED is OFF | Utility main line circuit breaker (MLCB) disabled and generator OFF. | Enable utility MLCB if utility is present or verify generator operation if outage. |
| Load not powered; LED flashing 1-second interval | Generator power was just applied to the unit. Utility power just applied to the unit.
The generator was overloaded and a shed occurred. |
Wait five minutes plus the priority time delay (see
Table 2-1) for the unit to enable output. |
| Load not powered; LED flashing 3-second interval | This load overloaded the generator while attempting recovery from a shed. It is in a 30-minute lockout wait period. | Wait 30 minutes from lockout for the unit to attempt to re-apply the load.
Review all loads enabled in the household. The generator may end up in another overload condition when this load is enabled. Disable some loads to prevent generator overload from recurring. |
| Load not powered; LED flashing 6-second interval | The lockout switch is enabled and the unit is on generator power. | During installation, it was determined that this load will be disabled during generator operation to prevent generator overload. Contact IASD for details. |
| Load not powered while on utility | Wiring or unstable frequency. | Check wiring. See Setting Lockout for information on unstable frequency. |
- Part No. 10000030493 Rev. D 11/22/2019
- ©2019 Generac Power Systems, Inc.
- All rights reserved.
- Specifications are subject to change without notice.
- No reproduction is allowed in any form without prior written consent from Generac Power Systems, Inc.
- Generac Power Systems, Inc. S45 W29290 Hwy. 59 Waukesha, WI 53189
- 1-888-GENERAC (1-888-436-3722)
- www.generac.com
Documents / Resources
 |
Generac Power Systems G0070001 Smart Management Module [pdf] User Manual G0070001 50A, G0070011 50A, G0070061 100A, G0070001 Smart Management Module, G0070001, Smart Management Module, Management Module, Module |