1. Introduction
Thank you for choosing the Ledlenser P7R rechargeable flashlight. This manual provides essential information for the safe and efficient use, setup, operation, and maintenance of your device. The P7R combines powerful illumination with convenient recharging capabilities, making it an ideal tool for various applications.

Figure 1: Ledlenser P7R Rechargeable Flashlight
2. Contenu du colis
Veuillez vérifier que tous les éléments énumérés ci-dessous sont inclus dans votre colis :
- Ledlenser P7R LED Torch
- 1 x Rechargeable Battery Set (Lithium-Ion)
- Floating Charge System (Magnetic Wall Mounting Charger)
- Câble USB
- Support de montage
- Poche
- Wrist Lanyard

Figure 2: All components included with the Ledlenser P7R flashlight.
3. Installation et charge initiale
3.1 Installation de la batterie
The Ledlenser P7R comes with a pre-installed rechargeable Lithium-Ion battery. Ensure the battery is securely seated before first use. If replacing the battery, unscrew the tail cap and insert the new battery with the positive (+) terminal facing the head of the flashlight.
3.2 Mounting the Floating Charge System
The Floating Charge System allows for convenient magnetic charging and storage. Use the provided mounting bracket and screws to secure the charger to a wall or suitable surface. Ensure the mounting location is dry and easily accessible.
3.3 Charge initiale
Before first use, fully charge the flashlight. Connect the USB cable to the Floating Charge System and a power source (e.g., USB wall adapter, computer USB port). Attach the flashlight to the magnetic charging port. The charge indicator will illuminate red during charging and turn green when fully charged.

Figure 3: The Ledlenser P7R connected to its Floating Charge System. The indicator light shows charging status (red for charging, green for charged).
4. Fonctionnement
4.1 Mise sous/hors tension
Press the switch on the tail cap to turn the flashlight on or off.
4.2 Changing Light Modes (Smart Light Technology)
The P7R features Smart Light Technology, offering multiple light programs and functions. Briefly press the switch repeatedly to cycle through the available light modes (e.g., High Power, Power, Low Power). The specific sequence and available modes can be customized or may vary based on the selected program.
4.3 Focusing (Advanced Focus System & Rapid Focus)
The Advanced Focus System (AFS) allows for a seamless transition from a broad flood beam for close-up illumination to a sharply focused spot beam for long-distance viewing. To adjust the focus, slide the head of the flashlight forward or backward. The Rapid Focus feature enables quick, single-handed adjustments of the light cone.
Figure 4: The Advanced Focus System allows for a smooth transition between a wide flood beam and a concentrated spot beam.
5. Advanced Features Overview
The Ledlenser P7R incorporates several advanced technologies to enhance its performance and user experience:
- Advanced Focus System (AFS): Patented reflector and lens combination for efficient light distribution in both flood and spot modes.
- Rapid Focus: Enables quick, single-handed adjustment of the light beam.
- Floating Charge System: Magnetic contact charging for easy and convenient recharging without removing the battery.
- Smart Light Technology: Offers individual light programs and optimized energy consumption, allowing users to select preferred light functions.
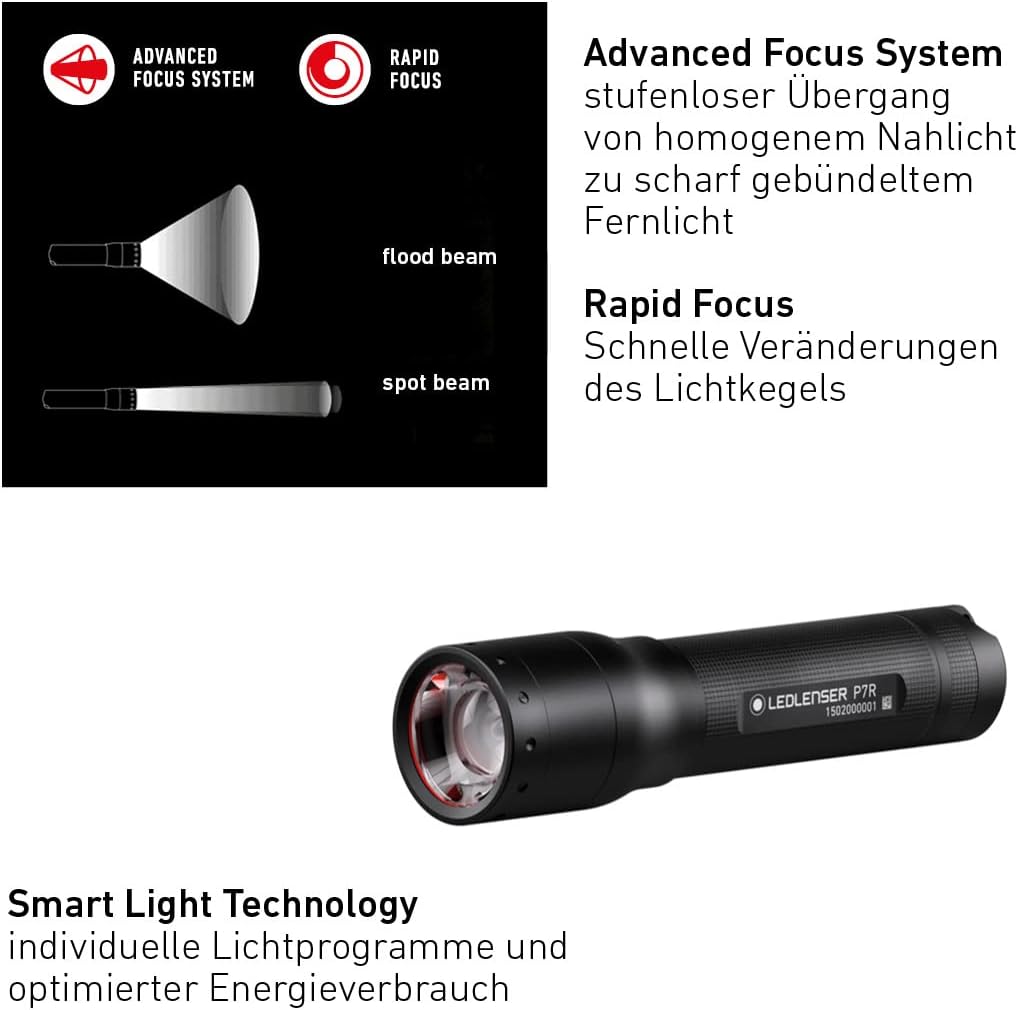
Figure 5: Icons representing the key technologies: Advanced Focus System, Rapid Focus, Floating Charge System, and Smart Light Technology.
6. Entretien
6.1 Nettoyage
Clean the flashlight regularly with a soft, damp cloth. Do not use abrasive cleaners or solvents. Keep the lens free of dirt and debris to ensure optimal light output.
6.2 Entretien de la batterie
To prolong battery life, avoid fully discharging the battery frequently. Recharge the flashlight when the light output noticeably diminishes. If storing the flashlight for an extended period, charge the battery to approximately 50% and recharge every few months.
6.3 Résistance à l'eau
The P7R has an IPX4 rating, meaning it is protected against splashing water from any direction. It is not designed for submersion. Ensure all seals are clean and intact to maintain water resistance.
7. Dépannage
| Problème | Cause possible | Solution |
|---|---|---|
| La lampe de poche ne s'allume pas. | Battery is discharged or incorrectly inserted. | Chargez la batterie. Vérifiez la polarité de la batterie. |
| La luminosité est faible. | Batterie faible. Lentille sale. | Rechargez la batterie. Nettoyez la lentille. |
| La lampe torche ne se charge pas. | Charging cable or power source issue. Dirty charging contacts. | Check USB cable and power source. Clean magnetic charging contacts on both flashlight and charger. |
| Focus mechanism is stiff. | Saletés ou débris dans le mécanisme. | Clean the focusing mechanism carefully. Do not force movement. |
8. Spécifications
| Performances des DEL | |
|---|---|
| Luminous Flux (Boost/Power/Mid Power/Low Power) | 1000 / - / 250 / 20 lumens |
| Beam Range (Boost/Power/Mid Power/Low Power) | 210 / - / 150 / 40 meters |
| Lighting Duration (Boost/Power/Mid Power/Low Power) | 2 / - / 5 / 40 hours |
| Housing & Dimensions | |
| Matériel | Aluminium |
| Length (defocused) | 158 mm (6.22 pouces) |
| Diamètre de la tête | 37 mm (1.46 pouces) |
| Poids | 210 g (7.4 oz) |
| Résistance à l'eau | IPX4 |
| Batterie | |
| Type de batterie | 1x 18650 Li-ion, 3.7V |
| Temps de charge | Environ 300 minutes |
| Plage de température de fonctionnement | -20°C à +40°C |
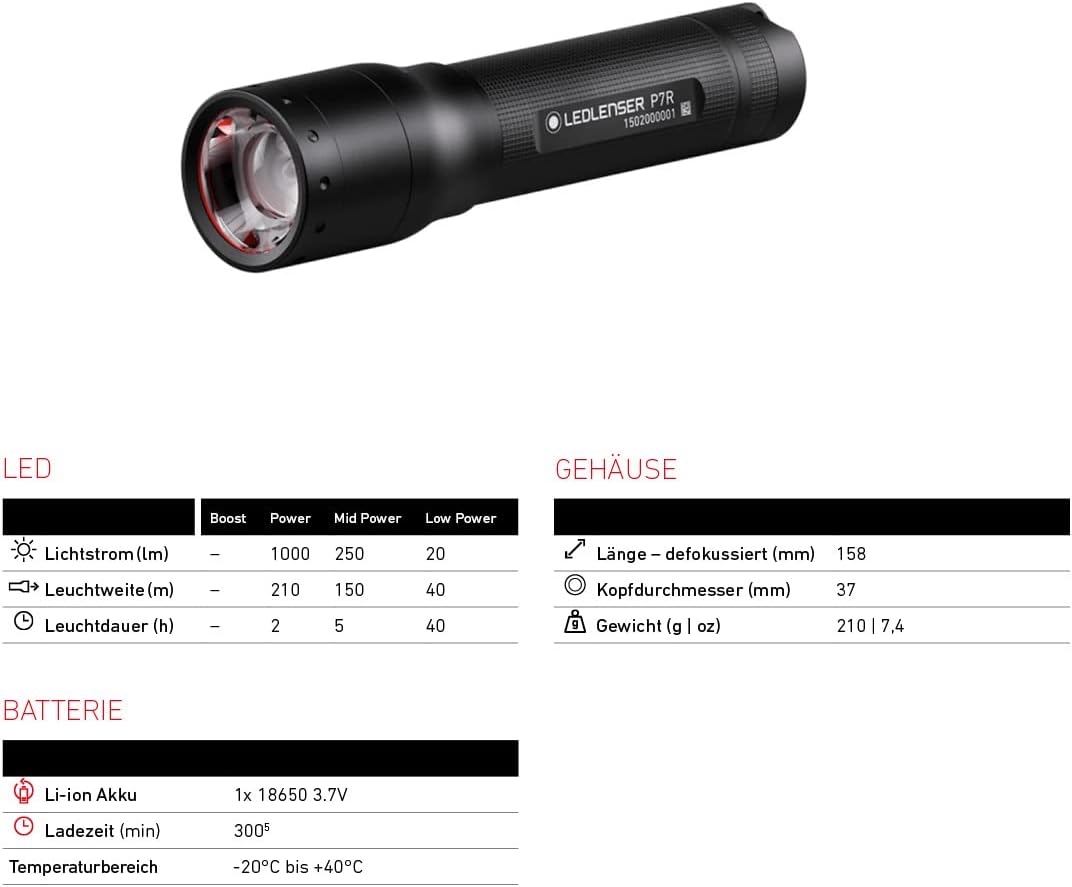
Figure 6: Detailed specifications for LED performance, housing, and battery.
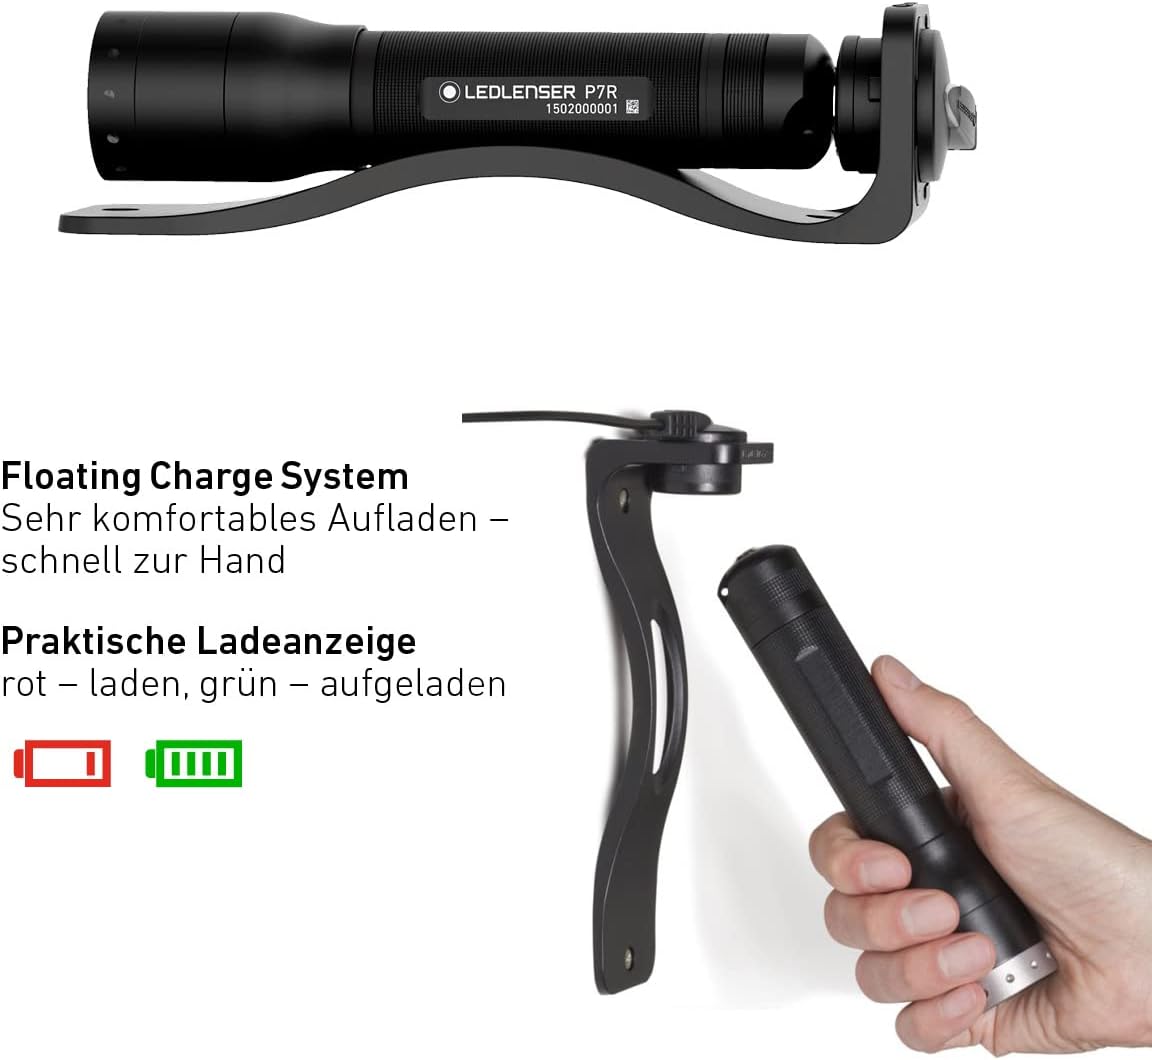
Figure 7: Physical dimensions of the Ledlenser P7R flashlight.
9. Garantie et assistance
The Ledlenser P7R comes with a 7-year warranty upon registration. For warranty claims, technical support, or further assistance, please refer to the official Ledlenser website or contact your local distributor. Keep your proof of purchase for warranty purposes.
Pour plus d'informations, visitez le Ledlenser Store.


