![]() CAN-AM Defender Turbo System
CAN-AM Defender Turbo System
Installation Guide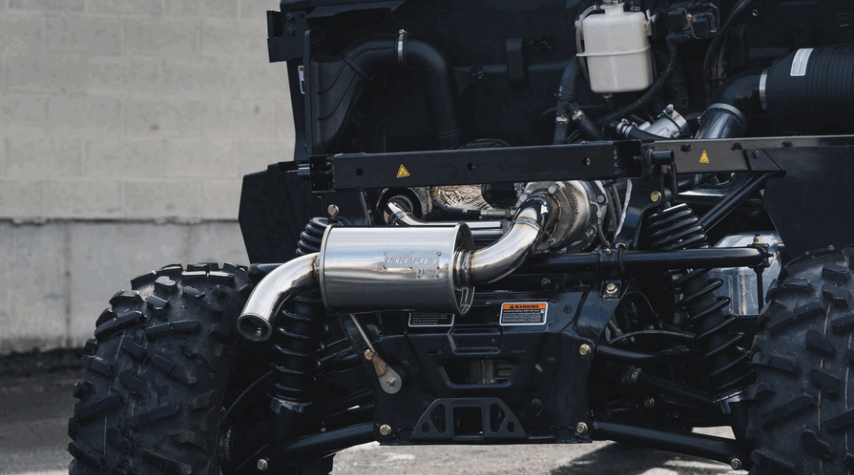
INTRODUCTION
WELCOME TO YOUR NEW CAN-AM DEFENDER TURBO SYSTEM.
The Force Turbos pump fuel turbo system is designed specifically for all Can-Am Defender® 1000 CC units.
With a boost level of 5 psi and high-volume design, you are sure to get the additional horsepower you are looking for with minimal stress on the motor. Your Defender will see a dramatic horsepower increase to the wheels from 45 RWHP to near or above 80 RWHP and 20 FTLBS of torque.
INSTALLATION TIME:
A professional mechanic can install the system in about 6 hours, while a home garage mechanic usually needs 8-10 hours or more.
DISCLAIMER:
While there are no internal engine modifications required, we still recommend that the installation technician have adequate experience in power sports mechanics. Proper installation is imperative for safe operation.
INSTALLATION VIDEO:
INCLUDED PARTS
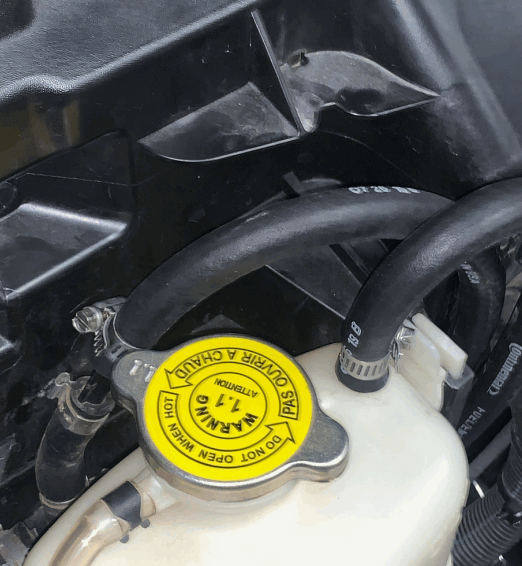
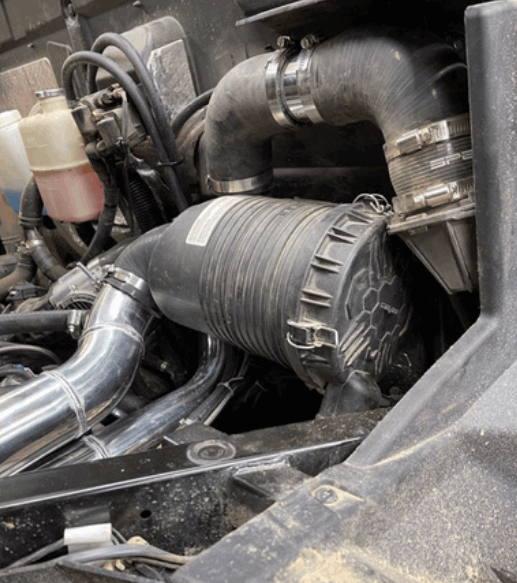
 STOCK VEHICLE
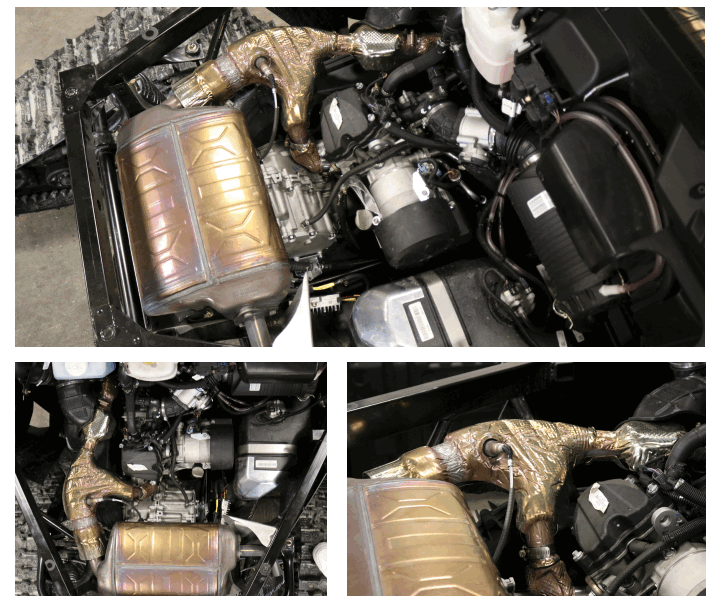
DISASSEMBLY
REMOVE THE FOLLOWING PARTS:
- Bed
- Bed shock
- Stock exhaust muffler
- Exhaust muffler mountain plate
- Air filter box
- Upper air filter intake box
- Pre-throttle body intake tube
- Stock O2 sensor
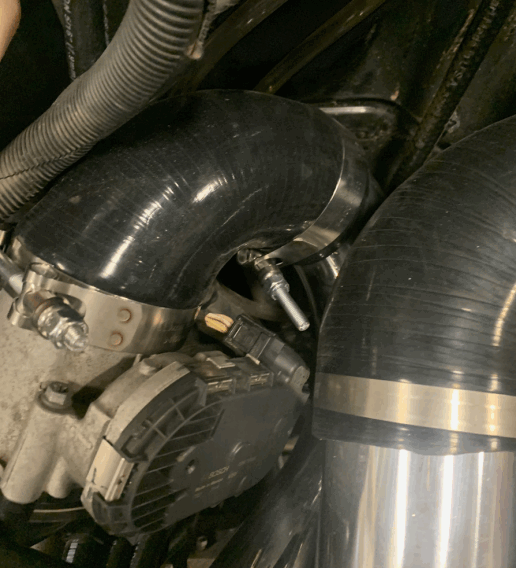
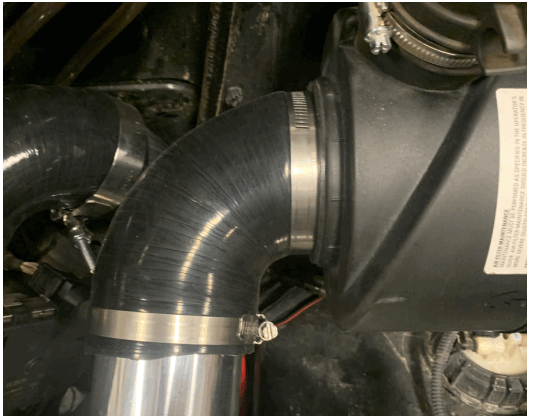
DISASSEMBLED VEHICLE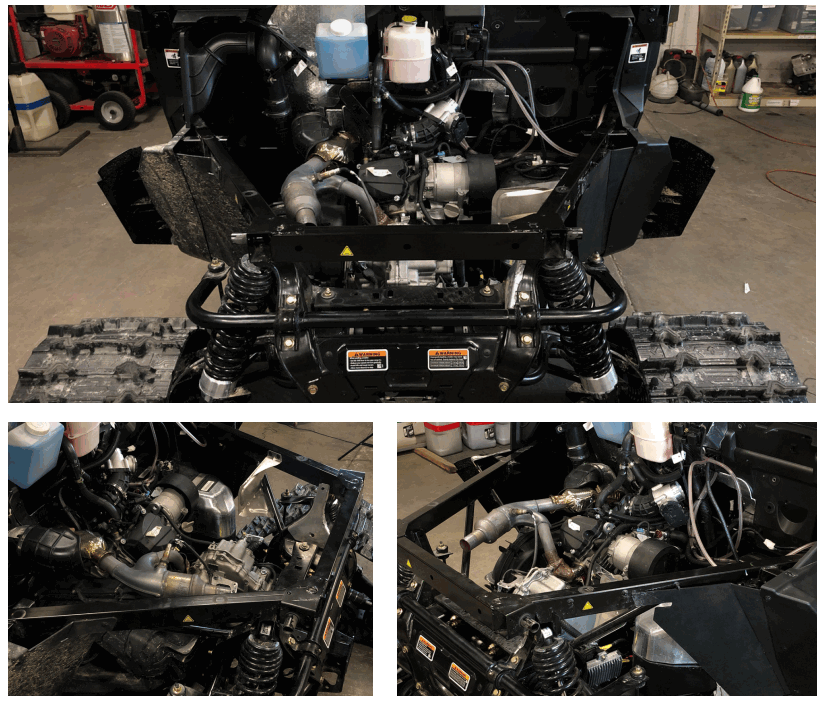
ASSEMBLY
- Start photo
- Follow Dynode controller instructions in order to marry Dynode to your vehicle. Once Dynode controller is married to vehicle, connect computer to Dynode fuel controller. Controller will become a flash drive. Copy PV info document and ####.sty stock tune file. Email them to Force Turbos. Force Turbos will supply you with the necessary base tune
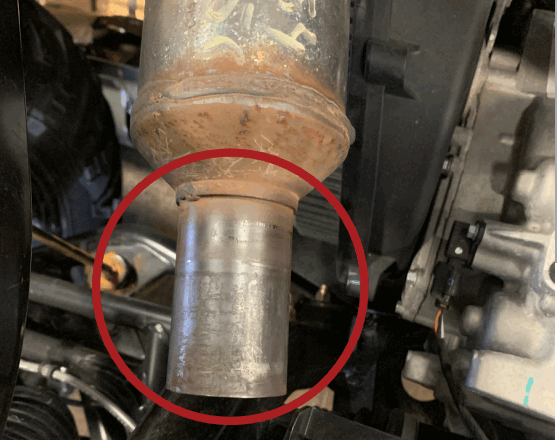
- Scotch-Brite end of header where the muffler is connected. You want a good seal on this connection
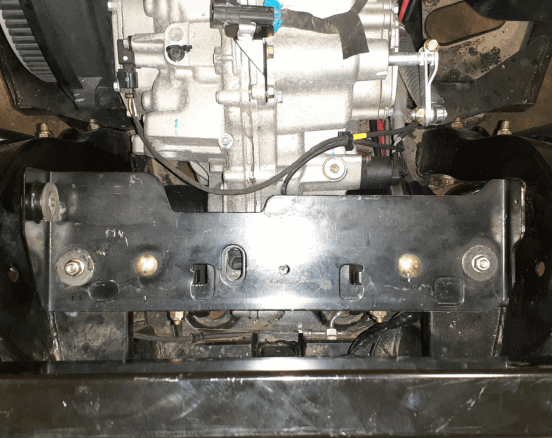
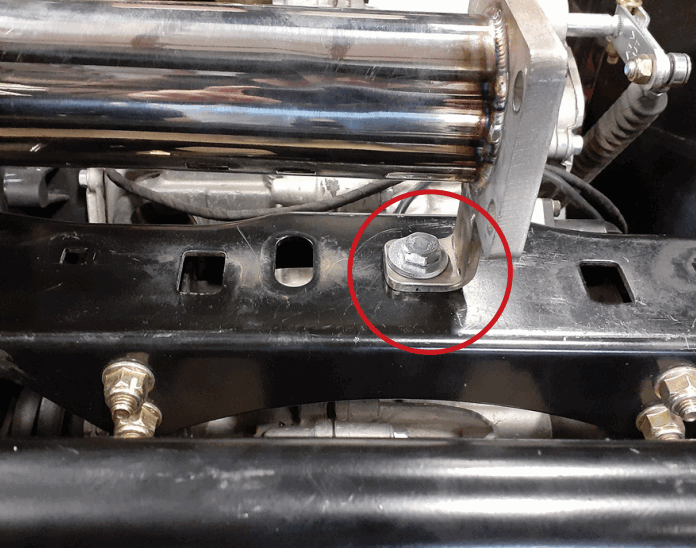
- Remove muffler bracket from transmission mount. Reinstall the 2 big washers and nuts to bolt and torque back down to spec

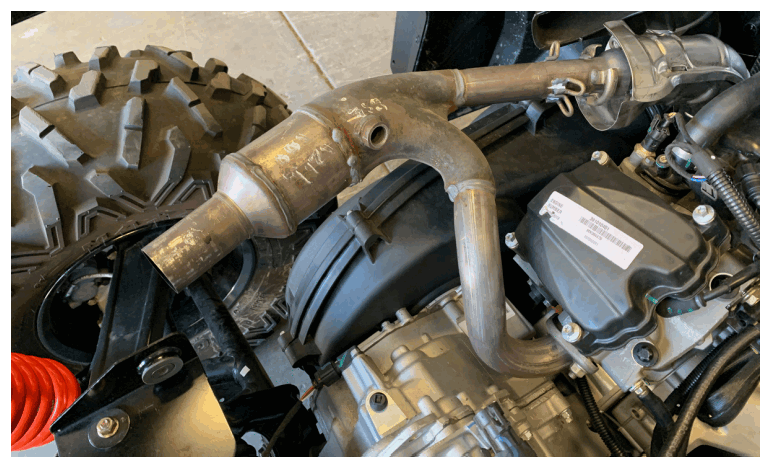
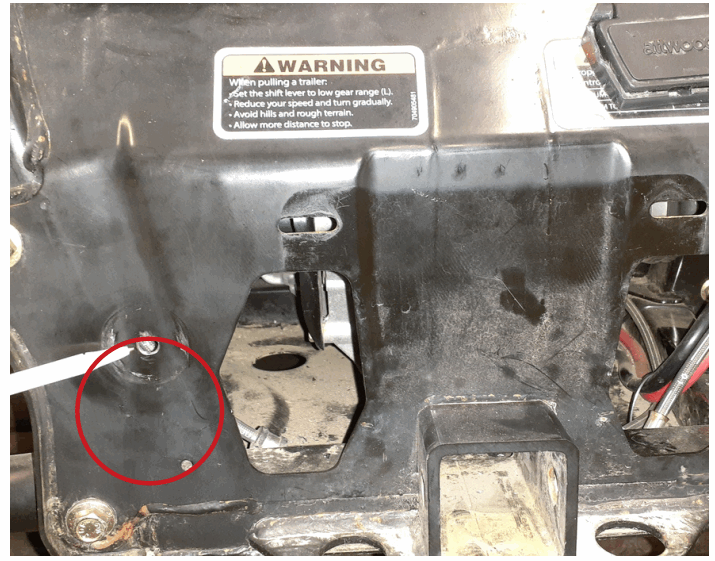
- Remove exhaust pipe from turbo assembly and bolt set up from turbo inlet pipe. Set turbo assembly into place and mark the hole on the bracket that will need to be drilled. Remove turbo assembly
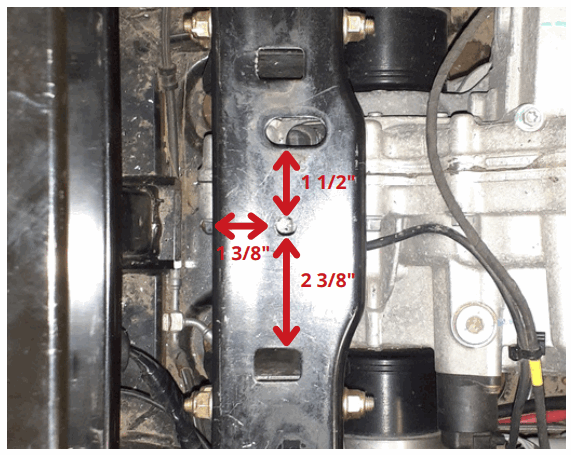
- Drill 3/8″ hole. Measure 1 1/2″ from the driver’s side oval and 1 3/8″ from the back of the transmission crossmember. Center punch and drill
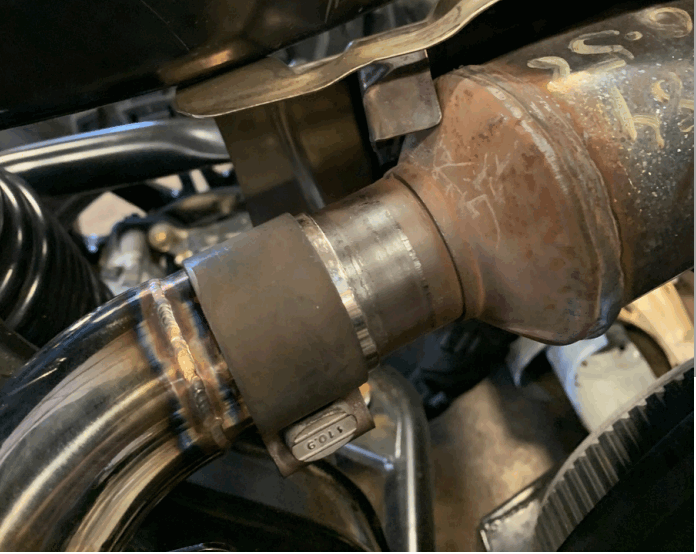
- Install exhaust clamp onto turbo inlet pipe
- Set turbo assembly into chassis. Bolt down turbo assembly into vehicle. Tighten exhaust clamp and reinstall exhaust heat shielding. Reinstall stock O2 sensor and plug in
- Bolt turbo exhaust muffler back onto turbo loosely. Mark mounting hole for rubber stud mount. Remove turbo exhaust muffler. Use 21/64″ drill bit to drill hole where rubber studs will be mounted (when drilling, make sure you do not hit transmission with drill bit). Mount rubber stud into hole
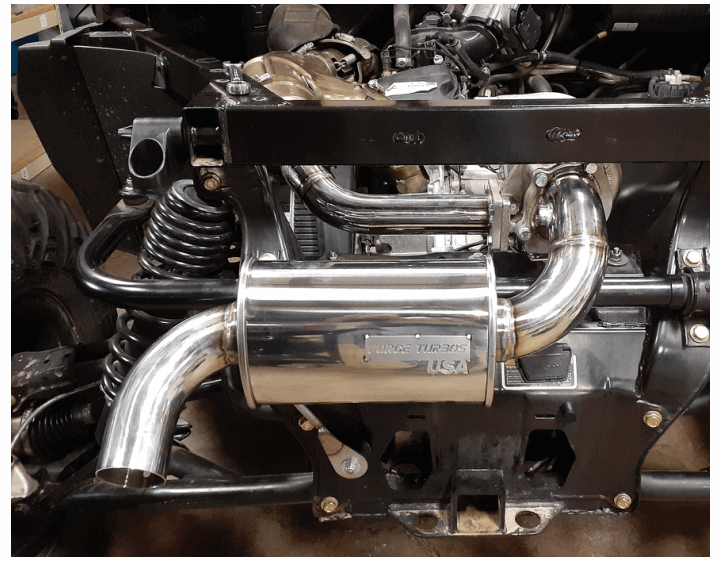
- Reassemble turbo exhaust muffler onto turbo assembly and tighten everything down
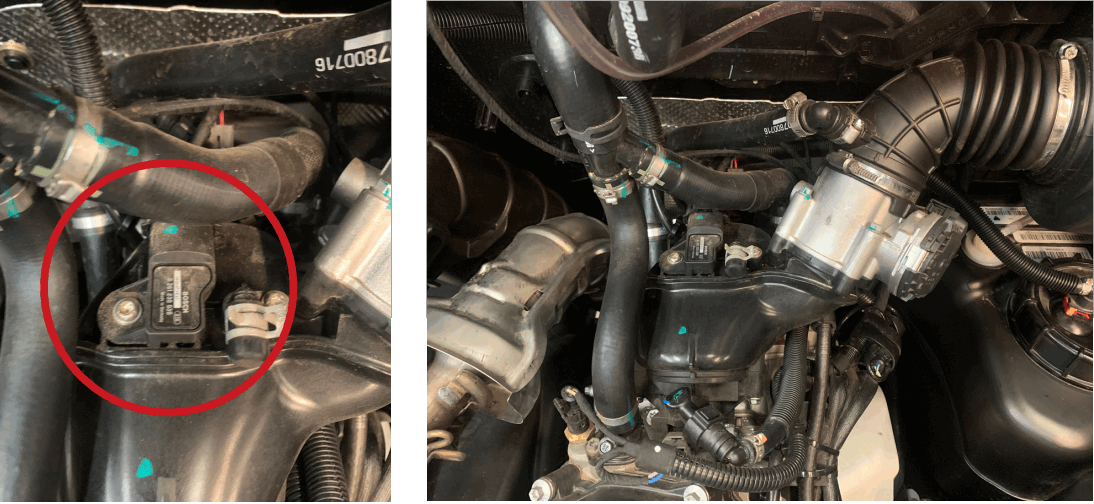
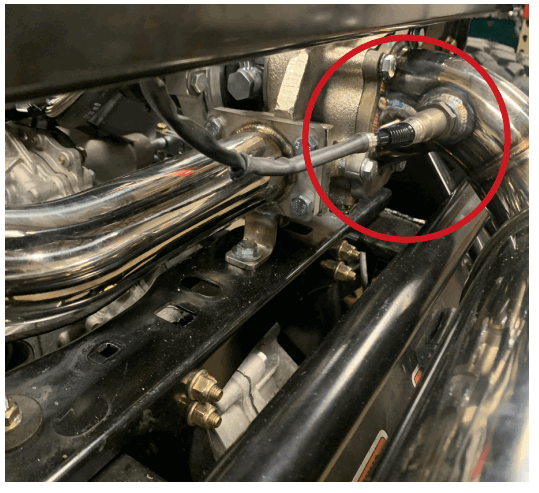
- Remove stock map sensor from airbox plenum on engine using T30 Torex. Clean surface. Install new 3 bar map sensor
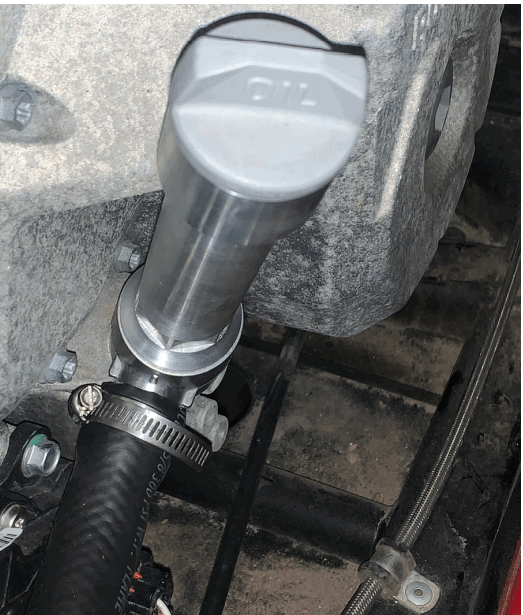
- Non AC Model: remove stock oil dip stick tube by turning it counter clockwise. Reinstall new billet dip stick tube with return drain. Tighten down
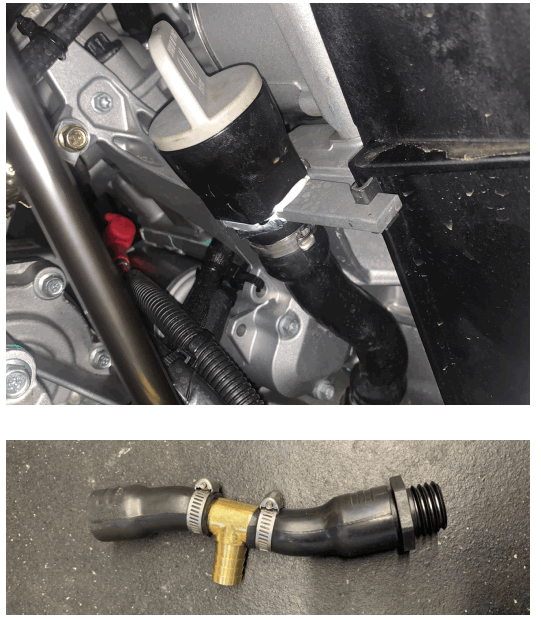
- AC Model: Cut flexible dip stick tube. Install brass tee into dip stick tube line. Tighten down clamps. (Note: make dip stick tube the same length as stock tube or oil level in engine will read wrong on the flexible dip stick)
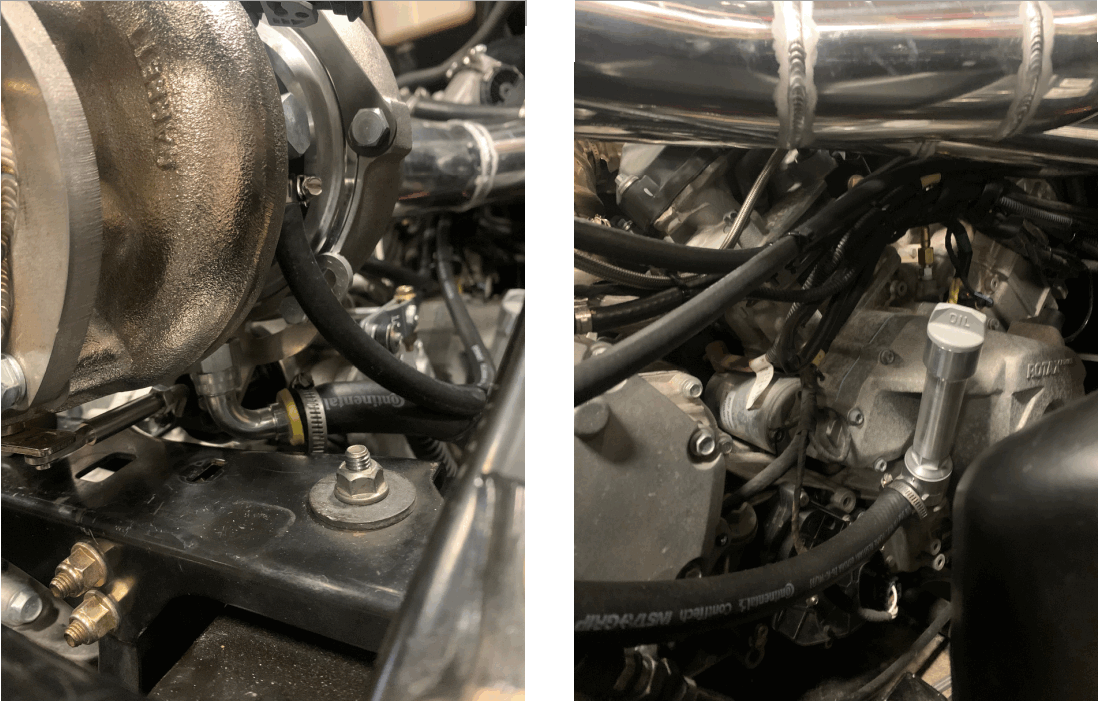
- Critical component. Install 5/8 hose onto bottom turbo, fitting the run hose in downward fashion to oil dip stick tube. Route hose so that the oil can gravity return to the engine. Make sure hose is secure. Tighten down clamps
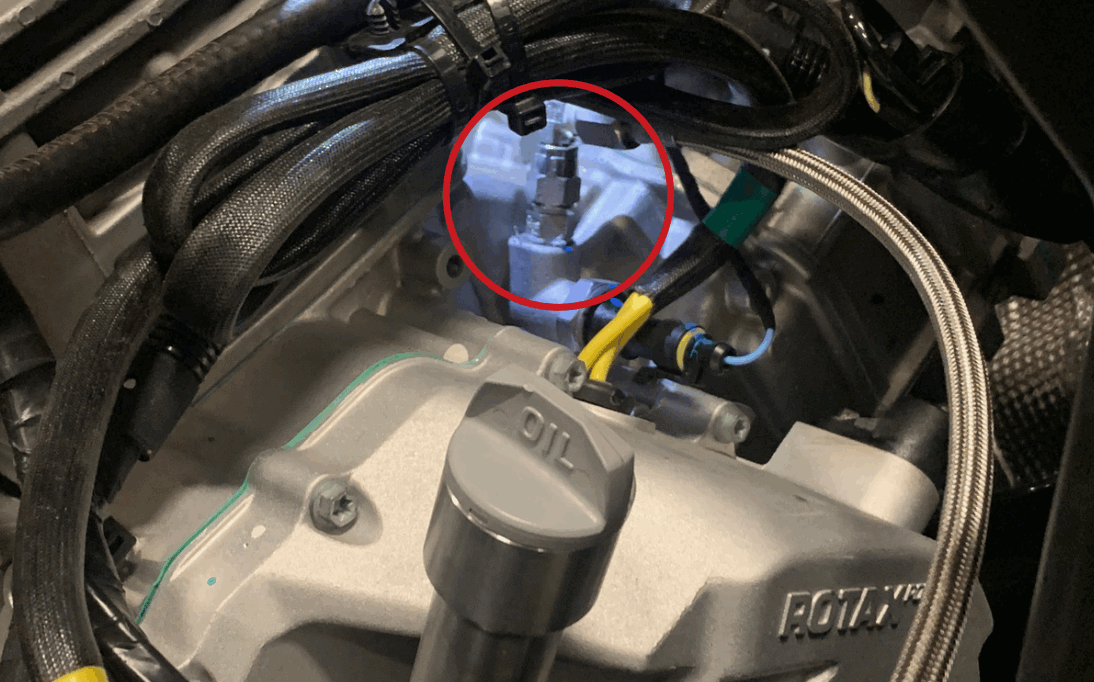
- On top of the motor and between cylinder is a counter sunk plug. Remove plug with 5mm Allen wrench. Install 4AN x 1.50 male adapter and tighten with 13 mm wrench. Install swivel 90 onto male adapter point toward passenger win of vehicle tighten down with 14mm wrench. Run oil line to top of the turbo tighten down with 15 mm wrench

- Unclip coolant bottle fill reservoir. Remove hose on top of coolant bottle that runs to Y fitting behind coolant bottle
- Install coolant line on Y fitting and run to rear side of the turbo. Install second coolant line on top of the coolant bottle and run to front side of turbo. Feel free to trim coolant lines if needed. Zip-tie coolant lines out and out of the way of moving parts or shifter linkage.
- Install charge tube. Charge tube will route between engine and fuel tank. Connect charge tube to throttle body using 2.5” silicone 90 pointing down. Some adjustment is needed to line up silicone 90 and throttle body. Tighten all clamps
- Install cold air intake connect 3” silicone 90 to turbo. Route cold air intake to air filter box area. Connect air filter box to coil air inlet pipe
- Mark new holes that need to drilled through back firewall to remount air filter box approx. 3” further to the right of the vehicle. Remove air filter box. Drill new holes and remount air filter box to turbo cold air inlet pipe. Tighten down all clamps
- Connect crank case breather line to 3” turbo cold air intake
- Install U bend silicone fitting assembly to top of the air filter box. Tighten down clamp
- Install Dynode AFR sensor into turbo exhaust. Run wires along right side of vehicle into the front cab area of the machine. Take care not to pinch or install the wire where damage can occur. Plug color matched wires into AFR Module
- Connect Dynode wide band wire to diagnostic port under hood of vehicle. Route wire into cab area of machine. Connect wiring to Dynode AFR controller
- Connect Dynode fuel controller to Dynode AFR controller. Power for unit is supplied by diagnostic port
- Once base tune is received, copy base tune from email and place into the Dynodes fuel controller. Load tune into ECU. Follow tune up load instructions supplied with the Dynode fuel controller
- Set up Dynodes screen 1
• Position 1 Engine speed
• Position 2 AFR 1 will show up once the vehicle has been started and Dynode has had time to calibrate the AFR/wide band unit
• Position 3 Baron (BAP)
• Position 4 Manifold absolute pressure (MAP) - Fill vehicle coolant bottle and oil to correct level. Start vehicle and run for short time. Recheck oil and coolant level. Add fluids if needed. Restart vehicle and check for leaks or problems
- Run vehicle slow. Check for mechanical problems. Watch AFR numbers. AFR will show:
• 14.7- 15.2 at idle
• 12.5- 13.5 mid throttle driving
• 11.2-12.2 full on throttle
If AFR numbers are higher than these numbers, a base map tune change will need to happen. Data log short run by pressing the circle button. Make short run and email over data log to Force Turbos for evaluation - Reinstall bed, tail lights, bed shock, and all other factory OEM parts
IF YOU HAVE ANY QUESTIONS, PLEASE CONTACT FORCE TURBOS AT WWW.FORCETURBOS.COM. WE APPRECIATE YOUR BUSINESS.
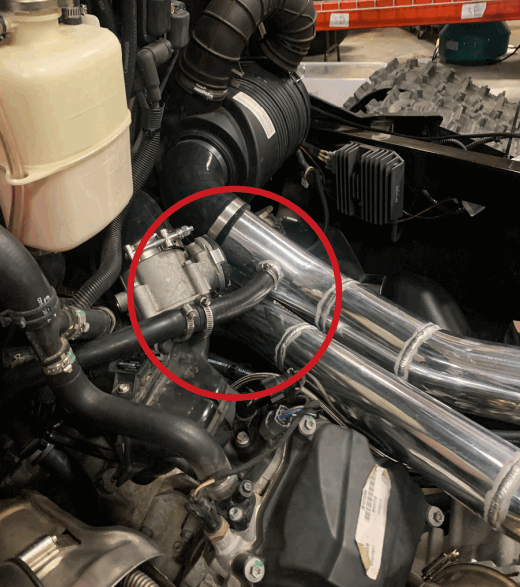
VEHICLE WITH TURBO SYSTEM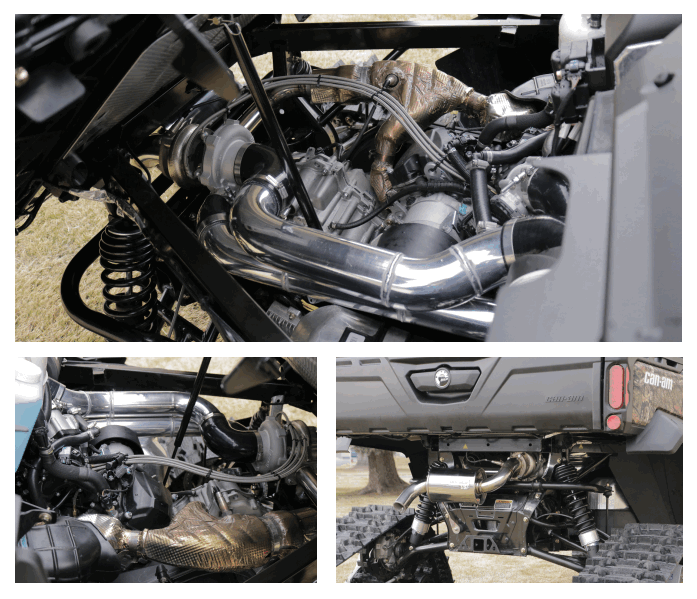
![]() WWW.FORCETURBOS.COM
WWW.FORCETURBOS.COM
801-807-8046
REV. NC
Documents / Resources
 |
FORCE TURBOS CAN-AM Defender Turbo System [pdf] Installation Guide CAN-AM Defender Turbo System, CAN-AM, Defender Turbo System, Turbo System |


