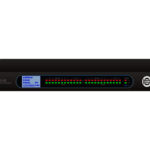
FONESTAR NMX SYSTEM Audio Matrix and Peripheral Devices

Specifications
- Models NMX-88, NMX-88D, NMX-1616, NMX-1616D
- Control PC software, Android App, iPad App
- Compatibility Remote control device NMX-WP
- Network Connection Ethernet
DESCRIPTION
The NMX-88, NMX-88D, NMX-1616, and NMX-1616D matrices are designed to be configured and controlled via PC software. In addition, FONESTAR offers other devices compatible with the matrices to complete your installation.n
- NMX-WP remote control from which you can control different options of the matrix to which it is associated. You can select functions such as volume control, gain control, mute, scene ca, ll, and special actions with UDP, RS-,232 or RS-485 commands.
- TAB-10-16 10” Android touch screen from which you can control different options of the matrices. You can select functions such as volume control, gain control, mute, scene call, and special actions with UDP, RS-232, or RS-485 commands.THE
- MCMD-1 DANTE desktop microphone allows messages to be given via a DANTE channel.
NOTE the TAB-10-16 touch screen requires an APP available on the Fonestar website.. This APP is available for Android or iOS being compatible with tablet and iPad.
The PC software will be needed to configure the IP addresses of these devices, to create and load screens in the TAB-10-16 (Android), Android tablets or iPads; and configure the options to be controlled by the NMX-WPremote control. In addition to the control and adjustment of inputs and outputs by means of filters, volume controls, mixers, etc.
DOWNLOAD AND INSTALLATION
PC software
The control software is available for PCs with the Windows 7 operating system
system or later, and the following minimum requirements:
- 1 GB free storage space
- Resolution 1024×768 pixels and bit depth 24 bits.
- 2 GB RAM
- Cat.5 Ethernet cable


- Download the control software. To do this, go to the SOFTWARE tab of the matrix web page www.fonestar.com/en/NMX-88, or read the QR code, and download the file
- “FONESTAR_NMXmatrix_PC_SW.zip”
- Install the software on your PC by double-clicking on the file:
- “FONESTAR_NMXmatrix_PC_SW_xxxx.msi”
- Once installed, the following icon will appear on your desktop.
APP for TAB-10-16 or Android tablets

- Download the control software. To do this, go to the SOFTWARE tab on the SOFTWARE page of the web page of the screen. www.fonestar.com/en/TAB-10-16, or read the QR code, and download the file
- “NMXMatrix_Android_APP_2.3.22.zip”.
- Install the APP on your Android device by running the APK file:
- “NMX_Matrix_Android_APP_2.3.22.apk”
NOTE your device may ask for permission to install external applications. Provide all permissions, it is a safe application.
- “NMX_Matrix_Android_APP_2.3.22.apk”
- Once installed, the following icon will appear in your application panel.
APP for iPad devices
- Download the APP from the App Store on your device by searching for ‘dsppro v2’.
- Install the APP on your iPad.
- Once installed, the following icon will appear in your application panel.
CONNECTION
To be able to control, configure, and customise all the devices in the system, you must have all of them connected to the same LAN network through their RJ45 ports. The connection will always be made in a star, with a SWITCH or ROUTER as the central node of the star. This equipment must be PoE to power the NMX-WP, MCMD-1, and TAB-10-16 devices (it can also be powered by its power adapter). All devices work with static IP addresses, so DHCP is not necessary. Only TAB-10-16 has network configuration via DHCP in addition to static (recommended).
IMPORTANT it is recommended to review and configure IP addresses each time you connect a new device to avoid network conflicts.
All devices are configured with a static IP and must be configured to connect to the same network. This section explains how to make the necessary settings to configure the network on each device.
CABLE CONNECTION OF DEVICES TO THE NETWORK
In this section we will explain the ports to connect the equipment to the network by cable. PC/Mac and TAB-10-16 displays, tablets and iPads can be connected to the network via Wi-Fi. It is recommended to use a quality router or switch and Cat 5e or better cables, so that communication between devices is not compromised and audio signals can be transmitted with as little delay as possible.
- Connect your PC/Mac to the network via the Ethernet port.
- Connect the matrix(cCES to the network. Note that if the matrix is DANTE, you must make at least 2 connections: the Ethernet port of the matrix and the PRIMARY port of the Dante card. It is also recommended to use a second network to connect to the SECONDARY port of the Dante card, creating redundancy so that if the first network has a communication failure, this second network will be able to keep the signal running normally.
- Connect the NMX-WP remote control via its LAN port. This connection requires PoE.
- Connect the TAB-10-16 via its Ethernet port. This connection requires PoE or connecting the power adapter.
- Connect the MCMD-1 via its Ethernet port. This connection requires PoE.

LAUNCH SOFTWARE
- Connect the matrix and a PC via a switch or router.
- Double-click on the application icon to start the programme and select the matrix model you want to configure. This selection will load the appropriate configuration panel for the specified matrix and then bind the matrix to it. If you have more matrices, you can add them later.
NOTE: It may take a few seconds the first time you start the programme.
- The programme will then display the main screen.

CONNECT AN NMX MATRIX
- In the PC software, in the upper right corner, you will find DEVICE LIST which will show you all active matrices physically connected to the same network as the PC and which are automatically detected by UDP discovery.
NOTE: Each matrix supports up to 4 simultaneous control connections (PCs). To add new matrices, you can either click the button and manually enter the IP address of the matrix or click the
  button to refresh the list of matrices (recommended).
- In this list, you can see the matrices whose configuration can be modified by pressing the SET IP button. On the pop-up screen, you can enter the DEVICE IP ADDRESS and NETMASK to configure the matrices on the same network as the PC.


- Once the network of all the matrices has been configured, you will have to link each matrix to the configuration panel from which you can control the inputs and outputs, filters, etc. Please note that a first configuration panel is created when you start the software. With this panel selected, click on the CONNECT button of the matrix to be linked. The indicator on this configuration panel will change status from grey to green, indicating that the matrix is connected, and the name of the panel will change to the name configured on the matrix for easy identification.


- To add other matrices, click on the
 button to the right of the tabs identifying each configuration panel of the matrices already added, and indicate how many matrices of each type you wish to add. Finally, repeat the same steps as many times as there are matrices in the installation:
- Select 1 configuration panel by clicking on the tab at the top.
- Search for active devices in the DEVICE LIST
- Select the matrix to be linked to the tab and click on CONNECT
- RECOMMENDED. To change the name of the matrices, select the tab of the matrix to be modified, go to the top menu SETTING > DEVICE SETTING, and modify the DEVICE NAME value.

CONNECT NMX-WP PANELS. To detect a wall panel with the PC software, the following aspects must be taken into account:
- The NMX-WP wall panel shall be associated with an NMX Matrix, and this matrix shall be connected to the correct IP address.
- PC, NMX-WP, and NMX Matrix must be on the same network.
- In the PC software, go to the SETTINGS > PANEL SETTINGS menu, and a new window will appear.

- On the right-hand side of the new window, you can see the NMX-WP wall panels detected in the network at the top. As with the matrices, the software detects wall panels that are physically connected to the same network but may not have the correct network configuration. We must ensure that the network settings set in the wall control correspond to the same network that we are configuring in the rest of the equipment. To do this, click on the SET IP button and configure DEVICE IP ADDRESS, NETMASK, and GATEWAY. And click on the OK button to save the configuration

- To link the wall panel to a matrix, click and drag the devices from the right panel (wall remotes at the top, matrices at the bottom) to the centre of the screen. Finally, join the points that have both drawings, and a line will be created between them.
NOTE if the pictures appear grey, not as shown in the image below, it means that they are not properly connected, check the network confi guration and the physical cables connecting the devices.  Finally, double click on the NMX-WP to confi gure the device name (DEVICE NAME), its IP (DEVICE IP ADDRESS), edit or delete the menu options you want to access from this panel (EDIT, DELETE) or add new options (+ ADD MENU).
CONNECT A TAB-10-16, TABLE, ,T OR IPAD SCREEN
To detect a TAB-10-6 tablet or iPad with the PC software, you should consider the following aspects:
– The tablet must have the APP installed and active.
– PC and tablet must be on the same network
- If the switch or router does not have DHCP, you will have to set the network configuration manually on the TAB-10-16 tablet or iPad.
- For Ethernet cable connections
- Go to SETTINGS
 > NETWORK & INTERNET. Selecte ETHERNET (wired) network type.
 - Check that the ETHERNET IP MODE is set to STATIC. If not, click and modify the network settings.
- If you are already in STATIC, check the values of the IP ADDRESS, NETMASK, and GATEWAY fields.
- Go to SETTINGS
- For Wi-Fi connections
- Go to SETTINGS > NETWORK & INTERNET.
- Select the type of Wi-Fi network.
- Enable Wi-Fi.
- Select the Wi-Fi network to connect to.
- The screen will prompt you for the network password, and below that, lastly, check that IP SETTINGS is set to STATIC. If not, click and modify the network settings. If you are already in STATIC, check the values of the IP ADDRESS, NETMASK, K, and GATEWAY fields.
- Click on CONNECT.
IMPORTANT: Each time you change the IP address of the TAB-10-16, you must restart it before continuing
to use it again.
- Go to SETTINGS
- For Ethernet cable connections
- Before proceeding, open the APP on the TAB-10-16 tablet or iPad.
- Now, in the PC software, go to the SETTINGS > USER INTERFACE menu, nd a new window will appear.

- Design or load previously designed screens on the PC from the top menu FILE > OPEN or by clicking on the icon
 .
.
FONESTAR provides you with pre-configured screens with the usual actions. These screens have been created for 8 channels and 16 channels:- Go to the SOFTWARE tab on the web page of the screen.
www.fonestar.com/en/TAB-10-16, or read the QR code, and download the file
“TAB-10-16_screen_examples.zip”. - Load the file AB-10-16_screen_examplesfonestaruser” into the software as indicated in step 4.
- Once uploaded, you will need to change the default IP address confi gured in the controls to the IP address of your parent. This modifi cation can be done independently or en masse.

- Standalone click on each item in the image, select the COMMAND tab of the PROPERTY pane on the right side of the window and edit the IP in the DEVICE IP ADDRESS fi eld.
- Mass (recommended): click on the icon
 in the top menu and replace the default IP address with the IP of your parent. To do so, fi ll in the SOURCE IP ADDRESS fi eld with the IP 192.168.0.10, the DESTINATION IP ADDRESS fi eld with the IP of your matrix and select the screen where you want to apply this change with the RANGE dropdown where ALL PAGES allows you to apply the change to all the screens at the same time and the rest of the available options will be each of the existing screens in the uploaded fi le. Press OK to apply the change or CANCEL to discard it.
- Go to the SOFTWARE tab on the web page of the screen.
- Once the screens have been designed, to load them into the device’s APP, click on the
 icon and the pop-up window will show the active devices.
 - Select 1 or more by checking/unchecking the tick on each of the lines, click on the SYNC button to synchronise and wait a few seconds until the process is fi nished. A % bar will indicate the progress of the charge and show
 when it has been completed.
IMPORTANT: It is recommended to save all designed screens on your PC and synchronise only when you are sure, as it is not possible to revert the changes or download the file from the screen to the PC
CONNECT MCMD-1 MICROPHONES
The MCMD-1 Dante microphone is a microphone that can only be used if one of the matrices in the installation is Dante, as it will need a free Dante channel to broadcast its signal. For configuration, it will be necessary to download and install the DANTE CONTROLLER software available from the official Audinate website. As with the rest of the devices, we must make sure that it has the correct network configuration, but as it is not a device that is configured using the SW, we must use another method.
To detect a microphone with the PC software, the following aspects must be taken into account.
- The MCMD-1 microphone will use a Dante channel of an NMX matrix, so this matrix must be connected to the correct IP address.
- PC, microphone, and matrix must be on the same LAN network.
- Install and run the Dante Controller software on your PC. When loading this software, you can check the equipment it detects in the ROUTING tab.
NOTE: These devices shall only be those that are configured on the same network and subnetwork. - To review the network configuration, go to the DEVICE INFORMATION tab and a list of all devices detected on the physical network, whether or not they are configured on the same network, will be displayed. This list will highlight in red all devices that are not on the same network as your PC and will display their IP address.

- If the device is highlighted in red, you need to correct your network confi guration. In order to access your confi guration you will need to change the IP address of your PC to the same network as the microphone. To do this, on your PC go to NETWORK & INTERNET SETTINGS, select the network connection you are using and modify the network settings.
- Once it is on the same network as the microphone, in the DEVICE INFORMATION tab of the Dante Controller software, the microphone will appear black, and all other devices that were previously black will be highlighted in red. At this point you can double click on the IP and change its confi guration in the NETWORK SETTINGS tab. After setting the desired confi guration press APPLY, then RESET and close the window.


- Reset the previous network confi guration on your PC and after a few seconds you will see again the list where all devices are correctly confi gured, i.e. no device will be shown in red.

- At this point, we can access the ROUTING ta,b,,,wwheree we can see the TRANSMITTER devices (Dante audio outputs) at the top and the RECEIVERS (Dante audio inputs) at the bottom. Click on the button to
 display all channels in matrix form.

- Through this matrix we can assign the audio channel of the microphone to 1 or more input channels of the matrix or matrix is Dante by clicking on the cell where the microphone channel and the input channel intersect. Almost immediately you will see a green tick in this cell indicating the correct assignment of the audio channel.

At this point we can apply DSP fi lters on the matrix output channel via the PC SW and send messages to the selected zones via the PC software or via the confi gurable buttons on the TAB-10-16 tablets.
For more information on this system, please refer to the manual on the website. Go to the DOCUMENTATION tab on the matrix website www.fonestar.com/en/NMX-88, or read the QR code, and download the manual.
FAQs
Q: What are the minimum requirements for the PC software?
A: The PC software requires Windows 7 OS or later, 1 GB free storage space, 1024×768 resolution, 24-bit depth, and 2 GB RAM.
Q: How can I install the Android App if my device asks for permissions?
A: Grant all permissions requested during installation, as it is an inactive application.
Documents / Resources
 |
FONESTAR NMX SYSTEM Audio Matrix and Peripheral Devices [pdf] User Guide NMX-88, NMX-88D, NMX-1616, NMX-1616D, NMX SYSTEM Audio Matrix and Peripheral Devices, NMX SYSTEM, Audio Matrix and Peripheral Devices, Matrix and Peripheral Devices, Peripheral Devices, Devices |