FANCYLEDS FSB3P2.0 Fancy Sync Box
Product Specifications:
- Model Number: FSB3P2.0
- Brand: Fancy Sync Box
- Website: fancyleds.com
Product Usage Instructions
Installation:
- Installing: Locate the adhesive strips included with your brackets. Peel off the protective backing from one side of each strip and firmly attach it to the bendable brackets. Flex the brackets to better fit the contours of your TV and place them on your TV in each corner.
Setup Options:
- LED Starting Placement: Follow the setup options provided on pages 4 and 5. Arrange the LED strip starting from a bottom corner and go up and around the perimeter until you return to the same starting bottom corner. Choose either left or right sided setup.
- Left Sided Setup: Starting at the bottom left corner at the back of your TV, adhere the LED strip following your TV’s edge in an upward, leftward, downward, and back to the starting position motion. Cut excess LEDs to create a 16:9 ratio rectangle.
- Right Sided Setup: Starting at the bottom right corner at the back of your TV, adhere the LED strip following your TV’s edge in an upward, rightward, downward, and back to the starting position motion. Cut excess LEDs to create a 16:9 ratio rectangle.
Connecting:
- Connect the LED Strip: Plug the USB-C LED Strip into the ‘LED STRIP’ port.
- Connect Your HDMI Device & TV: Disconnect your HDMI device from your TV and connect it to one of the three ‘Input’ HDMI ports on the Fancy Sync Box. Use the provided HDMI cable to connect the HDMI OUTPUT port of the Fancy Sync Box to your TV’s HDMI port.
Model number: FSB3P2.0
Included Items


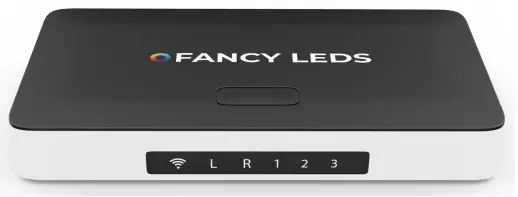
Fancy Sync Box Indicator

Installation
Installing
Locate the adhesive strips included with your brackets. Peel off the protective backing from one side of each strip and firmly attach it to the bendable brackets. Then, flex the brackets to better fit the contours of your TV.
Finally, place them on your TV in each corner.

Setup Options
LED Starting Placement
Instructions for the two setup options are available on pages 4 and 5. The diagram illustrates how to arrange the LED strip by selecting a bottom corner and then going up and around the perimeter until you return to the same starting bottom corner.
Choose the side that is most convenient for you; there is no preferred side. The red line represents the LED strip, while the blue line represents the wire/USB-C at the beginning of the LED strip. IMPORTANT: Only choose one option.

Option 1
Left Sided Setup (![]() )
)
Starting at the bottom left corner at the back of your TV, with the USB-C side of the LED strip, unravel the LED strip and peel off the protective backing to expose the adhesive. Adhere the strip by following your TV’s edge upwards to the top left, across to the top right, downwards to the bottom right, and back across to the bottom left.

Cutting Excess LEDs
It is likely you will now have excess LED strip that needs to be cut. The green circle on the diagram indicates the only place where you can cut the LED strip. You are required to cut the LEDs to create a perfect 16:9 ratio rectangle along your television’s perimeter. The green dotted line illustrated below indicates where to cut the strip.

Option 2
Right Sided Setup (![]() )
)
Starting at the bottom right corner at the back of your TV, with the USB-C side of the LED strip, unravel the LED strip and peel off the protective backing to expose the adhesive. Adhere the strip by following your TV’s edge: upwards to the top right, across to the top left, downwards to the bottom left, and back across to the bottom right.
 Cutting Excess LEDs
It is likely you will now have excess LED strip that needs to be cut. The green circle on the diagram indicates the only place where you can cut the LED strip. You are required to cut the LEDs to create a perfect 16:9 ratio rectangle along your television’s perimeter. The green dotted line illustrated below indicates where to cut the strip.

Connecting

Connect the LED Strip
Connect the USB-C LED Strip into the ‘LED STRIP’ port.
Connect Your HDMI Device & TV
Unplug your compatible HDMI device (e.g., PS5, Apple TV, etc.) from your TV and connect it to one of the three ‘Input’ HDMI ports on the Fancy Sync Box. Then, use the provided HDMI cable to connect the HDMI OUTPUT port of the Fancy Sync Box to the HDMI port on your TV.
Connect The Power Adaptor
Connect the other end of the power cable to the DC port on the Fancy Sync Box, then plug the power adapter into a power socket in your home.
Download Our App

Open the app & register an account
Open the app and register an account. This account can be used across multiple devices, allowing various individuals to control the Fancy Sync Box from their phones.
Ensure your phone is connected to a 2.4 GHz WiFi connection and that both Bluetooth and location settings are activated. Click on the blue “+” icon at the top right corner of the app and select ‘Add Device. The Fancy Sync Box will automatically appear on the page, at which point you can add the device.

WiFi Issues – Reset Button
If the Fancy Sync Box is not connecting, hold the ‘WiFi Reset’ button for 5 seconds, then release it.
This will reset your connection to the app when WiFi issues occur.
The WiFi indicator on the front of the Fancy Sync Box has the following meanings:
- Flashing slowly: Ready to connect
- Flashing rapidly: Connecting
- Solid light: Connected
App Settings
LED Strip Starting Corner
To calibrate your setup, open the Fancyleds app and tap on the Fancy Sync Box icon. Then navigate to the settings tab and modify the ‘LED Strip Starting Corner’ according to the setup option you selected-either left sided or right-sided. This ensures that the colors sync correctly with the screen and do not appear mirrored.

Scene Mode CEC
This particular switch allows you to decide if the LEDs should automatically turn on or off with your TV when a scene mode from the ‘Scene’ tab is activated. The Sync mode is permanently CEC enabled.
Diffusion
Low, Medium, and High diffusion modes significantly affect the level of reactivity in the LEDs. With Low mode,you will see a maximum of four colors at once, Medium allows for twelve colors, and High displays as many colors as possible. The speed of diffusion in each mode controls the transition rate from full illumination to the off state, reducing flickering where necessary. Recommended: Medium at 60% diffusion.

Voice Control
Fancyleds Voice Connection
After setting up your Fancy Sync Box, open the Fancyleds app, navigate to settings, and choose your voice connection service. Link your account by following the instructional prompts. Search for or select ‘Fancyleds’ as required (e.g., as a Google Assistant skill).

Frequently Asked Questions
How do I choose between left and right-sided setup?
Choose the side that is most convenient for you; there is no preferred side. Refer to pages 4 and 5 for detailed instructions on left and right sided setups.
Where should I cut the excess LED strip?
Cut the excess LEDs at the green circle indicated on the diagram to create a perfect 16:9 ratio rectangle along your television's perimeter.
My phone will not connect to the app?
Confirm you have a 2.4 GHz WiFi connection (confirm with modem manufacturer). Check the app permissions in the settings of your phone and enable location, WiFi, and Bluetooth. Remove the Fancy Sync Box icon from the app. Remove the power cable, wait for 5 seconds, reinsert it, then hold the Wifi reset button for 10 seconds to reset. If it still does not connect, reattempt the steps above using a different mobile device.
My TV keeps glitching going black with the Fancy Sync Box?
Try these quick troubleshooting steps not all will apply: • Turn the Variable Refresh Rate VRR setting off in the resolution settings of your Xbox or PS5 • Turn off the Variable Refresh Rate (VRR) setting on your TV in the settings. • Turn off the 'signal input plus' feature in your TV settings if supported, and if the VRR fix didn't work. • Turn off the 'gaming mode' on your TV. • Make sure your TV is producing a maximum resolution of 4K 60Hz.
My TV is not syncing with my LEDs?
You are required to connect a HDMI device into the input slot on the Fancy Sync Box. A compatible HDMI device is required for the syncing of the LEDs; integrated apps on the TV will not be synced. As such, if you would like to watch Netflix for example with synced LEDs, you will have to watch using a compatible HDMI device like an Xbox or Amazon Firestick. If you have a compatible HDMI device connected, make sure it is inserted into the Input port & your TV Monitor is connected to the 'Output' port.
The end section of the LED strip is not lighting up?
If the LED bulbs are not turning on at the end of your LED strip, or there is a section not working, you may have a malfunction. Please contact support.
How can I contact support for extra help?
Scan the QR code on the back of the instruction manual or email
FAQ / Support / More
Documents / Resources
 |
FANCYLEDS FSB3P2.0 Fancy Sync Box [pdf] User Manual FSB3P2.0 Fancy Sync Box, FSB3P2.0, Fancy Sync Box, Sync Box, Box |
 |
FANCYLEDS FSB3P2.0 Fancy Sync Box [pdf] User Manual FSB3P2.0 Fancy Sync Box, FSB3P2.0, Fancy Sync Box, Sync Box, Box |
References

- i>


- class="rp4wp-related-post-image">
