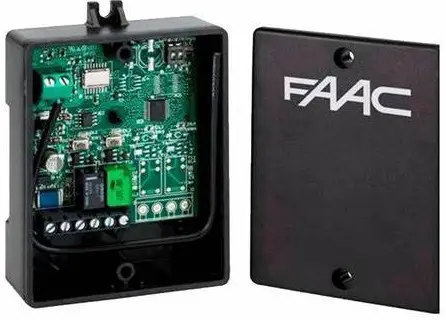
FAAC XR2N FDS External Receiver
Product Usage Instructions
Mounting
Secure the container to the support using two appropriate screws in the designated slots or on a DIN rail. Use suitable cable glands for connections to ensure IP protection. Finally, attach the cover and secure it with the provided screws.
Setting Operating Mode
Use SW6 and dip switches to set the operating mode for channels CH1 and CH2. SW6 ON corresponds to one mode, and SW6 OFF corresponds to another mode.
Setting Frequency
Use SW6 and dip switches to set the frequency between 433.92 MHz and 868.35 MHz.
Programming Remote Controls
Press the SW1 or SW2 buttons to program remote controls for channels CH1 and CH2 respectively. Hold the remote control about half a meter away from the receiver during programming.
Connecting External Antenna
To connect an external antenna, follow these steps:
- Remove the provided antenna wire.
- Connect the coaxial cable as shown in the figure.
The manufacturer, FAAC S.p.A. Soc. Unipersonale, EN declares that the FAAC model XR2N FDS radio receiver is in compliance with Directive 2014/53/EU. The full text of the EU declaration of conformity is available at the following Internet address: http://www.faac.biz/certificates
INTENDED USE
The XR2N FDS is a two-channel radio receiver de-signed for automatic vehicle and pedestrian entrance applications.
LIMITATIONS OF USE
XR2N FDS is compatible with the radio protocols indicated in the table.
UNAUTHORISED USE
Uses other than the intended use are prohibited.
TECHNICAL DATA
- Model: XR2N FDS
- Frequency 433.92 / 868.35 MHz
- Radio protocol FDS/SLH/RC/DS
- Channels 2
- Radio code memory max 248 (channels 1-2)
- Power supply 12-24 V “/~
- Current consumption max 100 mA
- Protection rating IP44
- Relay outputs 2
- Relay contact rating 0.5 A / 120VA
- Mounting screws / DIN rail
- Ambient operating temperature -20 °C to +55 °C
INSTALLATION
Fasten the enclosure to the support with two suitable screws through the slots, or mount it on a DIN rail.
When wiring up, insert suitable cable glands into the pre-cut holes to ensure the IP protection rating.
When finished, install the cover and secure it using the two screws provided.
OPERATION
The XR2N FDS can memorise up to 248 radio codes divided between the channels 1 and 2. When a chan-nel is activated by the radio control, the relative relay output is activated:

LED DL5 lights up when the receiver is powered.
DIP SWITCH SW6 PROGRAMMING
Dip switch 2 is not used
SETTING CH2 ACTIVATION

In the bistable setting, contact CH2 switches state and remains switched until it is activated again by the radio control.
SETTING THE OPERATING MODE

By setting DIP switch 3 to OFF, the radio codes of the protocols provided can coexist on the same channel.
SETTING THE SLH/RC/DS FREQUENCY

MEMORISING THE RADIO CONTROLS
Buttons SW1 and SW2 memorise the radio control for channel 1 (CH1) and channel 2 (CH2) respectively. Carry out the memorisation procedure holding the radio control about half a metre from the receiver.
MEMORISING THE FIRST FDS RADIO CONTROL
- Set the operating mode: dip switch 3-SW6 –>ON.
- Press the button of the receiver that corresponds to the channel that you wish to associate with the radio control until the relative LED starts to flash slowly (DL1->channel 1, DL2->channel 2). When the button is released, the LED continues to flash for 20 seconds, during which the radio codes can be memorised.
- Press and release the button of the FDS radio control that you want to memorise. Make sure that the flashing LED of the receiver becomes steady 2 seconds before it continues to flash for another 20 seconds. If the procedure was completed success-fully, the LED of the radio control flashes green/red 5 times before switching off.
- While the LED of the receiver is flashing, it is pos-sible to repeat the procedure at step 3 for other radio codes.
- If no code is memorised while the LED is flashing, after 20 seconds the LED switches off to indicate that the procedure has ended.
- To memorise additional radio controls at a later stage, repeat the procedure from step 2 or carry out the FDS self-learning procedure.
FDS SELF-LEARNING
- On a radio control that has already been memorised, press and hold the button you want to teach for 10 seconds, until its LED starts flashing green/red in sequence (for 20 seconds) and then release it.
- While the LED is flashing, bring the radio control that has already been memorised into contact face to face with the new one to be memorised.
- Press the button to be memorised on the new radio control and make sure that its LED flashes green / red 5 times before turning off.
- To complete the teaching procedure, wait for the LED of the radio control that has already been memorised to switch off, or press the button that you pressed in step 1 again.
MEMORISING THE FIRST SLH RADIO CONTROL
- Set the operating mode: dip switch 3-SW6 –>OFF.
- Set the operating frequency of the radio controls (DIP switch 4-SW6).
- Press the button of the receiver that corresponds to the channel that you wish to associate with the radio control until the relative LED starts to flash slowly (DL1->channel 1, DL2->channel 2). When the button is released, the LED continues to flash for 20 seconds, during which the following steps 2 and 3 should be carried out.
- On the SLH radio control: press buttons P1 + P2 simultaneously, then release them, the LED flashes.
- Press and release the button of the radio control to be memorised within 8 seconds. Make sure that the flashing LED of the receiver becomes steady 2 seconds before it switches off.
- Press the button of the radio control that has just been memorised twice in succession. The output associated with the channel activates.
MEMORISING OTHER SLH RADIO CONTROLS
- On the radio control that has already been memo-rised, press buttons P1 + P2 simultaneously, then release them, the LED flashes.
- Within 8 seconds, press and hold the button that has already been memorised, the LED lights up with a steady light.
- Bring the radio control that has already been memorised, into contact face to face with the new one to be memorised.
- Press the button to be memorised on the new radio control and make sure that its LED flashes twice before turning off.
- Release all buttons.
- Press the button on the new radio control that has just been memorised twice in succession. The associ-ated output on the receiver activates.
MEMORISING RC RADIO CONTROLS
- Set the operating mode: dip switch 3-SW6 –>OFF.
- Set the operating frequency of the radio controls: DIP switch 4-SW6 –>ON.
- Press the button of the receiver that corresponds to the channel that you wish to associate with the radio control until the relative LED starts to flash slowly (DL1->channel 1, DL2->channel 2). When the button is released, the LED continues to flash for 20 seconds, during which the codes can be memorised by pressing the relative buttons of the radio controls.
- Whenever a code is memorised, the LED of the receiver lights up steadily for 2 seconds and then flashes for 20 seconds.
- If no code is memorised while the LED is flashing, after 20 seconds the LED switches off to indicate that the procedure has ended.
- To memorise additional radio controls at a later stage, repeat the procedure from step 1.
MEMORISING RC RADIO CONTROLS REMOTELY
- Press buttons P1 + P2 for at least 5 seconds on a radio control that has already been memorised and then release them.
- Within 5 seconds, press and release the button of the radio control that has already been memorised to activate the learning phase on the same channel on the receiver.
- Press the button on the new radio control within 5 seconds. In the case of multiple radio controls, repeat this step for each one within 5 seconds of each other.
MEMORISING DS RADIO CONTROLS
- Set the operating mode: dip switch 3-SW6 –>OFF.
- Set the operating frequency of the radio controls (DIP switch 4-SW6).
- Set the required combination of the DIP switches on the radio control (avoid setting them to all On or all Off).
- Press the button of the receiver that corresponds to the channel that you wish to associate with the radio control until the relative LED starts to flash slowly (DL1->channel 1, DL2->channel 2). When the button is released, the LED continues to flash for 20 seconds, during which the following step should be carried out.
- Press and release the button of the radio control that you wish to memorise. Make sure that the flashing LED of the receiver becomes steady for 2 seconds and then flashes again for 20 seconds, during which it is possible to memorise another radio control with a different DIP switch combination.
- Whenever a code is memorised, the LED of the receiver lights up steadily for 2 seconds and then flashes for 20 seconds.
- If no code is memorised while the LED is flashing, after 20 seconds the LED switches off to indicate that the procedure has ended.
- To memorize other radio controls, it is possible to set a DIP switch combination that has already been memorised or repeat the procedure for new combinations.
CLEARING THE MEMORY
To delete all the radio codes for channels 1 and 2: press and hold button SW1 or SW2 until both LEDS DL1 and DL2 turn on steadily (after approximately 10 seconds).
MEMORY FULL
If in step 1 of the memorisation procedure, the LED turns off instead of continuing to flash for 20 seconds when the button is released, it means that the memory is full and it is not possible to memorise any more codes.
CONNECT THE EXTERNAL ANTENNA
To connect the external antenna (accessory) to terminal board J3 with the receiver powered off:
- Remove the antenna wire supplied.
- Connect the coaxial cable as shown in the figure.

FAAC S.p.A. Soc. Unipersonale
Via Calari, 10 – 40069 Zola Predosa BOLOGNA – ITALY Tel. +39 051 61724 – Fax +39 051 09 57 820 www.faac.it – www.faactechnologies.com
Frequently Asked Questions
Q: What is the intended use of XR2N FDS?
A: The XR2N FDS is designed for automatic vehicle and pedestrian entrance applications.
Q: What are the limitations of use for XR2N FDS?
A: XR2N FDS is compatible with the radio protocols indicated in the table provided in the manual.
Documents / Resources
 |
FAAC XR2N FDS External Receiver [pdf] Instruction Manual XR2N FDS External Receiver, XR2N FDS, External Receiver, Receiver |