1. مقدمه
This manual provides detailed instructions for the installation, configuration, and operation of your ASRock X870 Taichi Creator Motherboard. This high-performance ATX motherboard is designed to support AMD Ryzen 9000, 8000, and 7000 Series Processors with an AM5 socket, offering advanced features for creators and enthusiasts.
2. اطلاعات ایمنی
Please read the following safety guidelines carefully before installing or operating your motherboard to prevent damage to the product or injury to yourself.
- قبل از لمس هر قطعهای، همیشه سیم برق را از پریز برق جدا کنید.
- Wear an anti-static wrist strap to prevent electrostatic discharge (ESD) when handling components.
- برای جلوگیری از گرمای بیش از حد، تهویه مناسب را در کیس کامپیوتر خود تضمین کنید.
- مادربرد را از رطوبت و دمای شدید دور نگه دارید.
- Refer to the CPU and other component manuals for specific installation instructions.
3. محتویات بسته
مطمئن شوید که تمام اقلام ذکر شده در زیر در بستهبندی مادربرد شما موجود است. در صورت مفقود شدن یا آسیب دیدن هر یک از اقلام، با فروشنده خود تماس بگیرید.
- مادربرد ASRock X870 Taichi Creator
- راهنمای نصب سریع
- اعلامیه تنظیم مقررات
- کابلهای داده SATA
- آنتن Wi-Fi
- پیچها و پایههای M.2
- ASRock Graphics Card Holder
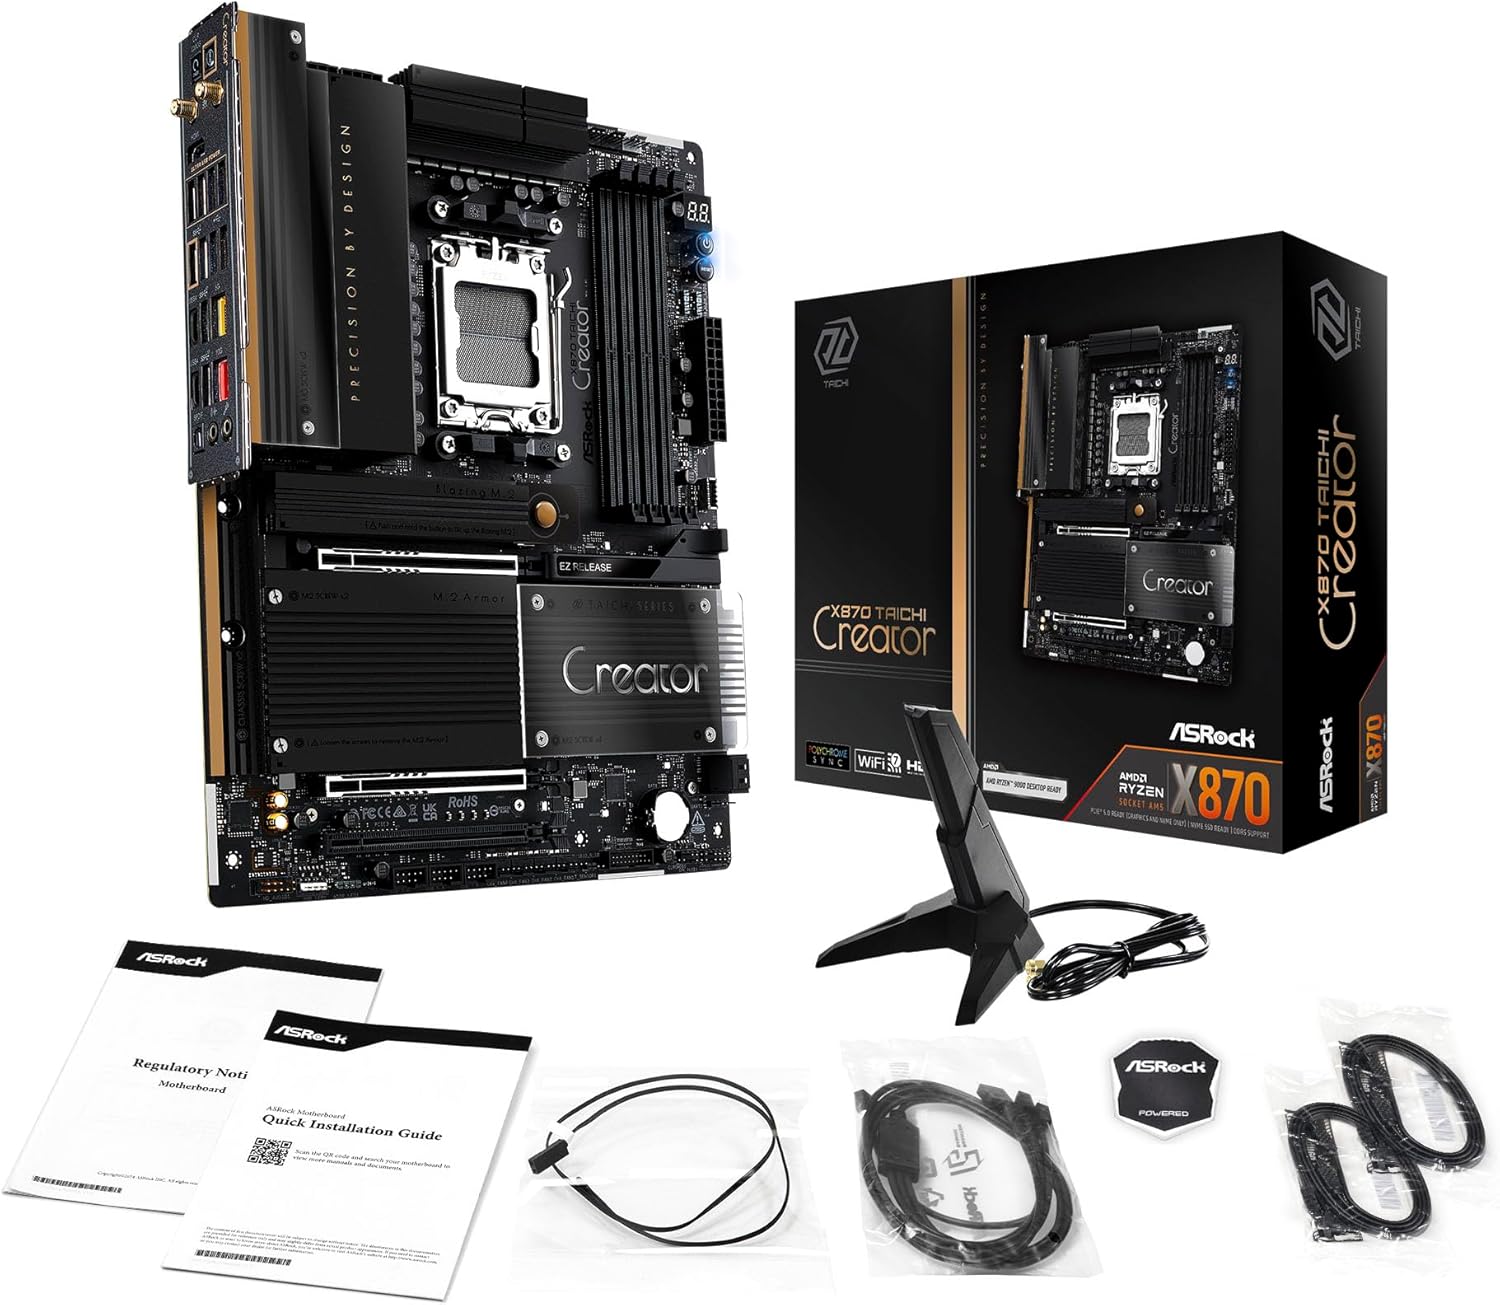
Image: The ASRock X870 Taichi Creator Motherboard shown alongside its retail packaging and various accessories, including cables, documentation, and a graphics card holder.
4. راه اندازی و نصب
Follow these steps for proper installation of your motherboard and its components.
4.1. CPU Installation (Socket AM5)
- سوکت پردازنده AM5 را روی مادربرد پیدا کنید.
- Gently lift the CPU retention lever.
- Align the triangular mark on your AMD Ryzen processor with the corresponding mark on the socket.
- Carefully place the CPU into the socket without applying force.
- Lower the retention lever until it clicks into place, securing the CPU.

تصویر: از بالا به پایین view of the ASRock X870 Taichi Creator Motherboard, highlighting the central AM5 CPU socket and surrounding components like VRMs and RAM slots.
۴. نصب حافظه (RAM)
The motherboard supports 4 x DDR5 DIMM slots for dual-channel memory technology.
- گیرههای دو سر اسلات DIMM را باز کنید.
- بریدگی روی ماژول حافظه DDR5 را با کلید موجود در اسلات DIMM همتراز کنید.
- ماژول حافظه را محکم داخل شیار قرار دهید تا گیرهها در جای خود قرار گیرند.
- For dual-channel configuration, refer to your motherboard manual for recommended slot pairing.
۵.۳ نصب دستگاه ذخیرهسازی
The motherboard features M.2 slots and SATA3 ports for storage.
۴. نصب SSD M.2
The board includes 1 Ultra M.2 (PCIe Gen3x4), 1 Hyper M.2 (PCIe Gen4x4), and 2 Blazing M.2 (PCIe Gen5x4) slots.
- Locate the desired M.2 slot and remove the M.2 heatsink if present.
- SSD M.2 را با زاویه 30 درجه داخل اسلات قرار دهید.
- SSD را به آرامی به پایین فشار دهید و آن را با پیچ M.2 یا پایه نگهدارنده ارائه شده محکم کنید.
- برای عملکرد حرارتی بهینه، هیت سینک M.2 را دوباره وصل کنید.
4.3.2. SATA Device Installation
Connect SATA storage devices (HDDs/SSDs) to the 4 SATA3 ports using SATA data cables.
۴.۲ نصب کارت PCIe
The motherboard provides 2 PCIe 5.0 x16 (x8/x8) slots and 1 PCIe 3.0 x16 slot.
- Select an available PCIe slot.
- پوشش شیار توسعه مربوطه را از کیس کامپیوتر خود بردارید.
- Align your PCIe card with the slot and press down firmly until it is seated correctly.
- کارت را با پیچ به کیس کامپیوتر محکم کنید.
4.5. اتصالات برق
کانکتور برق ATX 24 پین و کانکتور برق CPU 8 پین (یا 4+4 پین) را از منبع تغذیه (PSU) خود به پورتهای مربوطه روی مادربرد وصل کنید.
۵.۵. اتصالات پنل جلویی و ورودی/خروجی پشتی
Connect your PC case's front panel connectors (power button, reset button, USB ports, audio jacks) to the appropriate headers on the motherboard. Connect peripherals to the rear I/O panel.

تصویر: نمای نزدیک view of the rear I/O panel of the ASRock X870 Taichi Creator Motherboard, showing various ports including USB, HDMI, Ethernet, and audio jacks.
5. دستورالعمل های عملیاتی
۴.۱. بوت اولیه و تنظیمات BIOS/UEFI
- پس از مونتاژ کامپیوتر، مانیتور، کیبورد و ماوس را وصل کنید.
- سیستم خود را روشن کنید. در حین راهاندازی، چندین بار دکمه دل or F2 کلید برای ورود به ابزار تنظیم BIOS/UEFI.
- ترتیب بوت را پیکربندی کنید، XMP/EXPO را برای حافظه فعال کنید و سایر تنظیمات را در صورت نیاز تنظیم کنید.
- تغییرات را ذخیره کنید و از BIOS/UEFI خارج شوید. سیستم مجدداً راهاندازی خواهد شد.
5.2. نصب درایور
After installing your operating system, install the necessary drivers for the motherboard components. These can typically be found on the ASRock support website or the included driver CD/USB drive.
- درایورهای چیپست
- LAN Drivers (10Gbps, 5Gbps)
- Wi-Fi 7 + Bluetooth Drivers
- درایورهای صوتی (Realtek ALC4082)
- درایورهای USB
6. تعمیر و نگهداری
6.1. تمیز کردن
Regularly clean your PC to prevent dust buildup, which can lead to overheating. Use compressed air to remove dust from fans, heatsinks, and other components. Ensure the system is powered off and unplugged before cleaning.
۶.۲. بهروزرسانیهای بایوس
به صورت دورهای ASRock را بررسی کنید website for BIOS/UEFI updates. Updates can improve system stability, add support for new CPUs, or fix bugs. Follow the instructions provided by ASRock carefully when performing a BIOS update.
7 عیب یابی
اگر با مشکلی مواجه شدید، به مراحل عیبیابی رایج زیر مراجعه کنید:
- بدون برق: Ensure all power cables (24-pin ATX, 8-pin CPU) are securely connected. Check your PSU and wall outlet.
- بدون نمایش: Verify that your monitor is connected to the correct graphics output (dedicated GPU or integrated graphics). Reseat your graphics card and RAM modules.
- ناپایداری سیستم: Check CPU and GPU temperatures. Ensure RAM is properly seated and configured (XMP/EXPO settings). Update drivers and BIOS.
- فلش بک بایوس: The motherboard features a BIOS Flashback button on the rear I/O panel. This allows you to update the BIOS without a CPU or RAM installed. Refer to the ASRock webبرای دستورالعملهای دقیق در مورد استفاده از این ویژگی، به سایت مراجعه کنید.
- CMOS را پاک کنید: If your system fails to boot after changing BIOS settings, you can clear the CMOS to reset BIOS settings to default. Locate the 'CLR CMOS' button or jumper on the motherboard (often near the rear I/O).
8. مشخصات
| ویژگی | مشخصات |
|---|---|
| نام تجاری | ASRock |
| نام مدل | X870 |
| شماره مدل مورد | 90-MXBTE0-A0UAYZ |
| سوکت CPU | سوکت AM5 |
| پردازندههای سازگار | AMD Ryzen 9000, AMD Ryzen 8000, AMD Ryzen 7000 Series |
| نوع چیپست | AMD X870 |
| فناوری حافظه رم | DDR5 |
| حافظه های حافظه | 4 x DDR5 DIMM Slots (Dual Channel, up to 8000+(OC), 256GB max) |
| خروجی گرافیک | 2 x USB4 Type-C (up to 8K 30Hz), 1 x HDMI 2.1 (up to 4K 120Hz) |
| اسلات PCIe | 2 x PCIe 5.0 x16 (x8/x8), 1 x PCIe 3.0 x16 |
| ذخیره سازی | 4 x SATA3, 1 x Ultra M.2 (PCIe Gen3x4), 1 x Hyper M.2 (PCIe Gen4x4), 2 x Blazing M.2 (PCIe Gen5x4) |
| LAN | 10Gbps LAN, 5Gbps LAN |
| شبکه LAN بی سیم | 802.11be Wi-Fi 7 + Bluetooth |
| صوتی | کدک صوتی Realtek ALC4082 7.1 CH HD، صدای Nahimic |
| پورتهای USB (عقب) | 2 x USB 2.0, 6 x USB 3.2 Gen1, 2 x USB 3.2 Gen2, 2 x USB4 Type-C |
| پورتهای USB (جلو) | 6 x USB 2.0, 4 x USB 3.2 Gen1, 1 x USB 3.2 Gen2x2 Type-C |
| فاکتور فرم | ATX |
| طراحی فاز قدرت | 18+2+1 Power Phase, 80A SPS |
9. اطلاعات گارانتی
ASRock motherboards typically come with a limited manufacturer's warranty. The duration and terms of the warranty may vary by region and retailer. Please retain your proof of purchase for warranty claims. For detailed warranty information, refer to the official ASRock webسایت یا با محل خرید خود تماس بگیرید.
10. پشتیبانی فنی
For technical assistance, driver downloads, BIOS updates, and further product information, please visit the official ASRock support webسایت:
همچنین میتوانید مستقیماً از طریق خدمات مشتریان ASRock با آنها تماس بگیرید. webسایتی برای پشتیبانی شخصیسازیشده.


