مقدمه
از اینکه O را انتخاب کردید متشکریمurlife WiFi Extender. This device is designed to expand your existing Wi-Fi network coverage, eliminate dead spots, and provide a stable, high-speed internet connection throughout your home or office. With a data transfer rate of up to 300Mbps on the 2.4GHz band, it is ideal for streaming, online gaming, and general internet use. This manual provides detailed instructions for setup, operation, and troubleshooting.
اطلاعات ایمنی
- دستگاه را در معرض آب یا رطوبت قرار ندهید.
- سعی نکنید خودتان دستگاه را جدا کنید یا تعمیر کنید.
- فقط از آداپتور برق ارائه شده یا توصیه شده توسط سازنده استفاده کنید.
- دستگاه را از منابع گرما و نور مستقیم خورشید دور نگه دارید.
- از تهویه مناسب اطراف دستگاه برای جلوگیری از گرمای بیش از حد اطمینان حاصل کنید.
محتویات بسته
لطفاً محتویات بسته را با دقت بررسی کنید. در صورت مفقود شدن یا آسیب دیدن هر یک از اقلام، با فروشنده خود تماس بگیرید.
- Ourlife WiFi Extender (repeater body)
- راهنمای کاربر
محصول تمام شده استview
Ourlife WiFi Extender features a compact design with four high-gain external antennas for enhanced signal penetration and coverage. It includes an Ethernet port for wired connections.
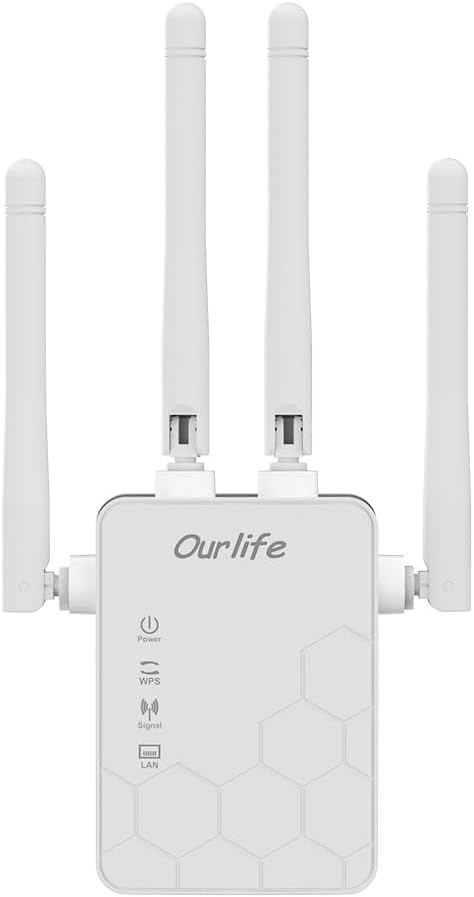
تصویر: جلو view of the Ourlife WiFi Extender, showing the Ourlife logo, power indicator, WPS button, signal strength indicator, and LAN port indicator. Four external antennas are visible.
اجزای کلیدی:
- نشانگر قدرت: وقتی دستگاه روشن می شود روشن می شود.
- دکمه WPS: Used for quick, one-button setup with compatible routers.
- نشانگر سیگنال: Shows the strength of the Wi-Fi signal received from the main router.
- پورت LAN: An Ethernet port for connecting wired devices or for setting up the extender in Access Point (AP) mode.
- آنتن های خارجی: Four adjustable antennas to optimize signal reception and transmission.

تصویر: کنار view of the Ourlife WiFi Extender with dimensions. The device measures approximately 17.2cm/6.8in in height, 5.4cm/2.1in in width, and 3.3cm/1.3in in depth.
راه اندازی
Ourlife WiFi Extender offers two primary setup methods: WPS (Wi-Fi Protected Setup) for quick connection, and manual setup via a web مرورگر.
Method 1: WPS Setup (Recommended for quick setup)
- روشن کردن: Plug the Ourlife WiFi Extender into an electrical outlet near your main Wi-Fi router. Wait for the Power indicator to light up.
- دکمه WPS را روی دستگاه اکستندر فشار دهید: Press the WPS button on the Ourlife WiFi Extender. The WPS indicator light will start blinking.
- دکمه WPS را روی روتر فشار دهید: Within 2 minutes, press the WPS button on your main Wi-Fi router.
- منتظر اتصال باشید: The WPS indicator on the extender will stop blinking and remain solid when the connection is established. The Signal indicator will also light up, indicating a successful connection.
- تغییر مکان توسعه دهنده: Once connected, unplug the extender and move it to a location halfway between your router and the Wi-Fi dead zone. Ensure the Signal indicator shows a strong signal (usually green or multiple bars) for optimal performance.

Image: Visual representation of the four simple setup steps: 1. Unbox, 2. Plug it in, 3. Press the button (WPS), 4. And Pair (with router).
روش ۲: تنظیم دستی از طریق Web مرورگر
- روشن کردن: Plug the Ourlife WiFi Extender into an electrical outlet near your computer or mobile device.
- به وایفای اکستندر متصل شوید: On your computer or mobile device, connect to the Wi-Fi network named "Ourlife_Extender" (or similar, check the label on the device). No password is required for the initial connection.
- باز کنید Web مرورگر: a را باز کنید web browser (e.g., Chrome, Firefox, Safari) and enter the default IP address or domain name (e.g., 192.168.10.1 or reapeter.net) into the address bar. Refer to the device label or included mini-manual for the exact address.
- ورود به سیستم: نام کاربری و رمز عبور پیشفرض را وارد کنید (معمولاً admin/admin).
- انتخاب حالت: Choose "Repeater Mode" or "AP Mode" based on your needs.
- حالت تکرار کننده: Extends your existing Wi-Fi network wirelessly.
- حالت AP (نقطه دسترسی): Converts a wired internet connection into a wireless Wi-Fi hotspot. Connect an Ethernet cable from your router to the extender's LAN port.
- پیکربندی شبکه:
- برای حالت تکرارکننده: Select your main Wi-Fi network from the list, enter its password, and choose whether to keep the same SSID or create a new one for the extended network.
- برای حالت AP: Set a new SSID (network name) and password for the Wi-Fi hotspot.
- اعمال تنظیمات: Save the settings and wait for the extender to restart.
- تغییر مکان توسعه دهنده: Once configured, unplug and relocate the extender to an optimal position.
عملیاتی
After successful setup, the Ourlife WiFi Extender will operate automatically. The Signal indicator will provide visual feedback on the connection quality.
اتصال دستگاه ها:
- دستگاه های بی سیم: Connect your smartphones, tablets, laptops, and other Wi-Fi enabled devices to the extended Wi-Fi network (the SSID you configured during setup).
- Wired Devices (via LAN Port): If you are using the extender in Repeater mode, you can connect a wired device (e.g., desktop PC, smart TV, game console) to the extender's LAN port using an Ethernet cable to provide it with network access.
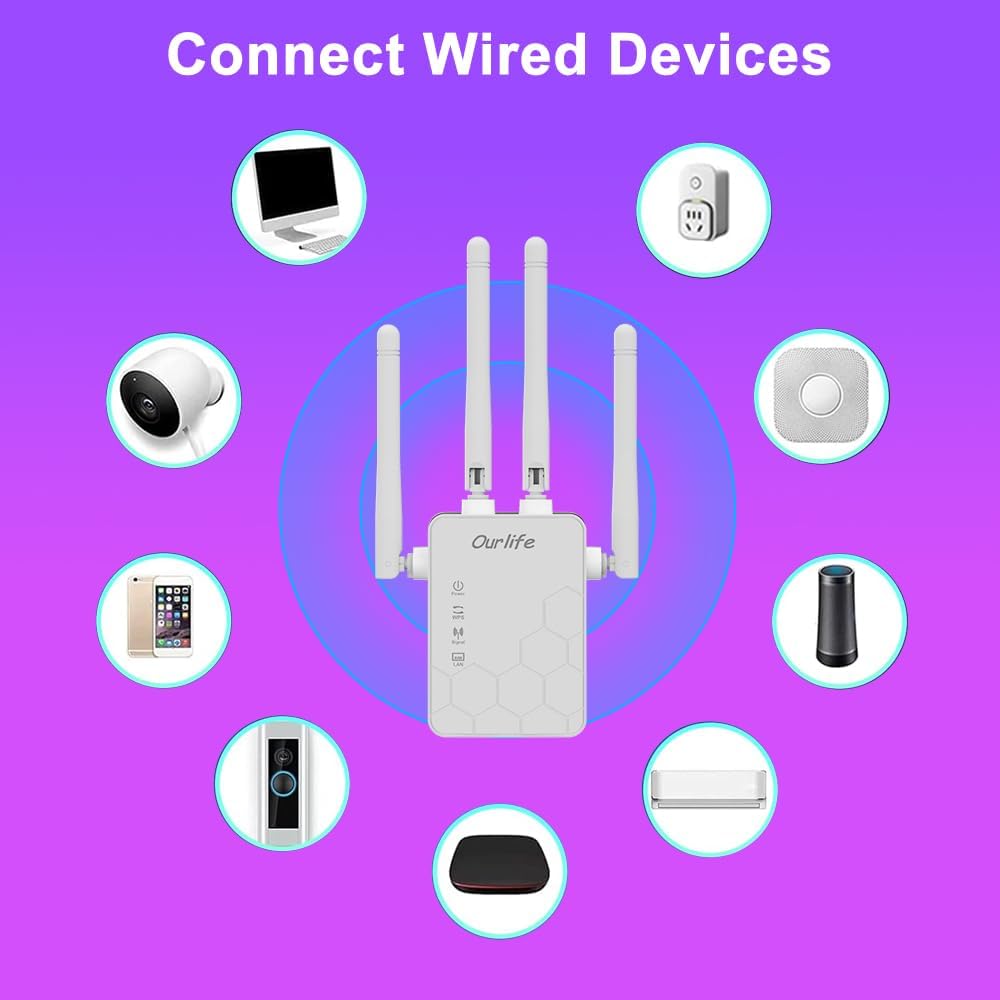
Image: Diagram showing various wired and wireless devices (e.g., desktop computer, smart plug, smart speaker, air conditioner, smart doorbell, security camera, smartphone) that can connect to the Ourlife WiFi Extender.

Image: The Ourlife WiFi Extender plugged into a wall outlet, with an Ethernet cable connected to its LAN port, illustrating its capability to provide a wired connection.
تعمیر و نگهداری
Regular maintenance helps ensure the longevity and optimal performance of your Ourlife WiFi Extender.
- تمیز کردن: برای تمیز کردن دستگاه از یک پارچه نرم و خشک استفاده کنید. از پاک کننده های مایع یا اسپری استفاده نکنید.
- به روز رسانی سیستم عامل: به صورت دورهای، اطلاعات سازنده را بررسی کنید webسایت برای بهروزرسانیهای میانافزار. بهروزرسانی میانافزار میتواند عملکرد را بهبود بخشد، ویژگیها را اضافه کند و اشکالات را برطرف کند.
- راه اندازی مجدد: اگر با مشکل شبکه مواجه شدید، با جدا کردن دوشاخه از پریز برق به مدت 10 ثانیه و سپس وصل کردن مجدد آن، اکستندر را مجدداً راهاندازی کنید.
- قرارگیری بهینه: Ensure the extender is placed in an open area, away from large metal objects, concrete walls, and other electronic devices that may cause interference.
عیب یابی
If you encounter issues with your Ourlife WiFi Extender, refer to the following common problems and solutions:
| مشکل | راه حل ممکن |
|---|---|
| دستگاه توسعه دهنده روشن نمیشود. | Ensure the extender is securely plugged into a working electrical outlet. Try a different outlet. |
| Cannot connect to the extender's Wi-Fi for setup. | Ensure you are connecting to the correct default SSID (e.g., "Ourlife_Extender"). Try restarting the extender and your device. |
| WPS setup fails. | Ensure your router supports WPS. Press the WPS button on both devices within the 2-minute window. Try manual setup if WPS continues to fail. |
| پس از اتصال به شبکه گسترده، دسترسی به اینترنت وجود ندارد. | Check if your main router has internet access. Relocate the extender closer to your main router to ensure a strong signal (check Signal indicator). Reconfigure the extender. |
| Slow speeds on the extended network. | Relocate the extender to an optimal position where the Signal indicator shows a strong connection to the main router. Avoid placing it near interference sources. Ensure your main router is providing good speeds. |
| رمز عبور ورود را فراموش کردهام برای web صفحه مدیریت | Perform a factory reset on the extender (usually by pressing and holding a reset button for 5-10 seconds). This will revert all settings to default, including the login credentials. |
مشخصات
| ویژگی | جزئیات |
|---|---|
| نام تجاری | Ourlاگر |
| مدل | Ourlife WiFi Extender 300Mbps |
| ASIN | B0D7HB4DBC |
| نرخ انتقال داده | 300 Megabits Per Second (2.4GHz) |
| آنتن ها | 4 High-Gain External Antennas |
| پورت اترنت | 1 عدد پورت LAN |
| رنگ | سفید |
| قابلیت اتصال | Wireless-N (802.11n/g/b) |
| پروتکل های امنیتی | Supports Wireless Security (WPA/WPA2) |
| ابعاد (تقریبا) | 17.2 سانتی متر (بالا) × 5.4 سانتی متر (عرض) × 3.3 سانتی متر (D) |
گارانتی و پشتیبانی
For warranty information and technical support, please refer to the documentation included with your purchase or visit the official Ourlاگر website. You can also contact Ourlife customer service directly for assistance with product setup, troubleshooting, or warranty claims.
Ourlife Store Link: Visit the Ourlife Store on Amazon


