مقدمه
The GODOX XProIIL is a professional TTL wireless flash trigger designed for Leica cameras, offering advanced control over your lighting setup. This manual provides detailed instructions for setting up and operating your XProIIL to achieve optimal photographic results.
آنچه در جعبه است
- 1x XProII-L Flash Trigger
- 1x کتابچه راهنمای دستورالعمل
- 1 عدد پارچه تمیز کننده
راه اندازی
1. نصب باتری
The XProIIL flash trigger requires two AA batteries. Open the battery compartment cover, insert the batteries according to the polarity indicators, and close the cover securely.
۵.۲ نصب روی دوربین
Slide the XProIIL onto your Leica camera's hot shoe. Secure it in place using the quick-release lock mechanism. Ensure it is firmly attached to prevent accidental dislodgement during use.

Image: The GODOX XProIIL securely mounted on a camera hot shoe, highlighting the quick-release lock for stable attachment.
3. روشن/خاموش کردن
Locate the power switch on the side of the unit. Slide it to the 'ON' position to power on the flash trigger. To power off, slide the switch to the 'OFF' position.
4. Channel and ID Settings
The XProIIL supports 32 channels and 99 wireless ID settings. To avoid signal interference in complex shooting environments, use the scanning function to automatically search for spare channels and IDs. Navigate to the 'SCAN' option in the menu and initiate the scan. Select an available channel and ID for stable signal transmission.
Video: Demonstrates setting channels and IDs on the GODOX XProII-L flash trigger, including the scan function to find optimal settings for wireless communication with flashes.
5. Bluetooth and App Connection
The XProIIL features Bluetooth connectivity, allowing you to adjust lighting parameters via the Godox Flash App on your smartphone or tablet. Enable Bluetooth on the trigger and pair it with your device through the app for convenient remote control.

Image: A smartphone displaying the Godox Flash App, illustrating the interface for adjusting flash settings remotely via Bluetooth.
دستورالعمل های عملیاتی
1. TTL Autoflash Mode
In TTL (Through-The-Lens) mode, the flash trigger automatically determines the correct flash output for optimal exposure. This allows you to focus on composition while the system handles lighting adjustments.
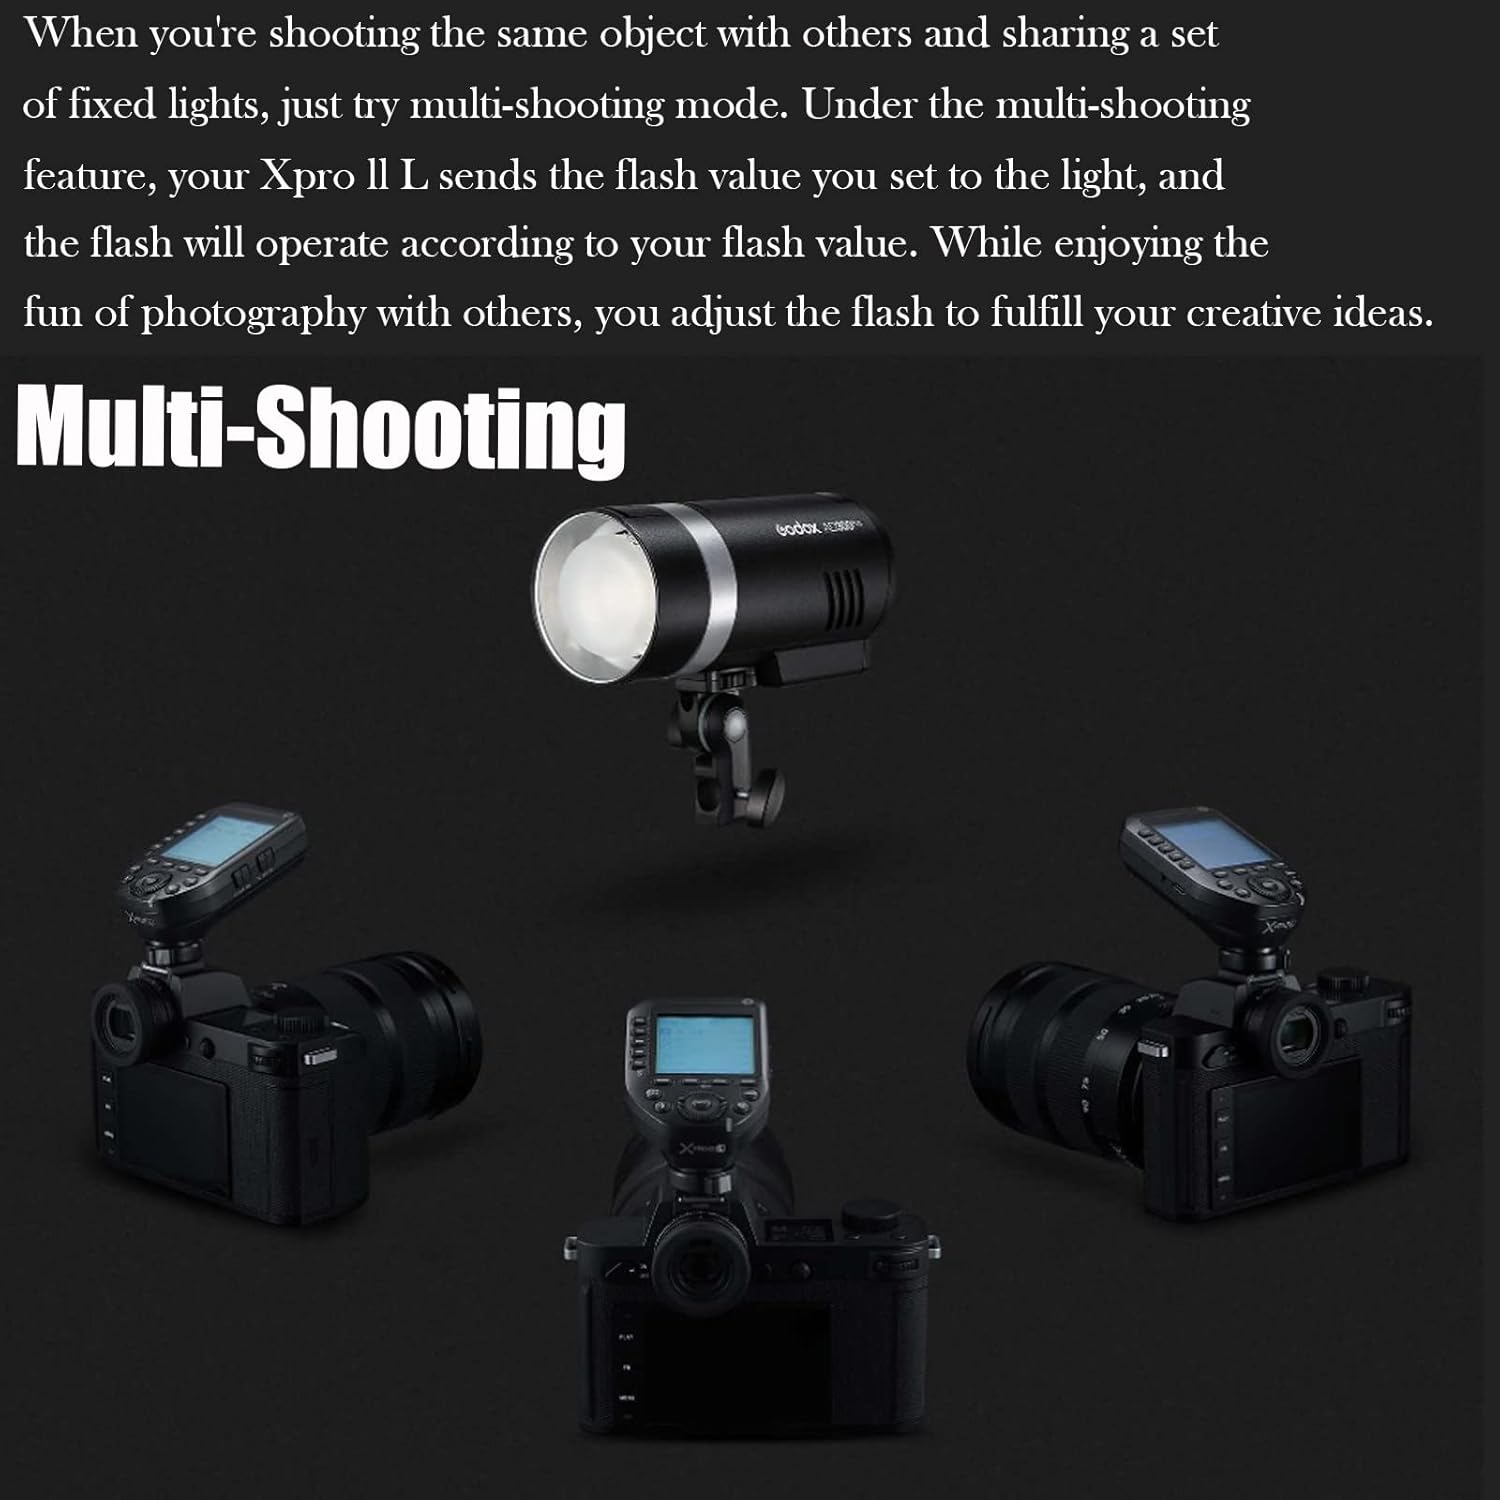
Image: The GODOX XProIIL's LCD screen displaying settings for TTL autoflash mode, indicating automatic exposure control.
2. حالت دستی
For precise control, switch to Manual mode. You can manually adjust the flash power output for each group directly from the trigger or via the Godox Flash App. This mode is ideal for consistent lighting in controlled environments.
3. TCM Instant Conversion
The Two-Way TCM (TTL Converted to Manual) function allows for instant conversion of TTL flash values to Manual mode while retaining parameters. This feature helps quickly achieve proper exposure values and ensures accurate light expression.

Image: The GODOX XProIIL's screen showing the TCM function, which converts TTL flash values to manual settings for precise control.
۴.۴. همگامسازی با سرعت بالا (HSS)
The XProIIL supports High-Speed Sync (HSS) with shutter speeds up to 1/8000s. This feature is essential for shooting with flash in bright ambient light or for freezing fast-moving subjects with a wide aperture.

Image: The GODOX XProIIL's display screen with indicators for HSS (High-Speed Sync) and TTL (Through-The-Lens) modes.
5. Multi-Shooting Mode
In multi-shooting mode, the XProIIL can send the flash value you set to a set of fixed lights. This allows for coordinated lighting across multiple flashes, ideal for complex setups or sharing lights with other photographers.

Image: A studio setup showing multiple cameras and a central flash unit, demonstrating the multi-shooting capability of the XProIIL.
6. Sekonic Light Meter Integration
The XProIIL integrates with the Sekonic L-858 light meter. With the Godox 2.4G module built into the L-858, you can adjust flash parameters directly from the light meter after metering, ensuring precise and convenient lighting control.

Image: The GODOX XProIIL and a Sekonic L-858 light meter shown in conjunction, illustrating their integrated functionality for flash parameter adjustment.
7. Single Contact Triggering
For burst mode shooting, the optional single contact triggering ensures flashes are triggered in rapid succession with shorter intervals, improving performance during continuous shooting.
تعمیر و نگهداری
- Keep the device dry. Do not handle with wet hands.
- Use a soft, dry cloth to clean the unit. Avoid harsh chemicals or abrasive materials.
- اگر قرار است برای مدت طولانی از دستگاه استفاده نشود، باتریها را خارج کنید تا از نشتی جلوگیری شود.
- در جای خشک و خنک و دور از نور مستقیم خورشید و دمای شدید نگهداری شود.
عیب یابی
- فلاش روشن نمیشود: Check battery levels, ensure the trigger is securely mounted, verify channel and ID settings match the receiver, and confirm the flash unit is powered on and ready.
- تداخل: Use the channel scan function to find a clear channel and ID. Ensure no other 2.4GHz devices are causing interference.
- مشکلات اتصال برنامه: Ensure Bluetooth is enabled on both the trigger and your smart device. Restart the app and the trigger, then attempt to pair again.
مشخصات
| شماره مدل | XProII-L |
| نام تجاری | گودوکس |
| کانال ها | 32 |
| گروه ها | 16 |
| تنظیمات شناسه بی سیم | 99 |
| همگام سازی با سرعت بالا | تا 1/8000 ثانیه |
| قابلیت اتصال | 2.4 گیگاهرتز بی سیم، بلوتوث |
| وزن مورد | 4.2 اونس |
| ابعاد بسته بندی | 5.12 x 4.92 x 2.76 اینچ |
گارانتی و پشتیبانی
برای اطلاعات گارانتی و پشتیبانی فنی، لطفاً به وبسایت رسمی GODOX مراجعه کنید. website or contact your authorized GODOX dealer. Keep your purchase receipt as proof of purchase for warranty claims.


