
1. مقدمه
Thank you for choosing the Physionics ELTR01 Elliptical Trainer. This manual provides essential information for the safe assembly, operation, and maintenance of your fitness equipment. Please read it thoroughly before use and keep it for future reference.
The Physionics ELTR01 is designed to provide an effective full-body cardio workout in the comfort of your home, engaging various muscle groups while being gentle on your joints.

Image 1.1: Physionics ELTR01 Elliptical Trainer in use.
2. اطلاعات ایمنی
- قبل از شروع هر برنامه ورزشی جدید، با پزشک مشورت کنید.
- کودکان و حیوانات خانگی را در حین استفاده از وسایل دور نگه دارید.
- Place the trainer on a flat, stable surface with adequate clearance around it.
- قبل از هر بار استفاده، مطمئن شوید که تمام پیچ و مهرهها محکم بسته شدهاند.
- از حداکثر وزن کاربر تجاوز نکنید 120 کیلوگرم (265 پوند).
- لباس و کفش ورزشی مناسب بپوشید.
- اگر احساس ضعف، سرگیجه یا درد کردید، فوراً ورزش را متوقف کنید.
- The equipment is for home use only, not for commercial or therapeutic purposes.

Image 2.1: Maximum user weight capacity of 120 kg (265 lbs).
3. محتویات بسته
Please check that all components are present and undamaged. If any parts are missing or damaged, contact customer support.
- اجزای قاب اصلی
- پدال (2)
- Handlebars (2) with Pulse Sensors
- صفحه نمایش ال سی دی
- Abdominal Support Pad
- یراق آلات مونتاژ (پیچ، واشر، مهره)
- ابزار مونتاژ (آچار، آچار آلن)
- راهنمای کاربر
4. راه اندازی و مونتاژ
Assembly typically requires two people. Follow the numbered steps in the included assembly diagram. Ensure all connections are secure before use.
- تمام قطعات را از بستهبندی خارج کرده و آنها را روی یک سطح تمیز و صاف قرار دهید.
- با استفاده از پیچ و مهرههای ارائه شده، تثبیتکنندههای جلو و عقب را به قاب اصلی وصل کنید.
- Mount the main upright post to the base frame.
- Connect the handlebars and pedal arms to the main frame, ensuring proper alignment.
- Install the abdominal support pad onto its adjustable post.
- Attach the LCD monitor to its bracket and connect the sensor wires (pulse and speed).
- Secure the pedals to the pedal arms.
- Double-check all bolts and nuts for tightness.

تصویر ۴.۲: ابعاد محصول برای برنامهریزی قرارگیری.
5. دستورالعمل های عملیاتی
5.1 شروع به کار
Step onto the pedals one foot at a time, holding onto the handlebars for balance. Begin a smooth, elliptical motion. The movement should feel natural and fluid.

Image 5.1: Key features of the elliptical trainer.
۳.۴ عملکردهای مانیتور LCD
The digital LCD monitor tracks your workout progress. It typically displays the following functions:
- نبض: Your heart rate (when holding the pulse sensors).
- TIME: مدت زمان تمرین فعلی شما.
- زمان کل: Cumulative workout time.
- کالری: کالری سوزانده شده تخمینی
- دور در دقیقه (دور در دقیقه): Speed of your pedal strokes.
- اسکن: به طور خودکار تمام عملکردهای صفحه نمایش را تغییر میدهد.
Use the 'MODE' button to select a specific function or 'SCAN' mode. The 'RESET' button clears all values.

Image 5.2: Close-up of the LCD monitor and its functions.
5.3 Adjustable Abdominal Support
The abdominal support pad can be adjusted for height and depth to provide comfort and stability during your workout. Loosen the adjustment knob, position the pad, and then tighten the knob securely.

Image 5.3: Detail of the two-way adjustable abdominal support.
5.4 Grip Pulse Monitor
To measure your heart rate, firmly grasp the pulse sensors on the handlebars. Your pulse will be displayed on the LCD monitor after a few seconds.

Image 5.4: How to use the grip pulse monitor.
5.5 Non-Slip Pedals
The textured, non-slip pedals are designed to ensure stability and safety during your exercise. Always ensure your feet are centered and secure on the pedals.
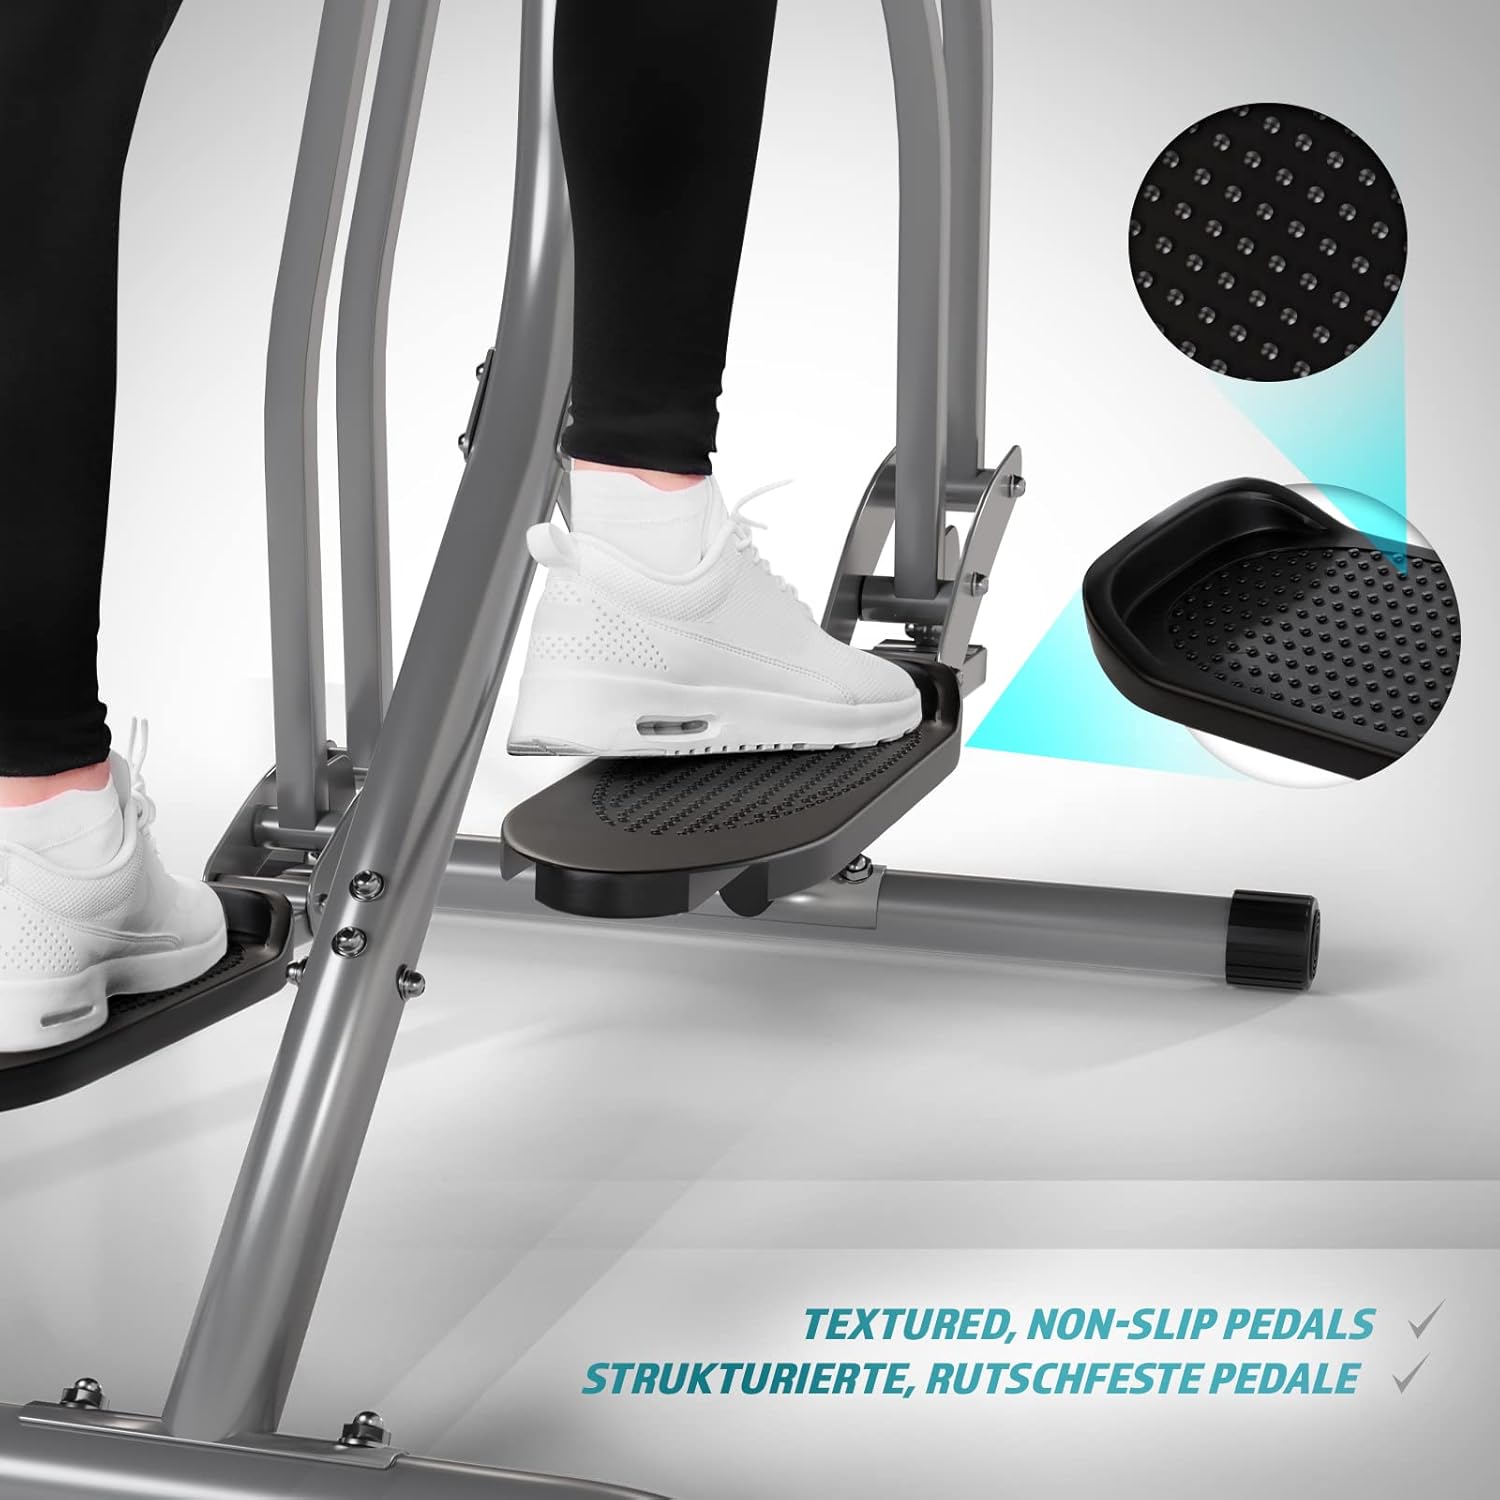
Image 5.5: Detail of the non-slip pedal surface.
5.6 Benefits of Elliptical Training
Elliptical training offers a low-impact workout that is beneficial for cardiovascular health, calorie burning, muscle toning, and improving balance and coordination. It is particularly gentle on joints compared to high-impact exercises.

Image 5.6: Elliptical training is gentle on joints.
6. تعمیر و نگهداری
- تمیز کردن: کفش ورزشی را با تبلیغ پاک کنیدamp بعد از هر بار استفاده، برای پاک کردن عرق و گرد و غبار، پارچه را تمیز کنید. از پاککنندههای ساینده استفاده نکنید.
- بازرسی: مرتباً تمام پیچ و مهرهها و قطعات متحرک را از نظر سفتی و فرسودگی بررسی کنید. هرگونه بست شل را محکم کنید.
- روغن کاری: Apply a small amount of silicone-based lubricant to moving joints and pivot points every few months to ensure smooth operation and prevent squeaking.
- ذخیره سازی: Store the trainer in a dry, cool place away from direct sunlight and moisture.
7 عیب یابی
| مشکل | علت احتمالی | راه حل |
|---|---|---|
| LCD monitor not displaying | باتریهای از کار افتاده؛ اتصال حسگر شل شده است | Replace batteries; Check and secure all sensor cables. |
| صدای جیرجیر یا سایش | پیچ و مهرههای شل؛ کمبود روغنکاری؛ قطعات فرسوده | Tighten all bolts; Lubricate moving joints; Contact support if noise persists. |
| Inaccurate pulse reading | Hands not firmly on sensors; Dry hands | Ensure firm, consistent contact with sensors; Slightly moisten hands if too dry. |
| ناپایدار در حین استفاده | سطح ناهموار؛ اتصالات شل قاب | Move to a level surface; Check and tighten all frame bolts. |
8. مشخصات
| ویژگی | جزئیات |
|---|---|
| نام مدل | واکر هوایی |
| شماره مدل | ELTR01 |
| نام تجاری | فیزیک |
| رنگ | نقره ای / مشکی |
| ابعاد محصول (L x W x H) | 97 × 60 × 144.5 سانتی متر |
| وزن مورد | 17 کیلوگرم |
| مواد اصلی | Steel, Plastic, Foam |
| مکانیسم مقاومتی | Air, Manual |
| حداکثر وزن توصیه شده | 120 کیلوگرم |
| Maximum Step Length | 90 سانتی متر |
| اندازه نمایشگر | 90 Centimeters (Note: This value from source data may refer to step length or a general display size, not the physical screen size of the LCD monitor.) |
| سازنده | FF Europe |
9. گارانتی و پشتیبانی
For warranty information, please refer to the documentation included with your purchase or contact your retailer. If you require technical assistance, have questions about assembly, or need replacement parts, please contact Physionics customer support through their official website or the contact details provided at the point of purchase.
Please have your model number (ELTR01) and purchase date ready when contacting support.


