1. مقدمه
This manual provides essential instructions for the safe and efficient operation, installation, and maintenance of your Steinbach SPS 50-1T self-priming filter pump. Please read this manual thoroughly before operating the pump to ensure proper function and longevity of the product. This filter pump is designed for use with swimming pools up to approximately 22,000 liters water content.
2. دستورالعمل های ایمنی
مهم: Always disconnect the pump from the power supply before performing any installation, maintenance, or cleaning tasks.
- Ensure the power supply matches the pump's specifications (230V/250W).
- The pump must be installed on a stable, level surface, protected from direct weather exposure.
- اگر سیم برق یا دوشاخه آسیب دیده است، پمپ را روشن نکنید.
- در حین کار پمپ، کودکان و افراد غیرمجاز را از آن دور نگه دارید.
- Never run the pump dry. Ensure the pump is filled with water before starting.
- حداکثر دمای آب برای کار 35 درجه سانتیگراد است.
- All electrical connections should be performed by a qualified electrician and comply with local regulations.
3. محصول تمام شدview و اجزاء
The Steinbach SPS 50-1T is a self-priming filter pump equipped with a pre-filter and an integrated timer. Familiarize yourself with the main components:

شکل 1: به طور کلی view of the Steinbach SPS 50-1T filter pump, showing the motor, pump housing, pre-filter, and control panel.
- موتور: The electrical unit that drives the pump impeller.
- مسکن پمپ: Contains the impeller and directs water flow.
- پیش فیلتر: A transparent chamber with a removable basket designed to capture larger debris before it reaches the pump impeller, protecting the pump from damage.
- اتصالات ورودی/خروجی: Points for connecting hoses (Ø 32/38 mm).
- کنترل پنل: Features ON/OFF and TIMER buttons, along with indicator lights for setting operation duration.

شکل 2: به تفصیل view of the pre-filter assembly, showing the transparent lid and the hose connection point for the inlet.
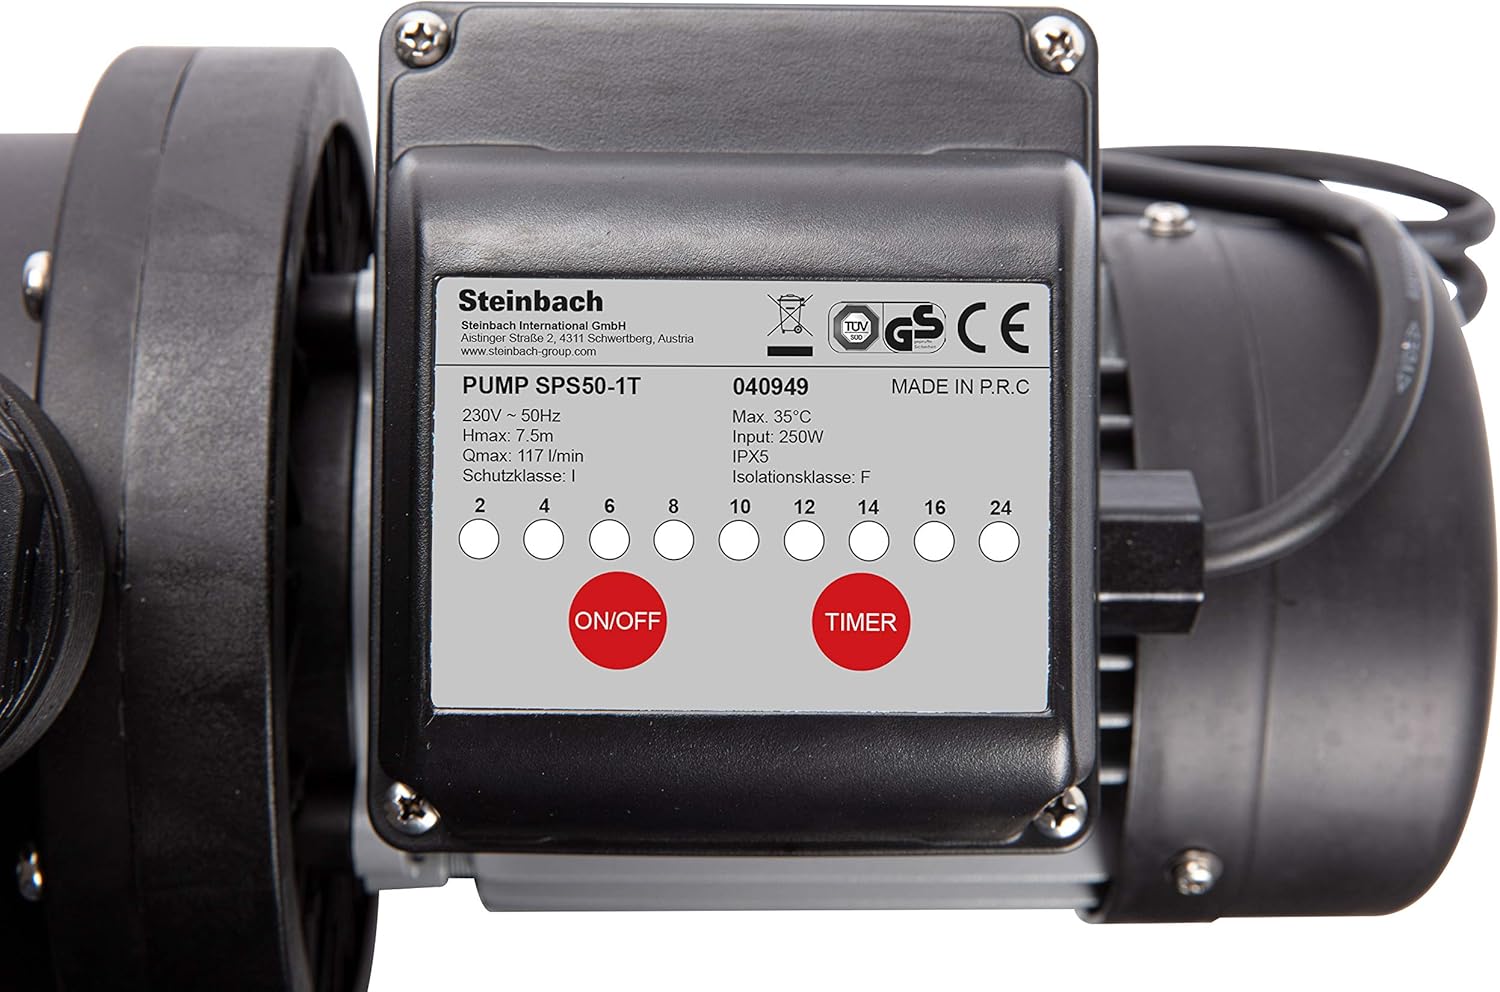
شکل 3: The pump's control panel, featuring the ON/OFF button, TIMER button, and indicator lights for setting operational hours.
4. راه اندازی و نصب
- قرار دادن: Position the pump on a firm, level surface, ideally below the water level of the pool for easier priming. Ensure it is protected from rain and direct sunlight.
- اتصالات شیلنگ: Connect the pool's skimmer line to the pump's inlet (pre-filter side) and the return line to the pump's outlet. Use hoses with a diameter of Ø 32/38 mm. Secure all connections with hose clampبرای جلوگیری از نشتی

شکل 4: View of the threaded inlet and outlet ports on the pump, ready for hose adapters.
- پرایمینگ پمپ: Before starting, ensure the pre-filter is filled with water. If the pump is above water level, it may require manual priming by filling the pre-filter chamber until water flows into the pump housing.
- اتصال برق: Plug the pump into a grounded electrical outlet (230V). Ensure the outlet is protected by a Residual Current Device (RCD) for safety.
5. دستورالعمل های عملیاتی
Once installed and primed, the pump is ready for operation.
5.1 عملیات دستی
- را فشار دهید روشن/خاموش button on the control panel to start the pump.
- را فشار دهید روشن/خاموش برای متوقف کردن پمپ، دوباره دکمه را فشار دهید.
5.2 عملکرد تایمر
The integrated timer allows for automated operation cycles.
- Ensure the pump is connected to power.
- را فشار دهید تایمر button repeatedly to select the desired operating duration (e.g., 2, 4, 6, 8, 10, 12, 14, 16, 24 hours). The corresponding indicator light will illuminate.
- The pump will start and run for the selected duration, then automatically shut off.
- The timer cycle will repeat daily at the same time it was initially set. To reset the timer, unplug the pump for a few seconds and then plug it back in.
6. تعمیر و نگهداری
نگهداری منظم، عملکرد بهینه را تضمین میکند و طول عمر پمپ شما را افزایش میدهد.
۶.۱ تمیز کردن سبد پیشفیلتر
- پمپ را از منبع تغذیه جدا کنید.
- Close any valves to prevent water flow from the pool.
- Unscrew the transparent lid of the pre-filter.
- Remove the pre-filter basket and clean it thoroughly under running water.
- Inspect the O-ring seal on the lid for damage and ensure it is clean.
- Replace the basket, secure the lid, and open the valves.
- Re-prime the pump if necessary before restarting.

شکل 5: The pre-filter chamber with its transparent lid removed, showing the internal basket for debris collection.
6.2 زمستان گذرانی
- At the end of the swimming season, disconnect the pump from power and drain all water from the pump and hoses to prevent freezing damage.
- Clean the pump thoroughly and store it in a dry, frost-free location.
7 عیب یابی
| مشکل | علت احتمالی | راه حل |
|---|---|---|
| پمپ روشن نمی شود | No power; tripped circuit breaker; motor overload. | Check power connection; reset circuit breaker; allow motor to cool. |
| پمپ کار میکند اما جریان آب وجود ندارد | Pump not primed; air leak in suction line; clogged pre-filter basket; closed valves. | Prime the pump; check all connections for leaks; clean pre-filter; open all valves. |
| کاهش جریان آب | Partially clogged pre-filter; restricted suction or return lines; low water level in pool. | Clean pre-filter; check and clear hoses; ensure adequate pool water level. |
| سر و صدای بیش از حد | Air in pump; cavitation; motor bearing wear. | Ensure pump is fully primed and no air leaks; check for obstructions in suction line; contact service if motor noise persists. |
8. مشخصات فنی
| ویژگی | مشخصات |
|---|---|
| مدل | SPS 50-1T (040949) |
| منبع تغذیه | 230 ولت / 50 هرتز |
| مصرف برق | 250 وات |
| Pump Power (Flow Rate) | 7,020 liters/hour (Q= 117 l/min) |
| حداکثر ارتفاع پمپ (هد) | 7.5 متر |
| نوع پمپ | Self-priming with Pre-Filter |
| اتصال شیلنگ | Ø 32/38 میلی متر |
| حداکثر دمای آب | 35 درجه سانتی گراد |
| Maximum Pool Size | 22,000 لیتر |
| سطح نویز | تقریبا 70 دسی بل |
| ویژگی های یکپارچه | تایمر |
| ابعاد محصول | 1 × 1 × 1 سانتی متر |
| وزن مورد | 6 کیلوگرم |
| مواد | Metal (motor housing), Plastic (pump housing, pre-filter) |
9. گارانتی و پشتیبانی
For warranty information, technical support, or spare parts, please refer to the documentation provided with your purchase or contact Steinbach customer service. Keep your proof of purchase for warranty claims.
You can find more information and contact details on the official Steinbach webسایت: www.steinbach.at


