EXQUIS V2.1.0 61 Key MPE Midi Controller

EXQUIS V2.1.0 61 Key MPE Midi Controller

This user manual describes the functionalities of the keyboard used without the Exquis application, that is to say connected via USB, MIDI DIN or CV, to third-party software, hardware synthesizer, or modular synthesizer.

The features currently available and presented here are subject to change. Don’t forget to watch for updates!

For any questions about your use of Exquis, do not hesitate to contact the community of players through its various points of contact; members of the Intuitive Instruments team or other users will be able to respond and share it with the community.

For technical issues, contact support at dualo.com/en/support.
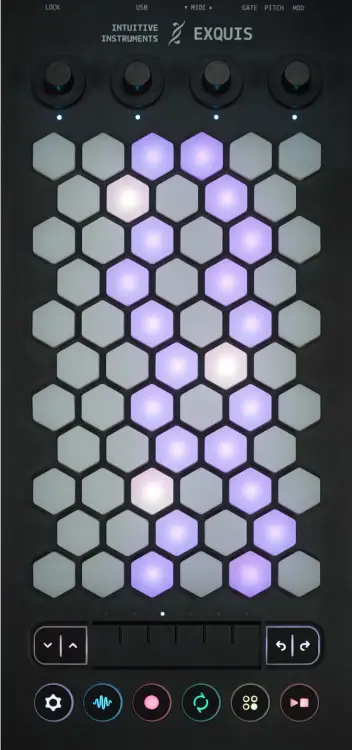
Connectors

Connectors

The Exquis keyboard allows connection:

  • in USB (USB-C connector), for power supply and/or use with third-party software (e.g. Ableton Live, Garage Band, etc.)
  • in MIDI (MIDI IN and OUT minijack connectors), for use with third-party software or hardware synthesizers.
  • in CV 0-5V (“GATE”, “PITCH” and “MOD” minijack connectors), for use with modular synthesizers.
The Exquis keyboard also has a Kensington Nano Security Slot™ for a suitable anti-theft device.

Startup

The Exquis keyboard simply requires power supply via USB (5 V and 0.9A max), for example from a computer, a suitable power supply, or even an external battery. The keyboard starts automatically once plugged.

Controls

From bottom to top, the Exquis keyboard features:

  • 10 backlit action push buttons
  • 1 continuous capacitive slider divided into 6 zones with light feedback
  • 61 backlit hex keys, sensitive to:
    • velocity: strike force
    • horizontal tilt: X, Pitch Bend
    • vertical tilt: Y, CC#74
    • pressure: Z axis, Channel Pressure or Polyphonic Aftertouch
  • 4 clickable encoders with light feedback.

Keyboard

By default, the Exquis keyboard arranges consecutive notes (semitones) horizontally, and harmonious notes (thirds) vertically, from the lowest at the bottom to the highest at the top:
Keyboard

Harmonious chords (several notes played simultaneously), stacking of thirds, are embodied in simple, continuous and ergonomic shapes:

The most common scales (selection of notes giving the tone of a piece) result from the assembly of two of these 4-note chords; they are thus embodied on the keyboard in the form of a continuous luminous double-strand, allowing you to play in tune and improvise effortlessly.
Keyboard

When plugged in, the keyboard displays the C major scale by default (C D E F G A B):

The number indicated at the bottom of the keys corresponds to the octave number.

Keyboard

Playing chords within the scale allows you to construct coherent and harmonious chord charts.

With one hand or two hands, explore and compare the different scales to create ever more different pieces!

Play

  1. Settings menu (hold): keyboard settings.
  2. Compatibility menu (hold): MIDI and layout settings
  3. MIDI CC#32, click to activate
  4. MIDI CC#33, hold to activate
  5. MIDI CC#34, hold to activate
    Default values are editable in the Exquis app:
    Menu > Standalone settings
  6. MIDI clock play (green) / stop (orange)
  7. Octave: transpose the keyboard, one octave (12 semitones) at a time, to play higher or lower.
  8. Slider: arpeggiator speed (ordered repetition of notes held on the keyboard). The pattern and mode are to be set in the settings menu. The values are expressed according to the units of time: 4 quarter note, 8 = eighth note, 16 sixteenth note,… 1/4 is equivalent to 1 note per beat, 1/8 to 2 notes per beat, 1/16 to 4 notes per beat…..
  9. MIDI CC#41, click CC#21
  10. MIDI CC#42, click CC#22
  11. MIDI CC#43, click CC#23
  12. MIDI CC#44
    Default values are editable in the Exquis app:
    Menu > Standalone settings
  13. Sustain (click):
    Either click briefly or hold the click to activate, then touch keys to add/remove notes, then click again briefly or release the click to deactivate.
    – Or hold notes, then click briefly or hold the click to lock the notes’ XYZ positions, then click again briefly or release the click to deactivate.
    You can use the sustain mode in combination with the arpeggiator.
    Play

Settings (1)

  1. MIDI clock output: USB (red), DIN (blue), both (magenta), none (white).
  2. Transpose: keyboard shift one semitone at a time. Particularly useful for recentering the scale on the keyboard.
  3. Slider: arpeggiator pattern. The animation of the 6 LEDs of the slider shows the chosen pattern. Briefly touch the slider to change the pattern:
    • Order: repeat in order of note triggering
    • Up: from the lowest to the highest
    • Down: from the highest to the lowest
    • Convergent: from outside to inside
    • Divergent: from inside to outside
    • Note repeat: notes repeated simultaneously
      Hold your finger on the slider for a second to switch from « classic » mode (hold while playing) to « latch » mode (touch to activate/deactivate)
  4. Internal tempo: used by the arpeggiator and MIDI clock, 120 by default. Follows the MIDI clock received via USB or MIDI DIN (if two clocks are received, follows the first).
  5. Tonic note: central note of a song, around which to build your melodies and chord charts (A=la, B=si, C=do, …).
  6. Scale: notes giving the tone of the piece.
    Try different scales and follow the lights to compare their musical colors; stay in the light path for your chords and melodies to make a harmonious piece. By default in memory:
    1. Major
    2. Natural Minor
    3. Melodic Minor
    4. Harmonic Minor
    5. Dorian
    6. Phrygian
    7. Lydian
    8. Mixolydian
    9. Locrian
    10. Phrygian dominant
    11. Major Pentatonic
    12. Minor Pentatonic
    13. Whole Tone
    14. Chromatic
  7. Keyboard brightness (turn) / sensitivity (click + turn) : adjustment of the keyboard global key trigger threshold, from 1 to 99, by default at 20. Warning: a low setting can cause unwanted note triggers.
    Settings

Settings (2) 

  1. MPE / Poly aftertouch: behaviour of MIDI channels sent via USB or MIDI DIN. Switch the mode by clicking on the encoder:
    • MIDI Polyphonic Expression (blue LED): control on the X Y and Z axes independent by key, one note per channel. Channel 1 is used for global messages, rotating the encoder allows you to edit the number of additional MIDI channels, shown on the keyboard (1 to
      A setting of 14 is recommended unless specific need. Channel 16 is used for communication with DAWs (e.g. Remote Script for Ableton Live)
    • Poly aftertouch (yellow LED): independent Z-axis control per note. You can choose the channel on which you send the notes, shown on the keyboard (1 to 16).
  2. Per note pitch bend range: in MPE, expressed in forty-eighths of the maximum range. Two use cases:
    • Set the Pitch bend range of the synthesizer used to 48 (generally the default value), then set this parameter.
    • Set this parameter to 48, then set the Pitch bend range of the synthesizer used. In CV, expressed in semitones.
  3. Note layout. By default in memory:
    • Exquis
    • Exquis with duplicates (duplicate notes of the scale are on)
      Settings

Saving and Resetting

All settings are automatically saved when exiting the settings menu, and kept when the keyboard is unplugged.
You can reset default settings by holding the 2nd encoder clicked while plugging into a power source.

Logo

Documents / Resources

EXQUIS V2.1.0 61 Key MPE Midi Controller [pdf] User Guide
V2.1.0 61 Key MPE Midi Controller, V2.1.0, 61 Key MPE Midi Controller, MPE Midi Controller, Midi Controller

References

Leave a comment

Your email address will not be published. Required fields are marked *