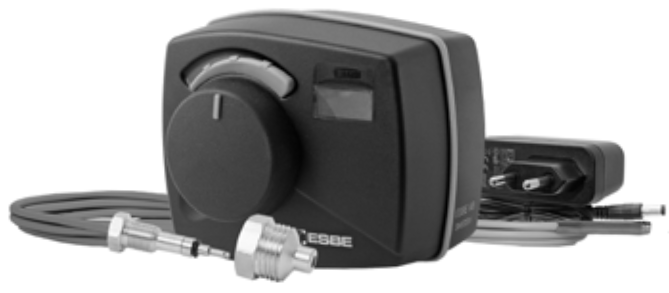
![]() CRS200 Series Setpoint Controls Sensor
CRS200 Series Setpoint Controls Sensor
Instruction Manual
![]()
CRS200 Series Setpoint Controls Sensor
Series CRS210
LVD 2014/35/EU
EMC 2014/30/EU
RoHS 2011/65/EU
EN 300220-2

 DECLARATION OF CONFORMITY
https://www.esbe.eu/group/support (Contorllers/Certificates)
 Series CRS210
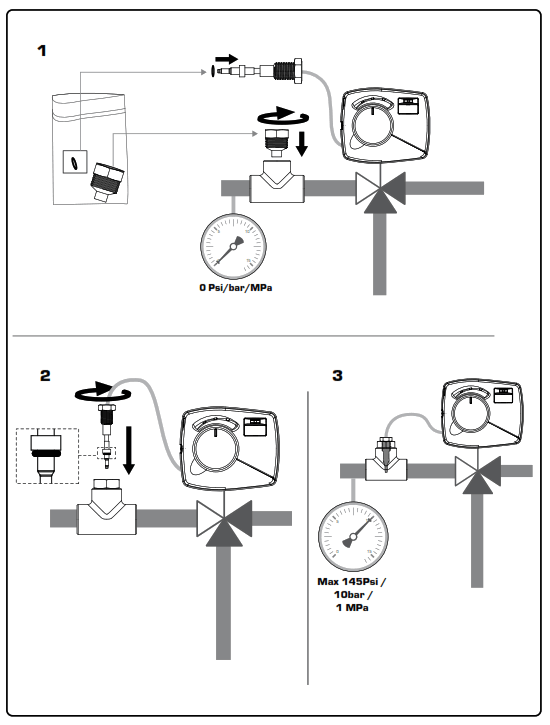
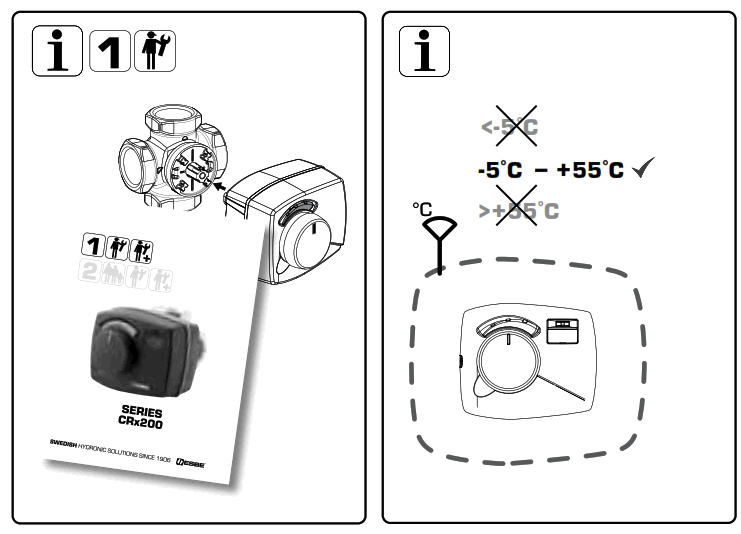
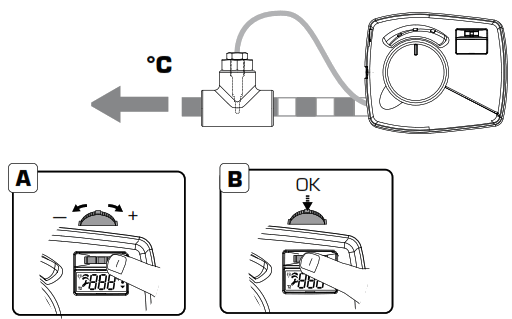
Sensor
- Install the supplied sensor adapter in a T-piece or equivalent.
- Install the flow temperature sensor in the sensor adapter.
- Pressurize the system, if necessary, tighten adapter or flow temperature sensor.
Working Direction
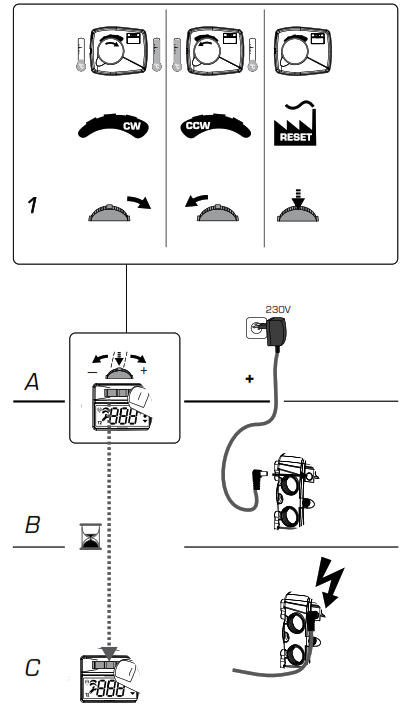
Working Direction
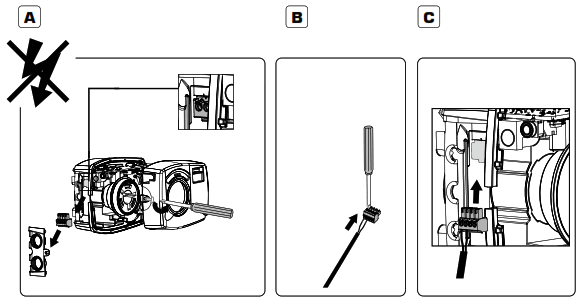
- Set the working direction of the controller by pressing the joystick to right for clockwise opening or left for counter clockwise opening (A).
- Keep the joystick in the desired direction and connect power (B).
- Wait 2 seconds until joystick is released (C), the correct working direction is now set.
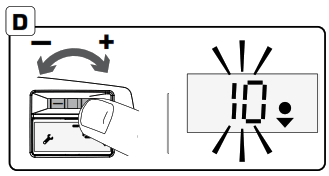
 Change of target temperature
Change of target temperature
- In order to change the target flow temperature, press the joystick to the right or to the left (A).
- Press the joystick down to confirm new target temperature (B).
 Advanced Settings
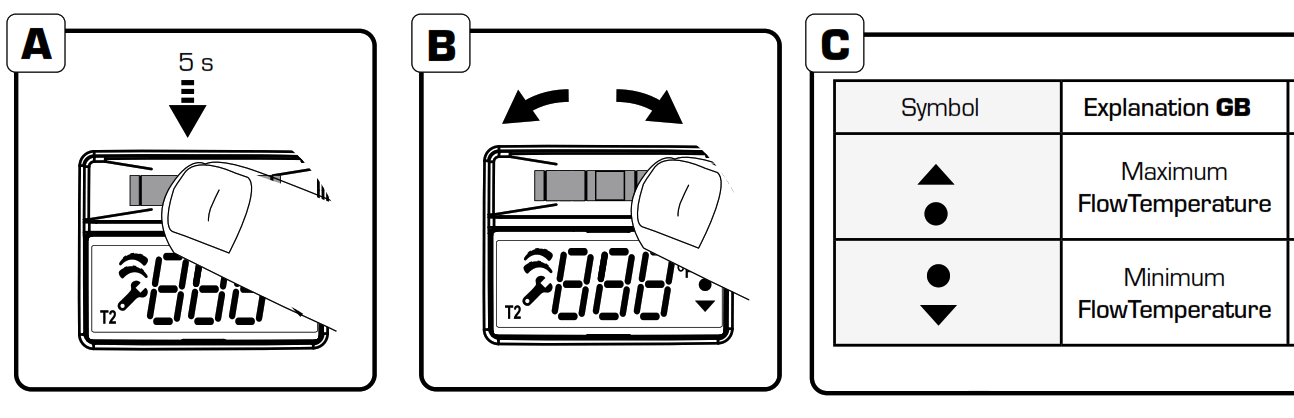
Advanced Settings
- Press the joystick for 5 seconds to reach advanced settings (A).
- To move between menus press joystick to left or right (B).
- Press down the joystick to enter desired menu (C).
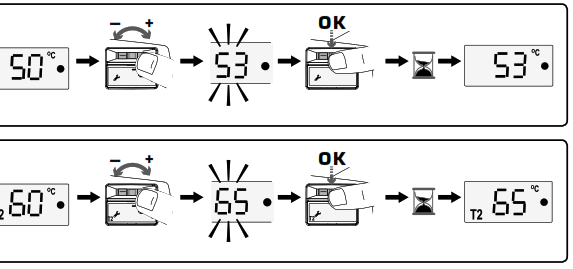
 Maximum Flow Temperature
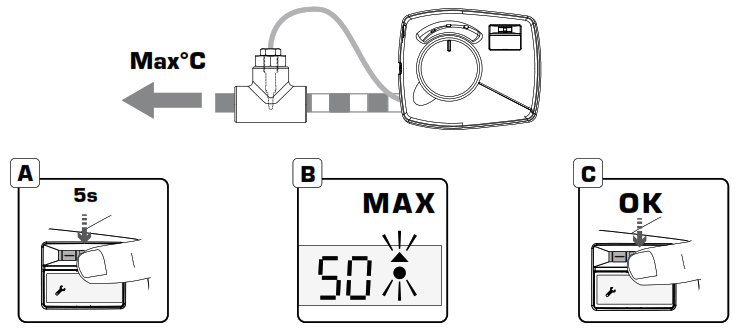
Maximum Flow Temperature
- To change the maximum flow temperature press down the joystick for 5 seconds to reach advanced settings (A).
- Choose menu “Max” by pressing the joystick (B) OK (C).
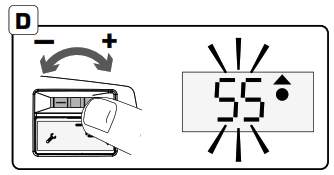
- Decide the maximum flow temperature by pressing the joystick (D) OK (C).
- Press down the joystick for 5 seconds to return to main menu (A).

Minimum Flow Temperature
- To change the minimum flow temperature press down the joystick for 5 seconds to reach advanced settings (A).
- Choose menu “Min” by pressing the joystick (B) OK (C).
- Decide the minimum flow temperature by pressing the joystick (D) OK (C).
- Press down the joystick for 5 seconds to return to main menu (A).
 Alternative temperature

Alternative temperature
An alternative target flow temperature can be activated for example during legionella flushing by an external signal (A).
To set the normal target flow temperature the external signal shall not be activated. Set the target temperature as described in menu 3 (B)![]()
To set the alternative target flow temperature the external signal must be activated. Set the target temperature as described in menu 3 (B)![]()
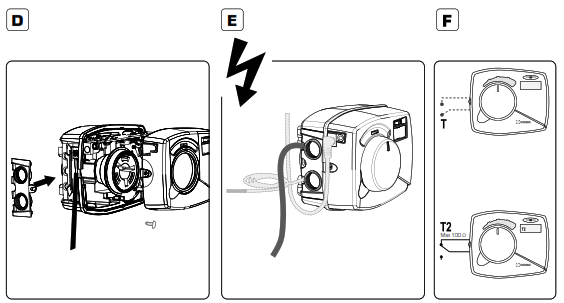
Activate T2 mode
Activate Alternative temperature
T2 mode is activated by an external signal.
- Disconnect power to the controller.
- Unscrew the cover (A) and connect two conductors to the green connector (B).
- Place the connector on the PCB (C) and assembly the cover back (D).
- Connect power to the controller (E).
When the two conductors are interconnected the alternative temperature is activated and the![]() symbol is shown in the display. The connection shall be without any voltage or current and with a maximum resistance of 100Ω. (F)
symbol is shown in the display. The connection shall be without any voltage or current and with a maximum resistance of 100Ω. (F)
![]() www.esbe.eu
www.esbe.eu

https://esbe.eu/group/
Mtrl.nr. 98141102 Ritn.nr. 9334 utg. A
Rev. 2021-07-07
Documents / Resources
 |
ESBE CRS200 Series Setpoint Controls Sensor [pdf] Instruction Manual CRS200 Series, Setpoint Controls Sensor, CRS200 Series Setpoint Controls Sensor, Controls Sensor, Sensor |


