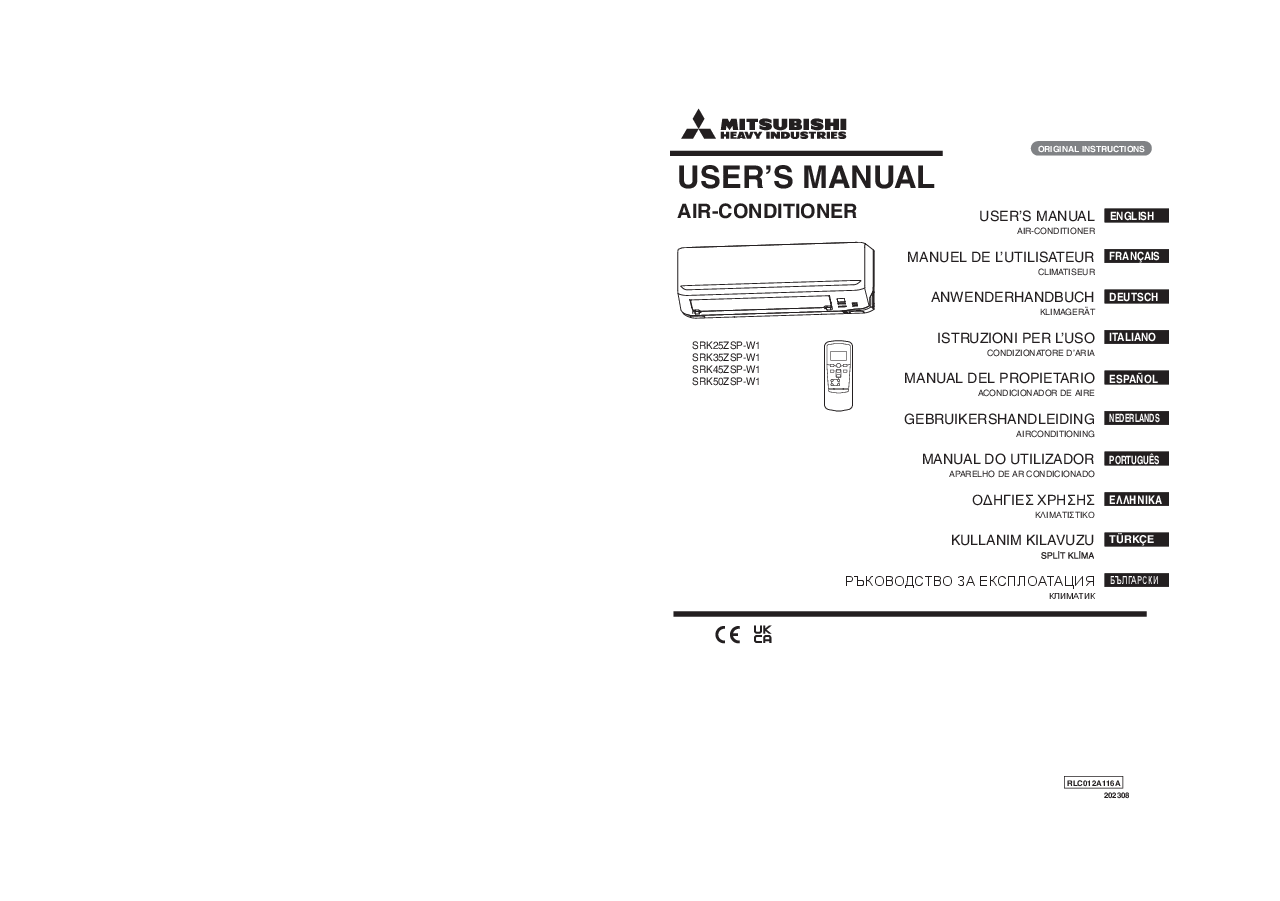
Mitsubishi Heavy Industries Air Conditioner User Manual
Thank you for purchasing a Mitsubishi Heavy Industries Thermal Systems, Ltd. Air-Conditioner. To ensure the best long-lasting performance, please read and follow this user's manual carefully before using your air-conditioner. After reading, please store the manual in a safe place and refer to it for operational questions or in the event of any irregularities.
This manual is a brief version. For the full version, please visit: Mitsubishi Heavy Industries Air Conditioner Full Manual
Your air-conditioner is marked with the symbol ♻️, indicating that waste electrical and electronic equipment (WEEE directive 2012/19/EU) should not be mixed with general household waste. It should be treated at an authorized facility for reuse, recycling, and recovery. Please contact your installer or local authority for more information.
The symbol ? on the batteries indicates compliance with EU directive 2006/66/EC. Batteries should be disposed of separately. If a chemical symbol is printed beneath it (Hg, Cd, Pb), it indicates the presence of mercury (0.0005%), cadmium (0.002%), or lead (0.004%). Please dispose of batteries correctly at your local community waste collection or recycling center.
The emission sound pressure level from each indoor and outdoor unit is under 70 dB(A).
Safety Precautions
Please read these safety precautions carefully to ensure proper operation. Keep this manual in a safe place for future reference.
- WARNING: Indicates a potentially hazardous situation which, if not avoided, can result in death or severe injury.
- CAUTION: Indicates a potentially hazardous situation which, if not avoided, can result in personal injury or property damage.
Symbols used:
- ? Strictly prohibited
- ? Observe instructions with great care
- ⏏ Provide proper earthing
WARNING:
- Strictly comply with domestic laws when disposing of the appliance.
- Do not use means to accelerate defrosting or cleaning other than those recommended by the manufacturer.
- Store the appliance in a room without continuously operating ignition sources (e.g., open flames, operating gas or electric heaters).
- Do not pierce or burn.
- Be aware that refrigerants may not have an odor.
- Store the appliance in a well-ventilated area corresponding to the room area specified for operation.
- Servicing operations must be performed by staff holding national or relevant qualifications.
- The indoor unit requires a minimum room area of 4.0 m².
CAUTION:
- Do not install where flammable gas may leak, as this may cause fire.
- Ensure an earth leakage breaker is installed to prevent electric shock.
- Install the drain hose properly to ensure all water is drained. Improper installation can lead to water leakage.
- Ensure the system is properly earthed. Never connect the earth wire to gas pipes, water pipes, lightning conductors, or telephone earth wires, as this may cause electric shock.
This product contains fluorinated greenhouse gases (R32) with a Global Warming Potential (GWP) of 675. Do not vent R32 into the atmosphere.
Operation Precautions
WARNING:
- Children should not play with the air-conditioner.
- Do not expose yourself to cooling air for extended periods, as it may affect your physical condition and cause health problems.
- Cleaning and user maintenance should not be performed by children without supervision.
- Do not insert anything into the air outlet, as the internal fan rotates at high speed and may cause injury.
- This air-conditioner can be used by children aged 8 and above, and persons with reduced physical, sensory, or mental capabilities, or lack of experience and knowledge, if they are supervised or instructed on safe use and understand the hazards involved.
- Store the remote control out of reach of children to prevent accidental ingestion of batteries.
CAUTION:
- Only use approved fuses. Using steel or copper wire instead of an approved fuse is strictly prohibited and may cause breakdown or fire.
- Do not handle switches with wet hands, as this may cause electric shock.
- Do not swing from the indoor unit; if it falls, you may get injured.
- Do not place flammable insecticides or paint sprays near the air-conditioner, nor spray them directly on the system, as this may result in fire.
- Do not expose any combustion appliance directly to the air stream of the air-conditioner, as it may malfunction.
- Do not wash the air-conditioner with water, as this could cause electric shock. Using a high-pressure washer may damage the aluminum fins and reduce performance.
- Do not use for preservation of food, plants, animals, precision devices, or works of art. The system is intended only for ordinary domestic rooms.
- Do not place anything containing water (e.g., vases) on top of the unit. Water entering the unit could damage insulation and cause electric shock.
- Do not install the air-conditioner where airflow is directed at plants or animals, as this will damage their health.
- Do not step or sit on the unit, or place anything on it. If the unit falls or items drop from it, people could get hurt.
- After prolonged use, regularly check the unit's support structure. Repair any damage promptly to prevent the unit from falling and causing injury.
Precautions for Relocation or Repairs
WARNING:
- Do not perform repairs or modifications yourself. Consult the dealer if the unit requires repair, as unauthorized work can cause water leaks, electric shocks, or fire.
- Consult your dealer for repairs. Incorrect repairs could cause electric shock, fire, etc.
- If the air-conditioner needs to be relocated, contact your dealer or a qualified installer. Faulty installation may cause water leakage, electric shock, fire, etc.
- If you notice anything abnormal (e.g., smell of burning), stop the system, turn off the power source, and consult your dealer. Continued use in abnormal circumstances can lead to malfunctioning, electric shock, or fire.
- If the air-conditioner fails to cool or warm the room, it may have a refrigerant leak. Contact your dealer. If refrigerant needs to be added, check with your dealer for proper instructions. Contact with refrigerant on bare skin may cause cold injury. Inhaling excessive refrigerant gas may temporarily cause dizziness, headache, irregular heartbeat, or heart palpitations. If refrigerant leaks onto a heat source, harmful gases could be generated.
Tips for Effective Operation
- Set a suitable room temperature to avoid wasting electricity and for your health.
- Clean the filters frequently, as clogged filters reduce efficiency.
- Avoid direct sunlight and drafts. Close curtains or blinds during cooling and keep windows and doors shut except for ventilation.
- Adjust the airflow direction properly for a steady room temperature.
- Operate the unit only when needed, using the timer function.
- Keep heat sources out of the room as much as possible during cooling.
Name of Each Part
Indoor Unit
The indoor unit features an air inlet (back), louvers, flaps, a display section, an air outlet, and a room temperature sensor. The display section includes the Unit ON/OFF button, Remote control signal receiver, RUN light (green), and TIMER light (yellow).
Outdoor Unit
The outdoor unit includes an air inlet (back), heat exchanger, drain hole, air outlet, refrigerant pipe and electric wire, and a drain hose. It is also marked with warnings regarding flammable refrigerant.
Remote Control
The remote control includes buttons for FAN SPEED, HI POWER/ECONO, ON TIMER, SLEEP, CLEAN, CANCEL, OPERATION select, ON/OFF, MODE, AIR FLOW (DOWN), TEMP, and OFF TIMER. It also has a remote control signal receiver.
Using the Remote Control Holder
The remote control can be mounted on a wall or pillar using the provided holder. Ensure the air-conditioner receives signals properly before installation. Move the remote control up or down in the holder to install or remove it.
WARNING NOTE for Remote Control
- Do not place the remote control near high-temperature places.
- Do not expose the remote control to direct sunlight or strong lighting.
- Handle the remote control with care; do not drop it.
- Do not place obstructing obstacles between the remote control and the unit.
- Do not spill any liquid on the remote control.
- Do not place heavy objects on the remote control or step on it.
Setting the Batteries
- Remove the cover.
- Insert new batteries (R03 / AAA / Micro x 2), paying attention to the (+) and (-) marks.
- Close the cover.
- Press the ACL switch with the tip of a ballpoint pen.
- Set the current time.
NOTICE:
- Do not mix old and new batteries or batteries of different types.
- Remove batteries if the remote control is not used for a long period.
- If the display shows an abnormal condition, press the ACL switch.
Current Time Setting
- Press the ACL switch with the tip of a ballpoint pen.
- Press the ⬆ or ⬇ button to set the time.
- Press the ON/OFF button.
Ensure the button is pressed within 60 seconds of the last operation in step 2; otherwise, the time will not be set.
NOTICE: The remote control data is reset when the present time is set.
Temporary Run Operation
If the remote control is not available, the unit can be operated using the ON/OFF button on the unit itself. The default operation mode is AUTO for mode, AUTO for fan speed, and AUTO for airflow.
NOTICE: Do not keep pressing the unit ON/OFF button for 5 seconds or more, as this initiates a forced cooling operation used during servicing or relocation.
Select Operation Mode
- Press the MODE button to select the desired mode: AUTO (?), COOL (❄️), HEAT (?), DRY (?), or FAN (?).
- Press the ON/OFF button to start operation.
- Press the TEMP button and use the ⬆ or ⬇ button to set the preferred temperature.
- Press the FAN SPEED button to set the fan speed. Fan speed cannot be set during DRY operation.
To stop: Press the ON/OFF button.
Operation Temperature Range
| Operation | Conditions |
|---|---|
| Cooling | Outside temperature: -15 to 46°C Inside temperature: 18 to 32°C Inside humidity: ≤ 80% |
| Heating | Outside temperature: -15 to 24°C Inside temperature: 10 to 30°C |
Additional Information: Defrosting
During heating operation, the outdoor unit's heat exchanger may frost over. Automatic defrosting will activate, stopping heating for 5 to 15 minutes. During this period, both indoor and outdoor fans stop, and the RUN light flashes slowly. Steam may be released from the outdoor unit during defrosting.
Fan Speed
The FAN SPEED can be set except in DRY mode. Options include AUTO, HI (High power), MED (Medium), and LO (Low energy-saving operation).
NOTICE:
- When changing FAN SPEED from HI to LO, the sound of refrigerant may be heard.
- In COOL mode, if the outside temperature is low, the FAN SPEED may change automatically to protect the air-conditioner.
Airflow Direction Adjustment
The up/down airflow direction can be set using the AIR FLOW button. Pressing the button cycles through flap positions, including stopped and swing modes.
NOTICE: During heating operation, the flap direction is fixed horizontally from the start of operation until warm air is supplied, when the room temperature reaches the set point and the compressor stops, or during defrosting.
Memory Flap (Flap Stopped)
Pressing the AIR FLOW button while the flap is swinging will stop it at the current position. This position is memorized, and the flap will automatically return to it on the next operation.
CAUTION:
- In COOL or DRY operation, do not operate for extended periods with airflow directed straight down, as condensation may form on the outlet grill and drip.
- Do not adjust the flap by hand, as this may alter the control angle or prevent the flap from closing completely.
Adjusting Left/Right Airflow Direction
Adjust the left/right louvers by hand. Ensure you touch the operation point of the louver when adjusting.
CAUTION: Please stop the operation when adjusting the airflow direction.
Sleep Timer Operation
The unit will stop automatically after the set time. Press the SLEEP button to cycle through the time settings (1H, 2H, 3H, etc.).
How to cancel: Press the CANCEL button.
NOTICE:
- The set temperature is automatically adjusted to prevent excessive cooling or heating.
- SLEEP TIMER cannot be set simultaneously with OFF TIMER operation.
ON/OFF Timer Operation
ON TIMER: Set when the unit is NOT operating.
OFF TIMER: Set when the unit IS operating.
- Press the ON/OFF button.
- Press the ON or OFF TIMER button.
- Press the ⬆ or ⬇ button to set the time in 10-minute increments.
- Press the ON or OFF TIMER button again to confirm the setting. The display changes from flashing to steady lighting.
How to cancel: Press the CANCEL button.
NOTICE:
- With the ON TIMER, operation starts 5 to 60 minutes before the set time to reach the optimum temperature at the set time.
- Ensure the button is pressed within 60 seconds of the last operation in step 3; otherwise, the setting will not be completed.
- The current time is not displayed during ON or OFF TIMER operation.
- Pressing the ON/OFF button after setting the ON/OFF TIMER cancels the setting.
Sleep Timer + ON Timer Operation
This combines SLEEP TIMER and ON TIMER. For example, to stop after 3 hours and start operation at 8:00:
- SLEEP TIMER setting: Set the desired time (e.g., 3H).
- ON TIMER operation setting: Set the desired start time (e.g., 8:00).
The timer light (yellow) on the unit will illuminate, indicating the setting is complete.
How to cancel: Press the CANCEL button.
NOTICE: After the SLEEP TIMER set time elapses, the operation stops, and then starts 5 to 60 minutes before the ON TIMER's set time. The timer light turns off when the ON TIMER set time is reached.
Program Timer Operation
This allows combining ON and OFF TIMER operations. Once set, the timer operations will repeat daily unless the ON/OFF button is pressed.
Example: Present time is 21:00, and the air-conditioner is running. To stop at 22:30 and start at 8:00:
- OFF TIMER operation setting: Set to 22:30.
- ON TIMER operation setting: Set to 8:00.
The timer light (yellow) on the unit will illuminate.
How to cancel: Press the CANCEL or ON/OFF button.
Changing set time: Set a new time using the OFF TIMER or ON TIMER button.
NOTICE: (o) Operation starts first, then stops. (o) Operation stops first, then starts.
High Power / Economy Operation
- Press the ON/OFF button.
- Press the HIGH POWER/ECONO button.
When the mode is AUTO, COOL, or HEAT: Pressing the button cycles through HIGH POWER (?), ECONOMY (?), and No display (Normal operation).
When the mode is DRY, FAN, or PROGRAM TIMER: Pressing the button cycles through ECONOMY (?) and No display (Normal operation).
NOTICE: During HIGH POWER operation, the room temperature is not controlled.
Self Clean Operation
This function should be run after AUTO, COOL, and DRY operations to dry the inside of the unit and prevent mold and bacteria growth.
- Press the CLEAN switch with the tip of a ballpoint pen to activate this function.
Pressing the CLEAN switch cycles through the display options: CLEAN (✨) and No display (Normal operation).
NOTICE:
- The air-conditioner stops automatically after two hours.
- To stop immediately, press the ON/OFF button.
- The RUN light illuminates during SELF CLEAN operation.
- This function does not remove existing mold, germs, or grime.
Auto Restart Function
This function records the operational status before a power cut and automatically resumes operations once power is restored. Timer settings and HIGH POWER operations are canceled.
Maintenance
Before Maintenance
CAUTION: Turn off the power source. Do not spill liquid on the unit. Do not touch aluminum fins. Stand firmly on a stepladder when removing the inlet panel and filter.
Do not use hot water (≥ 40°C), petrol, paint thinner, benzine, or harsh cleansers, as they may deform or scratch the unit.
During the Operational Season
Cleaning the Air Filter
- Remove the air filter: Pull the air inlet panel forward, hold the knobs on both sides, lift slightly, and remove the panel forward.
- Cleaning: If the filter is dirty, clean it with warm water (approx. 30°C) and dry it thoroughly.
CAUTION: Do not clean filters with boiling water or dry them over an open flame. Pull them out gently.
Reinstall the Air Filter
Hold the filter firmly at both sides and insert it securely. Operating without air filters can lead to unit dust accumulation and damage.
Cleaning the Unit
Wipe the unit with a soft, dry cloth or use a vacuum cleaner. For stubborn dirt, use a cloth dampened with warm water.
Cleaning the Air Inlet Panel
The panel can be washed with water. Wipe off moisture and dry it away from direct sunlight.
At the End of the Season
- Perform fan operation for 2-3 hours to dry the inside of the unit.
- Stop the unit and turn off the power source. The unit consumes approximately 4W when not operating.
- Clean and reinstall the air filters.
- Clean both the indoor and outdoor units.
- Remove batteries from the remote control.
At the Beginning of the Season
- Ensure earth wiring is intact.
- Check for corrosion or rust on the outdoor unit's base frame.
- Ensure no obstacles block airflow around the indoor and outdoor unit openings.
- Turn on the power source.
- Insert batteries into the remote control.
NOTICE: Clogged air filters can affect cooling/heating performance, increase noise, and consume more electricity. Clean filters regularly.
Proper Installation
Suitable Installation Position
- Do not place obstructions in front of the indoor unit that hinder ventilation.
- Do not install the unit where flammable gases may leak, where there is substantial oil splashing, or in environments with sulfide gases or strong sea breezes. Contact your dealer for advice.
- Keep the air-conditioner and remote control at least 1 meter away from TVs or radios.
- Ensure the dehumidified liquid drains properly from the indoor unit.
Pay Attention to Operating Noises
- Choose an installation location that can support the unit's weight and minimizes operating noise and vibration. Use vibration-proof pads if necessary.
- Select a place where the airflow, noise, or vibration from the units will not inconvenience neighbors.
- Do not place obstacles near the outdoor unit's outlet and inlet to prevent malfunctioning and increased noise.
- If you hear irregular noise during operation, contact your dealer.
Inspection and Maintenance
Over time, the inside of the air-conditioner may accumulate dirt, reducing performance. In addition to regular cleaning, professional inspection and maintenance are recommended for a longer, trouble-free lifespan.
- Contact your dealer or distributor for inspection and maintenance services (charges apply).
- It is recommended to schedule maintenance during the off-season.
- If the power supply cord is damaged, it must be replaced by a qualified repair shop using special tools.
Troubleshooting
The air-conditioner does not work at all.
- Is the power source turned on?
- Is there a power failure or a blown fuse?
Poor Cooling or Heating
- Is the thermostat set to a suitable temperature?
- Is the air filter clean?
- Are doors or windows left open?
- Is there direct sunlight entering the room?
- Is there a heat source in the room?
- Are there too many people in the room?
If the air-conditioner does not operate properly after checking these points, or if you have any doubts, switch off the power and contact your dealer.
Contact Your Dealer
Turn off the power switch immediately and inform your dealer in the following situations:
- The fuse or switch blows continuously.
- The cable becomes extremely hot, or its covering is cracked.
- The TV, radio, or other equipment starts to malfunction.
- A switch does not activate properly.
- A strange noise is heard during operation.
If abnormalities persist after turning the power off and on again after 3 minutes, contact your dealer.
Airflow Issues
- No airflow during HEATING operation: The RUN light flashes slowly (1.5 seconds ON, 0.5 seconds OFF). Airflow will commence after the indoor heat exchanger warms up (2-5 minutes).
- No airflow during DRY operation: The RUN light is on. Airflow is stopped to prevent blowing out cold air until the indoor heat exchanger warms up.
- Defrosting: When outdoor temperature is low and humidity is high, the unit may perform automatic defrosting. During this process, water or steam may be released from the outdoor unit, and the RUN light flashes slowly.
- The indoor fan may stop to prevent re-evaporation of dehumidified moisture and save energy.
Noise
- Gurgling sound: Caused by refrigerant moving within the unit.
- Cracking sound: Caused by heat expansion or contraction.
- Hissing or clicking sound: Caused by the operation of refrigerant control valves or electric components.
- Whistling noise from the outdoor unit: Indicates the compressor's rotation speed is increasing or decreasing.
Others
- Unit does not restart immediately after stopping: The RUN light stays on. The fan will not stop immediately after operation stops (indoor fan stops after 2 hours for SELF CLEAN; outdoor fan stops after approximately 1 minute to protect the unit). The 3-minute protection timer prevents immediate restart after stopping operation.
- Steam releases during COOL operation: May occur if room temperature and humidity are very high. It disappears as temperature and humidity decrease. Close windows and doors.
- Slight smell: Air blown during operation may carry odors from tobacco or cosmetics adhering to the unit.
- Unit does not restart after power cut: If the auto-restart function is not set, use the remote control to restart.
- Remote control signals not received: Ensure the signal receiver is not exposed to direct sunlight or bright light. Block sunlight or reduce other light sources.
- Moisture on air outlet grills: May form during prolonged operation in high humidity and may drip.
EU Declaration of Conformity
MITSUBISHI HEAVY INDUSTRIES THERMAL SYSTEMS, LTD., Tokyo, Japan, declares that the Split Type Air Conditioner (Model names: SRK Series, SRC Series) conforms to EU Directives: Machinery 2006/42/EC. Applied Standards: EN 60335-1, EN 60335-2-40. Authorized Representative in the EU: MHIAE SERVICES B.V., Amsterdam, Netherlands.
UK Declaration of Conformity
MITSUBISHI HEAVY INDUSTRIES THERMAL SYSTEMS, LTD., Tokyo, Japan, declares that the Split Type Air Conditioner (Model names: SRK Series, SRC Series) conforms to relevant GB Directives: Supply of Machinery Regulations S.I. 2008/1597. Applied Standards: EN 60335-1, EN 60335-2-40. Authorized Representative in the GB: MITSUBISHI HEAVY INDUSTRIES AIR-CONDITIONING EUROPE, LTD., Uxbridge, United Kingdom.
Contact Information
MITSUBISHI HEAVY INDUSTRIES THERMAL SYSTEMS, LTD.
Address: 2-3, Marunouchi 3-chome, Chiyoda-ku, Tokyo, 100-8332, Japan
Website: https://www.mhi-mth.co.jp/en/
MITSUBISHI HEAVY INDUSTRIES AIR-CONDITIONING EUROPE, LTD.
Address: 5 The Square, Stockley Park, Uxbridge, Middlesex, UB11 1ET, United Kingdom
Tel: +44-333-207-4072
Fax: +44-333-207-4089
Website: https://mhiae.com
MHIAE SERVICES B.V.
(Wholly-owned subsidiary of MITSUBISHI HEAVY INDUSTRIES AIR-CONDITIONING EUROPE, LTD.)
Address: Herikerbergweg 238, Luna ArenA, 1101 CM Amsterdam, Netherlands
P.O. Box 233931100 DW Amsterdam, Netherlands
Tel: +31-20-406-4535
Website: http://www.mhiaeservices.com/