1. Introducción
Thank you for choosing the MELLCOM Louvered Pergola with Screen 12x20. This wall-mounted adjustable pergola is designed to enhance your outdoor living space, providing versatile sunshade, rain protection, and privacy. This manual provides essential information for safe installation, operation, and maintenance of your new pergola.
Información importante de seguridad
Always follow the included instruction manual for safe installation. Use appropriate tools and ensure the surface is flat and solid before mounting. Avoid excessive snow load and open louvers to prevent damage. Always supervise children and pets around the pergola.
2. Componentes sobreview
Your MELLCOM Louvered Pergola consists of several key components designed for durability and functionality. Please ensure all parts are present and undamaged before beginning assembly.
- Marco de aluminio: Powder-coated in matte dark grey for rust-free, weatherproof, and UV-protected properties.
- Techo de lamas ajustable: Four independent roof sections that adjust from 0° to 90° with a crank mechanism.
- Pull-Down Screen Sides: Four integrated screens made of durable Textilene for weather resistance, privacy, and UV protection.
- Sistema de drenaje integrado: Sloped louvered design with internal gutters and posts that channel rainwater.
- Hardware: Includes pre-drilled parts and expansion bolts for secure installation.
For a detailed visual breakdown of all parts, please refer to the assembly videos in the Setup section.
3. Configuración y montaje
Assembly typically takes 6-8 hours with two or more people. Ensure you have adequate space and all necessary tools before starting. The pergola is designed for straightforward installation on any flat, solid surface.
3.1 Instalación del marco
Begin by assembling the main aluminum frame. Ensure all connections are secure but do not fully tighten bolts until the entire frame is upright and aligned.

Imagen: Más alláview of the pergola frame components before assembly.

Image: Steps for securely fastening the wall-mounted side of the pergola to a solid wall using expansion bolts.
3.2 Louvered Roof Installation
Once the main frame is stable, proceed with installing the louvered roof sections. Each section is designed for independent adjustment.

Imagen: Primer plano view of the louvered roof mechanism, showing how the slats can be adjusted.
3.3 Pull-Down Screen Installation
Attach the four pull-down screen sides to the designated tracks on the pergola frame. Ensure they slide smoothly and can be easily adjusted.

Image: The pull-down screen sides in action, providing privacy and shade.
3.4 Vídeos de montaje
For detailed visual guidance, please refer to the following assembly videos:
Video: MELLCOM 10x12 Wood Grain Louvered Pergola Assembly Video. This video demonstrates the assembly process for a similar MELLCOM louvered pergola model.
Video: MELLCOM Louvered Pergola 12x16 Assembly Video. This video provides a visual guide for assembling a MELLCOM louvered pergola, which shares many similarities with the 12x20 model.
Video: Airwire 10x20 Ft Louvered Pergola. This video demonstrates the assembly of a 10x20 ft louvered pergola from a different brand, offering additional visual reference for the assembly process.
4. Instrucciones de funcionamiento
4.1 Techo de lamas ajustable
The louvered roof sections can be adjusted independently from 0° (fully closed) to 90° (fully open) using the integrated crank mechanism. This allows you to control the amount of sun, shade, or rain protection as desired.

Image: Close-up of the crank mechanism used to adjust the louvered roof slats.
Video: Adjustable Louvered Pergola, Aluminum Outdoor Pergola. This video demonstrates the smooth operation of the adjustable louvered roof.
Video: PURPLE LEAF Louvered Pergola with LED Strip Lights. This video showcases the adjustable louvered roof and its functionality, including LED lighting options.
4.2 Pull-Down Screen Sides
The four pull-down screens can be easily adjusted to your desired height using the bottom rod. When not in use, simply lift them into their casing for retraction. These screens provide privacy, UV protection, and weather resistance.
4.3 Sistema de drenaje integrado
The sloped louvered roof and internal drainage system efficiently channel rainwater through the beams and out the posts, keeping the space dry and comfortable.
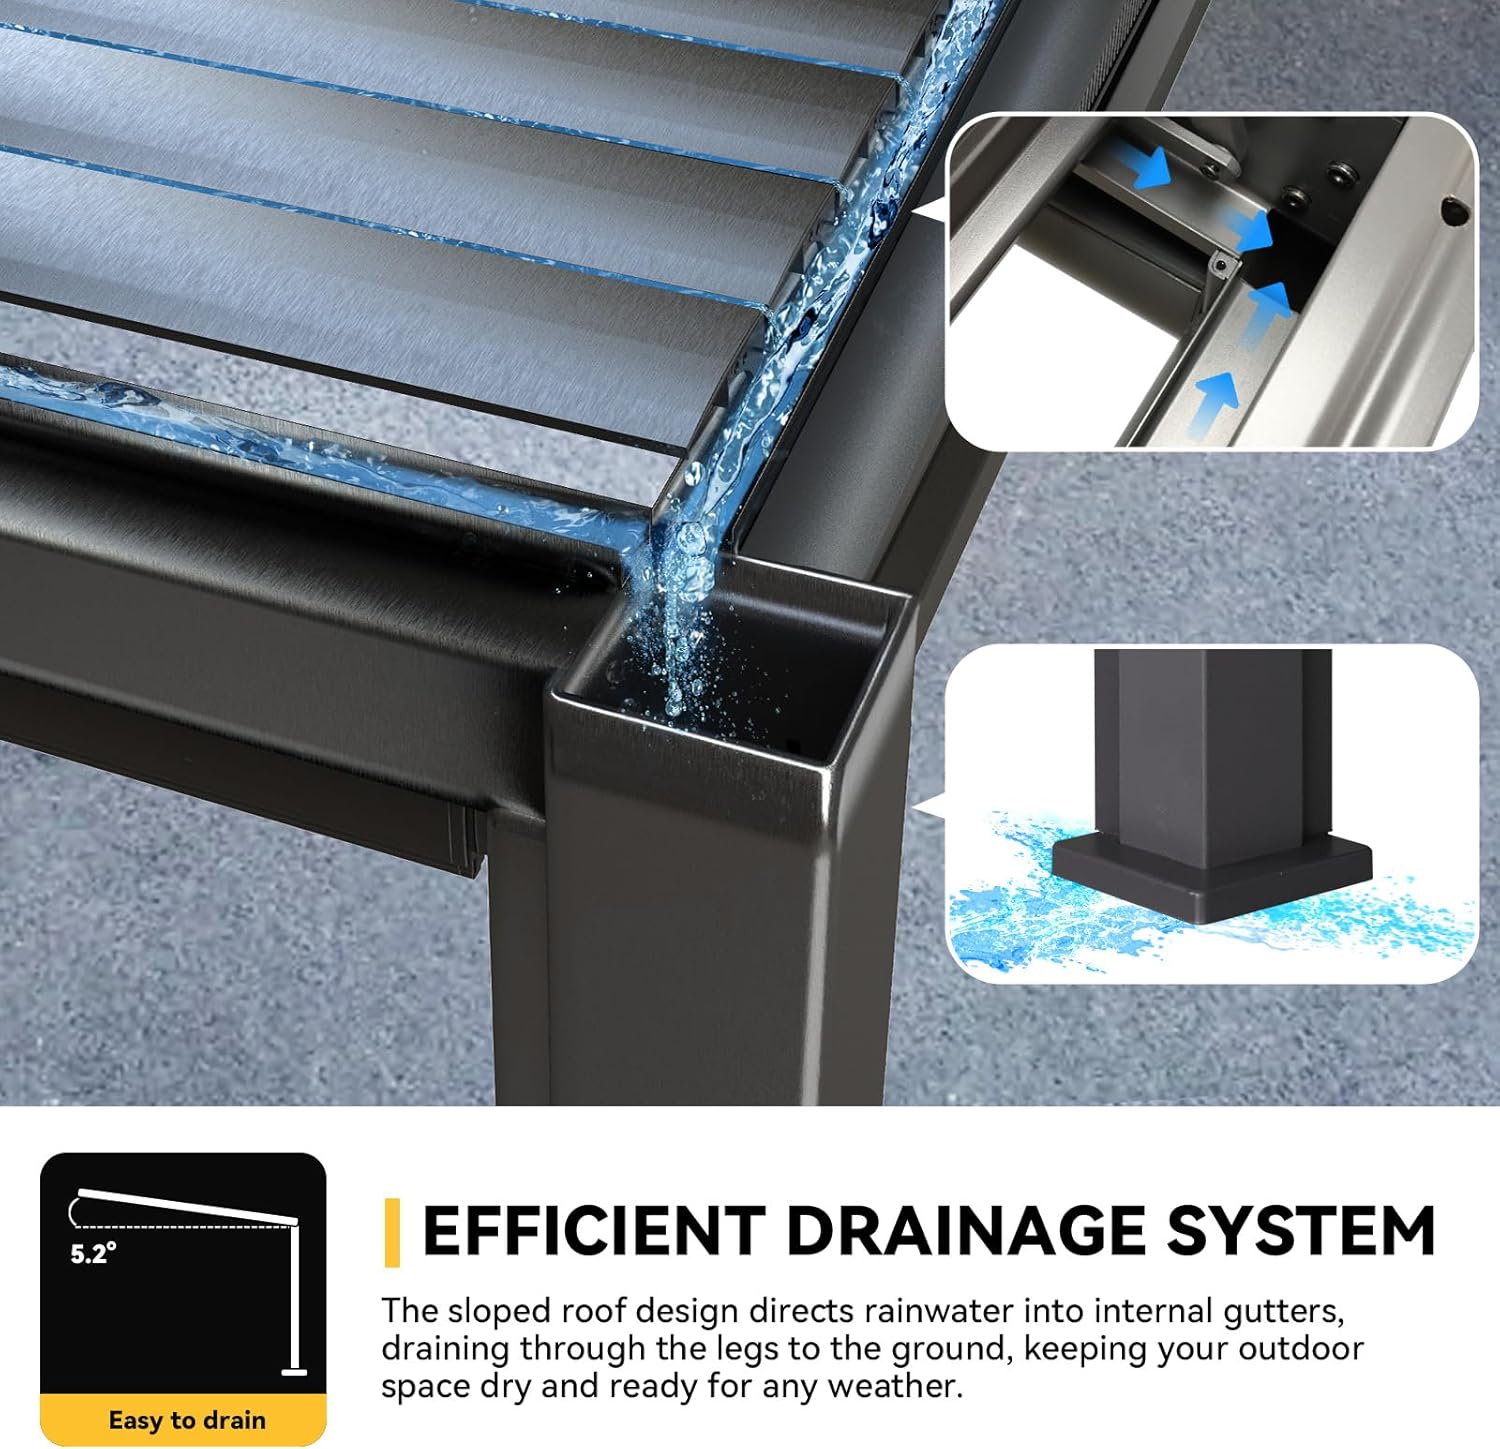
Image: Rainwater being channeled through the integrated drainage system of the pergola.
Video: Outdoor Pergola with Adjustable Rainproof and Gutter System. This video highlights the rainproof capabilities and gutter system of a similar outdoor pergola.
5. Mantenimiento
5.1 Limpieza
- Regularly clean the aluminum frame with mild soap and water. Avoid abrasive cleaners.
- Clean the Textilene screens with a soft brush or cloth and mild soapy water. Rinse thoroughly and allow to air dry.
- Ensure the drainage system is free of debris to prevent water buildup.
5.2 Preparación para el invierno
In areas with heavy snowfall, it is crucial to prevent excessive snow load on the louvered roof. Open the louvers to allow snow to pass through, extending the lifespan of your pergola.
6. Solución de problemas
- Las persianas no se ajustan suavemente: Check for any obstructions in the mechanism or debris in the tracks. Ensure the crank is properly engaged.
- Screens sticking or not retracting: Inspect the screen tracks for dirt or damage. Clean the tracks and screens as per maintenance instructions.
- Acumulación de agua en el tejado: Verify that the louvers are fully closed when rain protection is desired. Check the drainage system for blockages.
- Inestabilidad de la pérgola: Ensure all frame bolts and anchor bolts are securely tightened. Re-check the installation on a flat, solid surface.
Si encuentra problemas que no se tratan aquí o necesita más ayuda, comuníquese con atención al cliente.
7. Especificaciones
| Marca | MELLCOM |
| Material | Aluminio |
| Estilo | Moderno |
| Dimensiones del producto | 226" de largo x 140" de ancho x 101" de alto |
| Peso del artículo | 612.9 libras |
| Material del marco | Aluminio |
| Nivel de resistencia al agua | Resistente al agua |
| Forma | Rectangular |
| Protección contra la luz ultravioleta | SÍ |
| Requiere ensamblaje | Sí |
| Color | Gris |
8. Garantía y soporte
For any questions, concerns, or assistance with your MELLCOM Louvered Pergola, please do not hesitate to contact our customer support team. We are happy to help.
Please retain your purchase receipt for warranty claims. The manufacturer's warranty covers defects in materials and workmanship under normal use. Specific warranty terms and conditions may apply.