1. Introducción
Gracias por la compraasing the TecMATE OptiMATE 7 Select 12V 10A Battery Charger. This advanced charger is designed to maintain and recover various 12V lead-acid batteries, including AGM, liquid, EFB, spiral cell, and gel types. It features patented Ampmatic technology for automatic current adjustment, multi-stage recovery charging, and a power supply mode for vehicle electronics. Please read this manual thoroughly before use to ensure safe and optimal performance.
2. Información de seguridad
- Always connect the charger to the battery terminals before plugging it into the AC power outlet. Disconnect from AC power before disconnecting from the battery.
- Asegúrese de que el cargador sea compatible con el tipo y volumen de su batería.tage (12V lead-acid only). This model is not suitable for 24V batteries.
- No intente cargar baterías congeladas, dañadas o no recargables.
- Avoid charging batteries that have reached the end of their life or have internal short circuits, as the charger cannot revive them.
- Usar en un área bien ventilada. Las baterías pueden producir gases explosivos.
- Mantener fuera del alcance de los niños y las mascotas.
- No exponga el cargador a la lluvia ni a una humedad excesiva.
- If the connection between the charger and cables feels tight, especially when new or in cold weather, gently warm the connector with a hairdryer to ease insertion.
3. Producto terminadoview
The TecMATE OptiMATE 7 Select (Model TM257) is a high-performance 12V 10A battery charger designed for a wide range of lead-acid batteries. It incorporates several advanced features to ensure efficient charging, recovery, and long-term maintenance.
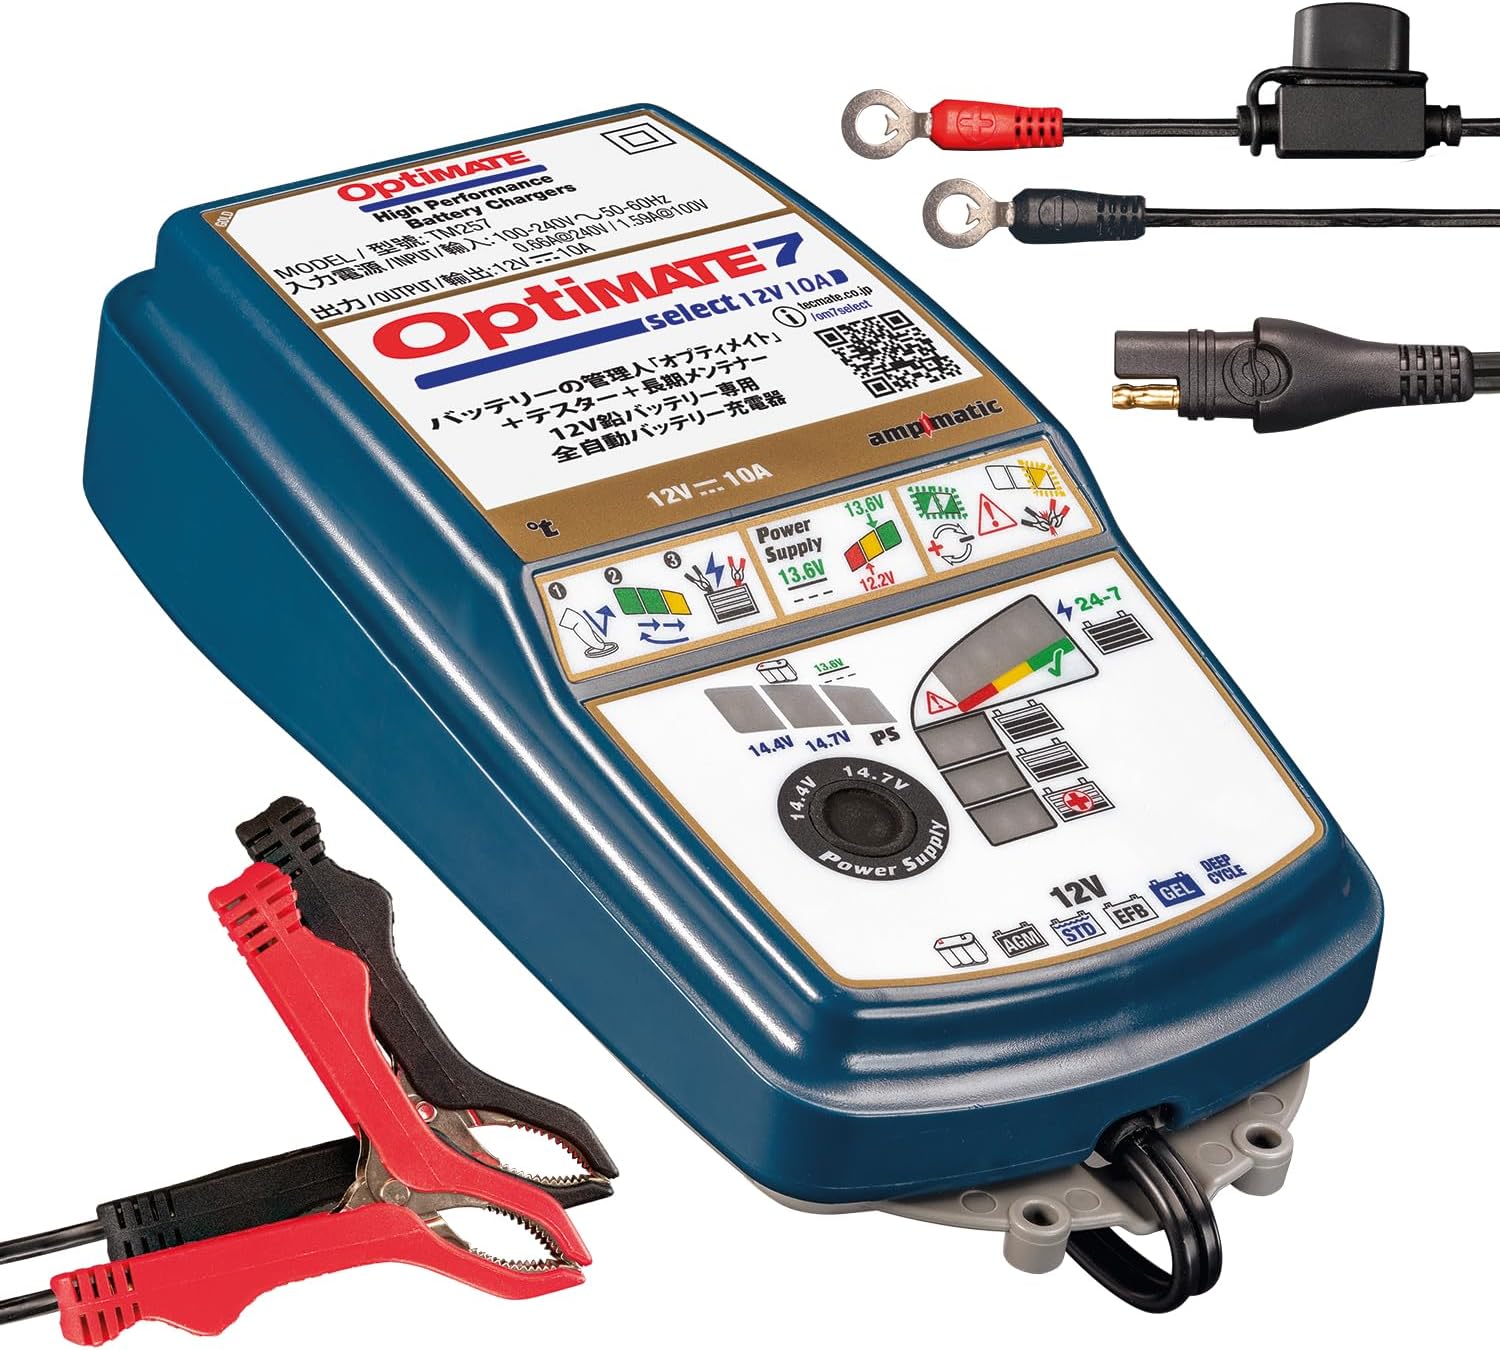
Image 1: TecMATE OptiMATE 7 Select charger with M8/M10 ring terminal and alligator clip cables.
Características principales:
- 12V Lead-Acid Battery Compatibility: Charges 12V AGM, liquid, EFB, spiral cell, and gel batteries from 3Ah to 240Ah.
- Salida 10A: Provides a robust 10 Amp corriente de carga.
- Ampmatic Technology: Patented technology that automatically adjusts the charging current based on battery size and condition.
- Multi-Stage Recovery Charging: Features a powerful 3-stage desulfation function to recover deeply discharged batteries.
- Battery Diagnostic Function: Easy-to-understand LED indicators (red, yellow, green) provide clear battery health status.
- 24/7 Maintenance Mode: Safely maintains the battery when left connected for extended periods, preventing overcharge.
- Modo de fuente de alimentación: Provides a stable 13.6V (max 8A) power supply, useful for vehicle diagnostics, tuning, or maintaining vehicle settings during battery changes.
- Compensación de temperatura: Ajusta automáticamente el volumen de carga.tage based on ambient temperature for optimal performance.
4. Configuración
Before connecting the charger, ensure your vehicle is turned off and the ignition key is removed. Identify the battery terminals (positive '+' and negative '-').
Accesorios incluidos:
- M8/M10 Ring Terminal Cable: For permanent connection to battery terminals.
- Alligator Clip Cable: For temporary connection to battery terminals.
- Japanese Instruction Manual (refer to this translated version for English instructions).
Pasos de conexión:
- Conectar a la batería: Choose either the ring terminal cable for a semi-permanent connection or the alligator clip cable for temporary use. Connect the red (+) clamp/ring to the positive (+) battery terminal and the black (-) clamp/ring to the negative (-) battery terminal. Ensure a secure connection. The battery can remain in the vehicle during charging.
- Conecte el cargador a la alimentación de CA: Plug the charger's AC power cord into a standard wall outlet (100-240V, 50-60Hz).

Image 2: Connection diagram for the OptiMATE charger. Connect to battery first, then to power outlet.
Note on Cable Connection: The connection point between the charger and the accessory cables (alligator clip or ring terminal) is designed to be tight for safety, preventing accidental disconnection. If you find it difficult to connect, especially when new or in cold conditions, gently warm the rubber part of the connector with a hairdryer for a few seconds to make it more pliable.
5. Instrucciones de funcionamiento
Once connected, the OptiMATE 7 Select will automatically begin its charging program. The LED indicators on the charger will display the current stage of the charging process.
Automatic Charging Process:
- Diagnóstico: The charger first assesses the battery's condition, including voltagey resistencia interna.
- Recovery (Desulfation): If a deeply discharged or sulfated battery is detected, the charger will initiate a powerful 3-stage desulfation process using high-voltage pulses (up to 22V, limited to 16V when connected to a vehicle for protection) to break down lead sulfate crystals. This can recover batteries with as low as 0.5V.
- Carga a granel: The main charging phase where the battery receives the majority of its charge at maximum current (up to 10A). The Ampmatic function automatically adjusts the current based on the battery's capacity and condition.
- Carga de absorción: El voltage is held constant while the current gradually decreases, bringing the battery to a full charge.
- Verificación: The charger checks if the battery can retain its charge.
- Maintenance (Float Charge): Once fully charged, the charger switches to a long-term maintenance mode, delivering small currents as needed to keep the battery at optimal charge without overcharging. This mode is safe for 24/7 connection.

Image 3: OptiMATE's automatic adjustment technologies, including temperature compensation and Ampmatic current adjustment.
Modo de fuente de alimentación:
The OptiMATE 7 Select features a Power Supply mode, providing a stable 13.6V output (maximum 8A). This is useful for:
- Powering vehicle diagnostic equipment.
- Maintaining vehicle electronics settings during battery replacement.
- Supporting vehicle systems during tuning or software updates.
To activate Power Supply mode, refer to the detailed instructions in the full manual (often indicated by a specific LED pattern or button press). Connection to the battery is required when initiating this function.

Image 4: OptiMATE 7 Select in Power Supply mode, providing stable power to a vehicle.
6. Mantenimiento
The OptiMATE 7 Select is designed for long-term battery maintenance. Its 24/7 maintenance mode ensures your battery remains optimally charged without risk of overcharging, extending its lifespan.
Conexión a largo plazo:
You can leave the charger connected to your battery indefinitely. The charger will automatically cycle between charging and rest periods, keeping the battery healthy. This is particularly beneficial for vehicles stored for extended periods, such as motorcycles, classic cars, or RVs.

Image 5: The OptiMATE charger provides safe, continuous charging and battery diagnosis.
Cuidado del cargador:
- Mantenga el cargador limpio y seco.
- Inspect cables and connectors regularly for any signs of damage.
- Guarde el cargador en un lugar fresco y seco cuando no esté en uso.
7. Solución de problemas
Esta sección aborda problemas comunes que podrías encontrar.
Problemas comunes y soluciones:
- Charger does not start or LEDs do not light up:
- Asegúrese de que el cable de alimentación de CA esté enchufado de forma segura a una toma de corriente activa.
- Check that the battery connections are secure and correct (red to +, black to -).
- Verifique el vol de la bateríatage is above 0.5V. The charger cannot initiate charging for batteries below this threshold.
- Green LED lights up, but engine does not start:
- This may indicate a microscopic internal short circuit within the battery. While the surface voltage may appear normal, it drops sharply during engine startup.
- The OptiMATE's battery health diagnosis is a guideline; it may not detect all internal battery abnormalities.
- Internal battery short circuits cannot be repaired by a charger; battery replacement is necessary in such cases.
- Charging does not proceed beyond LED 4 (blue) for more than 24 hours:
- This can occur if the vehicle's electrical system temporarily activates during charging.
- Unplug the charger from the AC outlet, wait a few seconds, and then plug it back in to restart the charging cycle.
- If it restarts from red LED 3, leave it connected for about 5 minutes (with power on), then disconnect and reconnect the battery leads to confirm charging starts from LED 4 (blue).
- If it still restarts from LED 3 (red), connect the charger to the battery in Power Supply mode (LED #2 lights up) for 5 minutes. This may help it start from LED 4 (blue) more easily.
- Charger indicates an error (e.g., specific red LED flashing):
- Refer to the LED indicator guide in the full manual for specific error codes. Common errors include reverse polarity, short-circuited battery, or an unrecoverable battery.
8. Especificaciones
| Característica | Especificación |
|---|---|
| Número de modelo | TM257 |
| Marca | TecMATE |
| Vol de entradatage | 100-240V, 50-60Hz |
| Vol de salidatage | 12 V |
| Corriente de salida | 10A |
| Rango de capacidad de la batería | 3 Ah - 240 Ah |
| Tipos de baterías compatibles | 12V Lead-Acid (AGM, Liquid, EFB, Spiral Cell, Gel) |
| Power Supply Mode Output | 13.6V (Max 8A) |
| Dimensiones (L x An x Al) | 27 x 17 x 13 cm |
| Peso | 1.45 kilogramos |
| Color | Azul |
9. Garantía y soporte
For warranty information and technical support, please refer to the official TecMATE webSitio web o contacte a su distribuidor local. Conserve su comprobante de compra para reclamaciones de garantía.
Official product information can be found at: https://tecmate.co.jp/om7select/ y https://www.optimate1.com/om7select


