1. Introducción
This manual provides essential instructions for the safe and efficient operation of your Reflecta Combo Album SCAN 64400 Scanner. Please read this manual thoroughly before using the device to ensure proper setup, usage, and maintenance. Keep this manual for future reference.
2. Información de seguridad
To prevent damage to the device or injury to yourself, observe the following safety precautions:
- Solo uso externo: This device is designed for scanning photos, film, and slides. Do not attempt to use it for any other purpose.
- Fuente de energía: Use only the power adapter supplied with the scanner. Ensure the voltage coincide con su fuente de alimentación local.
- Ventilación: Do not block ventilation openings. Ensure adequate airflow around the scanner to prevent overheating.
- Exposición a líquidos: Keep the scanner away from water and other liquids. Do not operate the device with wet hands.
- Limpieza: Desconecte la alimentación antes de limpiar. Utilice un paño suave y seco. No utilice limpiadores líquidos ni en aerosol.
- Desmontaje: Do not attempt to disassemble or repair the scanner yourself. Refer all servicing to qualified service personnel.
- Niños: Mantenga el dispositivo fuera del alcance de los niños.
3. Contenido del paquete
Verifique que todos los artículos estén presentes en el paquete:
- Reflecta Combo Album SCAN 64400 Scanner Unit
- Adaptador de corriente
- Cable USB
- Film Holder (for 35mm film strips)
- Slide Holder (for mounted 35mm slides)
- Cepillo de limpieza
- Manual de usuario (este documento)
4. Producto terminadoview
Familiarize yourself with the components of your scanner.
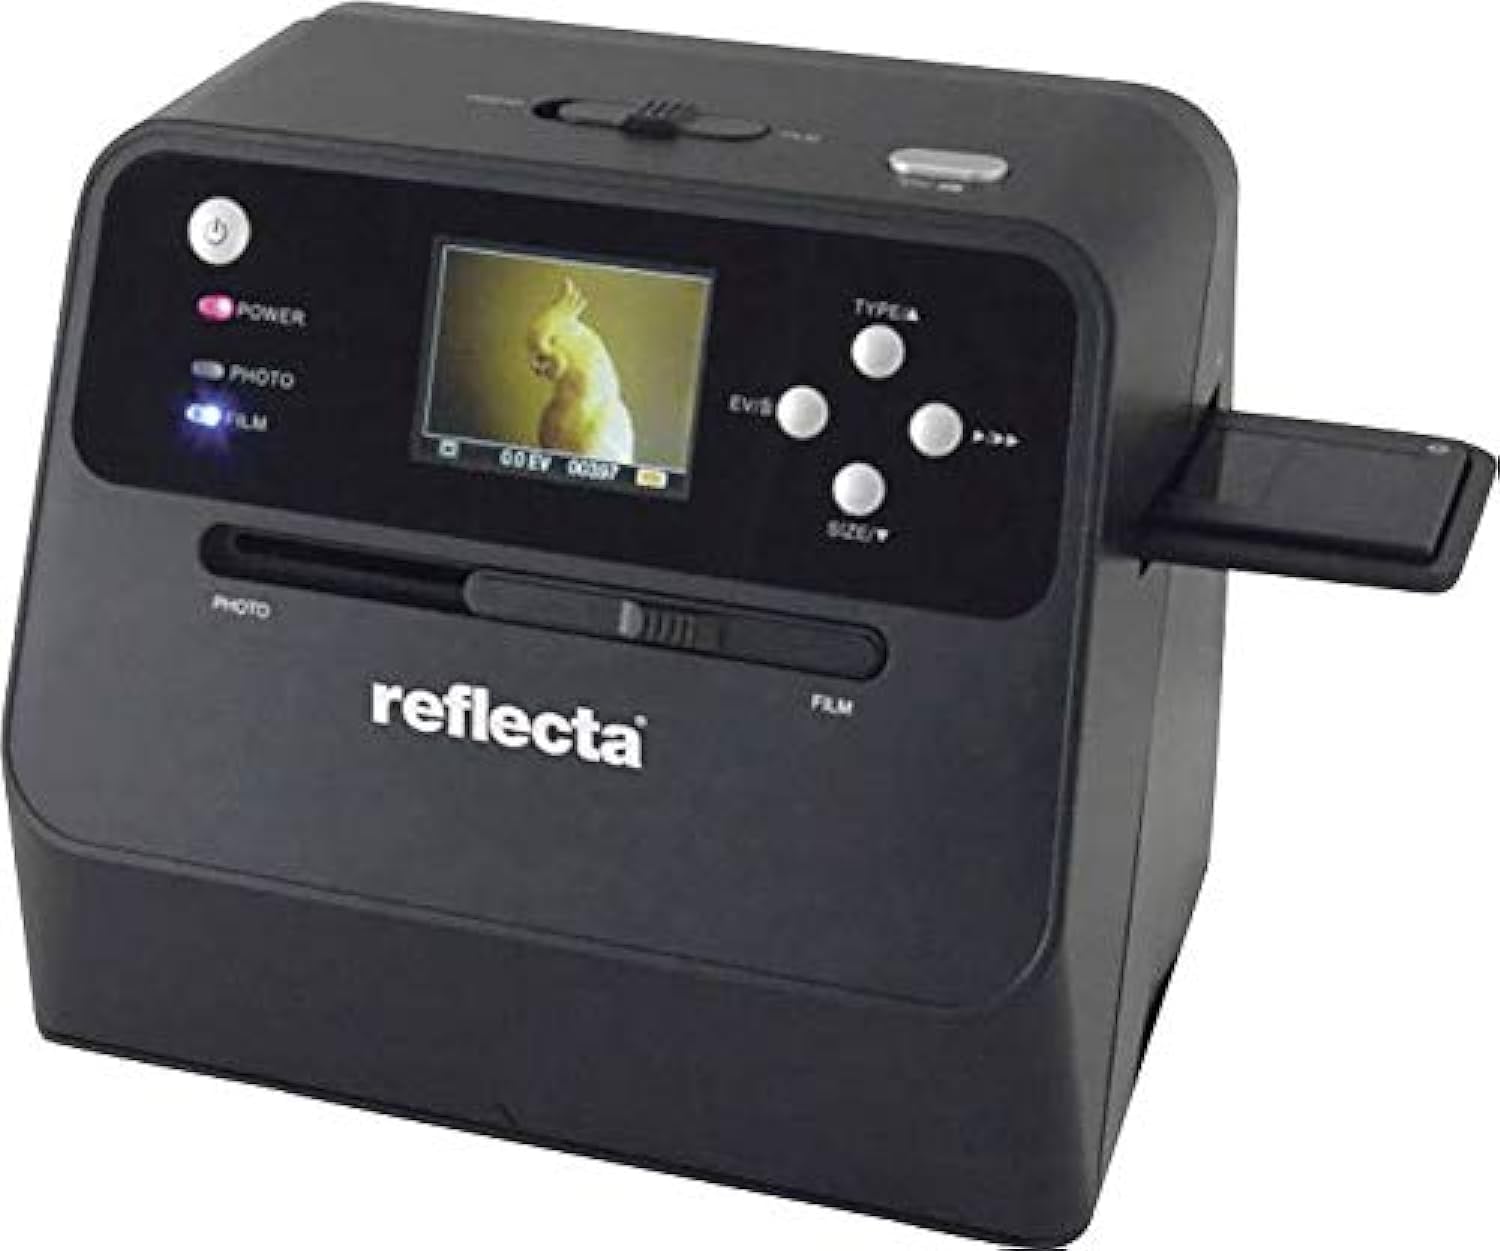
Figura 4.1: Frente view of the Reflecta Combo Album SCAN 64400 Scanner, showing the display screen, control buttons, and input slots for photos and film.

Figura 4.2: The scanner unit displayed with its included film holder and a small cleaning brush, essential accessories for film and slide scanning.
4.1. Componentes del escáner
- Botón de encendido: Turns the scanner on/off.
- Pantalla LCD: Shows scan preview, menu options, and settings.
- Botones de control: Navigation (Up/Down/Left/Right), OK/Enter, Type (Photo/Film), Size.
- Photo Input Slot: For scanning physical photos.
- Film Input Slot: For inserting film/slide holders.
- Ranura para tarjeta SD: For saving scanned images (SD card not included).
- Puerto USB: For connecting to a computer or power adapter.
5. Configuración
5.1. Conexión de alimentación
- Connect the small end of the USB cable to the USB port on the scanner.
- Conecte el extremo grande del cable USB al adaptador de corriente provisto.
- Conecte el adaptador de corriente a una toma de corriente estándar.
- Press the Power button to turn on the scanner.
5.2. Inserción de una tarjeta SD (opcional)
The scanner saves images to an SD card. If you wish to save scans, insert an SD card (up to 32GB, Class 10 recommended) into the SD card slot until it clicks into place. Ensure the card is formatted correctly (FAT32).
6. Funcionamiento del escáner
6.1. Scanning Photos
This scanner is designed to digitize physical photos, including those mounted in albums.
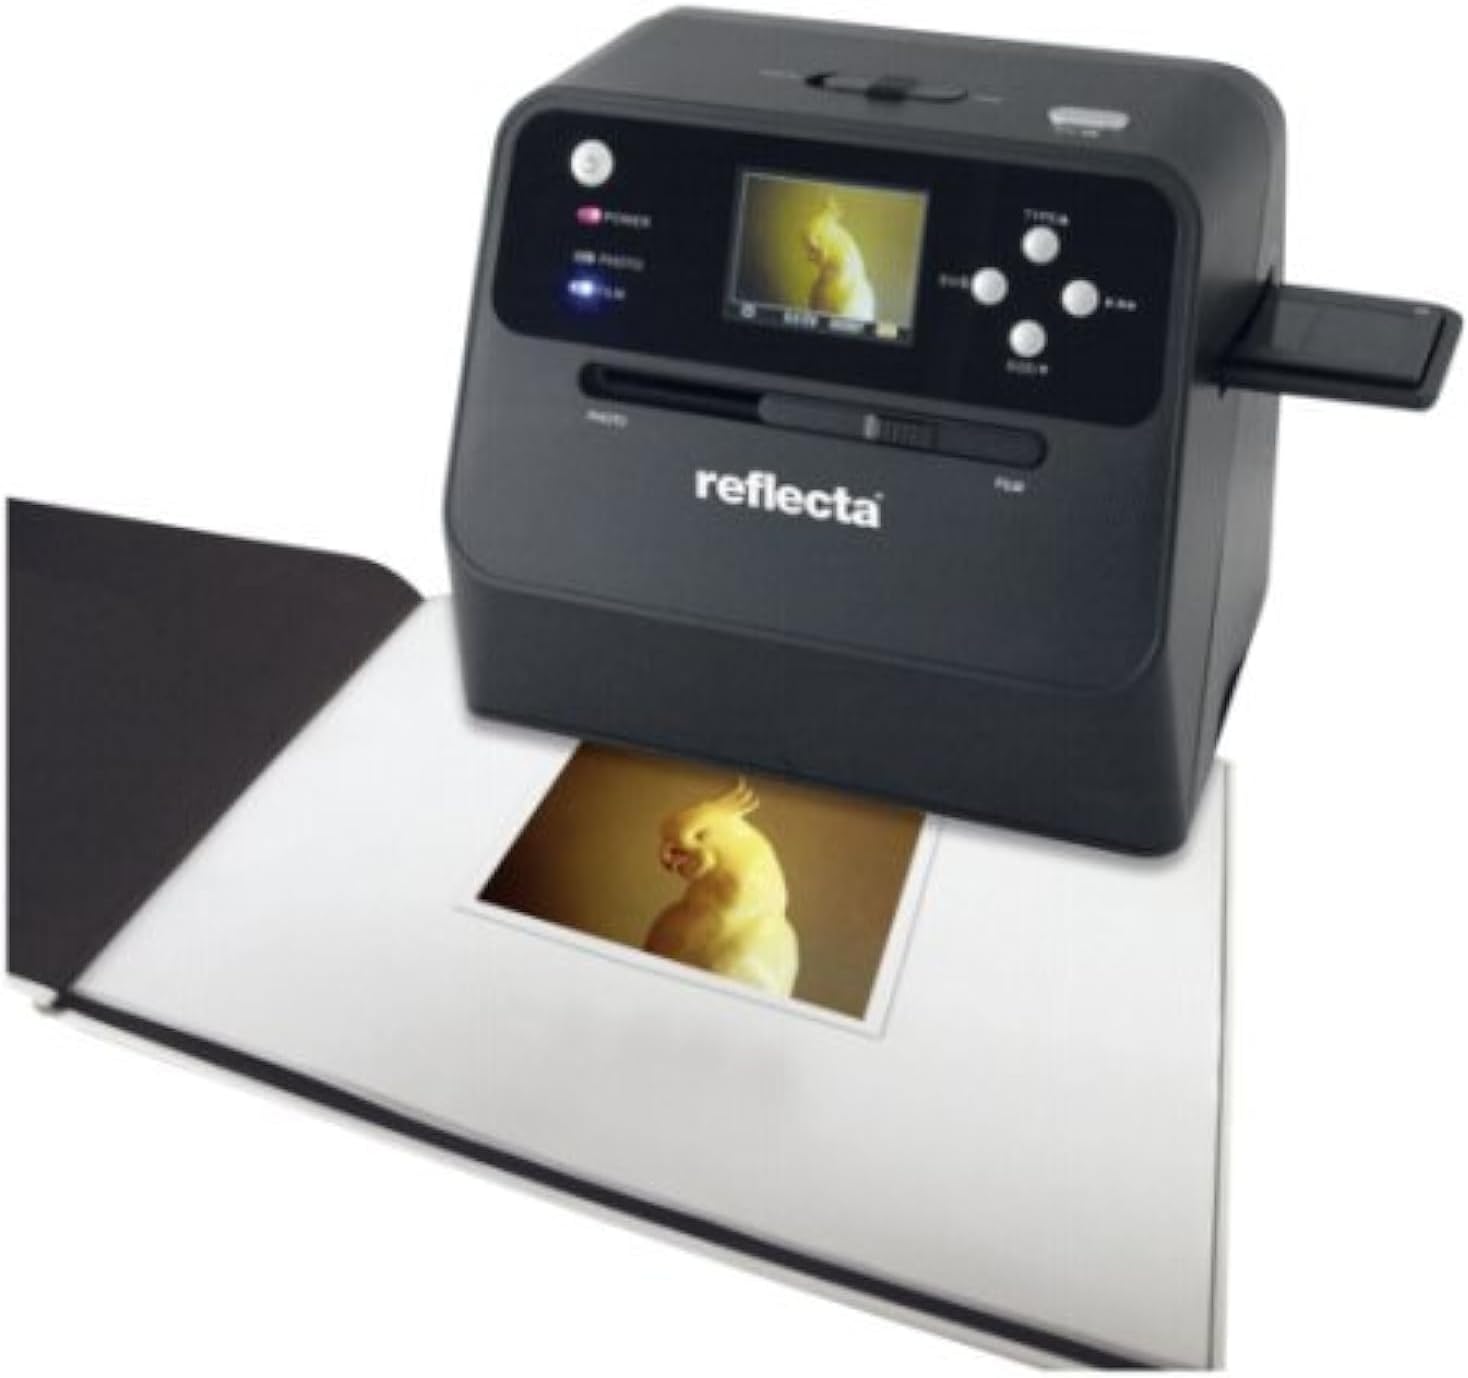
Figura 6.1: The scanner positioned over an open photo album, demonstrating its capability to scan a photo directly from the album without removal.
- Asegúrese de que el escáner esté encendido.
- Presione el TIPO button until "PHOTO" mode is selected on the display.
- Carefully place the scanner over the photo you wish to scan. Ensure the photo is flat and well-lit.
- Use the navigation buttons to adjust the scanning area if necessary.
- Presione el OK button to initiate the scan. The scanned image will appear on the display.
- Para guardar la imagen, presione el botón OK button again. The image will be saved to the inserted SD card.
- You can adjust image settings (e.g., exposure, color balance) using the menu options before scanning. Refer to the on-screen menu for details.
6.2. Scanning Film and Slides
The scanner supports 35mm film strips and mounted slides.
- Asegúrese de que el escáner esté encendido.
- Presione el TIPO button until "FILM" mode is selected on the display.
- Open the appropriate film or slide holder.
- Carefully insert your 35mm film strip or mounted slide into the holder, ensuring it is correctly aligned.
- Cierre el soporte de forma segura.
- Insert the loaded holder into the Film Input Slot on the side of the scanner.
- Use the navigation buttons to preview and adjust the image on the display.
- Presione el OK Botón para iniciar el escaneo.
- Para guardar la imagen, presione el botón OK button again. The image will be saved to the inserted SD card.
7. Mantenimiento
7.1. Limpieza del escáner
Regular cleaning ensures optimal scan quality.
- Exterior: Limpie el exterior del escáner con un paño suave, seco y sin pelusa. No utilice limpiadores abrasivos ni disolventes.
- Photo Scanning Area: Gently wipe the glass surface in the photo scanning area with a microfiber cloth. For stubborn smudges, a small amount of lens cleaning solution can be applied to the cloth (not directly to the scanner).
- Film/Slide Input: Use the provided cleaning brush (or a soft, dry brush) to remove dust from the film input slot and film/slide holders. Avoid touching the internal optical components.
- Lente: If dust is visible on the internal lens, use a can of compressed air (held upright) to gently blow away particles. Do not use excessive force.
Always ensure the scanner is powered off and unplugged before cleaning.
8. Solución de problemas
Consulte esta sección para conocer problemas comunes y sus soluciones.
| Problema | Posible causa | Solución |
|---|---|---|
| El escáner no se enciende. | Power cable not connected properly; Power adapter faulty. | Revise todas las conexiones eléctricas. Pruebe con otra toma de corriente. Asegúrese de que el adaptador de corriente funcione. |
| Las imágenes escaneadas están borrosas o poco claras. | Dust/smudges on scanning surface/lens; Photo/film not flat or properly inserted. | Clean the scanning surfaces and lens (refer to Section 7.1). Ensure photos are flat and film/slides are correctly seated in their holders. |
| Colors in scanned images are incorrect. | Incorrect color settings; Original photo/film faded. | Adjust color balance and exposure settings in the scanner menu. Some fading in original media may be irreversible. |
| No se pueden guardar imágenes en la tarjeta SD. | SD card full, locked, or not formatted correctly; SD card faulty. | Check if the SD card is full and delete unnecessary files. Ensure the write-protect tab is unlocked. Format the SD card (this will erase all data). Try a different SD card. |
| Scanner freezes or becomes unresponsive. | Fallo temporal del software. | Turn off the scanner, disconnect the power, wait 10 seconds, then reconnect and power on again. |
9. Especificaciones
Technical specifications for the Reflecta Combo Album SCAN 64400 Scanner.
| Característica | Detalle |
|---|---|
| Nombre del modelo | Reflecta Combo Album SCAN 64400 |
| Tipo de escáner | Document, Film, Photo |
| Tecnología de sensores ópticos | CMOS |
| Resolución del escáner | 2400 DPI (Optical), 2944 DPI (Maximum Horizontal) |
| Profundidad de color | 24 pb |
| Tipo de fuente de luz | CONDUJO |
| Maximum Supported Photo Size | 13 x 18 cm (5 x 7 pulgadas) |
| Tipos de películas admitidas | 35mm Film Strips, Mounted 35mm Slides |
| Tecnología de conectividad | USB |
| Medios de almacenamiento | Tarjeta SD (hasta 32 GB, no incluida) |
| Tipo de fuente de poder | Hand-operated / USB Power Adapter |
| Dimensiones del producto | 30 x 20 x 23 cm |
| Peso del artículo | 798 gramos |
| Compatibilidad del sistema operativo | Ventanas |
10. Garantía y soporte
Reflecta products are manufactured to high-quality standards. For information regarding warranty coverage, technical support, or service, please refer to the warranty card included with your product or visit the official Reflecta website. Please have your model number (64400) and purchase details available when contacting support.
Fabricante: Refleja


