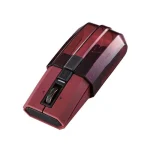
MSH Series Wireless Mouse
CR50726
Wireless Mouse
User Manual
Compliant model: MSH20M-3/MSH21M-3/ELECOM01B
Precautions
This manual describes the important precautions you should take for safe operation of this product. Observe these precautions carefully to avoid personal injury, damage, fire, and other problems.
Meaning of symbols
WARNING
Failure to observe precautions carries the possibility of serious personal injury or death due to fire, electric shock, or other causes.
CAUTION
* Screenshots will be replaced with English version when they are ready. * XXX will be determined when they are fixed.
Failure to observe precautions may result in personal injury due to electric shock or other causes, and may damage other equipment.
Prohibited action Mandatory action Situation that needs attention Notes and reference information
WARNING
If a foreign object (water, metal chips) enters this product, stop using immediately and remove the batteries. Continuing to use the product as it is may cause a fire or an electric shock.
If this product behaves abnormally, such as by generating heat or smoke, or giving off strange smells, cease usage immediately and shut down the connected device. After confirming that the product is not generating heat that will cause burns, remove the battery from the product. Afterwards, please contact your dealer. Continuing to use the product as it is may cause a fire or an electric shock.
Please do not drop or hit this product. In the event that the product is damaged, cease usage immediately. Turn OFF the power and remove the batteries. Afterwards, please contact your dealer. Fires or electric shocks may occur if this product is used when damaged.
Do not attempt to disassemble, modify, or repair this product. Doing so may cause a fire, electric shock, or product damage. Malfunctioning is not covered under warranty.
Do not put this product in fire. Breakage may cause fire or injury.
The receiver unit presents a swallowing hazard for children, so be sure to store it in a place out of the reach of children.
CAUTION
Do not place this product in any of the following environments:
In a car exposed to sunlight or a place exposed to direct sunlight. In a place that becomes hot, such as around a heater. In a moist place or a place where condensation may occur. In an uneven place or a place exposed to vibration. In a place where a magnetic field is generated (such as near a magnet.) In a dusty place.
This product does not have a waterproof structure. Use or store in a place not exposed to liquids such as water. Any liquid such as rain, water spray, juice, coffee, steam, and sweat, may cause this product to breakdown.
Only use this trackball with PCs, smartphones, tablets, and video game systems. Do not use this product with any device that may significantly be affected in the case of this product malfunctioning. When you no longer need to use this product and the battery, be sure to dispose of them in accordance with the local ordinances and laws of your area.
Battery
CAUTION
Please use either an AA alkaline battery, an AA manganese battery or an AA nickel-metal hydride rechargeable battery.
When not using this product for long periods of time, remove the batteries. Not removing them may cause leakage or malfunction.
Cleaning the Product
If the body of this product becomes dirty, wipe it with a soft, dry cloth.
Using a volatile liquid such as paint thinner, benzene or alcohol may affect the material quality and/or discolor this product.
Please note the following for disinfection.
Gently soak a cleaning cloth, such as a microfiber cloth, in the disinfectant solution. Make sure there are no loose droplets and gently wipe the product using the cloth. After wiping, dry thoroughly and wipe off any residual liquid. * Do not spray any liquid onto the product directly. Doing so can cause electric malfunctions.
IMPORTANT
Do not spray any liquid onto the product directly. Not doing so can cause malfunctions.
Do not use organic solvents or ultraviolet lights. Usage can result in deterioration of the housing components or paints, which can cause damage to the exterior.
We recommend using disposable gloves.
When using any alcohol-based products, please check that it is appropriate for the specific purpose and that it is used properly.
Please note that the customer is fully responsible for repair costs in the event that the product is damaged or operates abnormally due to the disinfection process.
We recommend that you disinfect your hands before and after using PCs and peripheral devices that are used by multiple people in order to prevent the spread of infection through the equipment.
Please ensure to turn off any connected devices. * When in sleep or hibernation mode, turn off connected devices. * Please unplug the AC adapter and power cable from the power outlet.
Cautions for Wireless Equipment
This product is a wireless device that can use the entire 2.4 GHz band, and is able to avoid the mobile entity identification device range. The GFSK method is adopted as the radio wave method, and the interference distance is 10 m. The 2.4 GHz band is also used in medical devices, Bluetooth, and wireless LAN devices of the IEEE 802.11b/11g/11n standards. Before using this product, check that there are no other “radio stations”* operating nearby. If electromagnetic interference occurs between this product and other “radio stations”*, move this product to another location or stop using this product. * Other “radio stations” refer to industrial, scientific and medical devices using the 2.4 GHz band, the same as this product, other radio stations of this type, licensed radio station premises for a mobile object identification system that is used in factory production lines, certain non-licensed low power radio stations, and amateur radio stations.
WARNING
Do not use in equipment which may cause serious effects due to it malfunctioning. There are rare cases in which an external radio wave at the same frequency, or the radio wave emitted from a mobile phone, causes this product to malfunction, slow down, or fail to operate. Do not use this product in places where radio wave usage is prohibited, such as hospitals. Radio waves of this product may affect electronic devices and medical devices (for example pacemakers). Due to the possibility of hindering safe navigation of aircraft, use of wireless mouse in aircraft is prohibited by the Civil Aeronautics Act. Turn off the power of the wireless mouse before boarding and do not use after boarding. * ELECOM is not liable for any accidents or any indirect or consequential damage incurred due to the failure of this product.
How to use
Items included in this package
The following are included in this package. Verify the package to ensure all items are accounted for prior to using this product. While every effort has been made to ensure proper packaging, in the event that any shortage or damage is discovered, please contact the retailer where the product was purchased. Mouse × 1 Receiver unit x 1
At the time of shipment, it is stored in the mouse. Please remove before use.
AA alkaline battery for confirming operability × 1
It is pre-inserted in the mouse body. Please remove the battery insulating pull tab before use.
Name and function of each part
* This manual uses illustrations of the “MSH20M-3, MSH21M-3” series for explanation.
Mouse
Left button To left click on your PC.
Right button To right click on your PC.
Wheel Rotate forward and backward or click like a button to operate your PC.
LED light The status light will light up for a period of time when the mouse is switched ON. The LED will blink during use when the battery level is low. The color of the LED light changes depending on the device to which it is connected. Bluetooth connection: Blue Wireless connection: White At the time of purchase, the mouse is set to Wireless connection: white.
Battery cover Remove this cover and insert the battery.
Optical sensor The LED light will light up blue when the power is on. This sensor will detect mouse movements when you move the mouse. * Please note that looking directly into the sensor light may hurt your eyes.
Power switch Turn the mouse power on (ON) and off (OFF).
Status light
Wireless
Bluetooth
Bluetooth
Connection Connection 1 Connection 2
The status light will light up when the CONNECT button is selected. During pairing standby state, the status light will blink. The LED will light up for a period of time when the mouse is switched ON. The LED will blink during use when the battery level is low.
Bluetooth connection 1 and Bluetooth connection 2: blue Wireless connection: White
CONNECT button Pair this product with your PC’s Bluetooth module or a Bluetooth adapter. Use this to switch between devices connected to this product. Please refer to “Switch connected device”.
Battery storage compartment Holds the battery.
Battery insulating tab Remove this tab before using.
Receiver unit storage compartment The receiver unit can be stored here when the mouse is not used wirelessly.
Receiver unit
USB connector (male) Connects to the PC USB-A port.
Switch connected device
This product can be used to switch between a Bluetooth device and a wirelessly connected device. Switch between connected devices in the following way. 1) Press the CONNECT button to switch between connected devices.
When the connection destination is Bluetooth connection 1 or Bluetooth connection 2, the LED lights up blue, and when it is on wireless connection, the LED lights up white.
Bluetooth Connection
Wireless Connection
Bluetooth Connection 1 Bluetooth Connection 2
Wireless Connection
Bluetooth Connection 1 Bluetooth Connection 2
Wireless Connection
When paired with either Bluetooth connection 1 or Bluetooth connection 2, the existing connection will be cut off when you switch to the unpaired channel. Switching back to the channel paired with a connected device will restore the connection.
To pair, please refer to “How to use” “Connecting and setting up the mouse” (OS specific) “3. Pair with PC”.
Connecting and setting up the mouse
Windows®
Using Bluetooth connection
1. Remove the battery insulating tab.
1) Remove the battery cover.
2) Remove the battery insulating tab.
3) Put the battery cover back on.
Replacing the battery… 1) Remove the battery cover.
2) Remove the battery.
3) Insert the battery according to the positive (+) and negative (-) marks indicated in the battery compartment.
Ensure that the battery is inserted with the positive (+) and negative (-) terminals oriented correctly. 4) Put the battery cover back on.
2. Turn the power ON
1) Slide the power switch on the underside of the product to the ON position.
ON side
The LED light will light up for a period of time. * When the battery level is running low, the LED light will blink for a period of time.
Power-saving mode When the mouse is left untouched for a fixed period of time while the power is ON, it automatically shifts to power-saving mode. The mouse returns from power-saving mode when it is moved. * Mouse operation may be unstable for 2-3 seconds after returning from the power-saving mode.
3. Pairing with a PC
Pairing involves registering Bluetooth devices (in this case, this product and your device) with each other, and authorizing a connection between them. This section covers Windows standard Bluetooth functions. Depending on your device or Bluetooth adaptor, unique Bluetooth functions may be used. Please read the respective manuals for each function. Please carry out the pairing operation using your current mouse or touchpad on your device. The following instructions are for Windows 11 (23H2). 1) Right click on “Start” on the bottom of the screen and then, click on “Settings”. The “Settings” page will appear.
2) Under “Home”, click “Add Device” under “Bluetooth Devices”. The “Add Devices” page will appear.
If “Bluetooth” is off, turn it on.
3) Use the CONNECT button to select the device you want to connect to (Bluetooth connection 1 or Bluetooth connection 2).
The LED light and the status light will light up blue for 3 seconds. Please refer to “Switch connected device” to switch between connected devices. The selected connected Bluetooth device will be registered under your paired devices.
4) Click “Bluetooth”.
5) When the add device screen is displayed, hold down the CONNECT button on the underside for 3 seconds and then release.
Pairing mode will be activated and the status light will blink blue.
CONNECT button
6) Click on “ELECOM shellpha”. Pairing begins.
7) “Your device is ready to go!”When the status changes to “XX”, click on “Complete”.
8) Pairing is complete when this product is added to “Bluetooth Devices” and the status is “Connected”.
You can now use the mouse. Using wireless connection
1. Remove the battery insulating tab.
1) Remove the battery cover.
2) Remove the battery insulating tab.
3) Remove the receiver unit.
4) Put the battery cover back on.
Replacing the battery… 1) Remove the battery cover.
2) Remove the battery.
3) Insert the battery according to the positive (+) and negative (-) marks indicated in the battery compartment.
Ensure that the battery is inserted with the positive (+) and negative (-) terminals oriented correctly. 4) Put the battery cover back on.
2. Turn the power ON
1) Slide the power switch on the underside of the product to the ON position. ON side
The LED light will light up for a period of time. * When the battery level is running low, the LED light will blink for a period of time.
Power-saving mode When the mouse is left untouched for a fixed period of time while the power is ON, it automatically shifts to power-saving mode. The mouse returns from power-saving mode when it is moved. * Mouse operation may be unstable for 2-3 seconds after returning from the power-saving mode.
3. Connect to a PC
1) Start up your PC. Please wait until the PC has started up and can be operated.
2) Using the CONNECT button, select the device you want to connect to (wireless connection).
The LED light and the status light will light up white for 3 seconds. Please refer to “Switch connected device” to switch between connected devices.
3) Insert the receiver unit into the PC’s USB-A port.
USB-A port
You may use any USB-A port. Ensure that the connector is correctly oriented to the port. If there is strong resistance when inserting, check the shape and orientation of the connector. Forcibly inserting the connector may damage the connector, and there is a risk of injury. Do not touch the terminal portion of the USB connector.
When removing the receiver unit This product supports hot plugging. The receiver unit can be removed while the PC is on. 4) The driver will be automatically installed, and you will then be able to use the mouse. You can now use the mouse.
Change the mouse pointer speed
Adjust the mouse pointer movement speed on your PC if the mouse pointer moves too fast or too slow. For Windows 11 1) Click on “Start” on the bottom of the screen and click on “Settings”.
The “Settings” page will appear. 2) Click on “Bluetooth & devices” and then “Mouse”.
3) Adjust the “Mouse pointer speed” slider bar to adjust the mouse pointer movement speed.
For Windows 10 1) Open “Mouse” properties. From the start menu, click the Settings icon, select “Devices” “Mouse”, then click “Additional mouse options” under “Related Settings”. 2) Select the “Pointer Options” tab.
3) Adjust the “Select a pointer speed” slider bar to adjust the mouse pointer movement speed.
Change the number of lines scrolled in one wheel turn
For Windows 11 1) Click on “Start” on the bottom of the screen and click on “Settings”. The “Settings” page will appear. 2) Click on “Bluetooth & devices” and then “Mouse”.
3) Adjust the “Lines to scroll at a time” slider bar to adjust the number of lines per scroll.
For Windows 10 1) Open “Mouse” properties. From the start menu, click the Settings icon, select “Devices” “Mouse”, then click “Additional mouse options” under “Related Settings”. 2) Select the “Wheel” tab. 3) Change the value of “The following number of lines at a time” under “Roll the wheel one
notch to scroll”
Mac
Using Bluetooth connection
1. Remove the battery insulating tab.
1) Remove the battery cover.
2) Remove the battery insulating tab.
3) Put the battery cover back on.
Replacing the battery… 1) Remove the battery cover.
2) Remove the battery.
3) Insert the battery according to the positive (+) and negative (-) marks indicated in the battery compartment.
Ensure that the battery is inserted with the positive (+) and negative (-) terminals oriented correctly. 4) Put the battery cover back on.
2. Turn the power ON
1) Slide the power switch on the underside of the product to the ON position.
ON side
The LED light will light up for a period of time. * When the battery level is running low, the LED light will blink for a period of time.
Power-saving mode When the mouse is left untouched for a fixed period of time while the power is ON, it automatically shifts to power-saving mode. The mouse returns from power-saving mode when it is moved. * Mouse operation may be unstable for 2-3 seconds after returning from the power-saving mode.
3. Pairing with a PC
Pairing involves registering Bluetooth devices (in this case, this product and your device) with each other, and authorizing a connection between them. This section covers macOS standard Bluetooth functions. Depending on your device or Bluetooth adaptor, unique Bluetooth functions may be used. Please read the respective manuals for each function. Use your current mouse or the touchpad on your device to operate your device until pairing is complete. The following instructions are for macOS Sonoma (14). 1) From the Apple menu, click on “System Settings…”Click on XX. The System Settings window will appear.
2) Click on “Bluetooth” to turn on “Bluetooth”. The “Bluetooth” system settings page will appear.
3) Use the CONNECT button to select the device you want to connect to (Bluetooth connection 1 or Bluetooth connection 2).
The LED light and the status light will light up blue for 3 seconds. Please refer to “Switch connected device” to switch between connected devices. The selected connected Bluetooth device will be registered under your paired devices.
4) During the device search, hold down the CONNECT button on the underside for 3 seconds and then release.
Pairing mode will be activated and the status light will blink blue.
CONNECT button
5) When “ELECOM shellpha” is detected under “Nearby Devices”, click “Connect”. Pairing begins.
6) Pairing is complete when the status of “ELECOM shellpha” changes to “Connected”.
You can now use the mouse. By downloading and installing the “ELECOM Mouse Assistant” from our company website, functions such as button assignment function and presentation mode can be used. Please proceed to “Install ELECOM Mouse Assistant”.
Using wireless connection
1. Remove the battery insulating tab.
1) Remove the battery cover.
2) Remove the battery insulating tab.
3) Remove the receiver unit.
4) Put the battery cover back on. Replacing the battery… 1) Remove the battery cover. 2) Remove the battery.
3) Insert the battery according to the positive (+) and negative (-) marks indicated in the battery compartment.
Ensure that the battery is inserted with the positive (+) and negative (-) terminals oriented correctly. 4) Put the battery cover back on.
2. Turn the power ON
1) Slide the power switch on the underside of the product to the ON position.
ON side
The LED light will light up for a period of time. * When the battery level is running low, the LED light will blink for a period of time.
Power-saving mode When the mouse is left untouched for a fixed period of time while the power is ON, it automatically shifts to power-saving mode. The mouse returns from power-saving mode when it is moved. * Mouse operation may be unstable for 2-3 seconds after returning from the power-saving mode.
3. Connect to a PC
1) Start up your PC. Please wait until the PC has started up and can be operated. 2) Using the CONNECT button, select the device you want to connect to (wireless
connection). The LED light and the status light will light up white for 3 seconds.
Please refer to “Switch connected device” to switch between connected devices. 3) Insert the receiver unit into the PC’s USB-A port.
USB-A port
You may use any USB-A port. For terminals that do not have a USB-A port, such as a MacBook, use the USB Type-C® hub.
USB Type-C® hub
Ensure that the connector is correctly oriented to the port. If there is strong resistance when inserting, check the shape and orientation of the connector. Forcibly inserting the connector may damage the connector, and there is a risk of injury. Do not touch the terminal portion of the USB connector. When removing the receiver unit This product supports hot plugging. The receiver unit can be removed while the PC is on. 4) The driver will be automatically installed, and you will then be able to use the mouse. You can now use the mouse. By downloading and installing the “ELECOM Mouse Assistant” from our company website, functions such as button assignment function and presentation mode can be used. Please proceed to “Install ELECOM Mouse Assistant”.
Change the mouse pointer speed
Adjust the mouse pointer movement speed on your PC if the mouse pointer moves too fast or too slow. 1) Click “Mouse” under “System Settings”. The “Mouse” settings page will load up.
2) Adjust the “Tracking speed” slider to adjust the speed of the mouse pointer.
Unchecking “Natural scrolling” will cause the scroll direction to be reversed.
iPhone, iPad
Using Bluetooth connection
1. Remove the battery insulating tab.
1) Remove the battery cover. 2) Remove the battery insulating tab. 3) Put the battery cover back on. Replacing the battery… 1) Remove the battery cover.
2) Remove the battery.
3) Insert the battery according to the positive (+) and negative (-) marks indicated in the battery compartment.
Ensure that the battery is inserted with the positive (+) and negative (-) terminals oriented correctly. 4) Put the battery cover back on.
2. Turn the power ON
1) Slide the power switch on the underside of the product to the ON position.
ON side
The LED light will light up for a period of time. * When the battery level is running low, the LED light will blink for a period of time.
Power-saving mode When the mouse is left untouched for a fixed period of time while the power is ON, it automatically shifts to power-saving mode. The mouse returns from power-saving mode when it is moved. * Mouse operation may be unstable for 2-3 seconds after returning from the power-saving mode.
3. Pairing with an iPad or an iPhone
Pairing involves registering Bluetooth devices (in this case, this product and an iPad or an iPhone) with each other, and authorizing a connection between them. Tap to operate the iPad or iPhone device until pairing is complete. The following instructions are for iPadOS Ver.16.5. 1) Tap on “Settings” from the home page.
2) Tap on “Bluetooth” to turn on the “Bluetooth”.
3) Use the CONNECT button to select the device you want to connect to (Bluetooth connection 1 or Bluetooth connection 2).
The LED light and the status light will light up blue for 3 seconds. Please refer to “Switch connected device” to switch between connected devices. The selected connected Bluetooth device will be registered under your paired devices.
4) During the device search, hold down the CONNECT button on the underside for 3 seconds and then release.
Pairing mode will be activated and the status light will blink blue.
CONNECT button
5) Tap on “ELECOM shellpha” when it is detected under “DEVICES”. Pairing begins.
6) When the “Bluetooth Pairing Request” page loads, tap on “Pair”. 7) You can use the mouse when the status shows “Connected”
You can now use the mouse.
Register custom actions to the buttons.
Only the 2 buttons and the wheel can be used under the initial settings. Button 1: Single-Tap Button 2: Secondary Click
Follow the steps below to assign all other button functions.
1. Turn ON AssistiveTouch.
1) Tap on “Accessibility” under “Settings”. 2) Tap on “Touch”.
3) Tap on “AssistiveTouch”.
4) Tap on “AssistiveTouch” to turn ON.
2. Assign custom actions to the buttons.
1) Tap on “Devices” under “POINTING DEVICES”.
2) Tap on “ELECOM shellpha”. 3) “Customize Additional Buttons…”.Tap on XX.
4) When the “Customize Button” page loads, click on the button on the mouse to be added.
* When adding “Button 3”.
Button 3
5) A list of all assignable functions will load. Tap on the desired function to assign. * When assigning “Screenshot” to “Button 3”.
6) A function is assigned to the button. To assign other buttons, repeat the steps above.
When AssistiveTouch is OFF, the Custom Action function is disabled and only the initial right click, left click and wheel scroll functions may be used.
Android
Using Bluetooth connection
1. Remove the battery insulating tab.
1) Remove the battery cover.
2) Remove the battery insulating tab.
3) Put the battery cover back on.
Replacing the battery… 1) Remove the battery cover.
2) Remove the battery.
3) Insert the battery according to the positive (+) and negative (-) marks indicated in the battery compartment.
Ensure that the battery is inserted with the positive (+) and negative (-) terminals oriented correctly. 4) Put the battery cover back on.
2. Turn the power ON
1) Slide the power switch on the underside of the product to the ON position. ON side
The LED light will light up for a period of time. * When the battery level is running low, the LED light will blink for a period of time.
Power-saving mode When the mouse is left untouched for a fixed period of time while the power is ON, it automatically shifts to power-saving mode. The mouse returns from power-saving mode when it is moved. * Mouse operation may be unstable for 2-3 seconds after returning from the power-saving mode.
3. Pairing with an Android device.
Pairing involves registering Bluetooth devices (in this case, this product and an Android device) with each other, and authorizing a connection between them. Tap to operate the Android device until pairing is complete. Instructions for the Pixel Tablet (Android 14) are as follows. There may be differences depending on the OS version or device. 1) Tap on “Settings” from the home page. 2) Tap on “Connected devices”.
3) Tap on “Pair new device”
4) Use the CONNECT button to select the device you want to connect to (Bluetooth connection 1 or Bluetooth connection 2).
The LED light and the status light will light up blue for 3 seconds. Please refer to “Switch connected device” to switch between connected devices. The selected connected Bluetooth device will be registered under your paired devices.
5) Hold down the CONNECT button on the underside for 3 seconds and then release. Pairing mode will be activated and the status light will blink blue.
CONNECT button 6) Tap on “ELECOM shellpha” under “Available devices”. 7) Tap on “Pair”.
Pairing begins. 8) Pairing is complete when this product is added to “Other devices”.
You can now use the mouse.
Chrome OS
Using Bluetooth connection
1. Remove the battery insulating tab.
1) Remove the battery cover.
2) Remove the battery insulating tab.
3) Put the battery cover back on.
Replacing the battery… 1) Remove the battery cover.
2) Remove the battery.
3) Insert the battery according to the positive (+) and negative (-) marks indicated in the battery compartment.
Ensure that the battery is inserted with the positive (+) and negative (-) terminals oriented correctly.
4) Put the battery cover back on.
2. Turn the power ON
1) Slide the power switch on the underside of the product to the ON position. ON side
The LED light will light up for a period of time. * When the battery level is running low, the LED light will blink for a period of time.
Power-saving mode When the mouse is left untouched for a fixed period of time while the power is ON, it automatically shifts to power-saving mode. The mouse returns from power-saving mode when it is moved. * Mouse operation may be unstable for 2-3 seconds after returning from the power-saving mode.
3. Pairing with a PC
Pairing involves registering Bluetooth devices (in this case, this product and your device) with each other, and authorizing a connection between them. This section covers Chrome OS standard Bluetooth functions. Depending on your device, unique Bluetooth functions may be used. Please read the respective manuals for each function. Use your current mouse or the touchpad on your device to operate your device until pairing is complete. The following instructions are for Chrome OS (124.0.6367.95). 1) Click on the battery icon at the bottom right.
2) Bluetooth on the Quick Settings panel.
3) Under “Bluetooth”, click on “Pair new device”.
4) Use the CONNECT button to select the device you want to connect to (Bluetooth connection 1 or Bluetooth connection 2).
The LED light and the status light will light up blue for 3 seconds. Please refer to “Switch connected device” to switch between connected devices. The selected connected Bluetooth device will be registered under your paired devices.
5) During the device search, hold down the CONNECT button on the underside for 3 seconds and then release.
Pairing mode will be activated and the status light will blink blue.
CONNECT button
6) Click on “ELECOM shellpha”. Pairing begins.
7) “ELECOM shellpha connected” will be displayed at the bottom right of the screen.
Click “Bluetooth” like in step 2. Pairing is complete when “ELECOM shellpha” appears under “Currently connected”.
You can now use the mouse. Using wireless connection
1. Remove the battery insulating tab.
1) Remove the battery cover.
2) Remove the battery insulating tab.
3) Remove the receiver unit.
4) Put the battery cover back on.
Replacing the battery… 1) Remove the battery cover.
2) Remove the battery.
3) Insert the battery according to the positive (+) and negative (-) marks indicated in the battery compartment.
Ensure that the battery is inserted with the positive (+) and negative (-) terminals oriented correctly. 4) Put the battery cover back on.
2. Turn the power ON
1) Slide the power switch on the underside of the product to the ON position. ON side
The LED light will light up for a period of time. * When the battery level is running low, the LED light will blink for a period of time.
Power-saving mode When the mouse is left untouched for a fixed period of time while the power is ON, it automatically shifts to power-saving mode. The mouse returns from power-saving mode when it is moved. * Mouse operation may be unstable for 2-3 seconds after returning from the power-saving mode.
3. Connect to a PC
1) Start up your PC. Please wait until the PC has started up and can be operated. 2) Using the CONNECT button, select the device you want to connect to (wireless
connection). The LED light and the status light will light up white for 3 seconds.
Please refer to “Switch connected device” to switch between connected devices. 3) Insert the receiver unit into the PC’s USB-A port.
USB-A port
You may use any USB-A port. For devices that do not have a USB-A port, please use a USB Type-C hub.
USB Type-C® hub
Ensure that the connector is correctly oriented to the port. If there is strong resistance when inserting, check the shape and orientation of the connector. Forcibly inserting the connector may damage the connector, and there is a risk of injury. Do not touch the terminal portion of the USB connector. When removing the receiver unit This product supports hot plugging. The receiver unit can be removed while the PC is on.
4) The driver will be automatically installed, and you will then be able to use the mouse.
You can now use the mouse.
Change the mouse pointer speed
Adjust the mouse pointer movement speed on your PC if the mouse pointer moves too fast or too slow. 1) Click on the battery icon at the bottom right.
2) Click on
(settings) on the Quick Settings panel.
The settings page will appear.
3) Click “Mouse” under “Devices”.
4) Adjust the speed of the mouse pointer using the “Cursor speed” slider of “ELECOM shellpha”.
Change the number of lines scrolled in one wheel turn
1) Click on the battery icon at the bottom right.
2) Click on
(settings) on the Quick Settings panel.
The settings page will appear.
3) Click “Mouse” under “Devices”. 4) If “Controlled scrolling” for “ELECOM shellpha” is disabled, click to enable it.
5) Adjust the number of lines to be scrolled at a time using the slider for “Scroll speed” under “ELECOM shellpha”.
Specifications
Connector type Connection method Bluetooth® standard
USB-A plug USB 2.4 GHz wireless / Bluetooth® wireless Bluetooth 5.0 Class 2
* XXX will be determined when they are fixed.
Supported profiles
HOGP (HID Over GATT Profile)
Product Specifications
Windows OS, macOS, Chrome OS, Android, iOS and iPadOS-based devices that support Bluetooth® HOGP or USB-port equipped devices.
Supported OS
Windows 11/10, macOS Sonoma 14, iOS 17/iPad OS 17, ChromeOS, Android 12
Communication method Radio frequency Radio wave range
GFSK 2.4 GHz Maximum distance approximately 10 m * May vary depending on the environment.
Connected device switching
Yes
function
Sensor type
BlueLED
Sensor Resolution
2000 DPI
Buttons
3 * including wheel button
Number of wheels
1
Receiver unit storage compartment
Supported
Power source
Any 1 of AA alkaline battery, AA manganese battery or AA nickelmetal hydride rechargeable battery
Battery life
Maximum duration approximately 2 years (estimated operating time when using alkaline batteries) * May vary depending on the environment.
Size category
MSH20M-3 series: M size MSH21M-3 series: S size
External dimensions (main unit)
MSH20M-3 series: Length approx. XX mm × Width approx. XX mm × Height approx. XX mm / LXX.x x WXX.x x HXX.x in.
* XXX will be determined when they are fixed.
MSH21M-3 series: Length approx. XX mm × Width approx. XX mm × Height approx. XX mm / LXX.x x WXX.x x HXX.x in.
External dimensions (receiver)
Width approx. 16 × Length approx. 20 × Height approx. 7 mm / L 0.6 × D 0.8 × H 0.3 in.
Weight (main unit)
MSH20M-3 series: approximately XX g / xx.x oz MSH21M-3 series: approximately XX g / xx.x oz * excluding batteries
Mass (receiver unit)
Approximately 2 g / 0.1 oz
What’s Inside
1 mouse body, 1 AA alkaline battery (for confirming operability), 1 receiver
Compliance status
Model//: MSH20M-3, MSH21M-3, ELECOM01B www.elecom.co.jp/global/certification/
China /
: MSH20M-3 CMIIT ID: XXXXXXXXXX : MSH21M-3 CMIIT ID: XXXXXXXXXX RoHS Compliance ( https://www.elecom.co.jp/global/certification/pdf/RoHS_China.pdf
EU
* XXX will be determined when they are fixed.
CE Declaration of Conformity https://www.elecom.co.jp/global/certification/pdf/CE_DoC.pdf RoHS Compliance https://www.elecom.co.jp/global/certification/pdf/RoHS_EU_UK_Vietnam.pdf European Authorized Representative (For CE and GPSR matters only) VISHTEC ltd 3rd floor office 5, Plovdiv 2 Liuben Karavelov bul, 4002 Bulgaria compliance@vish-tec.com
WEEE Disposal and Recycling Information This symbol means that waste of electrical and electronic equipment (WEEE) should not be disposed as general household waste.WEEE should be treated separately to prevent possible harm to the environment or human health.Consult your retailer or local municipal office for collection, return, recycle or reuse of WEEE. DE: Informationen zu Elektro- und Elektronikgeräten https://www.elecom.co.jp/global/certification/pdf/DE_WEEE.pdf FR: INFORMATION DES CONSOMMATEURS SUR LA RÈGLE DE TRI https://www.elecom.co.jp/global/certification/pdf/FR-Info-Tri.pdf
Malaysia / Bahasa Melayu
XXXXXXXXXXXX XXXXXXXXXXXX
Singapore
* XXX will be determined when they are fixed.
Model Name/No.: MSH20M-3 Operating Frequencies: XXXX-XXXXMHz Maximum field intensity / RF Output power: X.XX dBm / X.XX mW Model Name/No.: MSH21M-3 Operating Frequencies: XXXX-XXXXMHz Maximum field intensity / RF Output power: X.XX dBm / X.XX mW Model Name/No.: ELECOM01B Operating Frequencies: XXXX-XXXXMHz Maximum field intensity / RF Output power: X.XX dBm / X.XX mW
Taiwan /
BSMI RoHS Compliance () https://www.elecom.co.jp/global/certification/pdf/RoHS_Taiwan.pdf
MSH20M-3: XXXXXXXXXXXXXX MSH21M-3: XXXXXXXXXXXXXX ELECOM01B: CCAH20LP8510T5
UK
UK Declaration of Conformity https://www.elecom.co.jp/global/certification/pdf/UK_DoC.pdf
RoHS Compliance https://www.elecom.co.jp/global/certification/pdf/RoHS_EU_UK_Vietnam.pdf
WEEE Disposal and Recycling Information This symbol means that waste of electrical and electronic equipment (WEEE) should not be disposed as general household waste. WEEE should be treated separately to prevent possible harm to the environment or human health. Consult your retailer or local municipal office for collection, return, recycle or reuse of WEEE.
US
FCCID:YWO-MSH20M-5 FCCID:YWO-MSH21M-5 FCC ID: YWO-ELECOM01B This device complies with Part 15 of the FCC Rules. Operation is subject to the following two conditions: (1) this device may not cause harmful interference, and (2) this device must accept any interference received, including interference that may cause undesired operation. NOTE; This equipment has been tested and found to comply with the limits for a Class B Digital Device, pursuant to part 15 of the FCC Rules. These limits are designed to provide reasonable protection against harmful interference in a residential installation. This equipment generates, uses and can radiated radio frequency energy and, if not installed and used in accordance with the instruction, may cause harmful interference to radio communication. However, there is no guarantee that interference will not occur in a particular installation. If this equipment does cause harmful interference to radio or television reception, which can be determined by tuning the equipment off and on, the user is encouraged to try to correct the interference by one or more of the following measures: – Reorient or relocate the receiving antenna – Increase the separation between the equipment and receiver
– Connect the equipment into an outlet on a circuit different from that to which the receiver is connected – Consult the dealer or an experienced radio/TV technician for help NOTICE: The manufacture is not responsible for any radio or TV interference caused by unauthorized modification to this equipment. Such modifications could void the user’s authority to operate the equipment.
In order to make improvements to this product, the design and specifications are subject to change without prior notice. FCC Caution: To assure continued compliance, any changes or modifications not expressly approved by the party responsible for compliance could void the user’s authority to operate this equipment. (Example – use only shielded interface cables when connecting to computer or peripheral devices). FCC Radiation Exposure Statement This equipment complies with FCC RF radiation exposure limits set forth for an uncontrolled environment. This equipment should be installed and operated with a minimum distance of 0.5 cm between the radiator and your body. This transmitter must not be co-located or operating in conjunction with any other antenna or transmitter. The antennas used for this transmitter must be installed to provide a separation distance of at least 0.5 cm from all persons and must not be co-located or operating in conjunction with any other antenna or transmitter. Responsible party ELECOM USA, Inc. 4041 MacArthur Blvd Suite 400, Newport Beach, CA 92660 USA elecomusa.com
Vietnam / Vit Nam
RoHS Compliance (Chng Nhn t Tiêu Chun RoHS) https://www.elecom.co.jp/global/certification/pdf/RoHS_EU_UK_Vietnam.pdf
Support information
ELECOM CO., LTD.
Fushimimachi 4-1-1, Chuo-ku, Osaka City
Go to Global Site
Global Support
Please contact the shop where you purchased this product if you have any feedback or questions about the contents of this manual. Specifications and external appearance of this product may be changed without prior notice for the purpose of product improvement. ELECOM is not responsible for any damages to, or failure of other devices caused by using this product. The images are for illustration purposes only and may differ from your actual product. When exporting this product, check the export regulations for the country of origin.
A customer who purchases outside Japan should contact the local retailer in the country of purchase for enquiries. In “ELECOM CO., LTD. (Japan)”, no customer support is available for enquiries about purchases or usage in/from any countries other than Japan. Also, no foreign language other than Japanese is available. Replacements will be made under stipulation of the ELECOM warranty.
Documents / Resources
 |
Elecom MSH Series Wireless Mouse [pdf] User Manual MSH21M-5, MSH21M5, YWO-MSH21M-5, YWOMSH21M5, MSH Series Wireless Mouse, MSH Series, Wireless Mouse, Mouse |