EDA ED-IPC2100 Series Using Standard Raspberry
Product Information
Specifications
- Product Name: ED-IPC2100 Series
- Manufacturer: EDA Technology Co., LTD
- Application: Raspberry Pi OS
- Supported Readers: Mechanical Engineer, Electrical Engineer, Software Engineer, System Engineer
- Usage: IOT, industrial control, automation, green energy, artificial intelligence
- Support: Indoor use only
Product Usage Instructions
Safety Instructions
- This product should be used in an environment that meets the requirements of design specifications to avoid failure and damage.
- Avoid illegal operations that may lead to personal safety accidents or property losses.
- Do not modify the equipment without permission to prevent equipment failure.
- Securely fix the equipment during installation to prevent it from falling.
- Maintain a distance of at least 20cm from the equipment if it is equipped with an antenna.
- Avoid using liquid cleaning equipment and keep away from liquids and flammable materials.
Contact Information
If you need further assistance or have any queries, you can contact EDA Technology Co., LTD:
- Address: Building 29, No.1661 Jialuo Highway, Jiading District, Shanghai
- Email: sales@edatec.cn
- Phone: +86-18217351262
- Website: www.edatec.cn
- Technical Support Email: support@edatec.cn
- Technical Support Phone: +86-18627838895
- Wechat: zzw_1998-
Copyright Statement
All rights reserved. No part of this document may be modified, distributed, or copied without written permission from EDA Technology Co., LTD.
Disclaimer
Foreword: This manual provides guidance for Mechanical Engineers, Electrical Engineers, Software Engineers, and System Engineers.
Symbolic Convention
Instruction Prompt symbols indicate important features or operations. Notice symbols may cause personal injury, system damage, or signal interruption/loss. Warning symbols may cause great harm to people.
FAQ
- Q: Can the product be used outdoors?
A: No, the product is only supported for indoor use. - Q: What should I do if I encounter equipment failure?
A: Contact technical support for assistance and do not attempt to modify the equipment without permission.
Application Guide
Using Standard Raspberry Pi OS on ED-IPC2100 Series
EDA Technology Co., LTD
February 2024
Contact Us
Thank you very much for purchasing and using our products, and we will serve you wholeheartedly.
As one of the global design partners of Raspberry Pi, we are committed to providing hardware solutions for IOT, industrial control, automation, green energy and artificial intelligence based on Raspberry Pi technology platform.
You can contact us in the following ways:
- EDA Technology Co.,LTD
- Address: Building 29, No.1661 Jialuo Highway, Jiading District, Shanghai Mail: sales@edatec.cn
- Phone: +86-18217351262
- Website: https://www.edatec.cn
Technical Support
- Mail: support@edatec.cn
- Phone: +86-18627838895
- Wechat: zzw_1998-
Copyright Statement
ED-IPC2100 series and its related intellectual property rights are owned by EDA Technology Co.,LTD.
EDA Technology Co.,LTD owns the copyright of this document and reserves all rights. Without the written permission of EDA Technology Co.,LTD, no part of this document may be modified, distributed or copied in any way or form.
Disclaimer
EDA Technology Co.,LTD does not guarantee that the information in this manual is up to date, correct, complete or of high quality. EDA Technology Co.,LTD also does not guarantee the further use of this information. If the material or non-material related losses are caused by using or not using the information in this manual, or by using incorrect or incomplete information, as long as it is not proved that it is the intention or negligence of EDA Technology Co.,LTD, the liability claim for EDA Technology Co.,LTD can be exempted. EDA Technology Co.,LTD expressly reserves the right to modify or supplement the contents or part of this manual without special notice.
Foreword
Reader Scope
This manual is applicable to the following readers:
- Mechanical Engineer
- Electrical Engineer
- Software Engineer
- System Engineer
Related Agreement
Symbolic Convention
| Symbolic | Instruction |
 |
Prompt symbols, indicating important features or operations. |
 |
Notice symbols, which may cause personal injury, system damage, or signal interruption/loss. |
 |
Warning symbols, which may cause great harm to people. |
Safety Instructions
- This product should be used in an environment that meets the requirements of design specifications, otherwise it may cause failure, and functional abnormality or component damage caused by non-compliance with relevant regulations are not within the product quality assurance scope.
- Our company will not bear any legal responsibility for personal safety accidents and property losses caused by illegal operation of products.
- Please do not modify the equipment without permission, which may cause equipment failure.
- When installing equipment, it is necessary to fix the equipment to prevent it from falling.
- If the equipment is equipped with an antenna, please keep a distance of at least 20cm from the equipment during use.
- Do not use liquid cleaning equipment, and keep away from liquids and flammable materials.
- This product is only supported for indoor use.
Overview
This chapter introduces the background information and application range of using standard Raspberry Pi OS on the ED-IPC2100 series.
- Background
- Application Range
Background
ED-IPC2100 series products have an operating system with BSP installed by default when leaving the factory. It has added supporting for BSP, created users, enabled SSH and supports BSP online upgrade. It is safe and reliable, and users can use the operating system.
NOTE
If the user has no special needs, it is recommended to use the default operating system. The download path is ED-IPC2100/raspios.
If the user wants to use the standard Raspberry Pi OS after receiving the product, some functions will be unavailable after changing the operating system to the standard Raspberry Pi OS. In order to solve this problem, ED-IPC2100 supports online installation for Firmware packages to make the product better compatibles with the standard Raspberry Pi OS and ensure that all functions can be used.
ED-IPC2100 supports the standard Raspberry Pi OS by installing the kernel package and firmware package online on the standard Raspberry Pi OS (bookworm and bullseye). The operations for bookworm system and bullseye system are different. Since the bookworm system is newer, so it is recommended to install firmware package on bullseye system to support this application.
Application Range
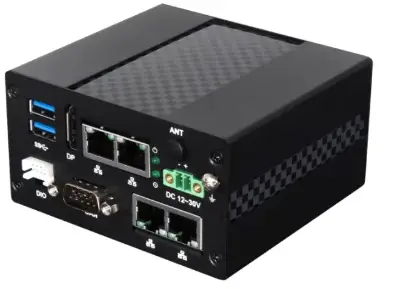
The products involved in this application include ED-IPC2110, ED-IPC2130 and ED-IPC2140.
Since using a 64-bit operating system can better utilize the hardware performance of the product, it is recommended to use the 64-bit standard Raspberry Pi OS (bookworm and bullseye). The details are as follows:
| Product Model | Supported OS |
| ED-IPC2110 | Raspberry Pi OS(Desktop) 64-bit-bookworm (Debian 12) Raspberry Pi OS(Desktop) 64-bit-bullseye (Debian 11) Raspberry Pi OS(Lite) 64-bit-bookworm (Debian 12) Raspberry Pi OS(Lite) 64-bit-bullseye (Debian 11) |
| ED-IPC2130 | |
| ED-IPC2140 |
Application Guidance
This chapter introduces the operation steps of using standard Raspberry Pi OS on ED-IPC2100 series.
- Operating Process
- Downloading OS File
- Flashing to eMMC
- First boot-up Configuration
- Installing Firmware Package
Operating Process
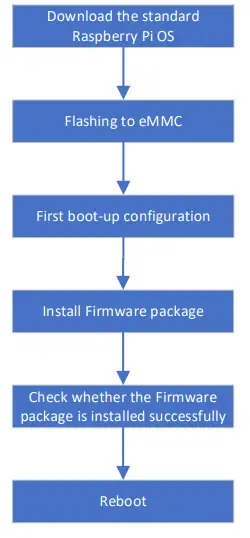
The main operation process of the application configuration is as shown below.
Downloading OS File
You can download the required Raspberry Pi OS file according to actual needs. The download paths are as follows:
| OS | Download Path |
| Raspberry Pi OS(Desktop) 64-bit-bookworm (Debian 12) | https://downloads.raspberrypi.com/raspios_arm64/images/raspios_arm64-2023-12-06/2023-12-05-raspios-bookworm-arm64.img.xz |
| Raspberry Pi OS(Desktop) 64-bit-bullseye (Debian 11) | https://downloads.raspberrypi.com/raspios_oldstable_arm64/images/raspios_oldstable_arm64-2023-12-06/2023-12-05-raspios-bullseye-arm64.img.xz |
| Raspberry Pi OS(Lite) 64-bit- bookworm (Debian 12) | https://downloads.raspberrypi.com/raspios_lite_arm64/images/raspios_lite_arm64-2023-12-11/2023-12-11-raspios-bookworm-arm64-lite.img.xz |
| Raspberry Pi OS(Lite) 64-bit- bullseye (Debian 11) | https://downloads.raspberrypi.com/raspios_lite_arm64/images/raspios_lite_arm64-2023-12-11/2023-12-11-raspios-bookworm-arm64-lite.img.xz |
Flashing to eMMC
It is recommended to use the official Raspberry Pi flashing tool, and the download path is as follows:
- Raspberry Pi Imager: https://downloads.raspberrypi.org/imager/imager_latest.exe
- SD Card Formatter: https://www.sdcardformatter.com/download/
- Rpiboot: https://github.com/raspberrypi/usbboot/raw/master/win32/rpiboot_setup.exe
Preparation
- The downloading and installation of the flashing tool to the computer has been completed.
- A Micro USB to USB-A cable has been prepared.
- The OS file has been obtained.
Steps
The steps are described using Windows OS as an example.
- Connect the power cable and USB cable.
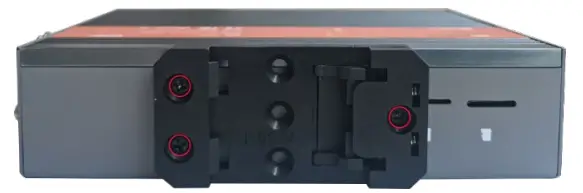
- Use a cross screwdriver to loosen three screws on the DIN-rail bracket counterclockwise (red box position in the figure below) and remove the default DIN-rail bracket.
- Locate the Micro USB port on the device, as shown in the red box below.
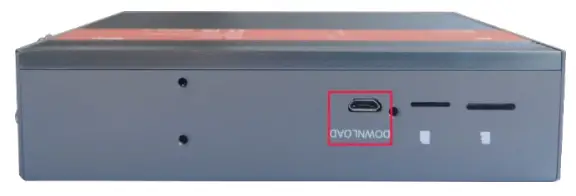
- Connect the power cable and USB cable, as shown in the figure below.

- Use a cross screwdriver to loosen three screws on the DIN-rail bracket counterclockwise (red box position in the figure below) and remove the default DIN-rail bracket.
- Disconnect the power supply of ED-IPC2100, and then power it on again.
- Open rpiboot tool to automatically convert the drive to a letter.
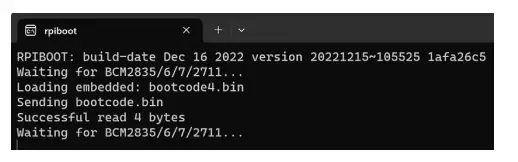
- After the completion of the drive letter, the drive letter will pop up in the lower right corner of the computer, as shown in the figure below E drive.

- Open SD Card Formatter, select the formatted drive letter, and click “Format” at the lower right to format.
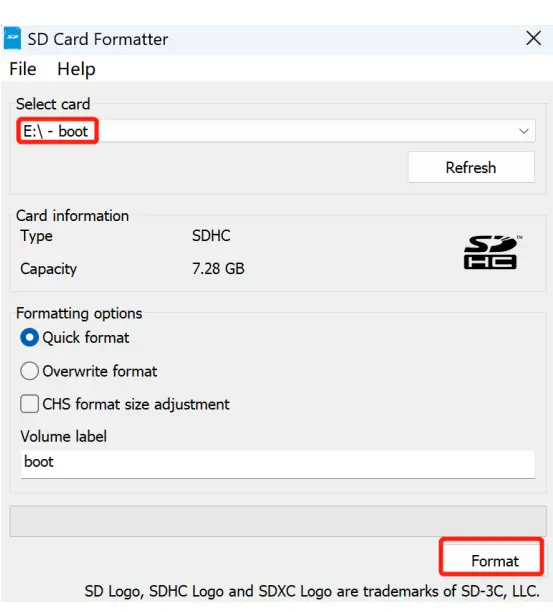
- In the pop-up prompt box, select “Yes”.
- When the formatting is completed, click “OK” in the prompt box.
- Close SD Card Formatter.
- Open Raspberry Pi Imager, select “CHOOSE OS” and select “Use Custom ” in the pop-up pane.
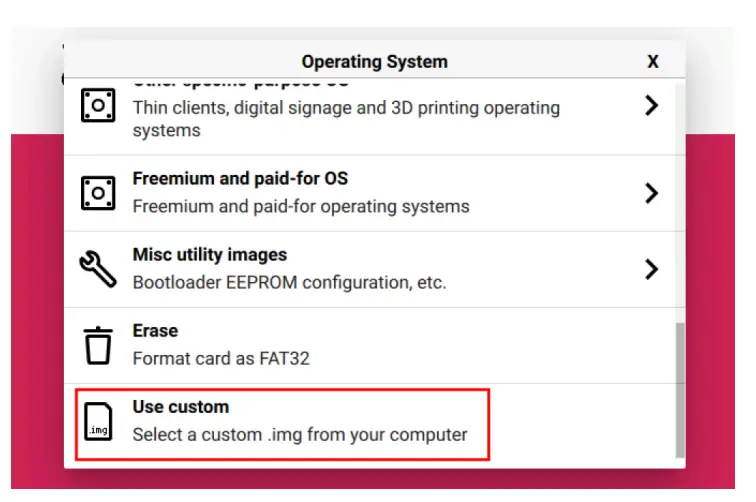
- According to the prompt, select the downloaded OS file under the user-defined path and return to the main page.
- Click “WRITE” and select “Yes” in the pop-up prompt box to start writing the OS.

- After the OS writing is completed, the file will be verified.

- After the file verification is completed, the prompt box “Write Successful” pops up, and click “CONTINUE” to finish flashing to eMMC.
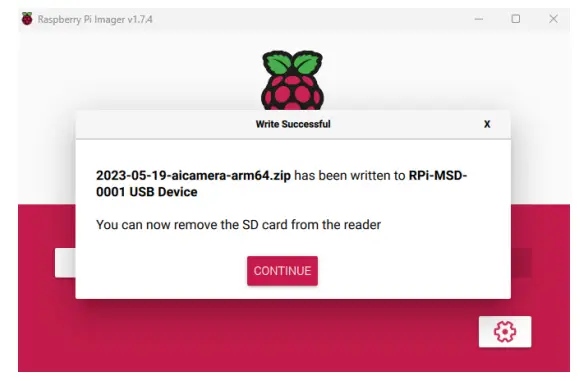
- Close Raspberry Pi Imager, remove USB cable and power on the device again.
First boot-up Configuration
This section introduces the relevant configurations when users start the system for the first time.
Standard Raspberry Pi OS (Desktop)
If you use the Desktop version of standard Raspberry Pi OS, and the OS is not configured in the advanced settings of Raspberry Pi Imager before flashing to eMMC. The initial configuration needs to be completed when the system is first started.
Preparation
- Accessories such as display, mouse, keyboard and power adapter that can be used normally have been ready.
- A network that can be used normally.
- Get the HDMI cable and network cable that can be used normally.
Steps
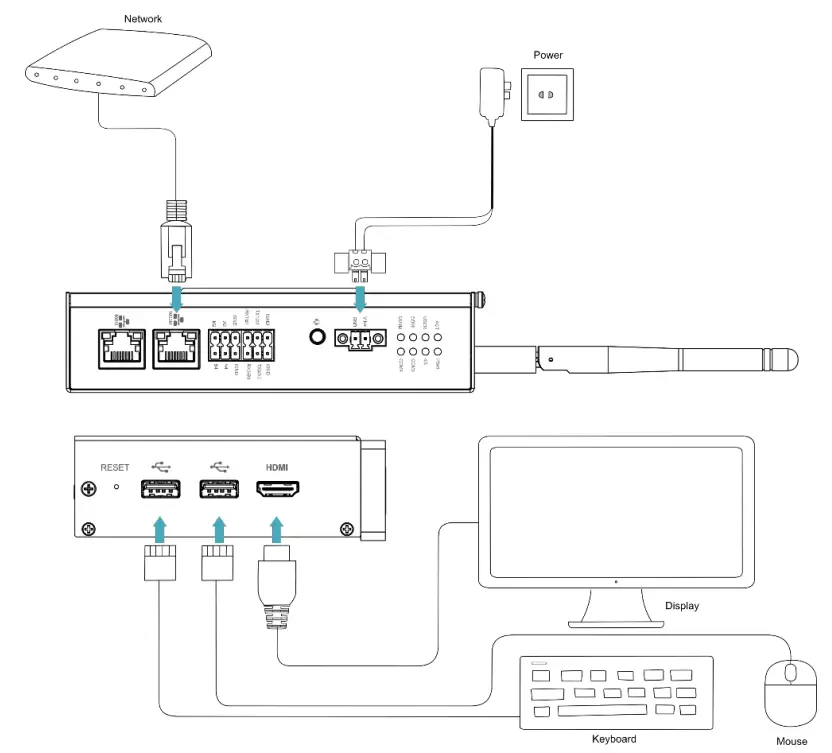
- Connect the device to the network through a network cable, connect the display through an HDMI cable, and connect the mouse, keyboard, and power adapter.
- Power on the device and the system will start. After the system starts normally, the “Welcome to Raspberry Pi Desktop” pane will pop up.

- Click “Next” and set parameters such as “Country”, “Language” and “Timezone” in the pop- up “Set Country” pane according to actual needs.
 TIP:
TIP:
The default keyboard layout of the system is the British keyboard layout, or you can check “Use US keyboard” as needed. - Click “Next” to customize and create “username” and “password” for logging in to the system in the pop-up “Create User” pane.

- Click “Next”:
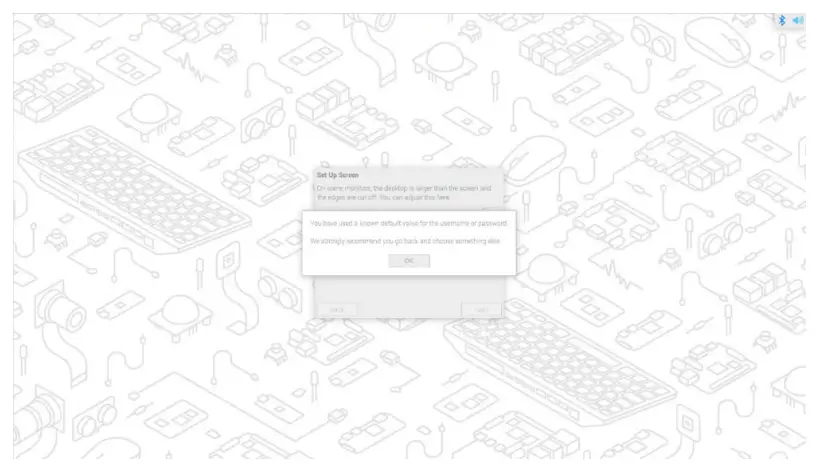
- If you use the old version of the default username pi and default password raspberry when creating the username and password, the following prompt box will pop up and click “OK”.
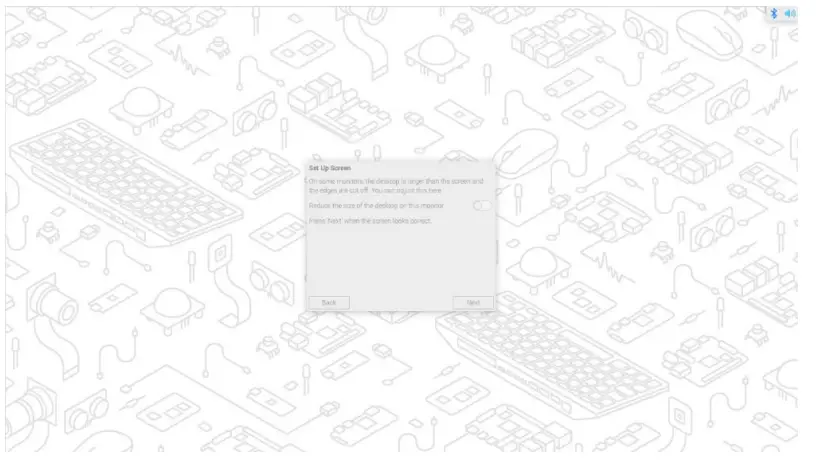
- The “Set Up Screen” pane pops up, and related parameters of screen are set as required.
- If you use the old version of the default username pi and default password raspberry when creating the username and password, the following prompt box will pop up and click “OK”.
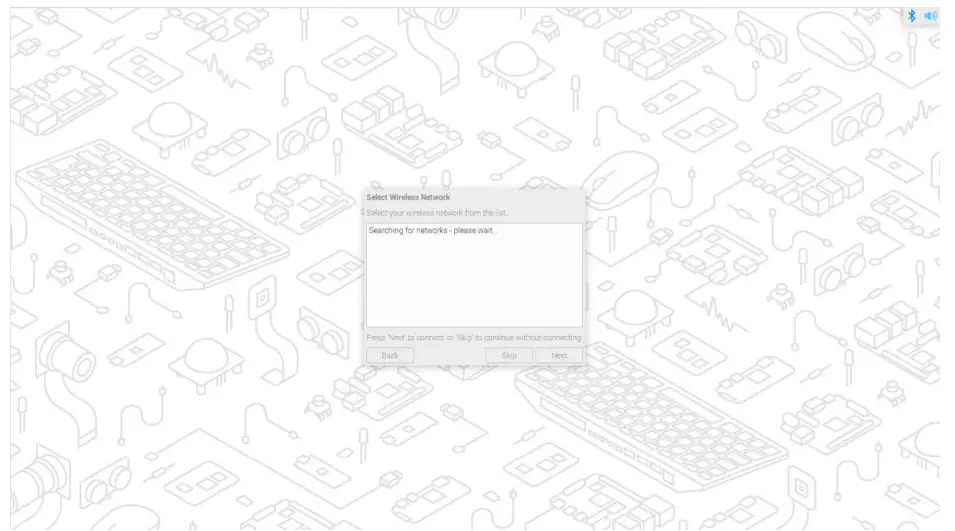
- (Optional) Click “Next” and select the wireless network to be connected in the pop-up “Select WiFi Network” pane.
 TIP:
TIP:
If you buy a product without Wi-Fi function, there is no such step. - (Optional) Click “Next” and enter the password of wireless network in the pop-up “Enter WiFi Password” pane.
TIP:
If you buy a product without Wi-Fi function, there is no such step. - Click “Next”, then click “Next” in the pop-up “Update Software” interface to automatically check and update the software.
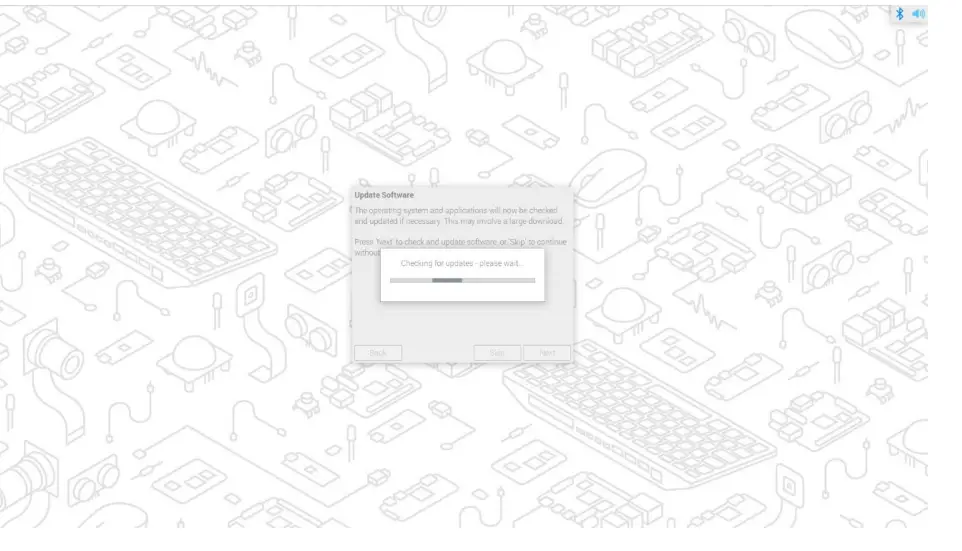
- After checking and updating the software, click “OK”, then click “Restart” in the pop-up “Setup Complete” pane to complete the initial configuration and start the system.

- After startup, enter the OS desktop.
NOTE
There may be slight differences in the initial configuration of different versions of Raspberry Pi OS, please refer to the actual interface. For related operations, please refer to
https://www.raspberrypi.com/documentation/computers/getting-started.html#getting-started-with-your-raspberry-pi.
Standard Raspberry Pi OS (Lite)
If you use the Lite version of standard Raspberry Pi OS, and the OS is not configured in the advanced settings of Raspberry Pi Imager before flashing to eMMC. The initial configuration needs to be completed when the system is first started.
Preparation
- Accessories such as display, mouse, keyboard and power adapter that can be used normally have been ready.
- A network that can be used normally.
- Get the HDMI cable and network cable that can be used normally.
Steps
- Connect the device to the network through a network cable, connect the display through an HDMI cable, and connect the mouse, keyboard, and power adapter.

- Power on the device and the system will start. After the system starts normally, the “Configuring keyboard-configuration ” pane will pop up. You need to set up a keyboard according to the actual needs.

- Select “OK”, then you can start creating a new username in the pane.

- Select “OK”, then you can start setting a password for the new user in the pane.
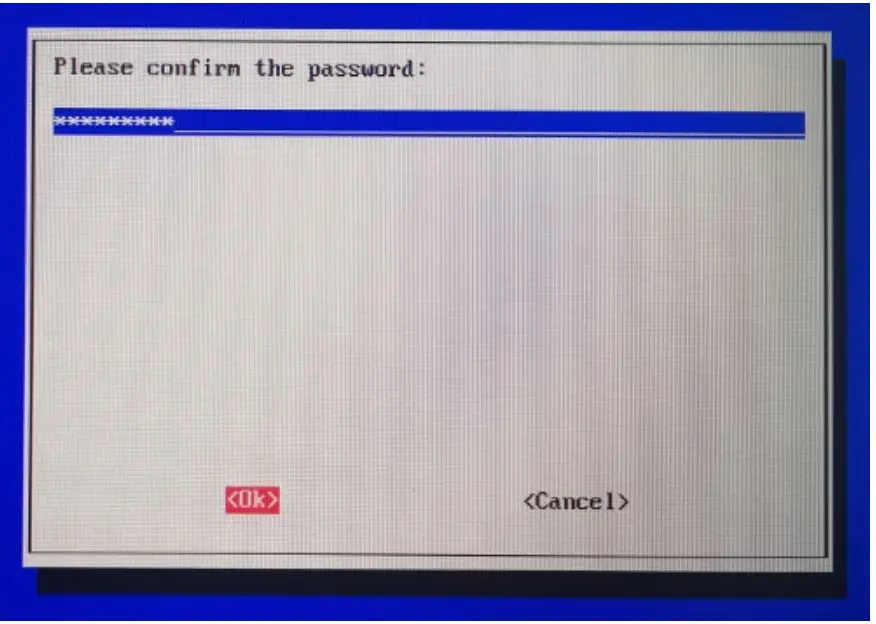
- Select “OK”, then input the password again in the pane.
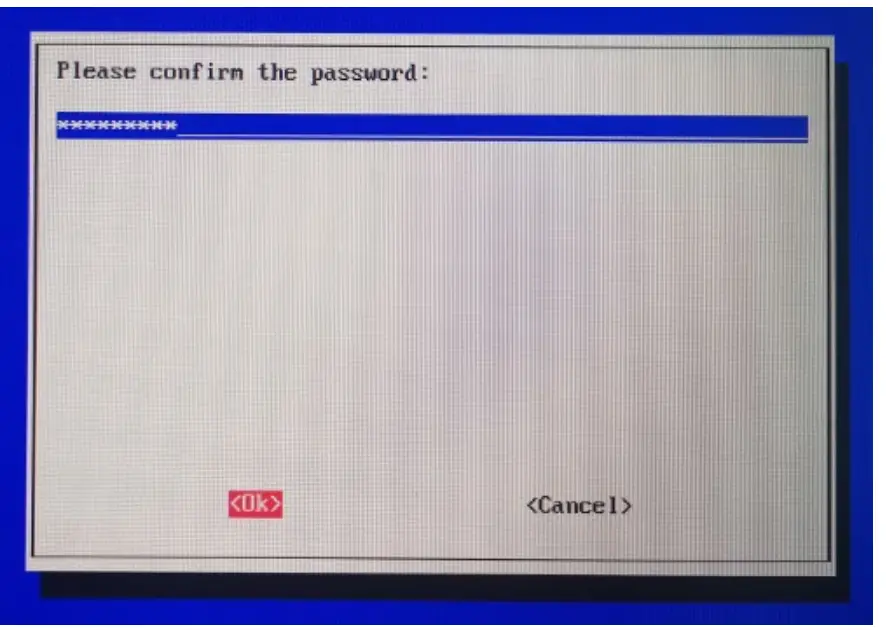
- Select “OK” to complete the initial setup and enter the login interface.
- According to the prompt, enter the username and password to log in the system. After the startup is completed, enter the operating system.
Installing Firmware Package
This section introduces the specific operations of installing the firmware package on the standard Raspberry Pi OS. It is compatible with the standard Raspberry Pi OS (bookworm, Debian 12) and the standard Raspberry Pi OS (bullseye, Debian 11).
Debian 11 (bullseye)
After flashing to eMMC of the Raspberry Pi OS (bullseye) on the ED-IPC2100 series, you can configure the system by adding the edatec apt source, installing the kernel package and installing the firmware package, so that the system can be used normally.
Preparation
The flashing to eMMC and startup configuration of the Raspberry Pi standard OS (bullseye) have been completed.
Steps
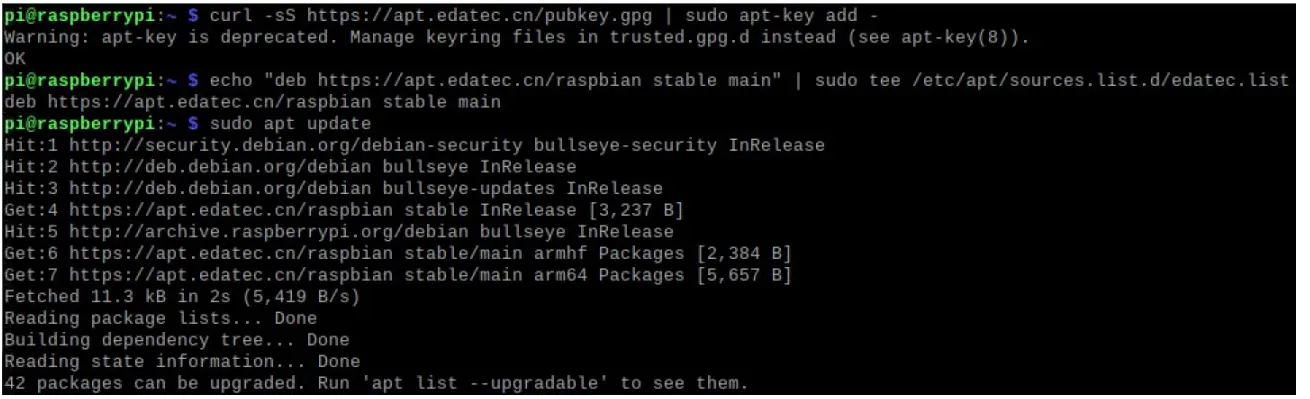
- After the device starts normally, execute the following commands in the command pane to add the edatec apt source. curl -sS https://apt.edatec.cn/pubkey.gpg | sudo apt-key add – echo “deb https://apt.edatec.cn/raspbian stable main” | sudo tee /etc/apt/sources.list.d/edatec.list sudo apt update
- Execute the following command to install the kernel package.
sudo apt install -y raspberrypi-kernel - Execute the following command to install the firmware package.
sudo apt install -y ed-ipc2110-firmware
TIP:
If you have installed the wrong firmware package, you can execute “sudo apt-get –purge remove package” to delete it, where “package” is the package name. - After the installation is completed, execute the following command to check whether the firmware package is installed successfully.

- Execute the following command to restart the device.
sudo reboot
Debian 12 (bookworm)
After flashing to eMMC of the Raspberry Pi OS (bookworm) on the ED-IPC2100 series, you can configure the system by adding the edatec apt source, installing the kernel package, installing the firmware package, and disabling raspberry kernel upgrade, so that the system can be used normally.
Preparation
The flashing to eMMC and startup configuration of the Raspberry Pi standard OS (bookworm) have been completed.
Steps
- After the device starts normally, execute the following commands in the command pane to add the edatec apt source.
curl -sS https://apt.edatec.cn/pubkey.gpg | sudo apt-key add -echo “deb https://apt.edatec.cn/raspbian stable main” | sudo tee /etc/apt/sources.list.d/edatec.list
sudo apt update
- Execute the following command to install the kernel package.
sudo apt install -y ed-linux-image-6.1.58-v8
curl -s ‘https://apt.edatec.cn/downloads/202403/kernel-change.sh‘ | sudo bash -s 6.1.58-rpi7-rpi-v8 - Execute the following command to install the firmware package.
sudo apt install -y ed-ipc2110-firmware
TIP:
If you have installed the wrong firmware package, you can execute “sudo apt-get –purge remove package” to delete it, where “package” is the package name. - Execute the following command to disable raspberry kernel upgrade.
dpkg -l | grep linux-image | awk ‘{print $2}’ | grep ^linux | while read line; do sudo apt-mark hold $line; done - After the installation is completed, execute the following command to check whether the firmware package is installed successfully.
dpkg -l | grep ed-ipc2110-firmware
The result in the picture below indicates that the firmware package has been installed successfully.  Execute the following command to restart the device.
sudo reboot
Firmware Update (Optional)
After the system starting normally, you can execute the following commands in the command pane to upgrade the system firmware and optimize the software functions.
TIP:
If you have a software problems when using ED-IPC2100 series products, you can try to upgrade the system Firmware.
- sudo apt update
- sudo apt upgrade
Documents / Resources
 |
EDA ED-IPC2100 Series Using Standard Raspberry [pdf] User Guide ED-IPC2100 Series Using Standard Raspberry, ED-IPC2100 Series, Using Standard Raspberry, Standard Raspberry, Raspberry |


