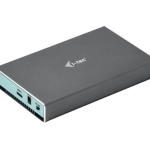
EDA TEC CM4 IO Board Metal Case with External Antenna and Cooling Fan

Special Notice:
ON/OFF switch of CM4 IO Case is driven by Bootloader & 40pin GPIO driver of CM4, so it controls the system on/off by software. It is not a traditional switch which cut off or turn on the power supply of the board. Forcing the power shutdown during CM4 operation may damage the file system and cause the system crash. It is highly recommended to implement the system on/off by our software code.
GPIO3 on 40pin connector is used for one-click switch. We define the signal as a GPIO instead of SCL1 of I2C. Please remap the I2C function to another pin since this signal has been used to implement one-click switch function.
Fan is directly powered by +12V DC power, the system doesn’t control the fan, if you want to turn off the fan after the system is shut down, you have to remove the power system of CM4 IO board. We will upgrade the fan and software in next version.
Preparation
The following hardware and software should be prepared before you start.
| rpiboot server | Linux host to program the bootloader into CM4 ( we use PI3B+ as a host in the document, you can use Pi4 or other Raspberry Pi
computer) |
| CM4 IO Board | A CM4 IO board with CM4 installed |
| CM4 IO case | A CM4 IO case with a switch |
| Micro USB
cable |
A standard USB plug on one end, a Micro USB plug on the other
end. |
| Dupont cable | Prevent CM4 IO from booting normally. |
| Power supply | 12V/2A DC, provide power for CM4 IO. |
Software Installation
Modify Bootloader
- Firstly test whether the bootloader on your CM4 supports software boot. Power on CM4 and type the following command:
pi@raspberrypi:~ $ vcgencmd bootloader_config As above shows, if there appears “WAKE_ON_GPIO=1” and
“POWER_OFF_ON_HALT=0”, then you can skip the step 2.1 and turn to step 2.2 “Change the Device Tree File”. If not, continue this section.
Boot Pi3B+, open the terminal after the system boot up, type the following command step by step. - Download the USB programming tool
git clone –depth=1 https://github.com/raspberrypi/usbboot
- Install the lib library
pi@raspberrypi:~/work/test1 $ sudo apt install libusb-1.0-0-dev
- Go to the downloaded usbboot folder
pi@raspberrypi:~/work/test1 $ cd usbboot/ - Compile usbboot
pi@raspberrypi:~/work/test1/usbboot $ sudo make
- Replace the files in the recovery directory with the “recovery folder” we provide.
- Connect PI3B+ and CM4 IO Board through a USB cable, please check the below connection.

- Connect the pin1 and pin2 of J2 by a Dupont cable, as shown in the following image.

- Run “rpiboot” on PI3B+, prepare for the bootloader burning and wait the CM4 IO board power on.
pi@raspberrypi:~/work/test1/usbboot $ sudo ./rpiboot -v -d recovery/ - Power CM4 IO on, then the following print information appears at the terminal of PI3B+.

- When the installation is complete, power CM4 off and remove the Dupont cable & USB cable.
Modify the Device Tree File
Configure GPIO3
Power on the CM4 again, open the terminal after the system boot up, type the following command step by step.
- View the status of each pin
pi@raspberrypi:~ $ sudo raspi-gpio get We just need to check the function of GPIO3 to make sure GPIO3 is configured as a normal GPIO function. If the GPIO3 in your CM4 IO is configured as with I2C function, you will need to overwrite the CM4 device tree file under the boot folder with the “bcm2711-rpi-cm4.dtb” we provide.
pi@raspberrypi:~ $sudo mv xxx/bcm2711-rpi-cm4.dtb /boot/bcm2711-rpi-cm4.dtb - Reboot
pi@raspberrypi:~ $ sudo reboot
Modify config.txt file
Type the following command at the terminal of CM4 IO.
- Open /boot/config.txt
pi@raspberrypi:~ $ sudo nano /boot/config.txt - Add “dtoverlay=gpio-shutdown”to config.txt file, as the following image shows.

- Save and exit when it is complete, execute the following command to shut down. pi@raspberrypi:~ $ sudo poweroff
- After the system shuts down, power off CM4 IO. Connect the two Dupont cables of the switch inside the case with CM4 IO, the red cable is connected to Pin3 and the black cable is connected to Pin39, as the following pictures show.

- Once connected, power CM4 IO on. When the system starts normally, the installation of the switch software is finished.
Documents / Resources
 |
EDA TEC CM4 IO Board Metal Case with External Antenna and Cooling Fan [pdf] Installation Guide CM4, IO Board Metal Case with External Antenna and Cooling Fan, CM4 IO Case |