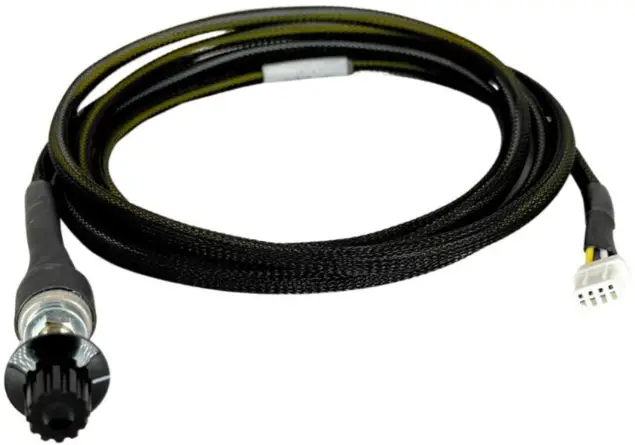
DieselModules 20250 Pro Edition Module
Important Pre-Install Info
What you will need:
- Pro Edition Module
- 20 minutes of your time


Be sure your truck has been off with the hood unlatched and key fob located away from the vehicle for at least 20 minutes before installing your module.
- The Key fob must be away from the vehicle for the entire installation process.
www.DieselModules.com (866)406-3777
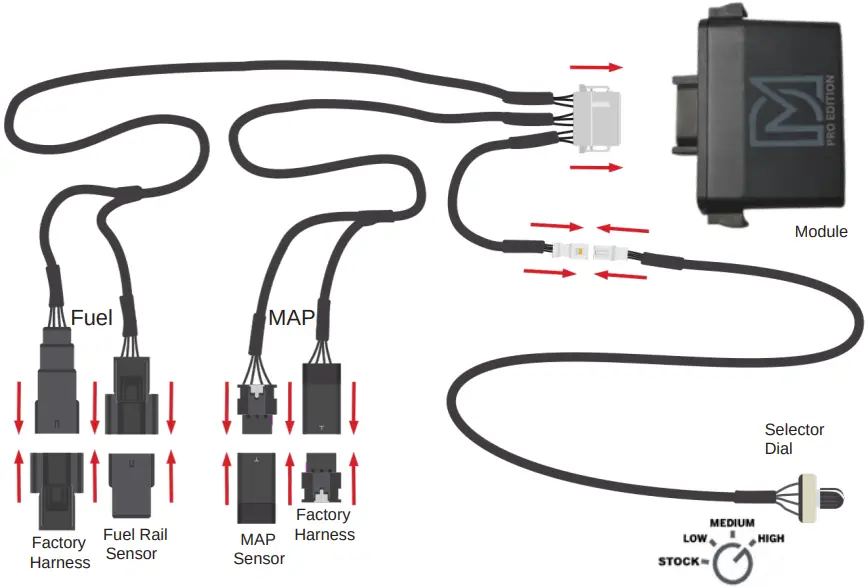
Harness Layout
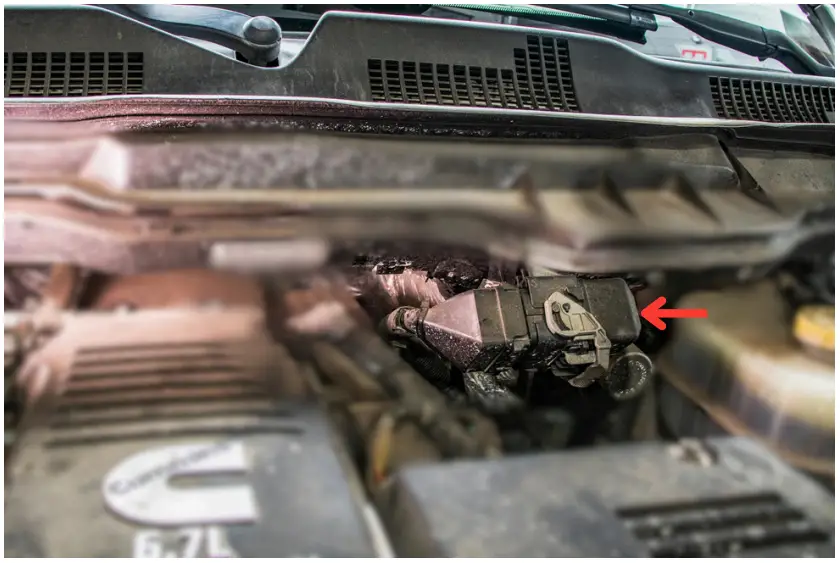
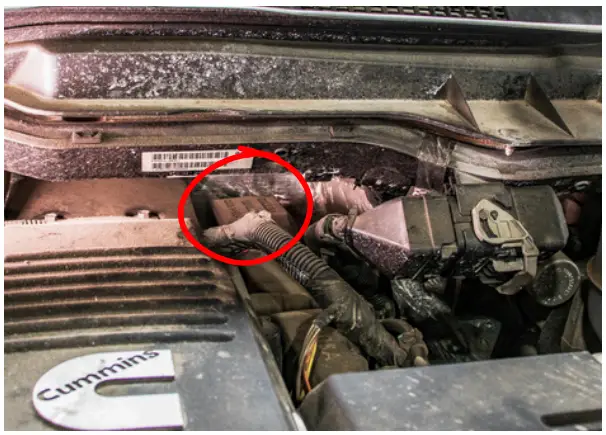
Moving Junction Box
First
Locate the Electrical Junction Box (right side of the engine at the firewall)
Fuel Rail Sensor Connection
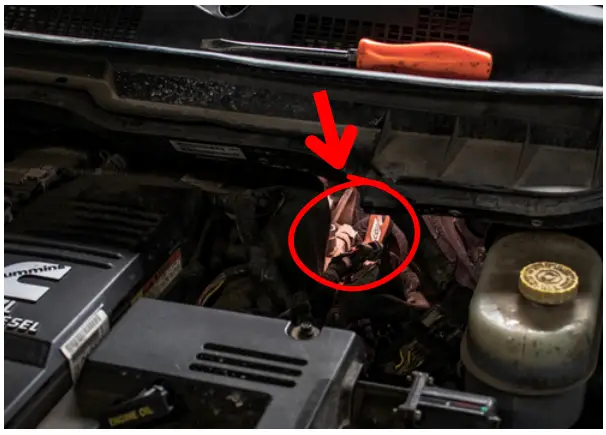
Step One
From above and the right side, slide a small screwdriver behind the junction. Lightly pull the screwdriver toward you to release the lock tab, while pulling the junction toward the engine with your left hand. Once it is released, move it to the side…
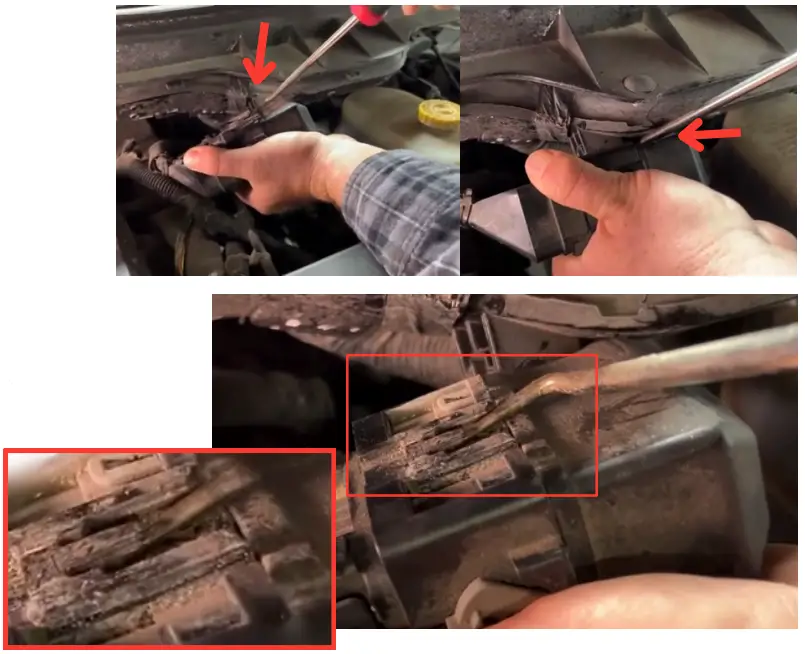
Lift the black insulation (circled in red) out of the way and tuck it to the side to allow easy access to the back of the fuel rail and the pressure sensor mounted to it.
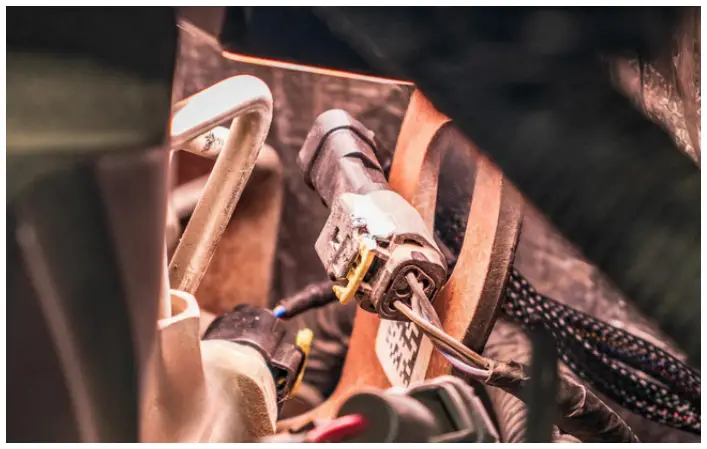
Step Two
Locate the fuel pressure sensor. Slide the yellow lock tab out, squeeze latch and remove connector.
NOTE: Due to the tight quarters, it is best to slide your right arm in near the battery and in front of the brake fluid reservoir.
This will allow an unobstructed view and easier access to the sensor.
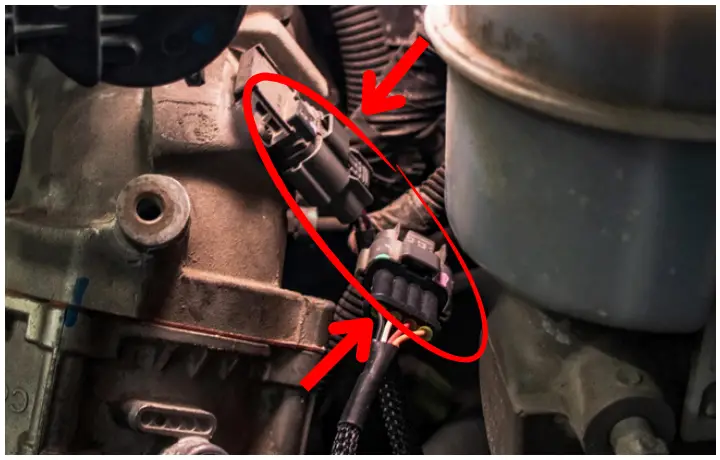
Map Sensor Connection
Step Three
Plug the female end of the module harness into the fuel pressure sensor and the male harness into the connector that you disconnected from it.
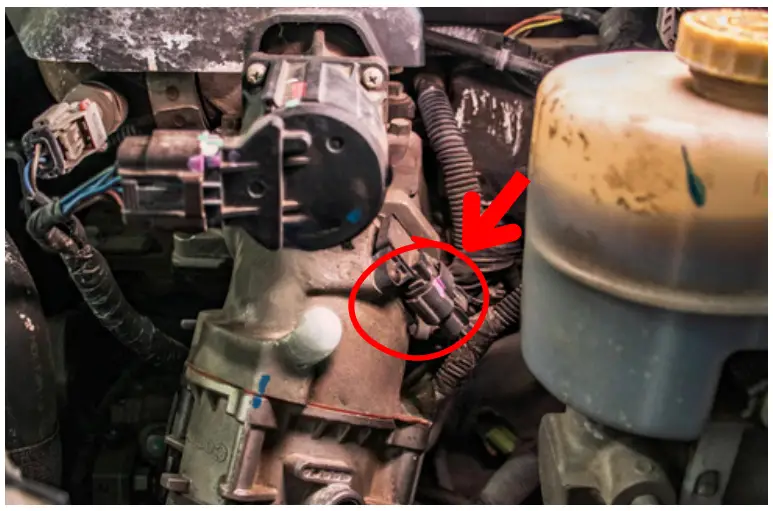
Step Four
Locate the Manifold Absolute Pressure (MAP) sensor connector, located on the drivers side on the intake manifold.
Press down on the grey tab and unplug the connectors.
Map Sensor/Module Connection
Step Five
Plug the module’s female end into the MAP sensor and the male end into the connector that you disconnected.
Step Six
Install grey wiring harness into the module and press firmly to ensure both locking tabs are fully seated.
Connect the switch to our harness.

Power Selector Dial
Step Seven
Connect “F” from the wire harness provided into the Selector Dial.
Step Eight
Use the zip ties provided to secure your module away from moving parts and extreme heat. The selector dial can be mounted under the hood or in the cab.

Low: Heavy Towing
Medium: Daily Driving
High: Maximum Power
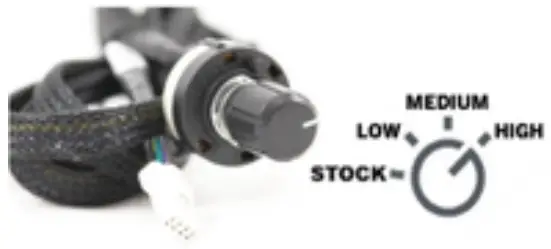
*Once installed, we recommend you set your selector switch on the (low) setting for the first tank of fuel to allow for your truck’s Adaptive Learning.
Customer Support
Important Info.
While this product is Warranty-Friendly SM and does not change or delete any stock settings or equipment, we recommend you “Take it off – Before you take it in” for service, while under warranty, to avoid visual contact.
If you have questions please contact technical support at:
(866)406-3777 ex. 2 or email us at: tech@dieselmodules.com

Documents / Resources
 |
DieselModules 20250 Pro Edition Module [pdf] Instruction Manual 20250, 20250 Pro Edition Module, Pro Edition Module, Edition Module, Module |