Einführung
The HelloBaby L55 Baby Monitor Floor Stand provides a stable and adjustable mounting solution for your baby monitor camera. Designed for ease of use and safety, this stand eliminates the need for drilling or wall mounting, offering flexible placement and optimal viewing angles. Its telescopic design allows for height adjustments, and the flexible gooseneck ensures precise camera positioning.
Einrichtung und Montage
Follow these steps to assemble your HelloBaby L55 Baby Monitor Floor Stand and attach your camera.
1. Komponenten auspacken
Carefully remove all components from the packaging. Ensure you have the base, telescopic pole sections, flexible gooseneck, and the 1/4-inch threaded screw adapter.
2. Assemble the Stand Pole
- Insert the bottom pole section into the designated hole on the stand's base. Twist clockwise to secure it firmly.
- Connect the middle pole sections by twisting them together clockwise until they are securely joined.
- Attach the assembled pole sections to the base by twisting clockwise.

Figure 1: Fully assembled stand with a baby monitor camera.
3. Attach the Flexible Gooseneck
Screw the flexible gooseneck onto the top of the assembled pole. Ensure it is tightened securely to prevent wobbling.

Figure 2: The flexible gooseneck attaches to the top pole section.
4. Mount the Baby Monitor Camera
The stand is compatible with HelloBaby monitor models HB6550, HB6550-2, HB6560, HB6560-2, HB6550Plus, HB6081, HB6339, HB66, HB66Pro, HB65, HB40, HB6351, and other cameras with a standard 1/4-inch threaded screw mount.
- Locate the 1/4-inch threaded screw hole on the bottom of your baby monitor camera.
- Align the camera's screw hole with the 1/4-inch threaded screw on the end of the flexible gooseneck.
- Twist the camera clockwise onto the screw until it is firmly attached. Do not overtighten.

Figure 3: The 1/4-inch threaded screw ensures broad compatibility.

Figure 4: Compatible HelloBaby baby monitor camera models.
Installationsvideo-Anleitung
Video 1: This video demonstrates the step-by-step installation process for the HelloBaby Baby Monitor Floor Stand, including assembling the pole sections and attaching the camera.
Betrieb
The HelloBaby L55 stand offers flexible positioning for optimal monitoring.
Höhe einstellen
The stand features a telescopic design, allowing height adjustment between 30 inches and 58.2 inches. To adjust the height, gently pull or push the upper pole section to the desired height. The internal locking mechanism will secure it in place. Ensure the stand is stable after adjustment.

Figure 5: The stand's adjustable height range.
Kamerawinkel anpassen
The flexible gooseneck allows for 360-degree rotation and bending to achieve any desired camera angle. Gently bend the gooseneck to position your camera for the best view of your baby. Ensure the gooseneck is securely holding the camera's position after adjustment.
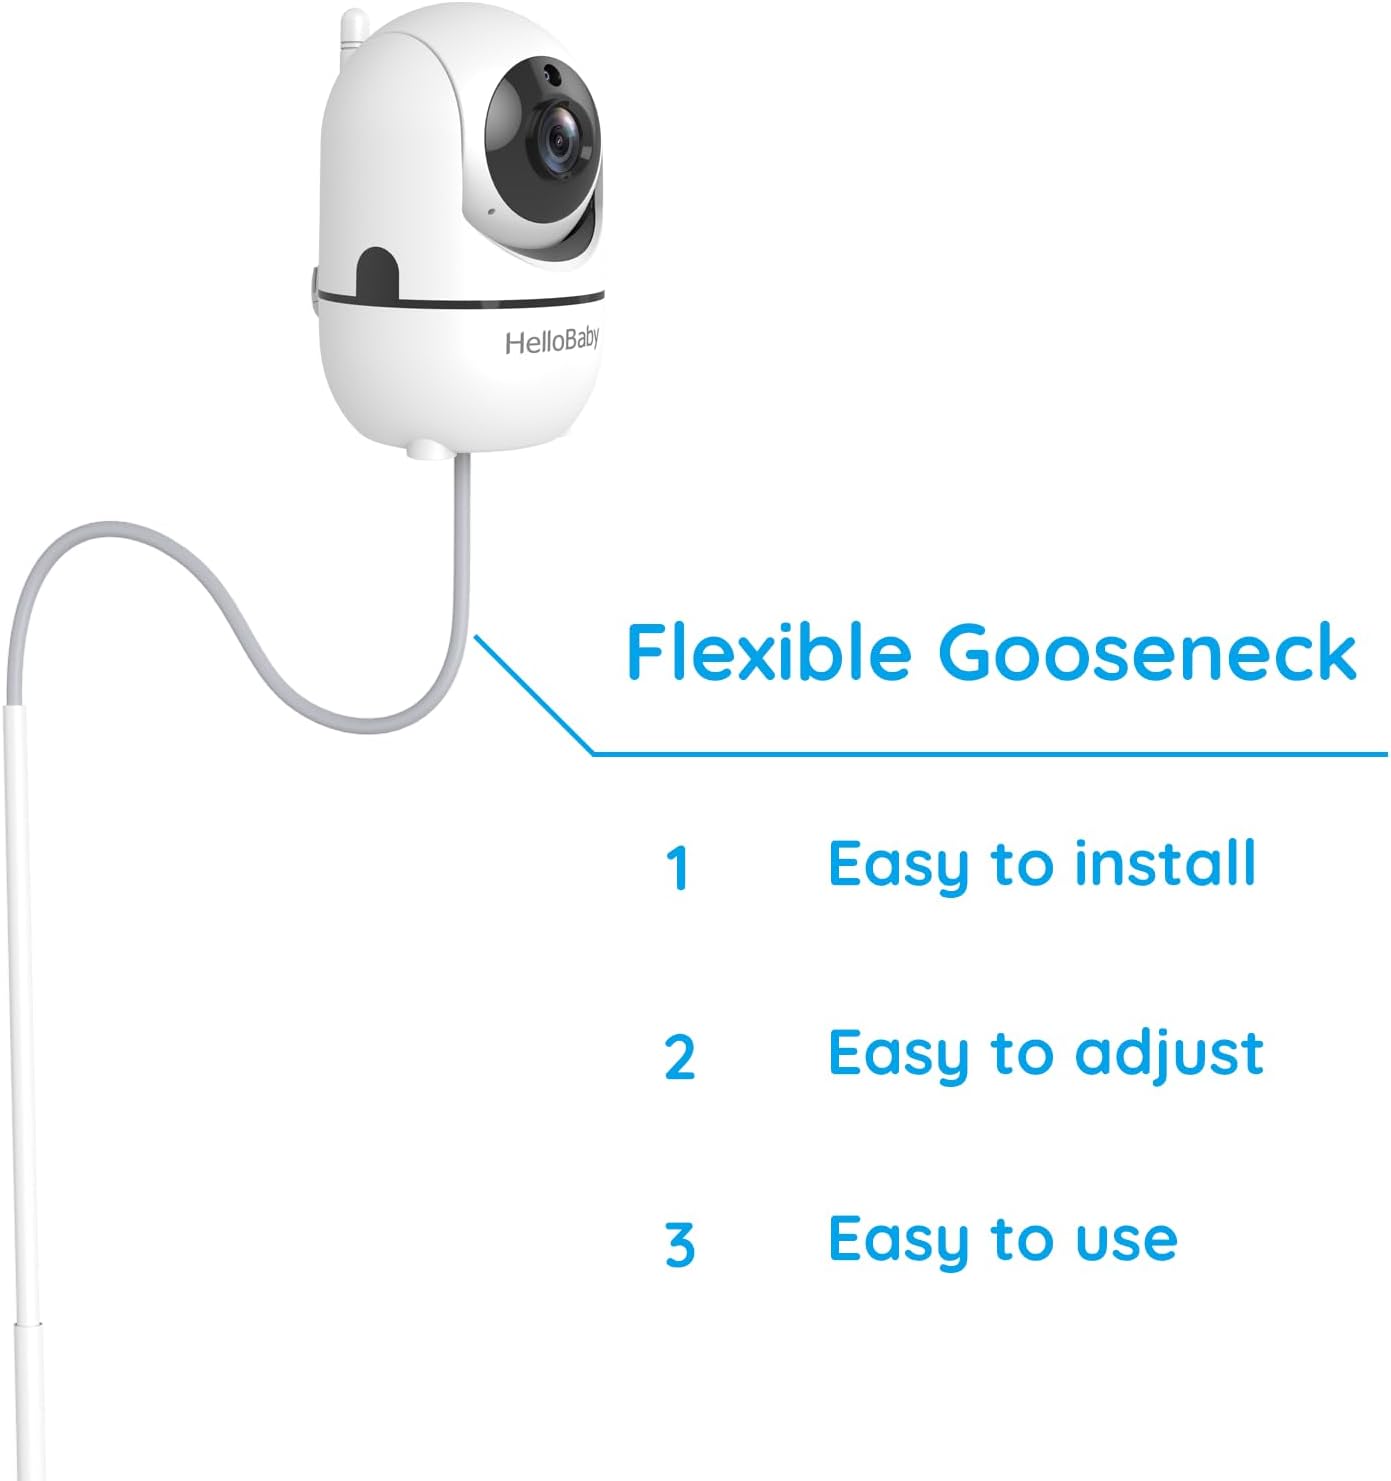
Figure 6: The flexible gooseneck allows for versatile camera positioning.
Sicherheitsaspekte
- Always ensure the stand is placed on a flat, stable surface to prevent tipping.
- Position the stand and camera so that power cords are out of reach of children to prevent entanglement hazards.
- Regularly check that all connections are secure and the camera is firmly attached to the gooseneck.
Wartung
To ensure the longevity and proper functioning of your HelloBaby L55 Baby Monitor Floor Stand, follow these maintenance guidelines:
- Reinigung: Wischen Sie den Ständer mit einem weichen, fusselfreien Tuch ab.amp Mit einem Tuch abwischen. Vermeiden Sie die Verwendung von Scheuermitteln oder Lösungsmitteln, da diese die Oberfläche beschädigen können.
- Inspektion: Periodically inspect all parts for any signs of wear, damage, or loose connections. If any damage is found, discontinue use and contact customer support.
- Lagerung: Wenn der Ständer nicht in Gebrauch ist, bewahren Sie ihn an einem kühlen, trockenen Ort fern von direkter Sonneneinstrahlung und extremen Temperaturen auf.
Fehlerbehebung
| Problem | Mögliche Ursache | Lösung |
|---|---|---|
| Der Ständer ist instabil oder wackelig. | Loose pole connections or uneven surface. | Ensure all pole sections are tightly screwed together and the stand is placed on a flat, level surface. |
| Camera does not attach securely. | Incorrect camera model or loose screw connection. | Verify your camera has a 1/4-inch threaded screw hole. Ensure the camera is twisted firmly onto the gooseneck's screw. |
| Der Schwanenhals hält die Position nicht. | Gooseneck not fully tightened or excessive weight. | Ensure the gooseneck is securely screwed into the top pole. The stand is designed for lightweight baby monitor cameras; avoid attaching heavier devices. |
Technische Daten
| Besonderheit | Detail |
|---|---|
| Modellnummer | L55 |
| Marke | hellobaby |
| Montagetyp | Bodenständer |
| Einstellbare Höhe | 30 Zoll bis 58.2 Zoll |
| Kompatible Geräte | HelloBaby HB6550/HB6560/HB6081/HB6550Plus/HB6339/HB66/HB66Pro/HB65/HB40/HB6351 & other cameras with 1/4-inch threaded screw |
| Artikelabmessungen (L x B x H) | 2 x 15.5 x 7.7 Zoll |
| Artikelgewicht | 3.72 Pfund (1.69 Kilogramm) |
| Im Lieferumfang enthaltene Komponenten | 1*Floor Stand |
| Verwendung im Innen- und Außenbereich | Innenbereich |
| Besonderheit | Tragbar |
Garantieinformationen
The HelloBaby L55 Baby Monitor Floor Stand comes with a manufacturer's warranty. For specific details regarding warranty coverage, duration, and terms, please refer to the warranty card included with your product or visit the official HelloBaby webBewahren Sie Ihren Kaufbeleg für Garantieansprüche auf.
Kundenservice
If you encounter any issues or have questions regarding your HelloBaby L55 Baby Monitor Floor Stand, please contact HelloBaby customer support. You can find contact information on the official HelloBaby weboder über den Händler, bei dem Sie das Produkt gekauft haben.
Für weitere Informationen und Produktaktualisierungen besuchen Sie bitte die HelloBaby Store auf Amazon.