1. Einleitung
Thank you for choosing the KODAK V500 Video Light. This professional-grade video light is designed to provide powerful, adjustable illumination for various photography and videography needs. Featuring a wide color temperature range from 2800K to 6500K, a high Color Rendering Index (CRI) of 96, and dimmable brightness, the V500 ensures accurate and versatile lighting. Its lightweight design, intuitive LCD display, and wireless remote control make it an essential tool for both studio and on-location use.
2. Wichtige Sicherheitshinweise
Please read all safety instructions carefully before using the KODAK V500 Video Light. Failure to follow these instructions may result in electric shock, fire, or serious injury.
- Nicht operate the light with wet hands or in wet conditions.
- Nicht block the ventilation openings on the light fixture. Overheating can cause damage or fire.
- Nicht look directly into the light source when it is operating at high brightness. This can cause eye damage.
- Keep the light away from flammable materials and liquids.
- Ensure the light is securely mounted on a stable stand before operation.
- Verwenden Sie ausschließlich das angegebene Netzteil und Zubehör.
- Vor der Reinigung oder bei Nichtgebrauch die Stromversorgung unterbrechen.
- Dieses Produkt ist kein Spielzeug. Außerhalb der Reichweite von Kindern aufbewahren.
- If any malfunction occurs, immediately disconnect power and contact customer support.
3. Packungsinhalt
Überprüfen Sie, ob alle Artikel in Ihrem Paket vorhanden sind:
- KODAK V500 Video Light Unit
- Drahtlose Fernbedienung
- Netzteil
- Standardreflektor
- Bedienungsanleitung
4. Produktüberschreitungview
Familiarize yourself with the components of your KODAK V500 Video Light and its remote control.
4.1. KODAK V500 Video Light Unit
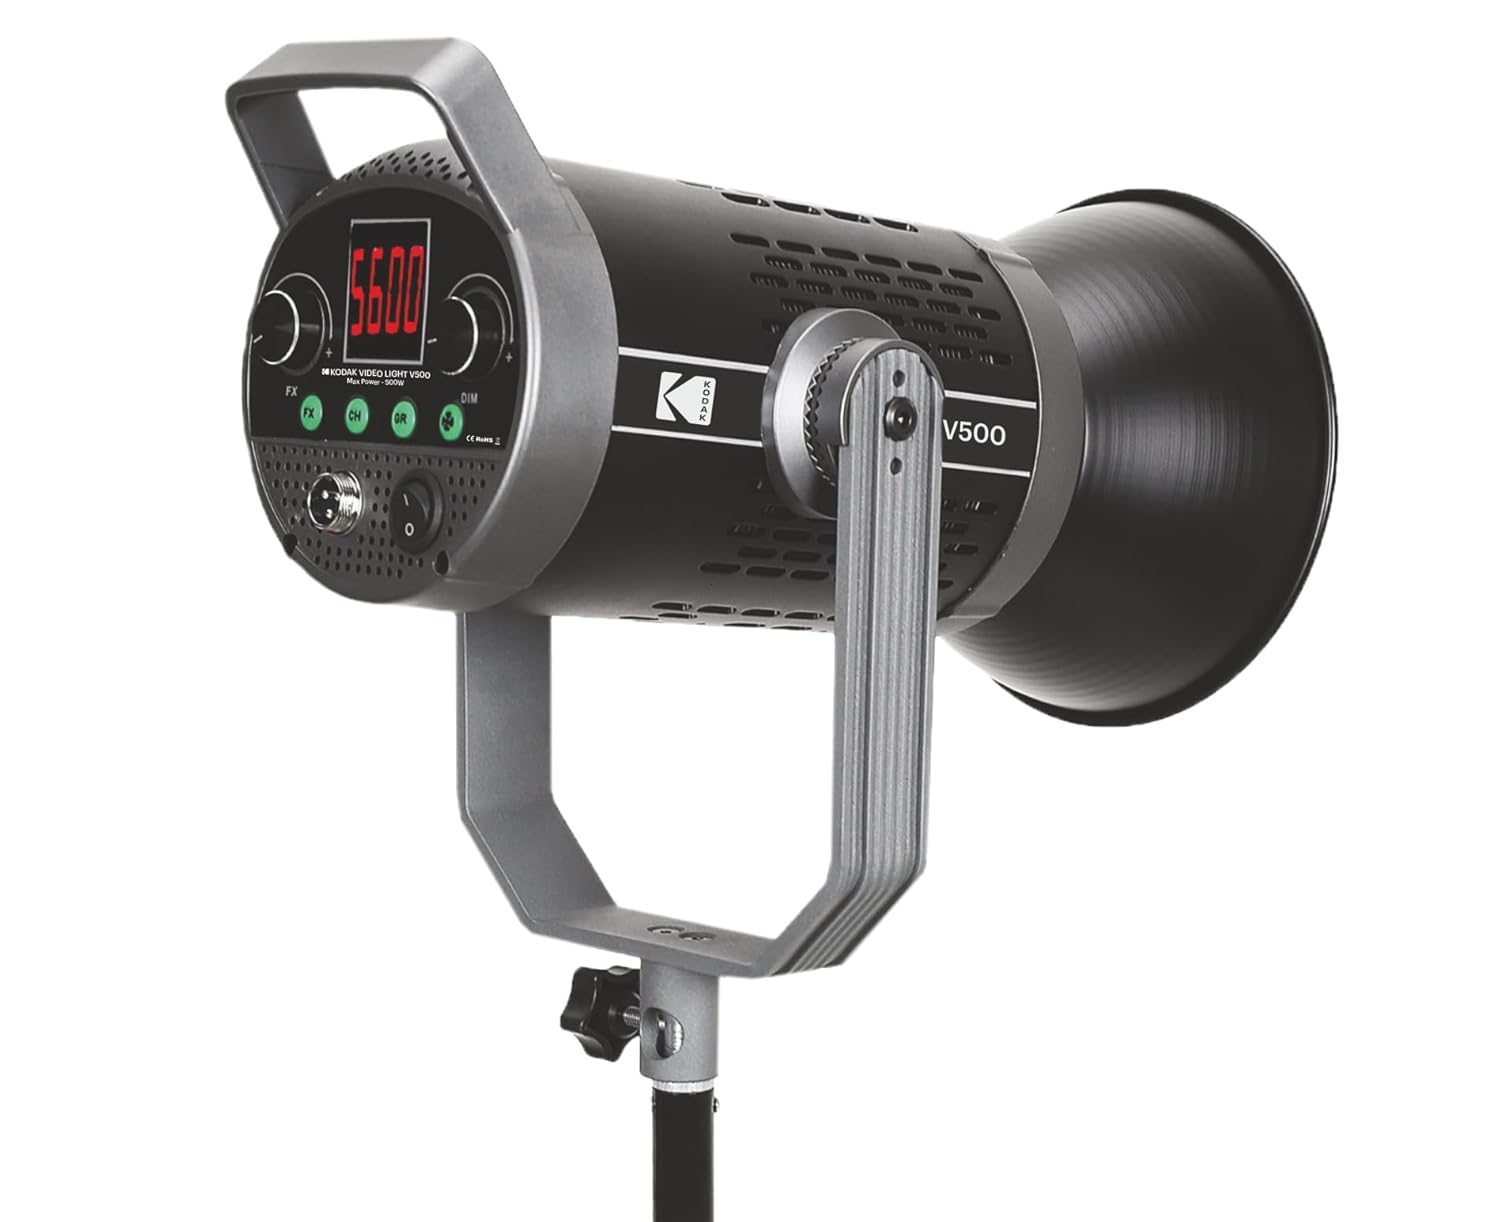
Abbildung 1: Front view of the KODAK V500 Video Light with reflector attached, mounted on a light stand.

Abbildung 2: Rear control panel of the KODAK V500 Video Light.
- Reflektor: Directs and focuses the light output.
- LED Lichtquelle: High-power LED array.
- Montagehalterung: Allows attachment to a light stand and adjustment of tilt angle.
- Feststellknopf: Secures the light's tilt angle.
- LCD Anzeige: Shows current settings such as color temperature, brightness, and channel/group.
- FX-Taste: Activates special effects modes (if available).
- CH/GR Buttons: Selects the operating channel or group for wireless control.
- DIM-Wähler: Adjusts brightness intensity.
- CCT-Zifferblatt: Adjusts color temperature (Correlated Color Temperature).
- Stromeingang (DC IN): Wird mit dem Netzteil verbunden.
- Stromschalter: Schaltet das Licht EIN oder AUS.
4.2. Drahtlose Fernbedienung

Abbildung 3: KODAK V500 Wireless Remote Control.
- Netzschalter: Schaltet das Licht EIN oder AUS.
- CCT/MODE Button: Switches between Color Temperature adjustment and other modes.
- Set-Taste: Confirms selections or enters menu.
- +/- Tasten: Adjusts values (brightness, color temperature) or navigates menus.
- KODAK Logo: Markenidentifikation.
5. Einrichtungsanweisungen
Follow these steps to set up your KODAK V500 Video Light for use.
- Montage der Leuchte:
- Attach the KODAK V500 Video Light to a compatible light stand using the mounting bracket.
- Tighten the locking knob on the light stand to secure the light.
- Adjust the tilt angle of the light using the locking knob on the light's mounting bracket, then tighten to secure.
- Anbringen des Reflektors:
- Align the reflector with the front of the light unit.
- Drehen Sie den Reflektor im Uhrzeigersinn, bis er sicher einrastet.
- Strom anschließen:
- Connect the power adapter cable to the DC IN port on the rear of the light unit.
- Stecken Sie das Netzteil in eine geeignete Steckdose.
6. Bedienungsanleitung
Learn how to power on, adjust settings, and utilize the features of your KODAK V500 Video Light.
6.1. Ein-/Ausschalten
Drücken Sie die Netzschalter on the rear control panel of the light unit to turn the light ON or OFF. Alternatively, use the Netzschalter auf der drahtlosen Fernbedienung.
6.2. Einstellen der Helligkeit
The KODAK V500 offers dimmable brightness control:
- Zur Leuchteinheit: Drehen Sie den DIM-Wählscheibe clockwise to increase brightness and counter-clockwise to decrease brightness. The brightness level will be displayed on the LCD.
- Verwenden der Fernbedienung: Drücken Sie die +/- Tasten um die Helligkeitsstufe anzupassen.
6.3. Farbtemperatur anpassen
The color temperature can be adjusted from 2800K (warm) to 6500K (cool):
- Zur Leuchteinheit: Drehen Sie den CCT-Zifferblatt clockwise to increase the color temperature (cooler light) and counter-clockwise to decrease it (warmer light). The color temperature will be displayed on the LCD.
- Verwenden der Fernbedienung: Drücken Sie die CCT/MODE Button to enter CCT adjustment mode, then use the +/- Tasten to change the color temperature.
6.4. Wireless Control (Channel and Group)
The KODAK V500 supports wireless control, allowing you to manage multiple lights simultaneously.
- Setting Channel (CH): Drücken Sie die CH-Taste on the light unit or remote. Use the +/- Tasten (on remote) or DIM/CCT Dials (on light) to select a channel (e.g., 1-16). Ensure all lights you wish to control together are set to the same channel.
- Setting Group (GR): Drücken Sie die GR-Taste on the light unit or remote. Use the +/- Tasten (on remote) or DIM/CCT Dials (on light) to select a group (e.g., A, B, C). This allows for independent control of lights within the same channel but different groups.
- Koppeln der Fernbedienung: The remote should automatically pair with lights on the same channel and group. If not, ensure both the light and remote are set to the desired channel and group.
6.5. Special Effects (FX)
The KODAK V500 may include various special effects modes for creative lighting scenarios.
- Drücken Sie die FX-Taste on the light unit to cycle through available special effects.
- Verwenden Sie die DIM/CCT Dials to adjust parameters within the selected effect, if applicable.
7. Wartung
Proper maintenance ensures the longevity and optimal performance of your KODAK V500 Video Light.
- Reinigung: Use a soft, dry cloth to wipe the exterior of the light. For stubborn dirt, a slightly damp Man kann ein Tuch verwenden und anschließend mit einem trockenen Tuch nachwischen. Nicht use harsh chemicals, solvents, or abrasive cleaners.
- Lagerung: Bewahren Sie die Lampe bei Nichtgebrauch an einem kühlen, trockenen Ort, fern von direkter Sonneneinstrahlung und übermäßiger Luftfeuchtigkeit auf.
- Linsenpflege: Keep the LED light source clean and free of dust. Use a lens blower or a soft brush to remove dust. Avoid touching the LED surface directly.
8. Fehlerbehebung
If you encounter issues with your KODAK V500 Video Light, refer to the following common problems and solutions.
| Problem | Mögliche Ursache | Lösung |
|---|---|---|
| Licht geht nicht an. | No power supply; Power adapter not connected; Power switch off. | Ensure power adapter is securely connected and plugged into a working outlet. Check if the power switch is in the ON position. |
| Fernbedienung funktioniert nicht. | Remote batteries low/dead; Incorrect channel/group setting; Obstruction between remote and light. | Replace remote batteries. Ensure the remote and light are set to the same channel and group. Remove any obstructions. Operate within effective range. |
| Helligkeit und Farbtemperatur können nicht angepasst werden. | Controls locked; Malfunction. | Check if any lock function is active (refer to advanced settings if applicable). If the issue persists, contact customer support. |
| Das Licht flackert oder verhält sich unregelmäßig. | Unstable power supply; Overheating; Internal fault. | Ensure a stable power source. Allow the light to cool down if it has been operating for an extended period. If the problem continues, discontinue use and contact support. |
9. Spezifikationen
Detailed technical specifications for the KODAK V500 Video Light.
| Besonderheit | Detail |
|---|---|
| Modellnummer | V500 |
| Leistungsabgabe | 500 W |
| Farbtemperaturbereich | 2800K - 6500K |
| Farbwiedergabeindex (CRI) | 96 |
| Helligkeitsanpassung | Dimmbar |
| Kontrollmethode | On-board controls, Wireless Remote Control |
| Produktabmessungen (L x B x H) | 33.5 x 19.5 x 15.5 cm |
| Artikelgewicht | 2.88 kg |
| Ursprungsland | China |
10. Garantie und Kundendienst
KODAK products are manufactured to high-quality standards. For warranty information, please refer to the warranty card included with your product or visit the official KODAK website. For technical assistance, troubleshooting, or service inquiries, please contact KODAK customer support.
Herstellerkontakt:
BHATIA PHOTO INDUSTRIES PVT LTD
Floor No.3, Kundan House, Nehru Place, New Delhi, Delhi, 110019
Kontakt: 9999535381
Email: Lapstuffmart204@gmail.com


