1. Einleitung
Vielen Dank für Ihren Einkauf.asing the Aspen 40-inch Washable Tower Fan. This manual provides important information regarding the safe operation, installation, maintenance, and troubleshooting of your new fan. Please read this manual thoroughly before use and retain it for future reference.
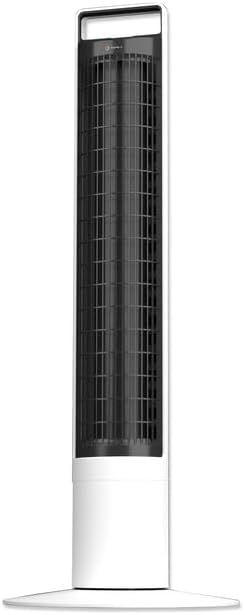
Bild: Vorderseite view of the Aspen 40-inch Washable Tower Fan.
2. Sicherheitshinweise
Beachten Sie beim Gebrauch elektrischer Geräte stets die grundlegenden Sicherheitsvorkehrungen, um das Risiko von Bränden, Stromschlägen und Verletzungen zu verringern.
- Betreiben Sie keinen Ventilator mit beschädigtem Kabel oder Stecker.
- Verlegen Sie das Kabel nicht unter Teppichen. Decken Sie das Kabel nicht mit Läufern oder ähnlichen Materialien ab. Verlegen Sie das Kabel nicht in Bereichen, in denen viel los ist und wo niemand darüber stolpern kann.
- Vor dem Bewegen, Reinigen oder Warten des Ventilators immer den Netzstecker ziehen.
- Do not immerse the main unit (base) in water or other liquids. Only the detachable tower is designed for washing.
- Ensure the fan is completely dry before reassembling and plugging in after cleaning.
- Dieser Ventilator ist nur für den Innenbereich geeignet.
3. Packungsinhalt
Überprüfen Sie, ob alle Komponenten im Paket vorhanden sind:
- Aspen 40-inch Tower Fan (Main Unit and Detachable Tower)
- Base Assembly (2 parts)
- Fernbedienung (inkl. 1 CR2-Batterie)
- Benutzerhandbuch (dieses Dokument)
4. Einrichtung
Befolgen Sie diese Schritte, um Ihren Turmventilator zusammenzubauen und aufzustellen:
- Basismontage: Connect the two halves of the base assembly. Align the fan tower with the assembled base and twist clockwise to secure it. A screwdriver may be needed for initial base assembly.
- Platzierung: Stellen Sie den Ventilator auf eine feste, ebene Fläche. Achten Sie darauf, dass um den Ventilator herum ausreichend Platz für eine optimale Luftzirkulation und Oszillation vorhanden ist.
- Stromanschluss: Stecken Sie das Netzkabel in eine normale Steckdose.

Image: Illustration of the fan base assembly process.
5. Bedienungsanleitung
Your Aspen Tower Fan can be operated using the control panel on top of the unit or the included magnetic RF remote control.
Funktionen des Bedienfelds und der Fernbedienung:

Image: Close-up of the fan's top control panel and the magnetic remote control, showing button functions.
- Ein-/Ausschalten: Drücke den Power Knopf (⏻) um den Ventilator ein- oder auszuschalten.
- Lüftergeschwindigkeit: Cycle through 4 fan speeds (Low, Medium, High, Turbo) by pressing the fan speed button (⇋).
- Schwingung: Drücken Sie die Oszillationstaste (↻) to activate or deactivate the 60-degree narrow-angle oscillation feature. This provides a consistent, focused breeze.

Image: Visual representation of the fan's 60-degree narrow-angle oscillation, showing airflow.
- Timer: Set the auto-off timer for up to 8 hours by pressing the timer button (◷). Each press adds an hour to the timer.
- Nachtlicht: Activate the 3-color LED nightlight by pressing the nightlight button (💡). Cycle through colors or turn off the light.

Image: The Aspen Tower Fan with its base illuminated by the built-in nightlight.
Praktische Funktionen:
- Tragegriff: The integrated handle on top of the fan allows for easy transport.

Image: A hand holding the fan by its convenient top carry handle.
- Magnetic Remote: The remote control magnetically attaches to the top of the fan for convenient storage.
6. Wartung
The Aspen Tower Fan features an easy-wash design for convenient cleaning. Regular cleaning ensures optimal performance and extends the life of your fan.
Cleaning the Detachable Fan Tower:
- Fernbedienung entfernen: First, remove the magnetic remote control from the top of the fan.
- Detach Tower: Twist the fan tower counter-clockwise from the base and gently pull it up to detach.
- Waschen: The detached fan tower can be washed or rinsed with soap and water. You can soak it or spray it with a water nozzle.
- Vollständig trocknen: Allow the fan tower to dry completely before reassembling. Ensure no moisture remains inside.
- Zusammenbauen: Align the line on the fan tower with the unlock symbol on the base, then push down and twist clockwise to lock it into place. Reinsert the remote.

Image: A person rinsing the detached fan tower with a shower head in a bathtub.

Image: A visual sequence showing a dusty fan, the rinsing process, and a clean, fresh fan.
Anleitungsvideo:
Video: Official Aspen video demonstrating how to clean the tower fan. This video shows the steps for detaching the tower, washing it, and reassembling it.
7. Fehlerbehebung
If you encounter issues with your Aspen Tower Fan, refer to the following common problems and solutions:
| Problem | Mögliche Ursache | Lösung |
|---|---|---|
| Der Ventilator schaltet sich nicht ein. | Kein Strom, Wackelkontakt, Batterie der Fernbedienung schwach. | Check power cord connection. Ensure outlet is working. Replace remote battery (CR2). |
| Reduzierter Luftstrom. | Dust buildup in tower. | Clean the detachable fan tower as per Maintenance section. |
| Der Ventilator macht ungewöhnliche Geräusche. | Obstruction, improper assembly. | Ensure no foreign objects are inside. Check if the tower is securely locked into the base. |
| Fernbedienung funktioniert nicht. | Battery depleted, obstruction between remote and fan. | Replace the CR2 battery in the remote. Ensure no objects are blocking the signal path. |
If the problem persists after trying these solutions, please contact Aspen customer support.
8. Spezifikationen
| Besonderheit | Detail |
|---|---|
| Marke | Espe |
| Modellname | Aspen Tower Fan Black (ASTF-A40-BLK) |
| Technische Daten | 12"T x 12"B x 41"H |
| Artikelgewicht | 9.9 Pfund |
| Farbe | Weiß |
| Stromquelle | Kabelgebundene Elektrik |
| Anzahl der Leistungsstufen | 4 Geschwindigkeiten |
| Kontrollmethode | Fernbedienung |
| Besondere Merkmale | Lightweight, Oscillating, Detachable for Washing, 3-Color Nightlight, 4 Timers, Magnetic RF Remote |
| Zimmertyp | Schlafzimmer, Wohnzimmer, Arbeitszimmer |
| Im Lieferumfang enthaltene Komponenten | Fernbedienung |
| Verwendung im Innen- und Außenbereich | Innenbereich |
| Batterien | 1 CR2-Batterie erforderlich (im Lieferumfang enthalten) |
9. Garantie und Support
Specific warranty details are not provided in this manual. For warranty information, product support, or to purchase replacement parts, please contact Aspen customer service.
You can visit the official Aspen store on Amazon for more information: Aspen Store


