1. Einleitung
This manual provides essential information for the safe and efficient operation of your Einhell Cordless Impact Drill TE-ID 18 Li Solo. This tool is a high-performance member of the Einhell Power X-Change family, designed for drilling and impact drilling tasks. Please read these instructions carefully before first use and keep them for future reference.

Figure 1: Einhell Cordless Impact Drill TE-ID 18 Li Solo. This image shows the main drill unit with an auxiliary handle and depth stop installed, ready for use. A battery is shown faded in the background, indicating it is not included.
2. Allgemeine Sicherheitshinweise
Always observe the following safety precautions when using power tools to reduce the risk of electric shock, fire, and serious injury.
- Sicherheit am Arbeitsplatz: Halten Sie Ihren Arbeitsbereich sauber und gut beleuchtet. Unordnung oder Dunkelheit erhöhen die Unfallgefahr. Betreiben Sie Elektrowerkzeuge nicht in explosionsgefährdeten Bereichen, z. B. in der Nähe von brennbaren Flüssigkeiten, Gasen oder Stäuben.
- Elektrische Sicherheit: Vermeiden Sie Körperkontakt mit geerdeten Oberflächen wie Rohren, Heizkörpern, Herden und Kühlschränken. Es besteht ein erhöhtes Risiko eines Stromschlags, wenn Ihr Körper geerdet ist.
- Persönliche Sicherheit: Always wear eye protection. Use hearing protection when operating impact drills. Wear a dust mask if drilling generates dust. Dress properly; avoid loose clothing or jewelry.
- Werkzeuggebrauch und -pflege: Wenden Sie keine Gewalt an. Verwenden Sie das für Ihren Anwendungszweck geeignete Elektrowerkzeug. Trennen Sie den Akku vom Elektrowerkzeug, bevor Sie Einstellungen vornehmen, Zubehör wechseln oder Elektrowerkzeuge lagern.
- Verwendung und Pflege des Akkuwerkzeugs: Laden Sie den Akku nur mit dem vom Hersteller angegebenen Ladegerät auf. Verwenden Sie Elektrowerkzeuge nur mit speziell dafür vorgesehenen Akkus.
3. Produktkomponenten
Familiarize yourself with the various parts of your Einhell Cordless Impact Drill for proper and safe operation.
- Schnellspannbohrfutter: Für schnellen und einfachen Bitwechsel.
- Moduswahlschalter: To switch between drilling and impact drilling.
- Speed Control Trigger: For variable speed adjustment.
- Vorwärts-/Rückwärtsschalter: To change rotation direction.
- Zusatzgriff: Bietet zusätzlichen Halt und Kontrolle.
- Tiefenstopp: Für eine präzise Steuerung der Bohrtiefe.
- Batterieschnittstelle: For connecting Power X-Change batteries (sold separately).
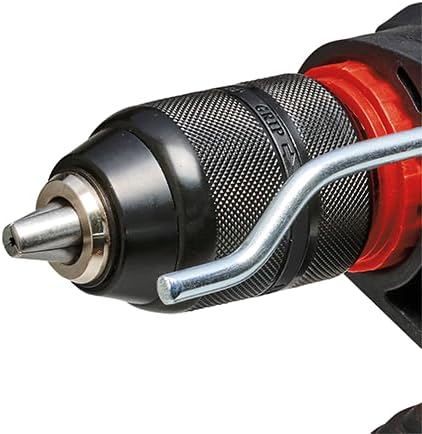
Abbildung 2: Nahaufnahme view of the 13 mm quick-change chuck. This component allows for tool-free bit changes.
4. Einrichtung
4.1 Battery Installation (Battery and Charger Not Included)
The Einhell TE-ID 18 Li Solo is part of the Power X-Change family and requires an 18V Power X-Change battery and charger, which are sold separately. Ensure the battery is fully charged before use.
- Align the charged Power X-Change battery with the battery interface on the base of the drill.
- Schieben Sie den Akku hinein, bis er sicher einrastet.
- Zum Entnehmen drücken Sie den Entriegelungsknopf an der Batterie und schieben diese heraus.

Figure 3: Illustration indicating that the battery and charger are not included with the drill unit. These items must be purchased separately as part of the Einhell Power X-Change system.

Abbildung 4: Überview of the Einhell Power X-Change system, demonstrating the wide range of compatible tools that can use the same battery. This highlights the modularity of the system.
4.2 Auxiliary Handle and Depth Stop Installation
- Den Hilfsgriff durch Drehen gegen den Uhrzeigersinn lösen.
- Schieben Sie den Griff auf die Vorderseite des Bohrmaschinenkörpers.
- Setzen Sie den Tiefenanschlag in die dafür vorgesehene Öffnung am Hilfsgriff ein.
- Adjust the auxiliary handle to a comfortable position and tighten it by rotating clockwise.
- Stellen Sie die gewünschte Bohrtiefe ein, indem Sie den Tiefenanschlag hinein- oder herausschieben.
4.3 Einsetzen von Bohrern
- Stellen Sie aus Sicherheitsgründen sicher, dass die Bohrmaschine ausgeschaltet und der Akku entfernt ist.
- Drehen Sie das Spannfutter gegen den Uhrzeigersinn, um die Backen zu öffnen.
- Führen Sie den Bohrer vollständig in das Bohrfutter ein.
- Rotate the chuck clockwise to securely tighten the jaws around the drill bit. Ensure the bit is centered and firmly gripped.
5. Bedienungsanleitung
5.1 Ein-/Ausschalten und Drehzahlregelung
The drill is activated by pressing the speed control trigger. The speed is variable, increasing with greater pressure on the trigger. To turn off, release the trigger.

Figure 5: Close-up of the drill's trigger and forward/reverse switch. The trigger provides variable speed control, and the switch above it controls the direction of rotation.
5.2 Vorwärts-/Rückwärtsdrehung
The forward/reverse switch, located above the trigger, controls the direction of rotation. Push it to the left for forward rotation (drilling) and to the right for reverse rotation (removing screws or jammed bits). Ensure the switch is in the central position to lock the trigger for safety when not in use.
5.3 Drilling and Impact Drilling Mode
The mode selector switch allows you to choose between standard drilling and impact drilling. For drilling into wood, metal, or plastic, select the drilling mode (drill bit symbol). For drilling into masonry or concrete, select the impact drilling mode (hammer symbol).

Figure 6: Close-up of the mode selector switch on the top of the drill. The left symbol indicates drilling mode, and the right symbol indicates impact drilling mode.
5.4 Allgemeine Bohrtipps
- Sichern Sie Ihr Werkstück stets.
- Start drilling at a low speed and gradually increase.
- Üben Sie gleichmäßigen, stetigen Druck aus. Wenden Sie keine Gewalt an.
- For deep holes, periodically withdraw the bit to clear debris.
- Use appropriate drill bits for the material.

Figure 7: A person demonstrating the use of the Einhell cordless impact drill for drilling into a wall. Proper grip and posture are shown, emphasizing safe operation.
6. Wartung
Regelmäßige Wartung gewährleistet die Langlebigkeit und optimale Leistung Ihrer Bohrmaschine.
- Reinigung: Keep the ventilation slots clean to prevent overheating. Use a soft brush or compressed air to remove dust and debris. Do not use water or chemical cleaners.
- Lagerung: Bewahren Sie die Bohrmaschine an einem trockenen, sicheren Ort außerhalb der Reichweite von Kindern auf. Entfernen Sie den Akku vor der Lagerung.
- Wartung des Spannfutters: Reinigen Sie die Spannbacken regelmäßig, um einen sicheren Halt der Bohrer zu gewährleisten.
7. Fehlerbehebung
| Problem | Mögliche Ursache | Lösung |
|---|---|---|
| Der Bohrer startet nicht. | Batterie nicht richtig eingesetzt oder entladen. | Stellen Sie sicher, dass der Akku vollständig eingesetzt ist. Laden oder tauschen Sie den Akku aus. |
| Reduzierte Leistung oder Geschwindigkeit. | Battery low or drill bit dull. | Charge battery. Replace or sharpen drill bit. |
| Drill bit jams. | Excessive pressure or incorrect bit for material. | Reduce pressure. Use appropriate bit. Use reverse rotation to free. |
| Überhitzung. | Verstopfte Lüftungsschlitze oder dauerhafte starke Beanspruchung. | Clean ventilation slots. Allow drill to cool down. |
8. Technische Daten
| Besonderheit | Wert |
|---|---|
| Modell | TE-ID 18 Li Solo (Part No. 4513960) |
| Marke | Einhell |
| Stromquelle | Battery Powered (Power X-Change 18V Li-Ion) |
| Bandtage | 18 Volt |
| Maximale Drehzahl | 260 U/min |
| Maximale Futtergröße | 13 Millimeter |
| Bohrleistung Holz | 25 Millimeter |
| Bohrkapazität Metall | 10 Millimeter |
| Artikelgewicht | 1.65 Kilogramm (3.63 Pfund) |
| Produktabmessungen (L x B x H) | 11.14" x 2.64" x 7.87" |
| Besondere Merkmale | Adjustable, Wireless, Speed Electronics, Forward/Reverse Rotation |
9. Garantie und Support
For warranty information and customer support, please refer to the documentation included with your purchase or visit the official Einhell webBewahren Sie Ihren Kaufbeleg für eventuelle Garantieansprüche auf.
Einhell Official WebWebsite: www.einhell.com


