1. Einleitung
This manual provides essential information for the safe and efficient operation of your Sony PSLX300USB USB Stereo Turntable. Please read it thoroughly before use and retain it for future reference.
The Sony PSLX300USB is designed to play vinyl records and offers the capability to convert analog audio from records into digital audio files via its USB output for storage on a computer.
2. Sicherheitshinweise
Wichtige Vorsichtsmaßnahmen
- The turntable contains fragile parts. Handle the unit with care to prevent damage.
- Sorgen Sie für ausreichende Belüftung rund um das Gerät, um eine Überhitzung zu vermeiden. Blockieren Sie die Belüftungsöffnungen nicht.
- Do not expose the unit to rain, moisture, or excessive humidity. Keep liquids away from the turntable.
- Vermeiden Sie es, das Gerät direkter Sonneneinstrahlung oder der Nähe von Wärmequellen auszusetzen.
- Verwenden Sie ausschließlich das für dieses Gerät angegebene Netzteil.
- Refer to the main product safety guidelines for detailed electrical safety instructions.
3. Hauptmerkmale
The Sony PSLX300USB turntable includes the following features:
- Supports 33 1/3 and 45 rpm Speeds for various record types.
- Vollautomatischer Betrieb für eine einfache Bedienung.
- Eingebauter Phono-Vorverstärkeramp for direct connection to most audio systems.
- Static balance tonearm for stable tracking.
- USB audio output for digital conversion of vinyl records.
- Reliable Belt Drive System.
4. Lieferumfang
Verify that all the following items are present in the packaging:
- Sony PSLX300USB Turntable Unit
- Staubschutzhülle
- RCA cables (integrated)
- USB-Kabel
- 45 U / min Adapter
5. Installationsanleitung
5.1 Auspacken und Aufstellen
- Carefully remove all components from the packaging. Keep packaging materials for future transport or storage.
- Place the turntable on a stable, level surface. Ensure the surface is free from vibrations and direct exposure to sunlight or heat sources.
5.2 Zusammenbau des Plattenspielers
- Installieren Sie den Plattenteller: Carefully place the platter onto the center spindle. Ensure it sits securely and rotates freely.
- Antriebsriemen einbauen: Locate the drive belt. Gently stretch it around the motor pulley (a small brass or plastic cylinder) and the inner rim of the platter. Ensure the belt is not twisted.
- Bringen Sie die Staubschutzhaube an: Insert the hinges of the dust cover into the corresponding slots at the rear of the turntable body.

Figure 1: Sony PSLX300USB Turntable with dust cover open, illustrating the main components.
5.3 Anschluss an ein Audiosystem
The PSLX300USB features a built-in phono preamp, allowing connection to either a PHONO input or a LINE/AUX input on your ampVerstärker oder Receiver.
- Cinch-Anschluss: Connect the integrated RCA cables (red and white plugs) from the turntable to the corresponding audio input (e.g., PHONO, AUX, LINE) on your ampVerstärker oder Receiver.
- Phono/Line Selector Switch: Locate the PHONO/LINE selector switch on the turntable (usually on the rear or bottom).
- Set the switch to "PHONO" if connecting to an amplifier's dedicated PHONO input.
- Set the switch to "LINE" if connecting to an amplifier's LINE or AUX input.
5.4 USB Connection (for Digital Conversion)
- Connect the supplied USB cable from the turntable's USB port to an available USB port on your computer.
- Your computer should automatically recognize the turntable as an audio input device.
- Install the provided audio recording software (if applicable) or a compatible third-party software (e.g., Audacity) on your computer to begin digitizing your vinyl collection.
6. Bedienungsanleitung
6.1 Abspielen einer Schallplatte
- Einschalten: Schließen Sie das Netzkabel an eine Steckdose an.
- Ortsrekord: Open the dust cover and carefully place a vinyl record on the platter. If playing a 45 RPM single, place the included adapter on the center spindle before placing the record.
- Geschwindigkeit auswählen: Set the SPEED selector switch (located on the turntable) to either "33" or "45" depending on the record's playback speed.
- Wiedergabe starten: Press the "START" button. The tonearm will automatically move to the beginning of the record and gently lower the stylus onto the groove.
- Wiedergabe stoppen: To stop playback, press the "STOP" button. The tonearm will automatically lift, return to its rest position, and the platter will stop spinning.
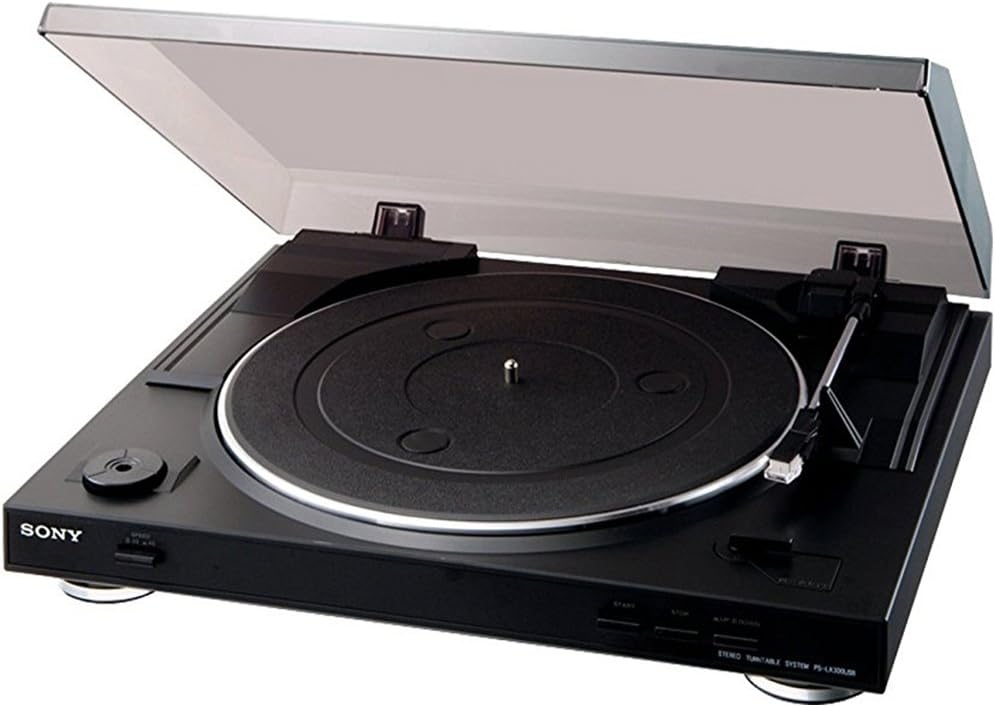
Abbildung 2: Nahaufnahme view of the turntable's control panel.
6.2 Digitizing Vinyl via USB
To convert your vinyl records to digital audio files:
- Mit PC verbinden: Stellen Sie sicher, dass der Plattenspieler über das USB-Kabel mit Ihrem Computer verbunden ist.
- Software starten: Open your preferred audio recording software (e.g., the supplied Audio Studio software, Audacity, etc.) on your computer.
- Configure Input: In the software's settings or preferences, select the Sony PSLX300USB (or similar name) as the audio input device.
- Aufzeichnen: Start the recording function in your software, then begin playing your record on the turntable using the steps in Section 6.1.
- Speichern: Once the record side is finished, stop the recording in your software and save the digital audio file im gewünschten Format (z. B. MP3, WAV).
7. Wartung und Pflege
7.1 Reinigung des Plattenspielers
- Wipe the dust cover and cabinet with a soft, dry cloth. Do not use abrasive cleaners, solvents, or alcohol, as these can damage the finish.
- Bei hartnäckigen Flecken leicht andrücken.ampDas Tuch mit Wasser und einem milden Reinigungsmittel befeuchten und anschließend sofort trocken wischen.
7.2 Stiftpflege
- Gently clean the stylus periodically using a soft brush specifically designed for stylus cleaning. Always brush from the back of the stylus towards the front.
- Avoid touching the stylus with your fingers, as oils and dirt can accumulate and affect sound quality.
- Replace the stylus when sound quality deteriorates significantly, or after approximately 300-500 hours of use, depending on record condition and playing habits.
7.3 Drive Belt Replacement
The drive belt is a wear item and may need replacement over time if playback speed becomes inconsistent or the platter fails to spin. Refer to Section 5.2 for instructions on how to access and install a new drive belt.
8. Fehlerbehebung
If you experience issues with your turntable, consult the following troubleshooting guide:
8.1 Kein Ton oder geringe Lautstärke
- Check all cable connections (RCA, power) to ensure they are secure.
- Verify that the PHONO/LINE selector switch on the turntable is set correctly for your ampEingangstyp des Verstärkers.
- Stellen Sie sicher, dass Ihre amplifier or receiver is set to the correct input source and the volume is turned up.
- Check if the stylus is properly installed in the cartridge and is not damaged.
8.2 Turntable Platter Not Spinning
- Ensure the power cord is securely connected to both the turntable and a working electrical outlet.
- Check if the drive belt is properly installed around the motor pulley and the inner rim of the platter. The belt may have slipped off.
- Press the "START" button to initiate platter rotation.
8.3 Poor Sound Quality (Distortion, Skips, Hiss)
- Clean the record thoroughly to remove dust and debris.
- Clean the stylus as described in Section 7.2.
- Ensure the turntable is placed on a stable, level surface to minimize vibrations.
- Check for stylus wear; a worn stylus can cause distortion and damage records. Replace if necessary.
8.4 Probleme bei der USB-Aufnahme
- Verify the USB cable connection between the turntable and your computer.
- Ensure the Sony PSLX300USB is selected as the audio input device within your recording software's settings.
- Check your computer's sound settings to ensure the USB audio device is enabled and recognized.
9. Spezifikationen
| Besonderheit | Detail |
|---|---|
| Modellname | PSLX300USB |
| Marke | Sony |
| Produktabmessungen (B x T x H) | 13.5 x 15.7 x 3.9 Zoll (ca.) |
| Artikelgewicht | 6 Pfund (ca.) |
| Unterstützte Geschwindigkeiten | 33 1/3 U/min, 45 U/min |
| Vorgangstyp | Vollautomatisch |
| Tonarmtyp | Statisches Gleichgewicht |
| Audioausgänge | USB, Analog (stereo RCA) |
| Phono-Präamp | Built-in (switchable) |
| Antriebssystem | Riemenantrieb |
| Material | Plastik |
| Farbe | Schwarz |
10. Garantie und Support
For detailed warranty information, terms, and conditions, please refer to the warranty card or documentation included with your purchase. Keep your proof of purchase (receipt) as it may be required for warranty claims.
Für technischen Support, Service oder weitere Hilfe besuchen Sie bitte die offizielle Sony-Supportseite. webBesuchen Sie die Sony-Website oder kontaktieren Sie den Sony-Kundendienst in Ihrer Region. Die Kontaktinformationen finden Sie in der Regel auf der Sony-Website. webauf der Website oder in Ihrer Produktdokumentation.


